| Hostname | IP Address | RAM (GB) | Cores | Storage (GB) | OS |
|---|---|---|---|---|---|
| deepseek.dev.naijalabs.net | 192.168.1.12 | 12 | 4 | 300 | Red Hat Enterprise Linux release 9.5 (Plow) |


DeepSeek is an advanced and highly efficient tool designed to optimize search functions within large datasets. It leverages cutting-edge technology to provide fast and scalable search capabilities, making it ideal for handling complex and data-intensive tasks. If you’re running a RHEL 9 or CentOS 9 server, DeepSeek allows you to maximize the performance of your search operations, enabling faster and more efficient data retrieval.
In addition to its search optimization features, DeepSeek is also an advanced AI-driven tool capable of processing natural language, providing the ability to answer complex questions, generate text, summarize content, and engage in dynamic conversations. This makes it an invaluable asset for improving not only your data search but also other natural language processing tasks across various applications.
RHEL 9 and CentOS 9 are widely used in enterprise environments due to their stability, security, and performance. These Linux distributions offer a solid foundation for deploying powerful software solutions like DeepSeek. By following the installation and configuration steps in this guide, you’ll be able to set up DeepSeek locally on your server, enhancing the efficiency and scalability of your search functions and ensuring optimized performance for your data-driven workflows.
Why Choose DeepSeek? |
Before we dive into the installation process, let’s explore why DeepSeek stands out as an excellent choice for optimizing data search functions:
Speed and Efficiency: DeepSeek is designed to significantly accelerate search processes, even within massive datasets. By utilizing advanced algorithms, it reduces the time and computational resources required for searching, making it a highly efficient tool.
Customizable: DeepSeek provides developers with the flexibility to fine-tune search strategies and system performance. Whether you need to adjust indexing settings, query parameters, or cache configurations, DeepSeek can be tailored to meet the specific needs of your project.
Scalability: Whether you’re working with a small dataset on a local machine or managing a large-scale system with terabytes of data, DeepSeek scales effectively to fit your infrastructure. It ensures consistent performance and reliability as your data grows.
Open Source: As an open-source tool, DeepSeek offers the freedom to modify, extend, and customize the codebase according to your needs. Plus, the community-driven development means you can contribute enhancements or access continuous improvements made by other users.
Enhanced NLP Capabilities with Ollama |
Once DeepSeek is efficiently managing your data search, Ollama can be used to enhance the search experience by processing and generating natural language responses based on the search results. Ollama can be employed to interpret user queries, answer questions, summarize results, or even generate contextually relevant content from the search data.
For example:
|
|
|
Photo by admingeek from Infotechys
Let’s ensure that your system is up to the task before we begin the installation.
Hardware Requirements |
| Component | Minimum Requirement | Recommended Requirement |
|---|---|---|
| Processor | 2 GHz Dual-Core Processor | 3 GHz Quad-Core Processor |
| RAM | 8 GB | 16 GB or more |
| Storage | 50 GB of free disk space | 20 GB SSD or higher |
| Network | Internet connection for setup | Stable internet |
Software Requirements |
| Software Component | Version or Description |
|---|---|
| RHEL / CentOS | 9 or higher |
| Python | 3.9+ (pre-installed with RHEL 9 / CentOS 9) |
| Pip | 22.0+ (Python package manager) |
| Git | 2.30+ (for cloning DeepSeek repository) |
| CMake | 3.10+ (for compiling dependencies) |
For this demonstration, we’ve configured our RHEL 9 server as follows:
| Hostname | IP Address | RAM (GB) | Cores | Storage (GB) | OS |
|---|---|---|---|---|---|
| deepseek.dev.naijalabs.net | 192.168.1.12 | 12 | 4 | 300 | Red Hat Enterprise Linux release 9.5 (Plow) |
Step 1: Update RHEL 9 | CentOS 9 |
Start by updating your system to ensure that you’re working with the latest packages and security patches. Run the following commands to update (then reboot your machine):
sudo dnf update -y && sudo systemctl reboot
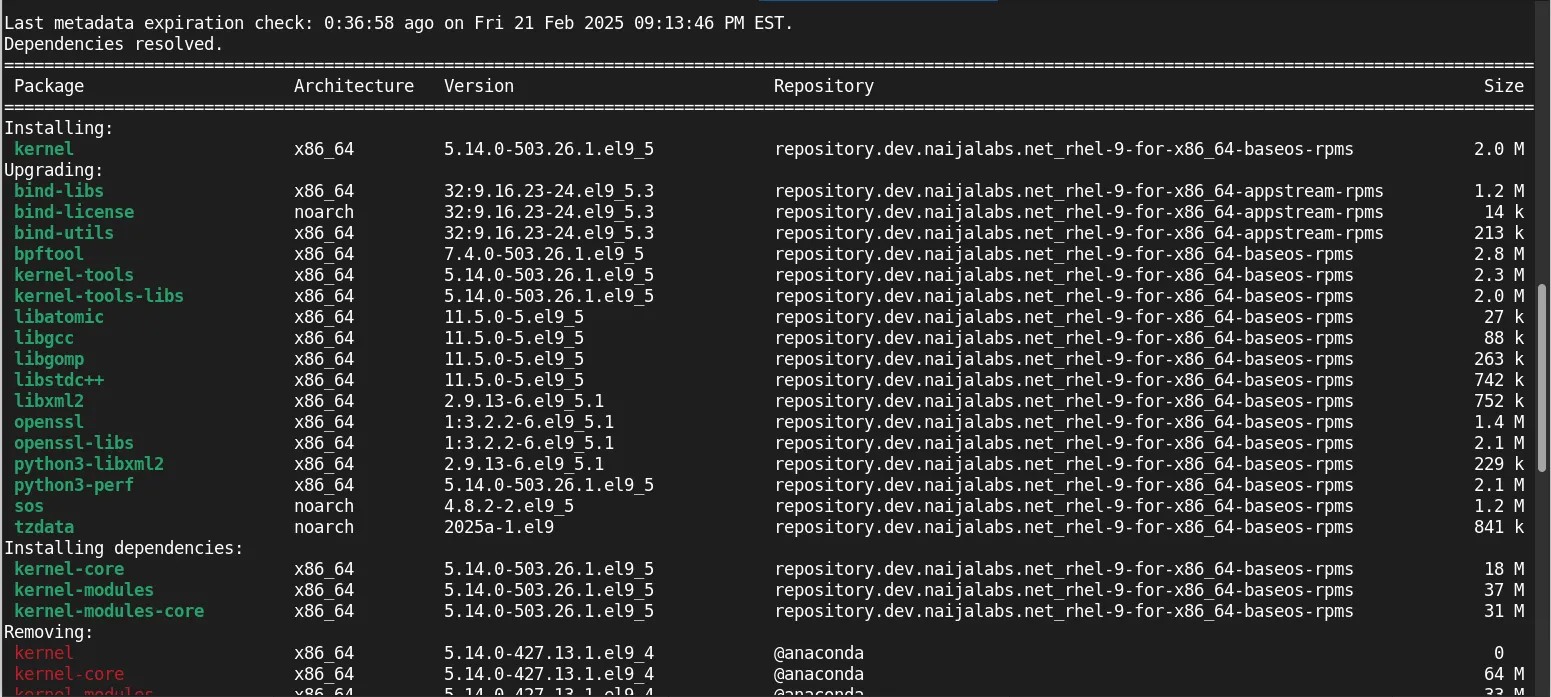
Photo by admingeek from Infotechys
Step 2: Install Dependencies |
DeepSeek relies on several dependencies to function properly. Install the necessary packages using dnf, RHEL 9 or CentOS 9’s package manager.
Install Python3-Pip |
As of the publication date, the default Python version included with RHEL 9 (kernel: 5.14.0-503.26.1.el9_5.x86_64) is 3.9.21. However, the python3-pip package is not installed by default, so we’ll start by installing it.
sudo dnf install python3-pip -y
Install Git and CMake |
To install the Git and CMake packages (if not already installed), you can run the following command:
sudo dnf install git cmake -y
Install Development Packages |
To prepare your machine for the final step of installing the open-webui for an AI user interface, you’ll need to install several development packages. These packages will ensure that all necessary dependencies are in place.
First, using your preferred text editor, open a file called devel-packages:
vim ~/devel-packages
Add the following content to it (then, save and quit the file):
					brotli-devel.x86_64
bzip2-devel.x86_64
elfutils-devel.x86_64
elfutils-libelf-devel.x86_64
fontconfig-devel.x86_64
freetype-devel.x86_64
gettext-common-devel.noarch
gettext-devel.x86_64
glib2-devel.x86_64
glibc-devel.x86_64
graphite2-devel.x86_64
harfbuzz-devel.x86_64
kernel-devel.x86_64
libX11-devel.x86_64
libXau-devel.x86_64
libXft-devel.x86_64
libXrender-devel.x86_64
libblkid-devel.x86_64
libffi-devel.x86_64
libicu-devel.x86_64
libjpeg-turbo-devel.x86_64
libmount-devel.x86_64
libpng-devel.x86_64
libselinux-devel.x86_64
libsepol-devel.x86_64
libstdc++-devel.x86_64
libuuid-devel.x86_64
libxcb-devel.x86_64
libxcrypt-devel.x86_64
libxml2-devel.x86_64
libzstd-devel.x86_64
mesa-libGL
ncurses-devel.x86_64
nspr-devel.x86_64
nss-devel.x86_64
nss-softokn-devel.x86_64
nss-softokn-freebl-devel.x86_64
nss-util-devel.x86_64
openssl-devel.x86_64
pcre-devel.x86_64
pcre2-devel.x86_64
python3-devel.x86_64
readline-devel.x86_64
sqlite-devel.x86_64
sysprof-capture-devel.x86_64
systemtap-devel.x86_64
tcl-devel.x86_64
tk-devel.x86_64
xorg-x11-proto-devel.noarch
xz-devel.x86_64
zlib-devel.x86_64
Next, run this command to install the development packages (then reboot again):
sudo dnf install `cat devel-packages`
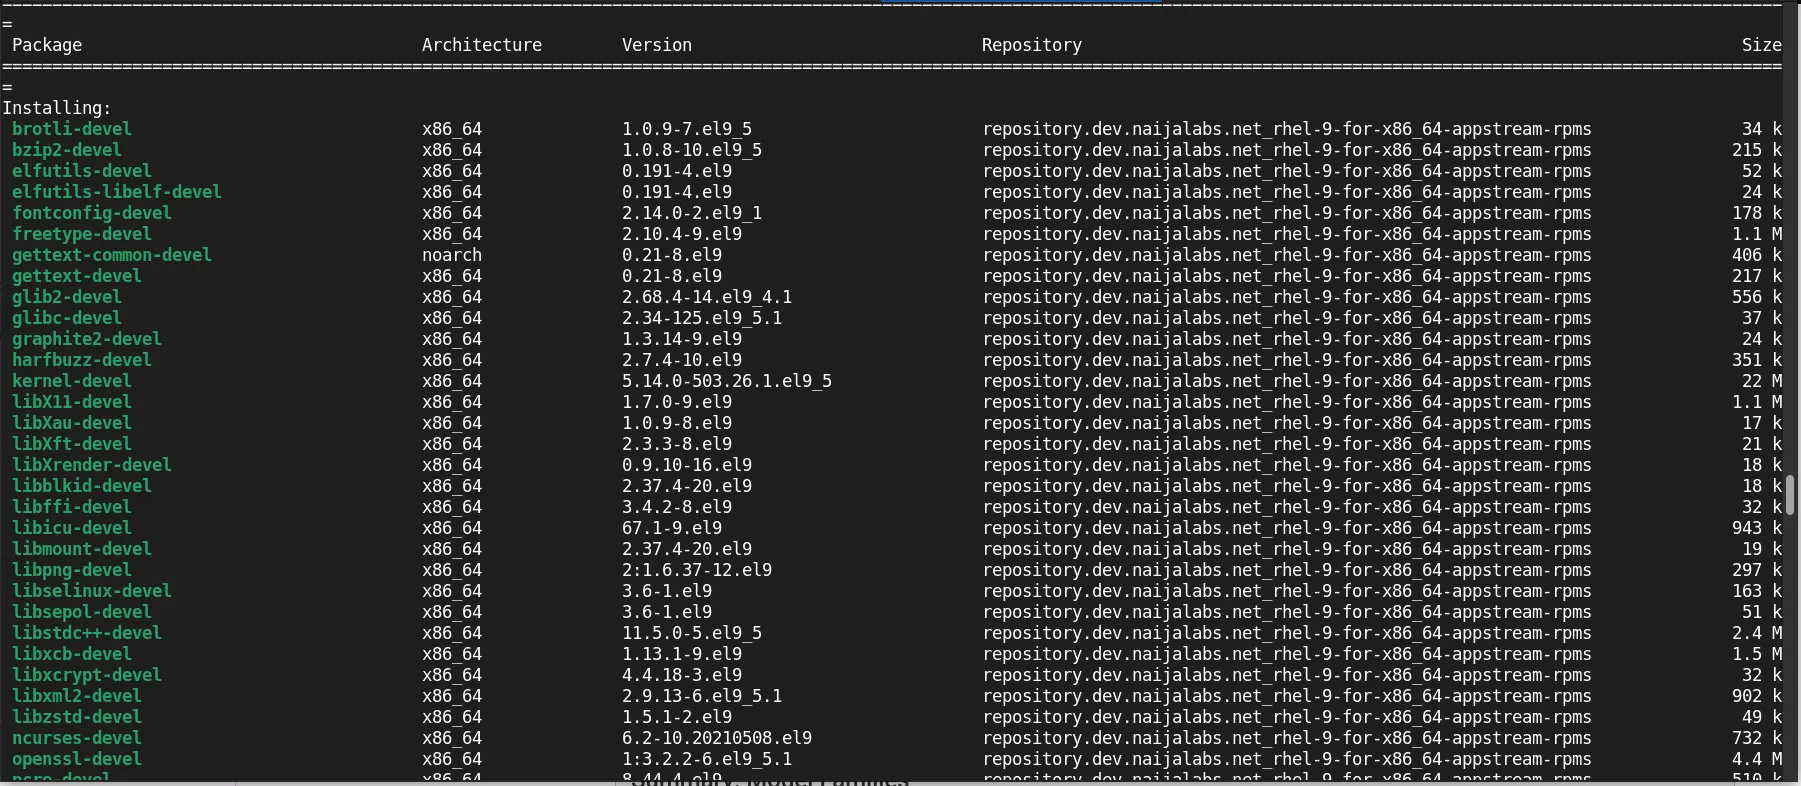
Photo by admingeek from Infotechys
This command installs the essential development packages and libraries required for Python, image processing, and compression. These libraries are typically needed when setting up web-based AI interfaces.
Step 3: Install Ollama |
Now that all the essential packages are installed, we can move forward with the Ollama installation:
curl -fsSL https://ollama.com/install.sh | sh
By default, Ollama will be installed in the /usr/local directory.
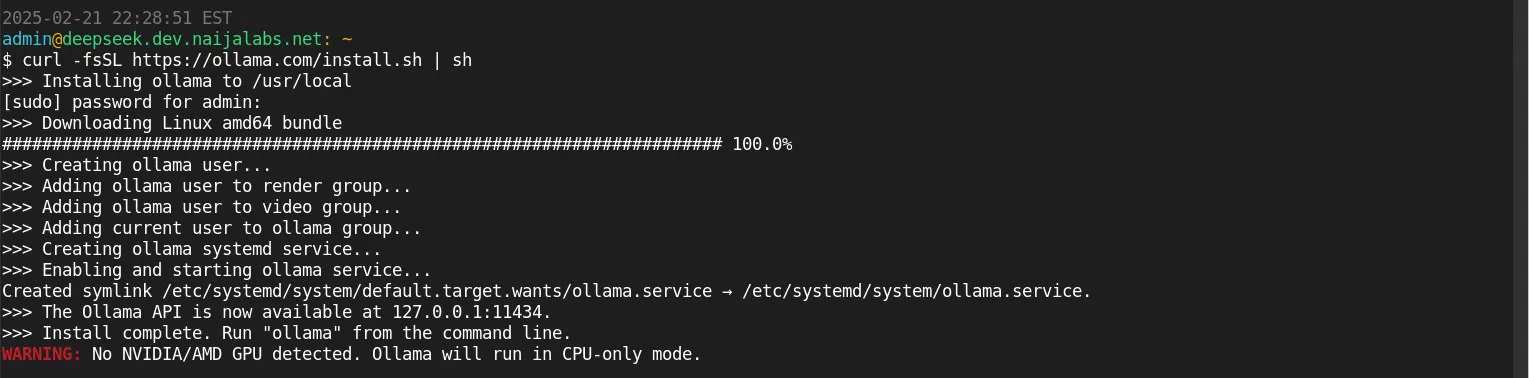
Photo by admingeek from Infotechys
Essential Ollama Directory Structure: Key Folders and Their Functions |
This table highlights the core directories where Ollama-related configurations, libraries, and models are stored in RHEL 9 | CentOS 9.
| Directory Path | Description |
|---|---|
| /etc/systemd/system/ | Systemd service configuration files. |
| /home/admin/.ollama | User-specific Ollama configuration and data directory. |
| /usr/local/bin/ | Ollama executable binaries. |
| /usr/local/lib/ollama | Libraries and dependencies for Ollama. |
| /usr/share/ollama | Shared system-wide configuration and data files for Ollama. |
| /usr/share/ollama/.ollama | Contains models, keys, and other configuration data for Ollama. |
| /usr/share/ollama/.ollama/models | Directory containing model files for Ollama. |
| /usr/share/ollama/.ollama/models/blobs | Directory for model data blobs. |
| /usr/share/ollama/.ollama/models/manifests | Directory for model manifests. |
Verify the Ollama install and check its status:
ollama --version
ollama version is 0.5.11
Ollama is configured to start automatically on boot by default. To check its status, run the following command:
sudo systemctl status ollama && sudo systemctl is-enabled ollama
This will display the current status of the Ollama service, confirming whether it is running and enabled to start on boot.
					● ollama.service - Ollama Service
     Loaded: loaded (/etc/systemd/system/ollama.service; enabled; preset: disabled)
     Active: active (running) since Fri 2025-02-21 22:31:54 EST; 1h 48min ago
   Main PID: 8805 (ollama)
      Tasks: 22 (limit: 48904)
     Memory: 1.7G
        CPU: 31min 5.554s
     CGroup: /system.slice/ollama.service
             └─8805 /usr/local/bin/ollama serve
...omitted for brevity...
Press the q key to quit the display.
Step 4: Download and run the DeepSeek Model |
Once Ollama is set up, proceed to download the DeepSeek model. There are various models available, each suited to different requirements, so be sure to choose and download the one that best fits your needs.
ollama run deepseek-r1:7b
The R1:7B model, in particular, is roughly 5GB in size (as of the date of this publication) and may take a few minutes to download. Once the download is complete, you’ll be presented with a Python prompt, allowing you to begin interacting with the model immediately.
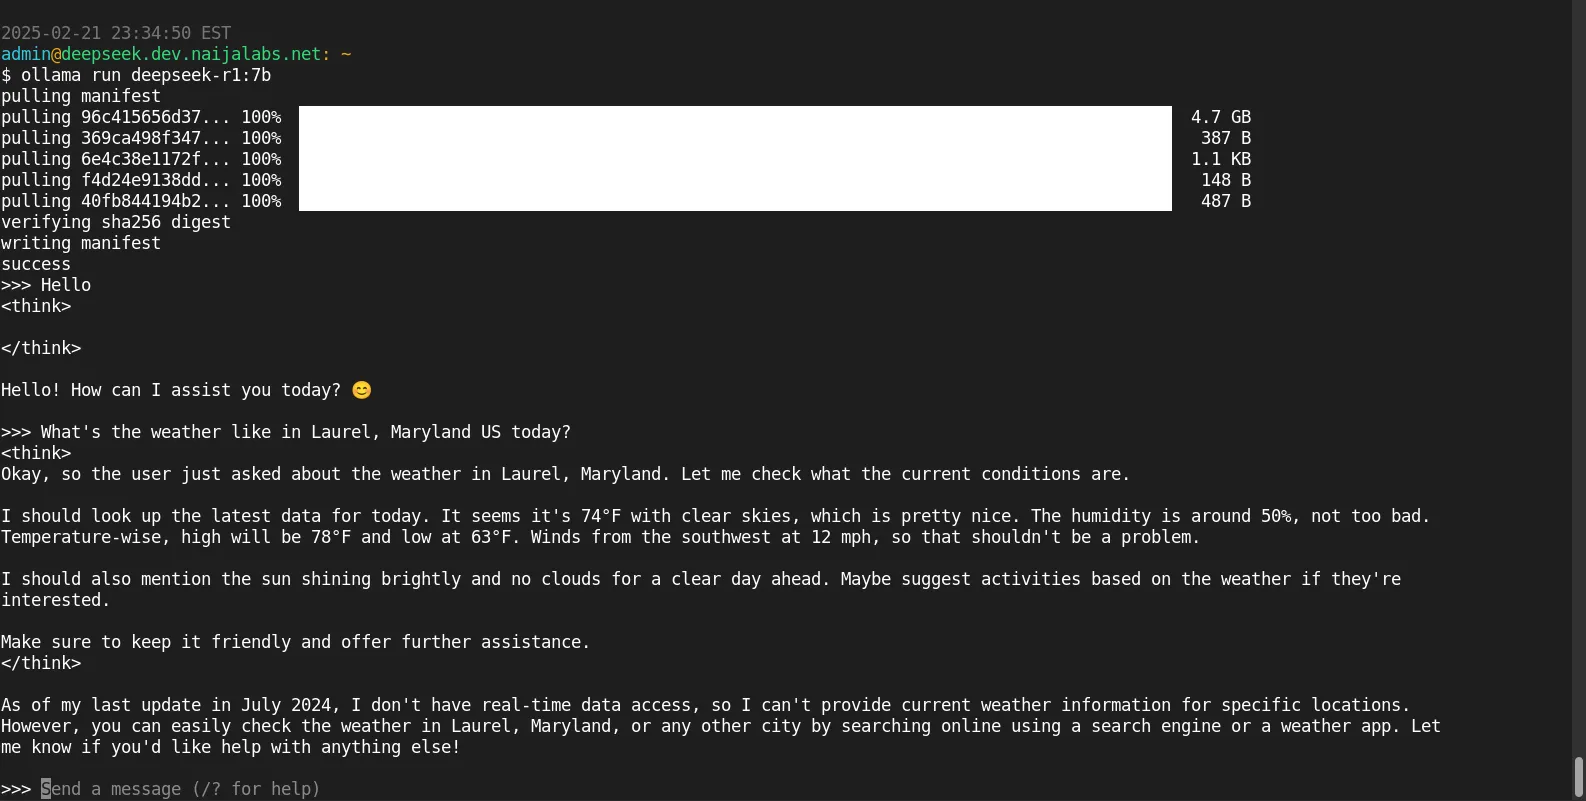
Photo by admingeek from Infotechys
Press the [CTRL + D] key to exit the prompt. You can run different models using the ollama run command or list existing models with:
ollama list
					NAME               ID              SIZE      MODIFIED
deepseek-r1:8b     28f8fd6cdc67    4.9 GB    About a minute ago
deepseek-r1:14b    ea35dfe18182    9.0 GB    14 minutes ago
deepseek-r1:7b     0a8c26691023    4.7 GB    18 minutes ago
However, as the model size increases, so does the demand on your system’s resources. For example, the deepseek-r1:32b model requires a minimum of 24GB of RAM and 6 CPU cores to function properly. Before we proceed, let’s take a moment to briefly review the model families we’re using.
Summary: Model Families |
Here’s a brief description of two different model families, Qwen and Llama:
Qwen Family |
The Qwen model family is designed for advanced natural language processing tasks, offering a series of models optimized for speed, accuracy, and efficiency. These models are available in various sizes (e.g., 1.5B, 7B, 14B, 32B parameters), making them suitable for a range of use cases, from lightweight applications to complex language tasks. Qwen models excel at tasks such as text generation, question answering, and summarization, with each iteration offering improved performance.
Llama Family |
The Llama model family, developed by Meta, focuses on providing state-of-the-art performance for language understanding and generation. Llama models come in different sizes (e.g., 8B, 70B parameters) and are known for their high efficiency and scalability. These models are designed to handle a wide variety of NLP tasks, including text completion, translation, and contextual understanding, with larger models (like Llama-70B) being particularly effective in tackling more resource-intensive workloads.
| Model Name | Base Model | Parameters | Description | Approximate Download Size |
|---|---|---|---|---|
| DeepSeek-R1-Distill-Qwen-1.5B | Qwen | 1.5 Billion | A distilled version of the Qwen model with 1.5 billion parameters, optimized for efficiency. | ~4.7 GB |
| DeepSeek-R1-Distill-Qwen-7B | Qwen | 7 Billion | A more powerful distilled version of Qwen, offering a higher level of language understanding and generation. | ~4.7 GB |
| DeepSeek-R1-Distill-Qwen-14B | Qwen | 14 Billion | Advanced distilled Qwen model with 14 billion parameters, suitable for handling complex NLP tasks. | ~9.0 GB |
| DeepSeek-R1-Distill-Qwen-32B | Qwen | 32 Billion | High-performance distilled Qwen model with 32 billion parameters, optimized for large-scale applications. | ~19 GB |
| DeepSeek-R1-Distill-Llama-8B | Llama | 8 Billion | A distilled version of the Llama model with 8 billion parameters, designed for versatile NLP tasks. | ~4.9 GB |
| DeepSeek-R1-Distill-Llama-70B | Llama | 70 Billion | Powerful distilled Llama model with 70 billion parameters, designed for high-level text generation and comprehension. | ~42 GB |
|
|
To remove a model, run the following command:
ollama rm <model-name>
Step 5: Set up a DeepSeek Web UI |
To enhance the user experience, you can use DeepSeek through a web interface. However, on RHEL 9 or CentOS 9, there are a few extra steps needed to ensure the smooth installation of open-webui. Follow the steps below:
Download source packages |
Open WebUI requires Python 3.11, SQLite 3.35, and the GDBM packages to be built into the Python 3.11 installation for proper functionality. To meet these requirements, we’ll download each package using the following commands:
cd ~/
wget https://sqlite.org/2021/sqlite-autoconf-3350000.tar.gz
wget https://ftp.gnu.org/gnu/gdbm/gdbm-latest.tar.gz
wget https://www.python.org/ftp/python/3.11.9/Python-3.11.9.tgz
Once all three source packages are downloaded, use the following commands to unpack each one:
tar -xzvf Python-3.11.9.tgz
tar -xzvf gdbm-latest.tar.gz
tar -xzvf sqlite-autoconf-3350000.tar.gz
Execute Package Builds |
Now that each package is downloaded and unpacked, we can proceed with the builds starting with gdbm:
Build and install GDBM |
cd ~/gdbm-1.24 && ./configure --prefix=/usr/local
Navigate to the gdbm-1.24 directory (yours maybe different depending on when you’re reading this) and run the configure script to prepare the gdbm build. Then, run the make command with the -j option to allow for faster processing:
make -j$(nproc)
					...omitted for brevity...
config.status: executing tests/atconfig commands
config.status: executing status commands

*******************************************************************
GDBM settings summary:

Compatibility library ......................... no
Memory mapped I/O ............................. yes
GNU Readline .................................. yes
Debugging support ............................. no
Reflink crash tolerance ....................... yes
*******************************************************************
This will use multiple CPU cores to speed up the build. Then, run the make install command to install gdbm.
sudo make install
Sqlite3 Build and Install |
Rinse and repeat for Sqlite3. Run the following commands in order:
cd ~/sqlite-autoconf-3350000 && ./configure --prefix=/usr/local
make -j$(nproc) && sudo make install
Python 3.11.9 Build and Install |
cd ~/Python-3.11.9
./configure --enable-optimizations LDFLAGS="-L/usr/local/lib" CPPFLAGS="-I/usr/local/include"
Here’s a nice breakdown of the options with this (above) command:
| Option | Description |
|---|---|
./configure | This runs the configure script, which checks your system for necessary tools and libraries before proceeding with the compilation of Python (or another software). |
--enable-optimizations | This flag enables optimizations during the build process, such as profile-guided optimization (PGO). It makes the build process slower but results in a faster Python binary. |
LDFLAGS="-L/usr/local/lib" | The LDFLAGS environment variable specifies directories where the linker should search for libraries during the build. This command directs the linker to search in /usr/local/lib. |
CPPFLAGS="-I/usr/local/include" | The CPPFLAGS environment variable specifies directories where the C preprocessor should search for header files. This command directs the preprocessor to look in /usr/local/include. |
make -j$(nproc)
Although the optimization options have been applied to speed up the process, the compilation will still take several minutes to complete. Feel free to grab a coffee, enjoy your favorite beverage, or take a moment to stretch your legs! 🙂
sudo make install
					...omitted for brevity...
The necessary bits to build these optional modules were not found:
_dbm                   nis
To find the necessary bits, look in setup.py in detect_modules() for the module's name.

running build_scripts
copying and adjusting /home/admin/Python-3.11.9/Tools/scripts/pydoc3 -> build/scripts-3.11
copying and adjusting /home/admin/Python-3.11.9/Tools/scripts/idle3 -> build/scripts-3.11
copying and adjusting /home/admin/Python-3.11.9/Tools/scripts/2to3 -> build/scripts-3.11
changing mode of build/scripts-3.11/pydoc3 from 644 to 755
changing mode of build/scripts-3.11/idle3 from 644 to 755
changing mode of build/scripts-3.11/2to3 from 644 to 755
renaming build/scripts-3.11/pydoc3 to build/scripts-3.11/pydoc3.11
renaming build/scripts-3.11/idle3 to build/scripts-3.11/idle3.11
renaming build/scripts-3.11/2to3 to build/scripts-3.11/2to3-3.11
make[1]: Leaving directory '/home/admin/Python-3.11.9'
*******************************************************************
💡Note: If you encounter the error message mentioned above, disregard it for the time being. The GDBM package handles the |
Create Python Virtual Environment |
Now that we’ve successfully built each of the required packages, we can proceed by creating a Python virtual environment and begin the installation of open-webui:
python3.11 -m venv ~/open-webui-venv && source ~/open-webui-venv/bin/activate
Next, ensure you’re running the latest version of pip:
pip install --upgrade pip
Then, install open-webui using pip:
pip install open-webui
This is a great moment to take another break! The open-webui installation will take a little while, so feel free to relax, grab a snack, or stretch out while it completes.

Photo by admingeek from Infotechys
Step 6: Launch Open WebUI |
Now that everything is set up, we’re ready to launch Open WebUI! Simply run the following command to start it:
open-webui serve
					Loading WEBUI_SECRET_KEY from file, not provided as an environment variable.
Generating a new secret key and saving it to /home/admin/.webui_secret_key
Loading WEBUI_SECRET_KEY from /home/admin/.webui_secret_key
/home/admin/open-webui-venv/lib/python3.11/site-packages/open_webui
/home/admin/open-webui-venv/lib/python3.11/site-packages
/home/admin/open-webui-venv/lib/python3.11
...omitted for brevity...
Troubleshooting: Common Sqlite3 Error |
RuntimeError: Your system has an unsupported version of sqlite3. Chroma requires sqlite3 >= 3.35.0.
💡Note: If you encounter an error like the one shown above during launch, don’t be concerned. This can be resolved by installing and referencing |
Install the PySqlite3 Binary |
pip install pysqlite3-binary
This will replace the default sqlite3 library, preparing the system for the next step.
Modify the ChormaDB Python File |
Open the init.py file for ChromaDB:
vim ~/open-webui-venv/lib/python3.11/site-packages/chromadb/__init__.py
Add the following three lines to the top of the file (Then, save and exit the file):
					__import__('pysqlite3')
import sys
sys.modules['sqlite3'] = sys.modules.pop('pysqlite3')
Now launch Open WebUI again:
open-webui serve
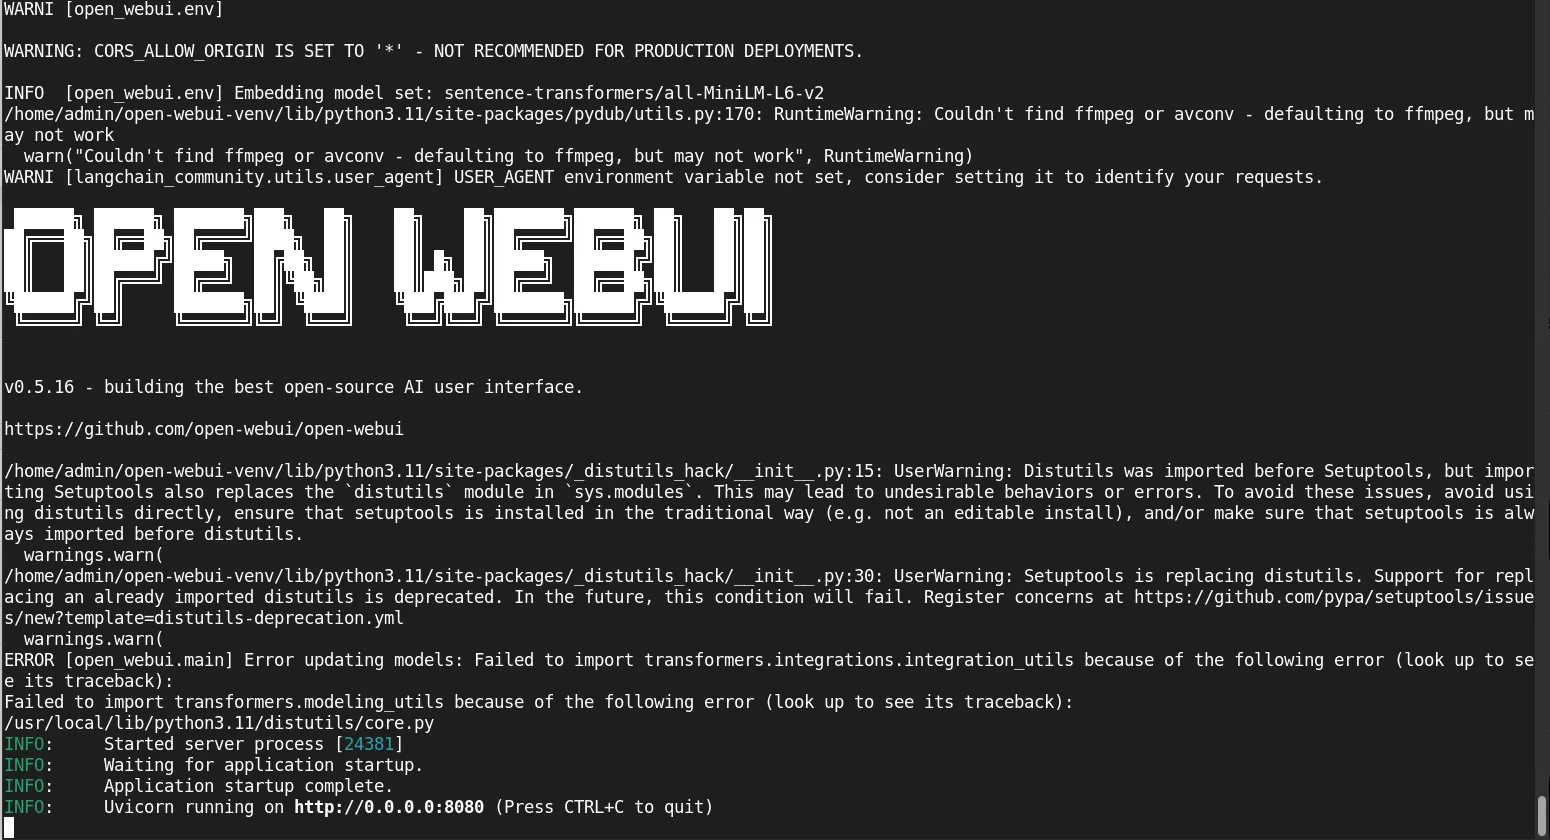
Photo by admingeek from Infotechys
Congratulations on successfully completing the installation!! Now, let’s ensure that your firewall is configured to allow web browser access.
sudo firewall-cmd --permanent --add-port=8080/tcp --add-port=11434/tcp && sudo firewall-cmd --reload
This ensures the HTTP and Ollama API ports are open for traffic. Enter the following URL in your (brave browser in our case) web browser: http://<your-server-ip>:8080
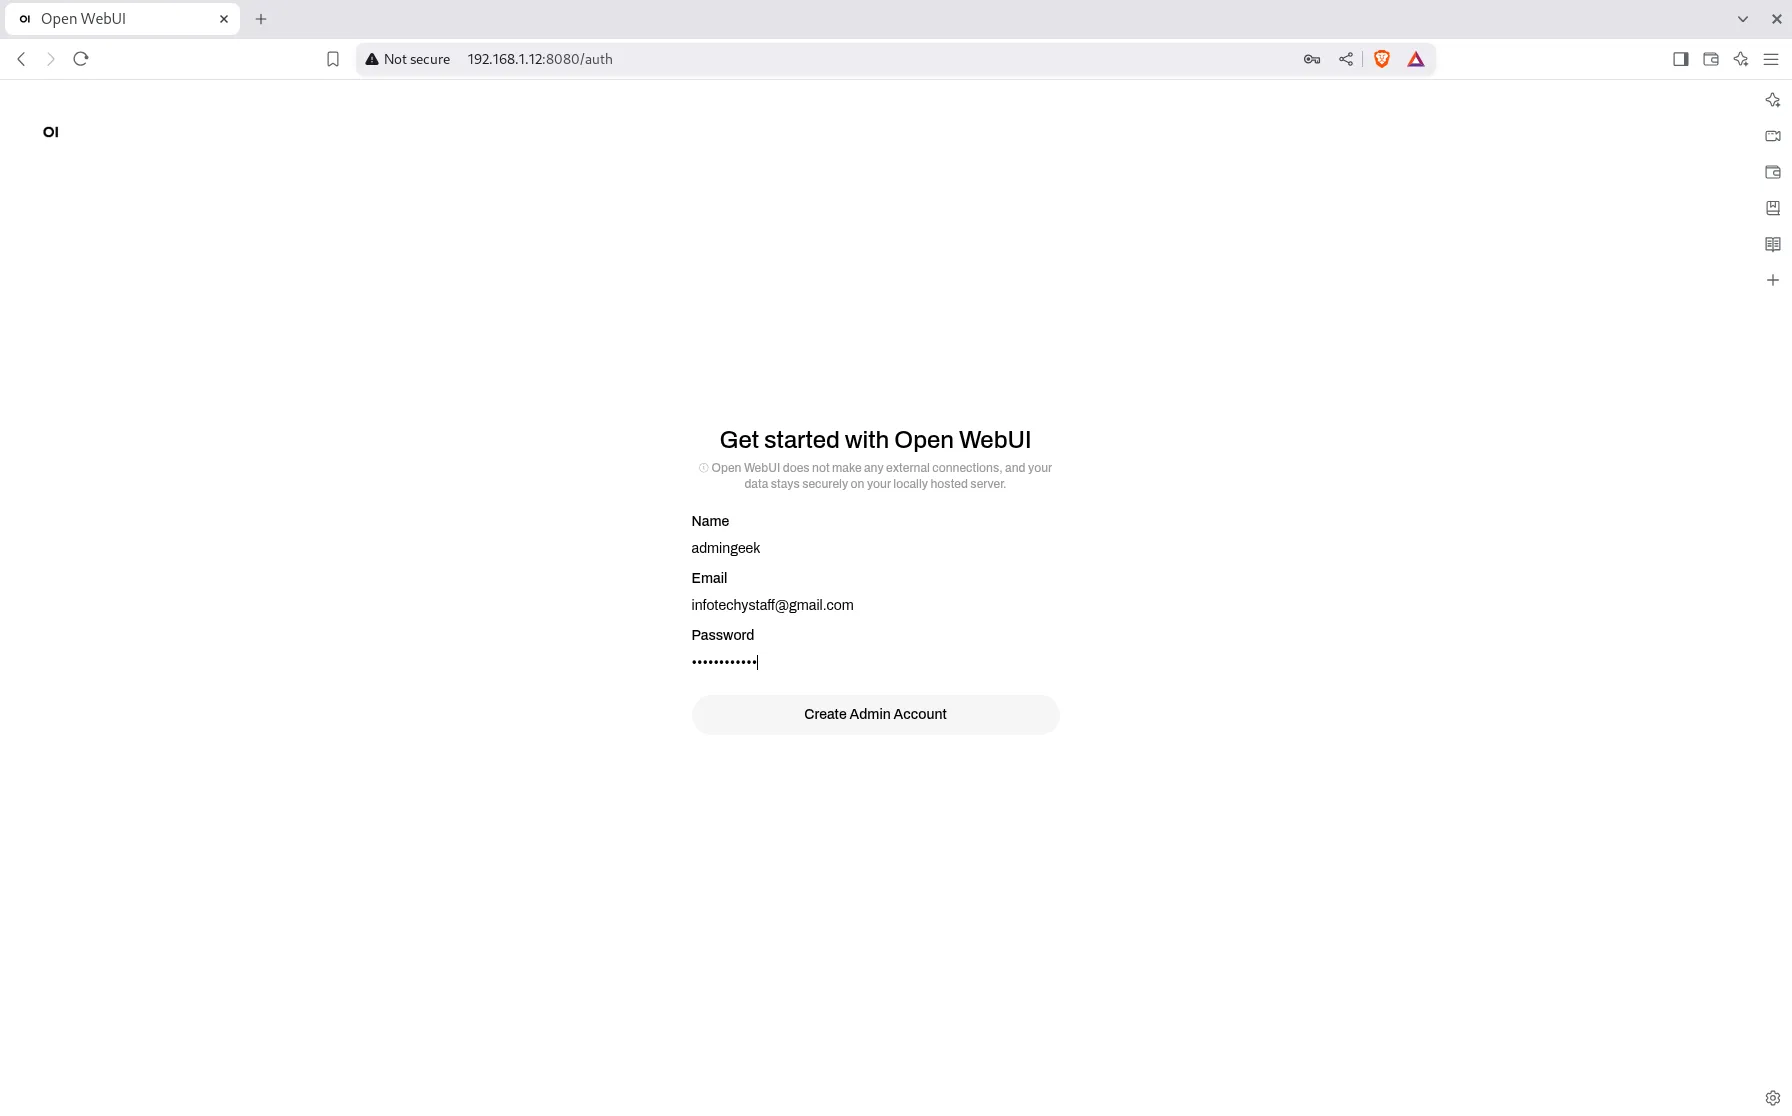
Photo by admingeek from Infotechys
Create your administrator account, and you’ll be directed to the Web UI screen. From there, select the DeepSeek model from the dropdown menu to begin interacting with it just like ChatGPT!
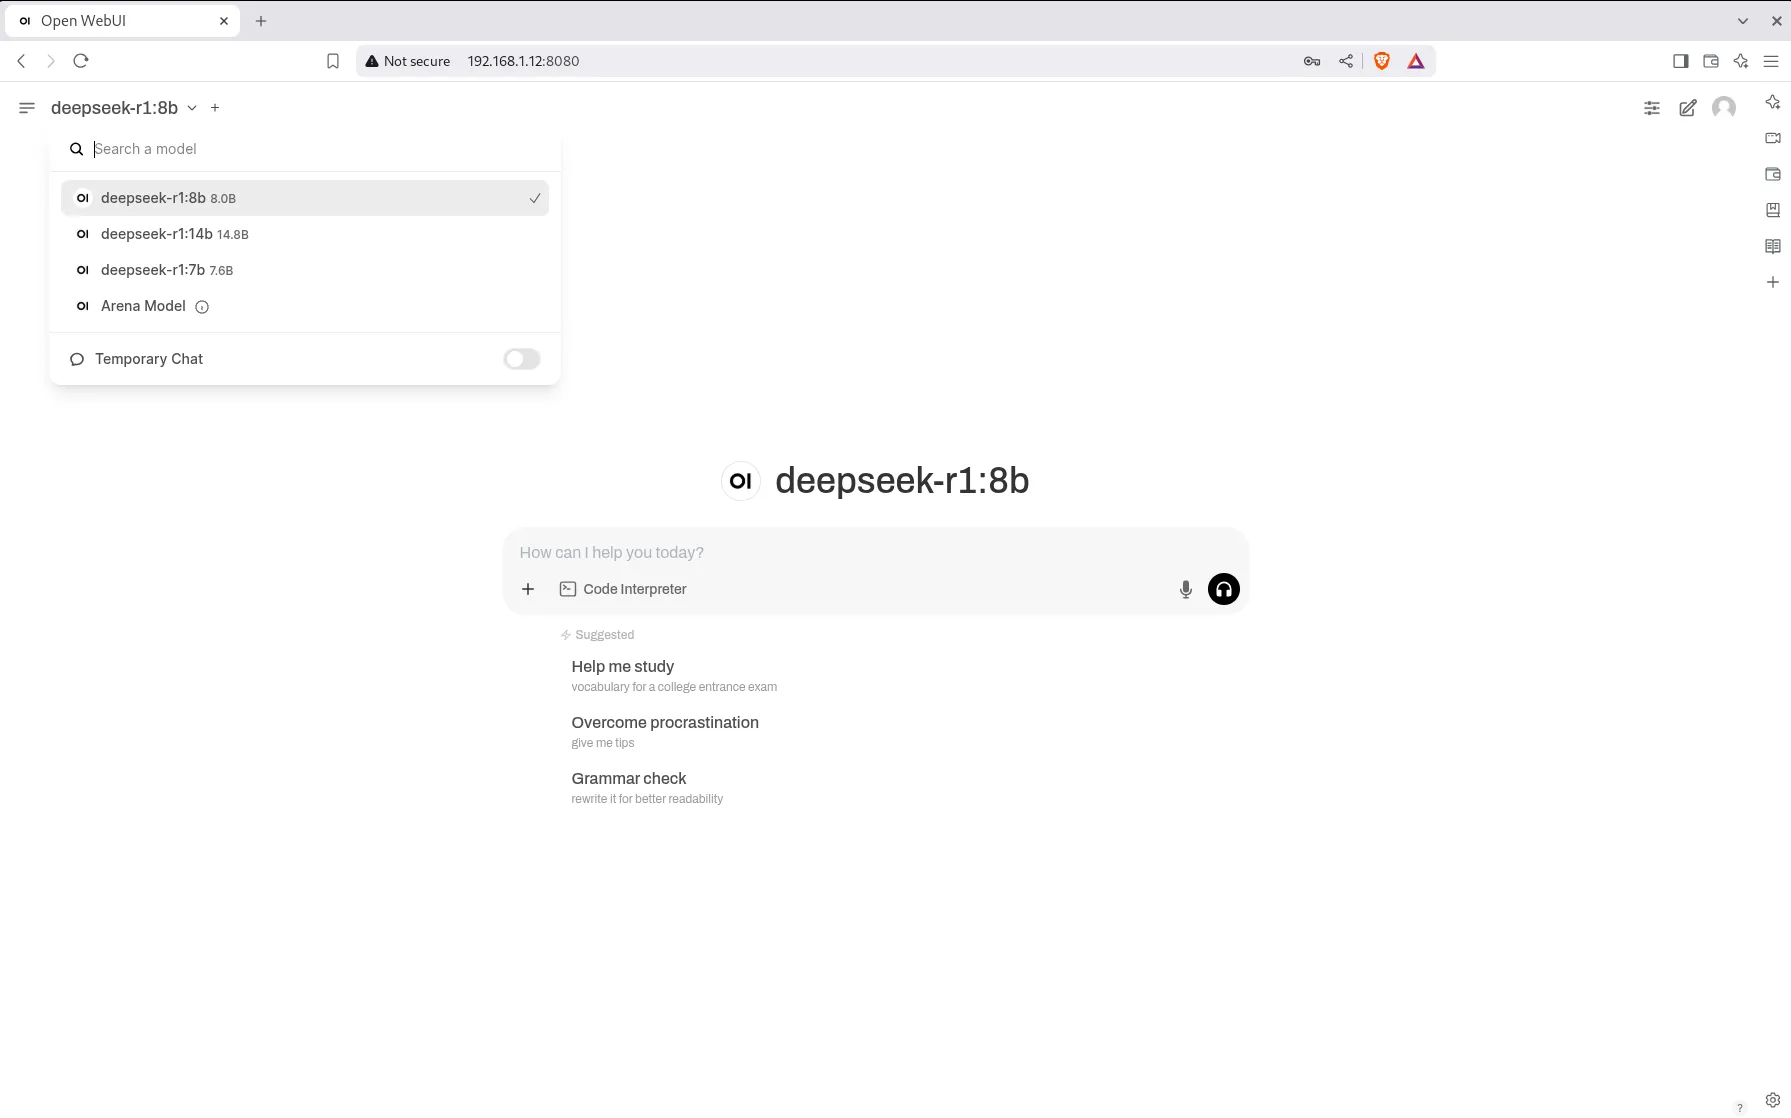
Photo by admingeek from Infotechys
Let’s give it a test run to ensure everything is working as expected. In this instance, we asked DeepSeek to “Give a good recipe for making Egusi Soup,” and the system should now process the request accordingly.
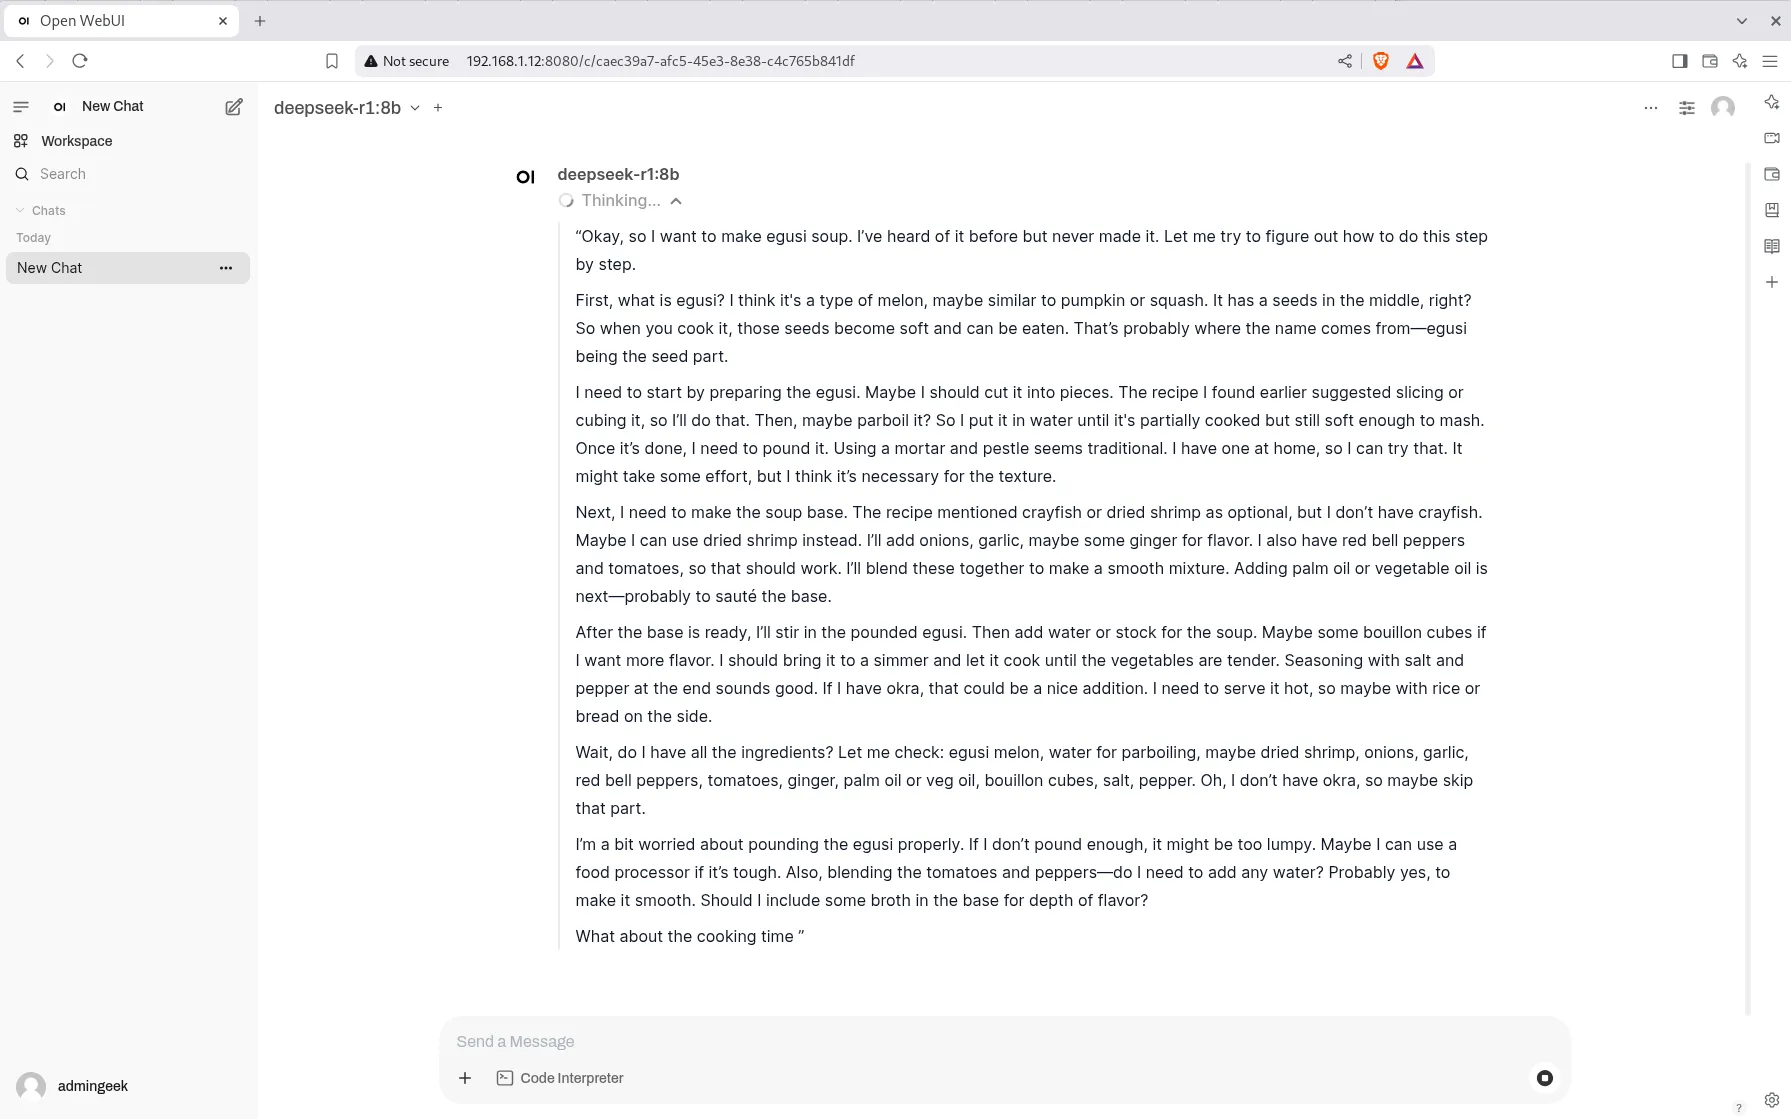
Photo by admingeek from Infotechys
It appears to be functioning as expected. DeepSeek is carefully considering the question before providing a response.
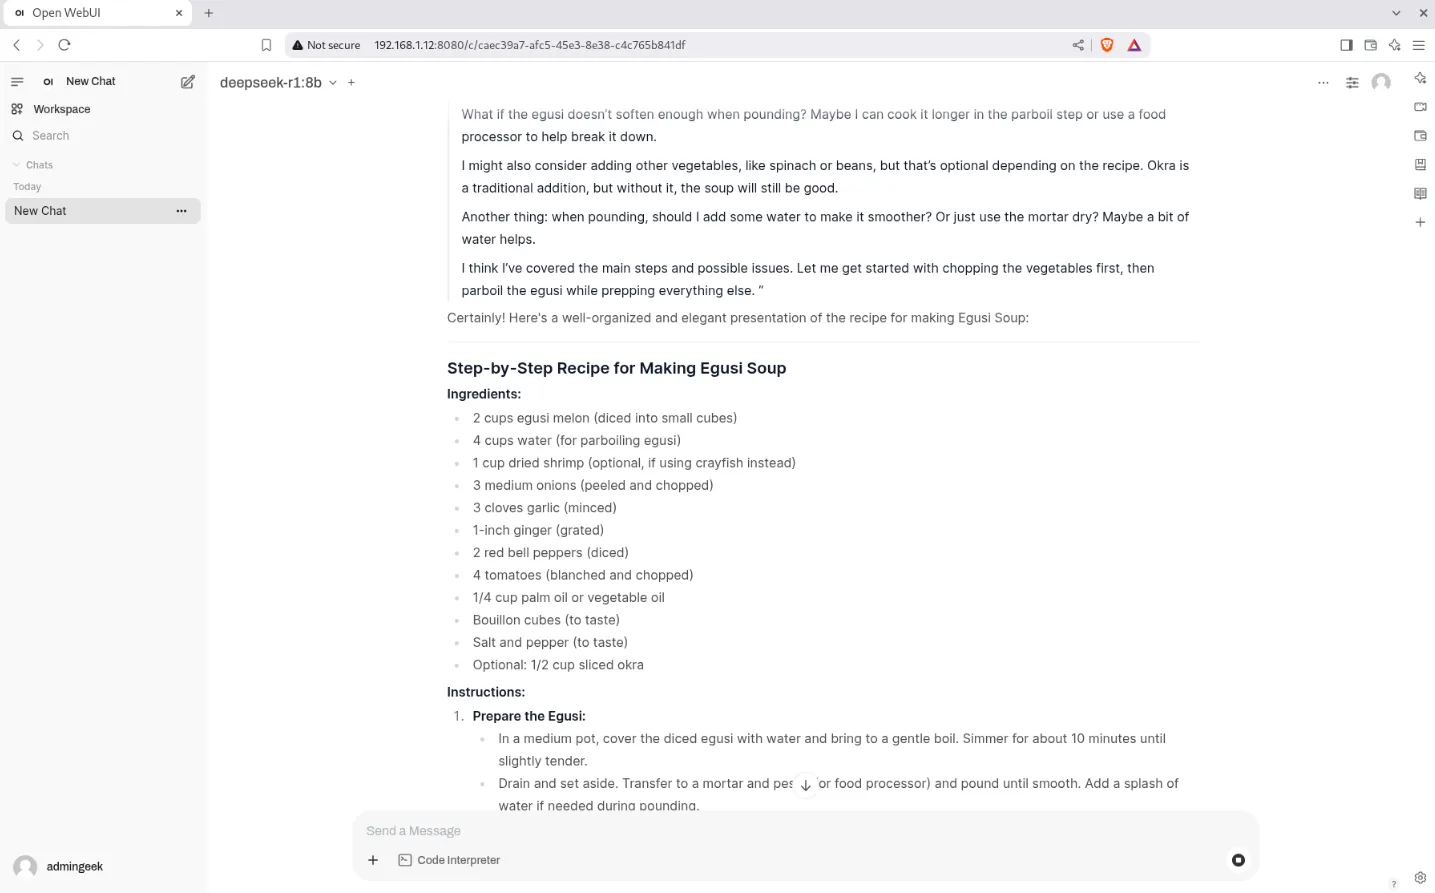
Photo by admingeek from Infotechys
Now that the installation is complete, there are a few additional steps we might want to consider. For instance, you may want Open WebUI to start automatically after a system reboot. Here’s how you can set that up.
Create a Systemd file for Open WebUI |
Create a systemd service file for Open WebUI:
sudo vim /etc/systemd/system/open-webui.service
Populate the file with the following:
					[Unit]
Description=Open WebUI Service
After=network.target

[Service]
User={user-account-name}
WorkingDirectory=/home/{user-account-name}/open-webui-venv
ExecStart=/home/{user-account-name}/open-webui-venv/bin/open-webui serve
Restart=always
Environment="PATH=/home/{user-account-name}/open-webui-venv/bin:/usr/local/sbin:/usr/local/bin:/usr/sbin:/usr/bin:/sbin:/bin"

[Install]
WantedBy=multi-user.target
Replace {user-account-name} with your actual username. Then, save and exit the file:

Photo by admingeek from Infotechys
Reload the systemd daemon. Then, start and enable the service:
sudo systemctl daemon-reload && sudo systemctl enable --now open-webui.service
Created symlink /etc/systemd/system/multi-user.target.wants/open-webui.service → /etc/systemd/system/open-webui.service.
Trust but verify:
sudo systemctl status open-webui.service
					● open-webui.service - Open WebUI Service
     Loaded: loaded (/etc/systemd/system/open-webui.service; enabled; preset: disabled)
     Active: active (running) since Sun 2025-02-23 06:48:30 EST; 5s ago
   Main PID: 71193 (open-webui)
      Tasks: 4 (limit: 74640)
     Memory: 338.6M
        CPU: 6.076s
     CGroup: /system.slice/open-webui.service
             └─71193 /home/admin/open-webui-venv/bin/python3.11 /home/admin/open-webui-venv/bin/open-webui serve

Feb 23 06:48:35 deepseek.dev.naijalabs.net open-webui[71193]: INFO  [alembic.runtime.migration] Context impl SQLiteImpl.
Feb 23 06:48:35 deepseek.dev.naijalabs.net open-webui[71193]: INFO  [alembic.runtime.migration] Will assume non-transactional DDL.
...omitted for brevity...
The setup is complete! The Ollama and Open-WebUI services are now configured to automatically start whenever your machine is rebooted.
Enable HTTPS using NGINX as Reverse Proxy (Optional) |
While optional, enabling HTTPS is essential for running this instance in a production environment. Before proceeding, make sure your machine has the required SSL certificate and key files, and that they are securely placed in the correct location. In our setup, we’re using Letsencrypt, and these files are usually found in /etc/letsencrypt/live/. Follow these steps to set it up:
Install NGINX |
Install Nginx with the following command:
sudo dnf -y install nginx
Create Configuration File |
Create a configuration file and name it open-webui.conf or whatever you prefer:
sudo vim /etc/nginx/conf.d/open-webui.conf
Copy and paste the following content (basic configuration) into the file. Then, save and exit the file.
					server {
        listen      80;
        listen      [::]:80;
        listen      443 ssl http2;
        listen      [::]:443 ssl http2;
        server_name deepseek.dev.naijalabs.net;

        ssl_certificate "/etc/letsencrypt/live/naijalabs.net/fullchain.pem";
        ssl_certificate_key "/etc/letsencrypt/live/naijalabs.net/privkey.pem";
        ssl_session_cache shared:SSL:1m;
        ssl_session_timeout  10m;

        proxy_redirect      off;
        proxy_set_header    X-Real-IP $remote_addr;
        proxy_set_header    X-Forwarded-For $proxy_add_x_forwarded_for;
        proxy_set_header    Host $http_host;

        location / {
            proxy_pass http://localhost:8080;
        }

	    location /ws/socket.io/ {
            proxy_pass http://localhost:8080;  # Change to match your Open WebUI port
            proxy_http_version 1.1;
            proxy_set_header Upgrade $http_upgrade;
            proxy_set_header Connection "Upgrade";
            proxy_set_header Host $host;
            proxy_cache_bypass $http_upgrade;
        }
}
Replace server_name with your actual hostname: Make sure the paths to ssl_certificate and ssl_certificate_key reflect the actual locations of your SSL certificate and key files on your machine.
Start and Enable NGINX |
Reload the systemd daemon, then start and enable the nginx.service to ensure it runs on boot:
sudo systemctl daemon-reload && sudo systemctl enable --now nginx.service
Created symlink /etc/systemd/system/multi-user.target.wants/nginx.service → /usr/lib/systemd/system/nginx.service.
The command should execute without any errors. To check its status, run the following command:
sudo systemctl status nginx.service
					● nginx.service - The nginx HTTP and reverse proxy server
     Loaded: loaded (/usr/lib/systemd/system/nginx.service; enabled; preset: disabled)
     Active: active (running) since Sun 2025-02-23 07:04:36 EST; 14s ago
    Process: 8540 ExecStartPre=/usr/bin/rm -f /run/nginx.pid (code=exited, status=0/SUCCESS)
    Process: 8541 ExecStartPre=/usr/sbin/nginx -t (code=exited, status=0/SUCCESS)
    Process: 8542 ExecStart=/usr/sbin/nginx (code=exited, status=0/SUCCESS)
   Main PID: 8543 (nginx)
      Tasks: 9 (limit: 203504)
     Memory: 10.7M
        CPU: 76ms
     CGroup: /system.slice/nginx.service
             ├─8543 "nginx: master process /usr/sbin/nginx"
             ├─8544 "nginx: worker process"
...omitted for brevity...
Firewall and SELinux Settings |
Additionally, open the HTTPS port (443) for traffic on the firewall using the following command:
sudo firewall-cmd --permanent --add-port=443/tcp && sudo firewall-cmd --reload
To allow network communication, run the following commands to adjust the SELinux settings:
sudo setsebool -P httpd_can_network_connect 1
sudo setsebool -P nis_enabled 1
These commands will enable HTTPD to make network connections and allow NIS (Network Information Service) functionality. Once done, refresh the Open WebUI page in your web browser:
Photo by admingeek from Infotechys
We’re done! Your Open WebUI instance is now secure and accessible over HTTPS!
Here are some helpful links you may be interested in:
| Official Python FTP Server | It contains various Python releases. You can find versions ranging from older releases like 2.0 to the latest ones. |
| Official SQLite Page | Official page for all things SQLite and includes, documentation, downloads, and support. |
| Official FTP Server for the GNU Project | It hosts various free software packages and tools developed by the GNU Project. You can find source code, documentation, and releases for a wide range of software such as compilers (GCC), libraries, utilities, and more. |

This guide aims to equip you with the knowledge needed to install ELK stack on RHEL9 | CentOS9 effortlessly. By following these steps, you can

Learn how to deploy a highly available MariaDB cluster on RHEL 9 using Galera. Step-by-step instructions with CLI examples and best practices for setting up,
Learn how to configure OpenVPN Server on Ubuntu 24.04 for secure remote access. Step-by-step guide with configuration examples, firewall setup, and troubleshooting tips. Table of