
Commands
Learn how to install Apache Guacamole on RHEL 9 or CentOS 9 using Ansible roles for automated, secure, and efficient remote desktop access. Step-by-step guide


Learn about securing SSH connections on RHEL 9 and CentOS 9 with Ansible roles. This guide covers key SSH security practices, Ansible playbook setup, and detailed instructions to protect your servers.
Securing SSH connections is an essential task for system administrators to ensure that only authorized users can access their Linux servers. With the popularity of RHEL 9 (Red Hat Enterprise Linux 9) and CentOS 9 as enterprise-grade Linux distributions, configuring SSH securely is a critical step in safeguarding your systems from unauthorized access. This process can be made simpler and more consistent by using Ansible, a powerful automation tool.
In this blog post, we’ll explore how to secure SSH connections on RHEL 9 and CentOS 9 servers using Ansible roles. You’ll learn how to automate SSH security tasks, enforce best practices, and apply configurations across multiple servers, making your security management more efficient and scalable.
Introduction to SSH Security on RHEL 9 and CentOS 9 |
SSH (Secure Shell) is the standard protocol used for remotely accessing Linux servers. Since SSH provides a secure encrypted channel, it’s critical to configure it properly to prevent unauthorized access. On both RHEL 9 and CentOS 9, the default SSH configurations are secure, but there are various enhancements you can make to harden your system further.
Best practices include:
|
Applying these practices manually to multiple servers can be time-consuming, especially when scaling to large environments. This is where Ansible comes in. Ansible allows you to automate the application of these security settings across multiple servers in a controlled and repeatable manner.
Why Use Ansible for SSH Security Automation? |
Ansible is a popular open-source automation tool that simplifies IT infrastructure management. It allows administrators to automate complex tasks, like securing SSH connections, by creating playbooks and roles. Here’s why Ansible is ideal for SSH security automation:
|
Prerequisites for Securing SSH with Ansible |
Before you begin securing SSH with Ansible, make sure you have the following prerequisites:
|
sudo dnf install ansible -y
|
For this demonstration, we configured our Linux servers as follows:
| Hostname | IP Address | RAM (GB) | Cores | OS |
|---|---|---|---|---|
| control.dev.naijalabs.net (Ansible Controller) | 192.168.1.21 | 4 | 2 | CentOS Stream release 9 |
| server1.dev.naijalabs.net | 192.168.1.213 | 4 | 2 | Red Hat Enterprise Linux release 9.5 (Plow) |
| server2.dev.naijalabs.net | 192.168.1.216 | 4 | 2 | CentOS Stream release 9 |
Best Practices for Securing SSH Connections on RHEL 9 | CentOS 9 |
Securing SSH is vital to prevent unauthorized access. Below are some of the best practices to follow when securing SSH on RHEL 9 and CentOS 9:
| Best Practice | Description |
|---|---|
| Use SSH Key-Based Authentication | Disable password-based login and use SSH keys to authenticate users securely. |
| Disable Root Login | Prevent direct root login via SSH to avoid giving attackers access to the most privileged user. |
| Change the Default SSH Port | Move SSH to a non-standard port to make it harder for attackers to target your system. |
| Enable Two-Factor Authentication | Add a second layer of security by requiring something other than just the SSH key, such as Google Authenticator. |
| Limit SSH Access by IP | Restrict SSH access to specific trusted IP addresses to reduce the attack surface. |
| Set SSH Timeout and Idle Limits | Set a timeout to automatically disconnect idle sessions and reduce the potential for unauthorized access. |
| Enable Fail2Ban | Use Fail2Ban to block IPs after multiple failed login attempts, protecting against brute-force attacks. |
We’ll use Ansible to automate the application of these best practices.
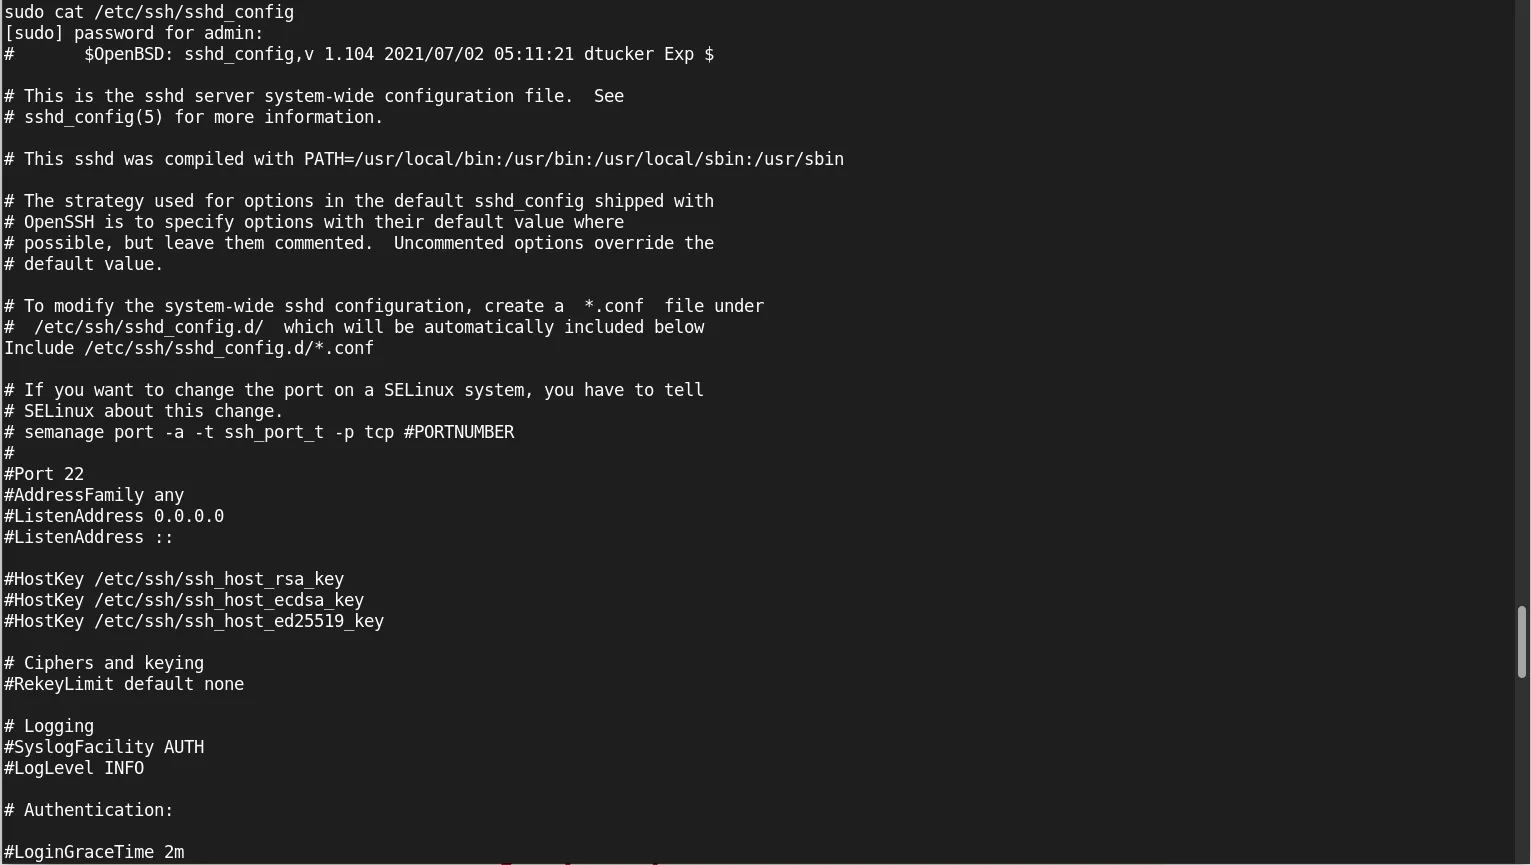
Photo by admingeek from Infotechys
Ansible roles allow you to organize your playbooks into reusable units, making your automation more modular and efficient. Let’s create a role to secure SSH on RHEL 9 and CentOS 9.
Step 1: Create the Role Directory Structure |
Create the directory structure for the Ansible role:
mkdir -p secure-ssh; cd secure-ssh; ansible-galaxy init ssh_security
- Role ssh_security was created successfully
This command creates the directory secure-ssh and navigates to it. Then, creates the ssh_security role. Now, let’s change to the role directory:
cd ssh_security
Step 2: Define SSH Security Tasks |
Inside the tasks directory, create a file named main.yml:
vim tasks/main.yml
Add the following tasks to configure SSH securely:
					---
# tasks file for ssh_security
- name: Ensure SSH is installed
  dnf:
    name: openssh-server
    state: present

- name: Disable root login in SSH
  lineinfile:
    path: /etc/ssh/sshd_config
    regexp: '^#PermitRootLogin'
    line: 'PermitRootLogin no'
    state: present
  notify:
    - restart sshd

- name: Disable password authentication
  lineinfile:
    path: /etc/ssh/sshd_config
    regexp: '^#PasswordAuthentication'
    line: 'PasswordAuthentication no'
    state: present
  notify:
    - restart sshd

- name: Change the SSH port to {{ ssh_port }}
  lineinfile:
    path: /etc/ssh/sshd_config
    regexp: '^#Port 22'
    line: 'Port {{ ssh_port }}'
    state: present
  notify:
    - restart sshd

- name: Configure SSH timeout
  lineinfile:
    path: /etc/ssh/sshd_config
    regexp: '^#ClientAliveInterval'
    line: 'ClientAliveInterval {{ client_alive_interval }}'
    state: present

- name: Enable and start sshd service
  service:
    name: sshd
    state: started
    enabled: true

- name: Add custom SSH port {{ ssh_port }} to SELinux
  command: semanage port -a -t ssh_port_t -p tcp {{ ssh_port }}
  ignore_errors: yes  # In case the port is already added, it will not cause a failure

- name: Configure firewall to allow SSH on port {{ ssh_port }}
  shell: |
    sudo firewall-cmd --permanent --add-port={{ item }}/tcp
    sudo firewall-cmd --reload
  with_items:
    - "{{ ssh_port }}"  # You can add more ports here as needed
  loop_control:
    loop_var: item  # Customizing the loop variable name if necessary
Summary and Explanations |
Here’s a brief description of each task:
| Task Name | Purpose | Details |
|---|---|---|
| Ensure SSH is installed | Ensures that the openssh-server package is installed on the system. | Uses dnf to install openssh-server with state: present. |
| Disable root login in SSH | Disables the ability to log in as the root user via SSH. | Modifies /etc/ssh/sshd_config to set PermitRootLogin no to enhance security. |
| Disable password authentication | Disables SSH login using passwords (forcing key-based authentication). | Modifies /etc/ssh/sshd_config to set PasswordAuthentication no to enhance security. |
| Change the SSH port to {{ ssh_port }} | Changes the default SSH port from 22 to a custom port provided in the ssh_port variable. | Modifies /etc/ssh/sshd_config to set a custom port (Port {{ ssh_port }}) for SSH connections. |
| Configure SSH timeout | Configures the SSH client alive interval to control session timeouts. | Modifies /etc/ssh/sshd_config to set ClientAliveInterval {{ client_alive_interval }} for timeouts. |
| Enable and start sshd service | Ensures that the SSH service is running and enabled to start on boot. | Uses the service module to start and enable sshd service (state: started, enabled: true). |
| Add custom SSH port {{ ssh_port }} to SELinux | Adds the custom SSH port to SELinux’s allowed ports. | Uses semanage port -a to associate the port with the ssh_port_t type, allowing SELinux to accept connections on the custom port. |
| Configure firewall to allow SSH on port {{ ssh_port }} | Updates the firewall to allow SSH traffic on the custom port. | Uses firewall-cmd to permanently open the custom port ({{ ssh_port }}) and reload the firewall settings. |
Step 3: Create a Handler to Restart SSH |
Inside the handlers directory, create a file named main.yml:
vim handlers/main.yml
Add the following content to restart the SSH service after making configuration changes:
					---
# handlers file for ssh_security
- name: restart sshd
  service:
    name: sshd
    state: restarted
Step 4: Create Default Variables |
In the defaults directory, create a main.yml file:
vim defaults/main.yml
Add the following default variables to configure SSH securely:
					---
# defaults file for ssh_security
ssh_port: 2222
client_alive_interval: 300
This will allow you to customize SSH settings for your environment.
Now that we have created the role, we can write an Ansible playbook to apply this role to our RHEL 9 and CentOS 9 servers. Create a new playbook named ssh_security.yml:
vim ~/secure-ssh/ssh_security.yml
Add the following content:
					---
# Main playbook for securing SSH
- name: Secure SSH connections on RHEL 9 and CentOS 9 servers
  hosts: all
  become: true
  roles:
    - ssh_security
In this playbook, we specify that the ssh_security role should be applied to all hosts in the inventory.
It’s important to test the playbook before applying it to production servers.
Test the playbook |
ansible-playbook -i inventory/hosts ssh_security.yml --check
The --check flag simulates the changes without actually applying them.
Apply the playbook |
ansible-playbook -i inventory/hosts ssh_security.yml
This will apply the SSH security configurations to your servers.
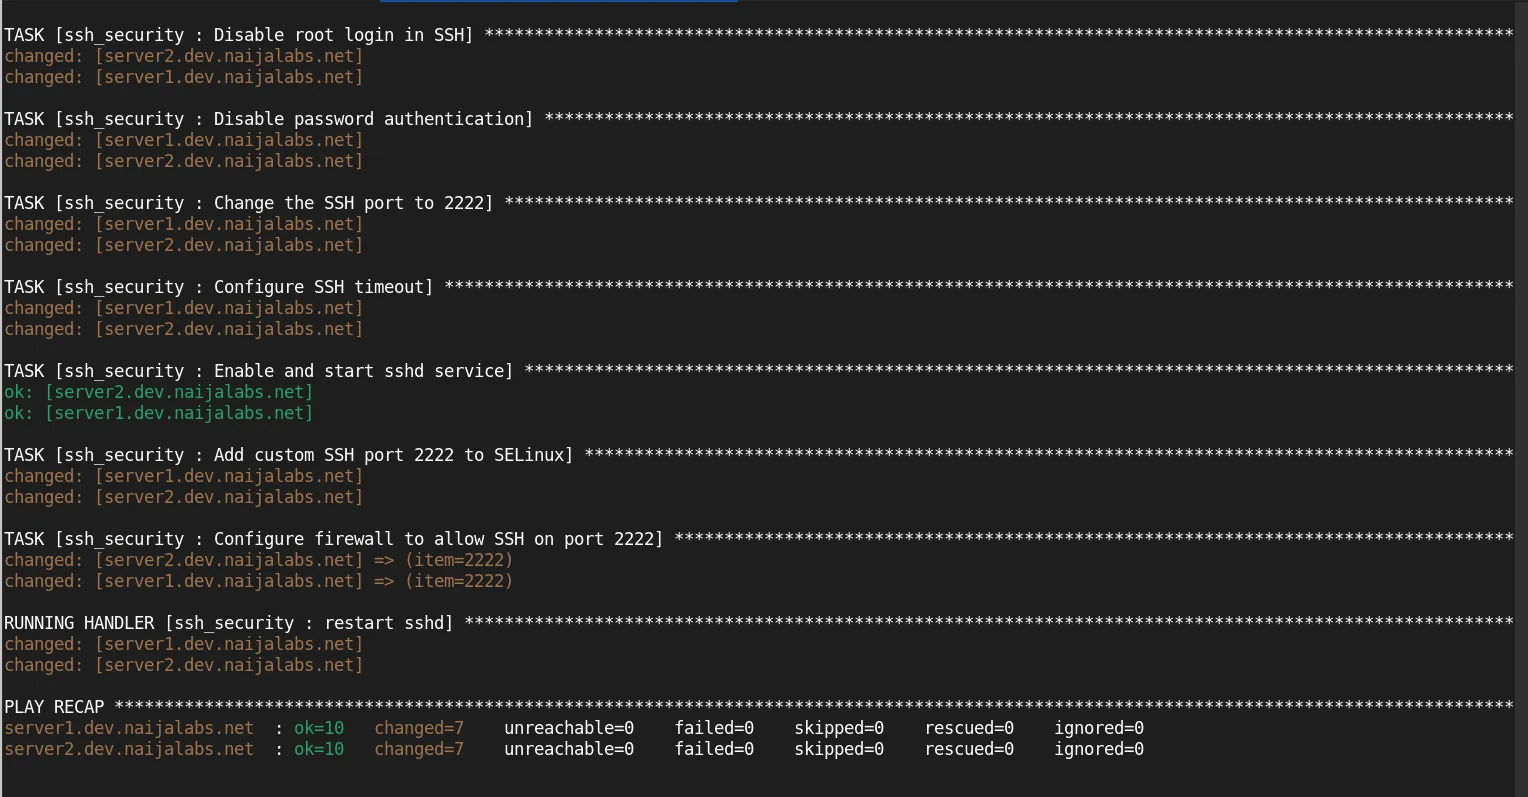
Photo by admingeek from Infotechys
Additional SSH Security Considerations |
While securing SSH connections using Ansible roles is an excellent start, consider these additional steps to further improve your server security:
Securing SSH connections on RHEL 9 and CentOS 9 is a critical aspect of protecting your servers from unauthorized access. By using Ansible roles to automate SSH security tasks, you ensure that your security measures are applied consistently across multiple systems. Enhance and customize the roles shared in the post to align with your organization’s specific security requirements. The steps outlined in this post help automate the process of configuring SSH securely, improving the overall security posture of your systems. Modify and expand on the roles provided in the post to meet security requirements in your organization.
Did you find this article useful? Your feedback is invaluable to us! Please feel free to share this post!
Learn how to install Apache Guacamole on RHEL 9 or CentOS 9 using Ansible roles for automated, secure, and efficient remote desktop access. Step-by-step guide

Learn how to install MySQL 8.4 on CentOS 9 using Ansible roles for automation, scalability, and repeatability. This step-by-step guide ensures a secure and efficient

Learn how to install Ansible Tower on RHEL 9 with this comprehensive step-by-step guide. Covering prerequisites, system requirements, and post-installation tasks, this resource is perfect for