
Learn how to install and configure Apache Hadoop on Linux, the open-source framework that revolutionized big data management with its fault-tolerance, scalability, and support for
In this article, we will review how to install WebSphere on RHEL9. It will include step-by-step instructions, prerequisites to ensure a smooth installation process, and insights into configuring WebSphere for optimal performance on Red Hat Enterprise Linux 9.
WebSphere, developed by IBM, is a robust and widely used application server that provides a stable platform for deploying and managing Java-based applications. In this guide, we’ll walk you through the step-by-step process of installing and configuring WebSphere on Red Hat Enterprise Linux 9 (RHEL 9) or CentOS 9. By following these instructions, you’ll have a fully operational WebSphere environment ready to host your Java applications.
Before you begin the installation process, ensure that you have the following prerequisites in place:
IBMid: We will assume that you already have an IBMid account. If not, you will need to create on before proceeding with this tutorial.
Operating System: RHEL 9 or CentOS 9 installed on your server.
Java Development Kit (JDK): WebSphere requires a Java runtime environment. Install the JDK by running the following command:
$ sudo dnf install java-11-openjdk-devel
The install will take a few minutes as there are over 170+ packages required to install Java-11-openjdk devel on a basic server instance.
[admin@ws-1 ~]$ sudo dnf install java-11-openjdk-devel
CentOS Stream 9 - BaseOS 1.9 MB/s | 8.0 MB 00:04
CentOS Stream 9 - AppStream 12 MB/s | 19 MB 00:01
CentOS Stream 9 - Extras packages 20 kB/s | 15 kB 00:00
Extra Packages for Enterprise Linux 9 - x86_64 5.0 MB/s | 20 MB 00:04
Extra Packages for Enterprise Linux 9 openh264 (From Cisco) - x86_64 1.9 kB/s | 2.5 kB 00:01
Extra Packages for Enterprise Linux 9 - Next - x86_64 740 kB/s | 1.4 MB 00:01
Dependencies resolved.
====================================================================================================================================================================
Package Architecture Version Repository Size
====================================================================================================================================================================
Installing:
java-11-openjdk-devel x86_64 1:11.0.18.0.10-3.el9 appstream 3.3 M
Installing dependencies:
ModemManager-glib x86_64 1.20.2-1.el9 baseos 335 k
adobe-source-code-pro-fonts noarch 2.030.1.050-12.el9.1 baseos 832 k
adwaita-cursor-theme noarch 40.1.1-3.el9 appstream 650 k
adwaita-icon-theme noarch 40.1.1-3.el9 appstream 12 M
alsa-lib x86_64 1.2.10-2.el9 appstream 523 k
at-spi2-atk x86_64 2.38.0-4.el9 appstream 87 k
at-spi2-core x86_64 2.40.3-1.el9 appstream 195 k
atk x86_64 2.36.0-5.el9 appstream 292 k
avahi-glib x86_64 0.8-20.el9 appstream 15 k
bluez-libs x86_64 5.56-6.el9 baseos 85 k
bubblewrap x86_64 0.4.1-6.el9 baseos 50 k
cairo x86_64 1.17.4-7.el9 appstream 660 k
cairo-gobject x86_64 1.17.4-7.el9 appstream 19 k
checkpolicy x86_64 3.6-1.el9 appstream 353 k
colord-libs x86_64 1.4.5-4.el9 appstream 229 k
copy-jdk-configs noarch 4.0-3.el9 appstream 28 k
cups-libs x86_64 1:2.3.3op2-22.el9 baseos 263 k
exempi x86_64 2.6.0-0.2.20211007gite23c213.el9 appstream 525 k
exiv2-libs x86_64 0.27.5-2.el9 appstream 781 k
fdk-aac-free x86_64 2.0.0-8.el9 appstream 325 k
flac-libs x86_64 1.3.3-12.el9 appstream 218 k
flatpak-selinux noarch 1.12.8-1.el9 appstream 21 k
flatpak-session-helper x86_64 1.12.8-1.el9 appstream 74 k
...
xdg-desktop-portal x86_64 1.12.6-1.el9 appstream 385 k
xkeyboard-config noarch 2.33-2.el9 appstream 859 k
xml-common noarch 0.6.3-58.el9 appstream 32 k
xorg-x11-fonts-Type1 noarch 7.5-33.el9 appstream 505 k
Installing weak dependencies:
abattis-cantarell-fonts noarch 0.301-4.el9 appstream 365 k
dconf x86_64 0.40.0-6.el9 appstream 113 k
exiv2 x86_64 0.27.5-2.el9 appstream 980 k
flatpak x86_64 1.12.8-1.el9 appstream 1.7 M
gtk3 x86_64 3.24.31-2.el9 appstream 4.9 M
libcanberra-gtk3 x86_64 0.30-27.el9 appstream 32 k
libproxy-webkitgtk4 x86_64 0.4.15-35.el9 appstream 22 k
p11-kit-server x86_64 0.25.3-2.el9 appstream 246 k
pipewire x86_64 1.0.0-2.el9 appstream 106 k
pipewire-alsa x86_64 1.0.0-2.el9 appstream 57 k
pipewire-jack-audio-connection-kit x86_64 1.0.0-2.el9 appstream 9.0 k
pipewire-pulseaudio x86_64 1.0.0-2.el9 appstream 192 k
tracker-miners x86_64 3.1.2-4.el9 appstream 944 k
xdg-desktop-portal-gtk x86_64 1.12.0-3.el9 appstream 134 k
Transaction Summary
====================================================================================================================================================================
Install 176 Packages
Total download size: 124 M
Installed size: 456 M
Is this ok [y/N]:
Also, ensure that the xorg-x11 package is installed on your machine. This will come in handy when running the installer.
$ sudo dnf install xorg-x11*
With the xorg-x11 packages installed, X11 forwarding will be enabled on your machine.
					[admin@ws-1 ~]$ sudo dnf install xorg-x11*
Last metadata expiration check: 0:00:20 ago on Sat 27 Jan 2024 12:01:45 AM UTC.
Package xorg-x11-xauth-1:1.1-10.el9.x86_64 is already installed.
Dependencies resolved.
========================================================================================================================================================================
 Package                                                  Architecture                  Version                                  Repository                        Size
========================================================================================================================================================================
Installing:
 xorg-x11-drivers                                         x86_64                        2021-4.el9                               appstream                        4.5 k
 xorg-x11-drv-dummy                                       x86_64                        0.3.7-17.el9                             appstream                         18 k
 xorg-x11-drv-evdev                                       x86_64                        2.10.6-12.el9                            appstream                         42 k
 xorg-x11-drv-fbdev                                       x86_64                        0.5.0-11.el9                             appstream                         20 k
 xorg-x11-drv-libinput                                    x86_64                        1.0.1-3.el9                              appstream                         46 k
 xorg-x11-drv-v4l                                         x86_64                        0.3.0-10.el9                             appstream                         20 k
 xorg-x11-drv-vmware                                      x86_64                        13.2.1-18.el9                            appstream                         65 k
 xorg-x11-drv-wacom                                       x86_64                        1.0.0-1.el9                              appstream                        310 k
 xorg-x11-drv-wacom-serial-support                        x86_64                        1.0.0-1.el9                              appstream                         24 k
 xorg-x11-fonts-100dpi                                    noarch                        7.5-33.el9                               appstream                        3.2 M
 xorg-x11-fonts-75dpi                                     noarch                        7.5-33.el9                               appstream                        2.8 M
...
mkfontscale                                              x86_64                        1.2.1-3.el9                              appstream                         32 k
 mtdev                                                    x86_64                        1.1.5-22.el9                             appstream                         22 k
 pixman                                                   x86_64                        0.40.0-6.el9                             appstream                        269 k
 ttmkfdir                                                 x86_64                        3.0.9-65.el9                             appstream                         53 k
 xcb-util                                                 x86_64                        0.4.0-19.el9                             appstream                         19 k
 xcb-util-image                                           x86_64                        0.4.0-19.el9                             appstream                         20 k
 xcb-util-keysyms                                         x86_64                        0.4.0-17.el9                             appstream                         15 k
 xcb-util-renderutil                                      x86_64                        0.3.9-20.el9                             appstream                         18 k
 xcb-util-wm                                              x86_64                        0.4.1-22.el9                             appstream                         32 k
 xkbcomp                                                  x86_64                        1.4.4-4.el9                              appstream                        100 k
 xkeyboard-config                                         noarch                        2.33-2.el9                               appstream                        859 k
 xml-common                                               noarch                        0.6.3-58.el9                             appstream                         32 k
Installing weak dependencies:
 mesa-dri-drivers                                         x86_64                        23.3.0-1.el9                             appstream                         11 M

Transaction Summary
========================================================================================================================================================================
Install  99 Packages

Total download size: 49 M
Installed size: 113 M
Is this ok [y/N]: y
System Requirements: Check and ensure that your server meets the hardware and software requirements specified by IBM for WebSphere.
- Ensure your machine has 4GB of RAM and 2 cores
- 20GB of storage allocated to /opt or install path.
IBM Installation Manager: Download and install the IBM Installation Manager, which is used to install WebSphere. You can get it from the official IBM website.
Forward X11 to your server as the root user by running the following command:
					$ ssh -XY root@ws-1
Last login: Sat Jan 27 00:14:17 2024 from 192.168.1.252
/usr/bin/xauth:  file /home/admin/.Xauthority does not exist

[root@ws-1 ~]# echo $DISPLAY
localhost:10.0
Note: We created a machine named ws-1 for this demonstration. The output of the echo $DISPLAY command indicates X11 was forwarded successfully.
For demonstration purposes, we will unpack and install the agent.installer.linux.gtk.x86_64_1.9.2006.20230925_1323.zip (your version will be different) file under the /opt directory on our machine.
					[root@ws-1 opt]# sudo unzip agent.installer.linux.gtk.x86_64_1.9.2006.20230925_1323.zip
Archive:  agent.installer.linux.gtk.x86_64_1.9.2006.20230925_1323.zip
  inflating: META-INF/MANIFEST.MF
  inflating: META-INF/PRD00008.SF
  inflating: META-INF/PRD00008.RSA
   creating: Offerings/
   creating: configuration/
   creating: configuration/org.eclipse.update/
...
  inflating: silent-install.ini
  inflating: tools/imcl
  inflating: tools/imcl.ini
  inflating: tools/imutilsc
  inflating: tools/imutilsc.ini
  inflating: user-silent-install.ini
  inflating: userinst
  inflating: userinst.ini
  inflating: userinstc
  inflating: userinstc.ini

[root@ws-1 opt]# ll
total 218468
-rw-r--r--.  1 admin admin 223019942 Jan 27 00:14 agent.installer.linux.gtk.x86_64_1.9.2006.20230925_1323.zip
-rwxr-xr-x.  1 root  root       4642 Sep 25 13:38 con-disk-set-inst.sh
drwxr-xr-x.  3 root  root         50 Sep 25 13:38 configuration
drwxr-xr-x. 13 root  root        122 Sep 25 13:38 documentation
-rwxr-xr-x.  1 root  root      80385 Nov 23  2016 groupinst
-rwxr-xr-x.  1 root  root      80385 Nov 23  2016 groupinstc
-rwxr-xr-x.  1 root  root        278 Sep 25 13:38 groupinstc.ini
-rwxr-xr-x.  1 root  root        233 Sep 25 13:38 groupinst.ini
-rwxr-xr-x.  1 root  root      80385 Nov 23  2016 install
-rwxr-xr-x.  1 root  root      80385 Nov 23  2016 installc
-rwxr-xr-x.  1 root  root        276 Sep 25 13:38 installc.ini
Now run the following command to launch the Installation Wizard:
[root@ws-1 opt]# ./install
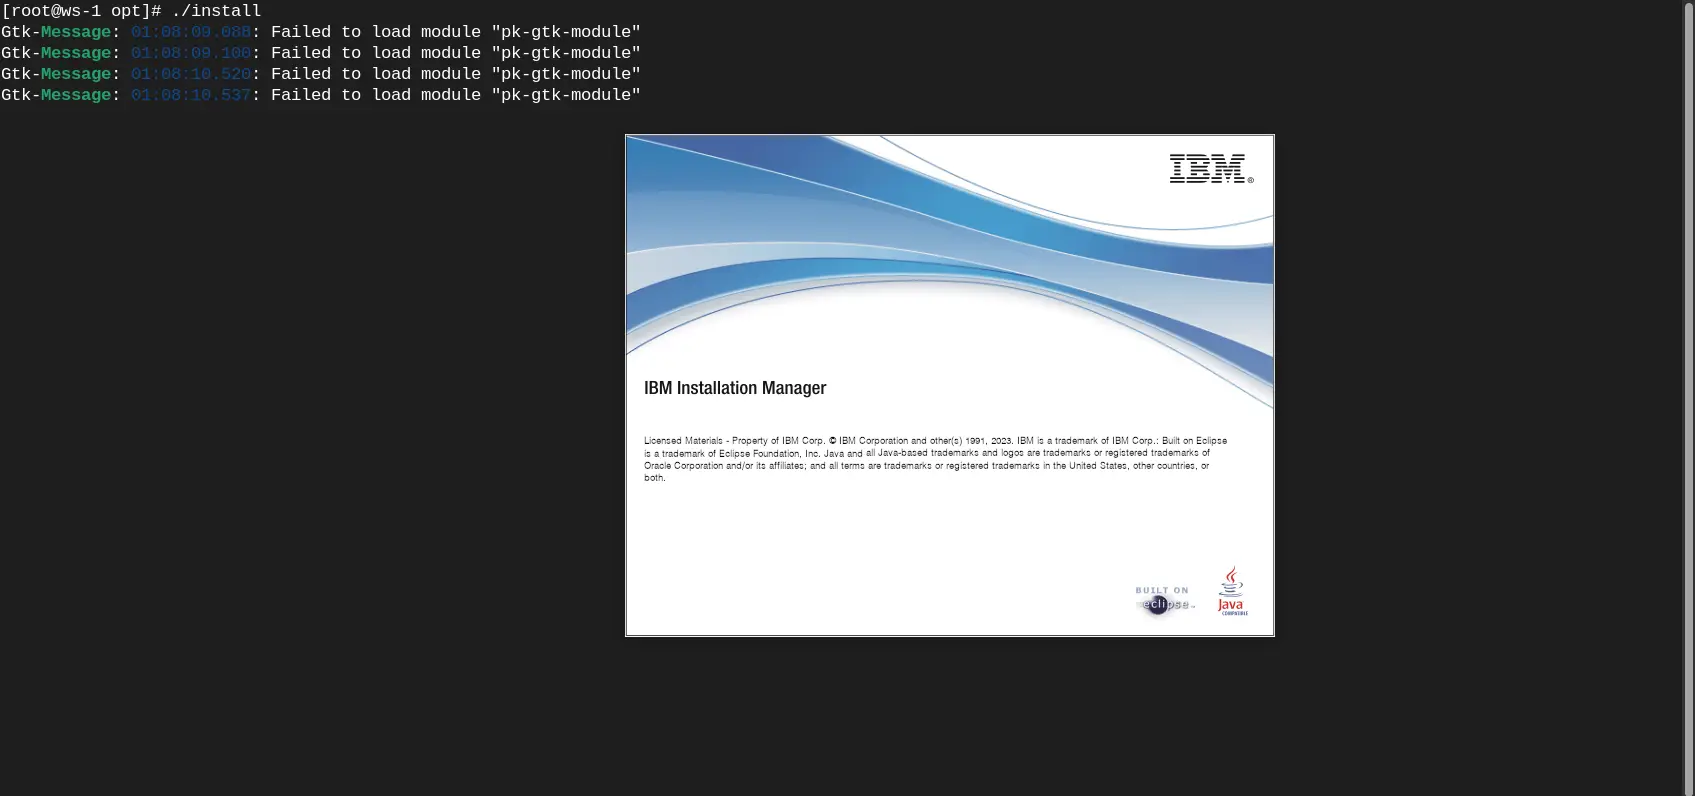
Photo by admingeek from Infotechys
Follow the steps (below) to install the IBM Installation manager. We need this tool to install the WebSphere Application Server.
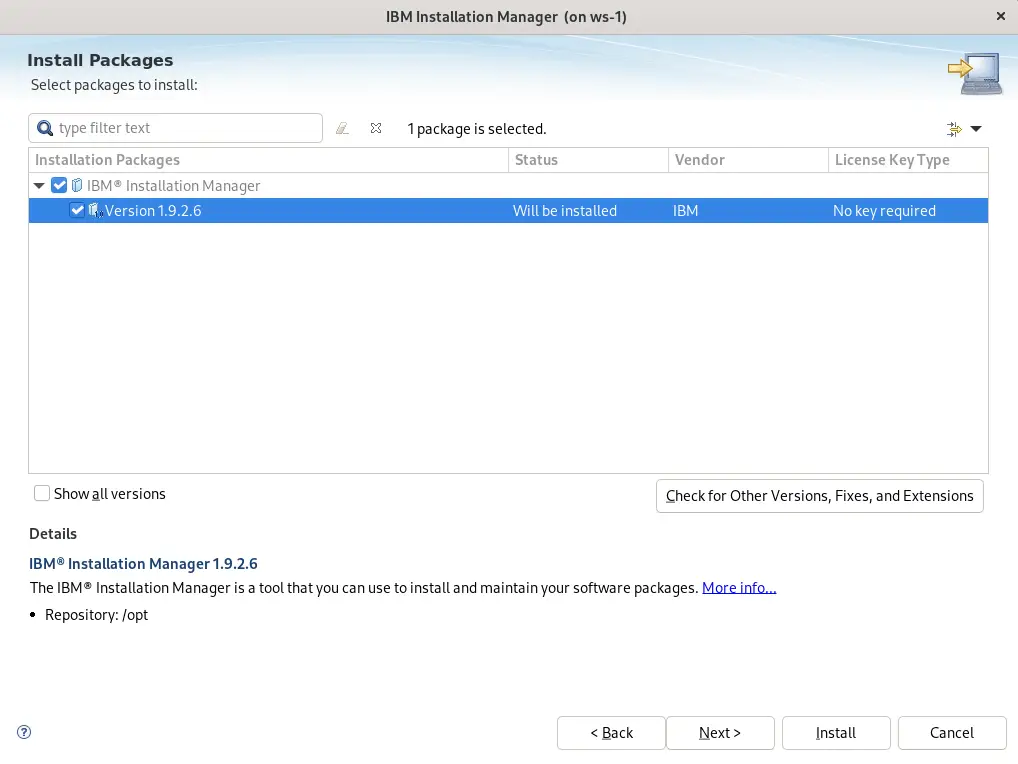
Photo by admingeek from Infotechys
Click the Next button to continue.
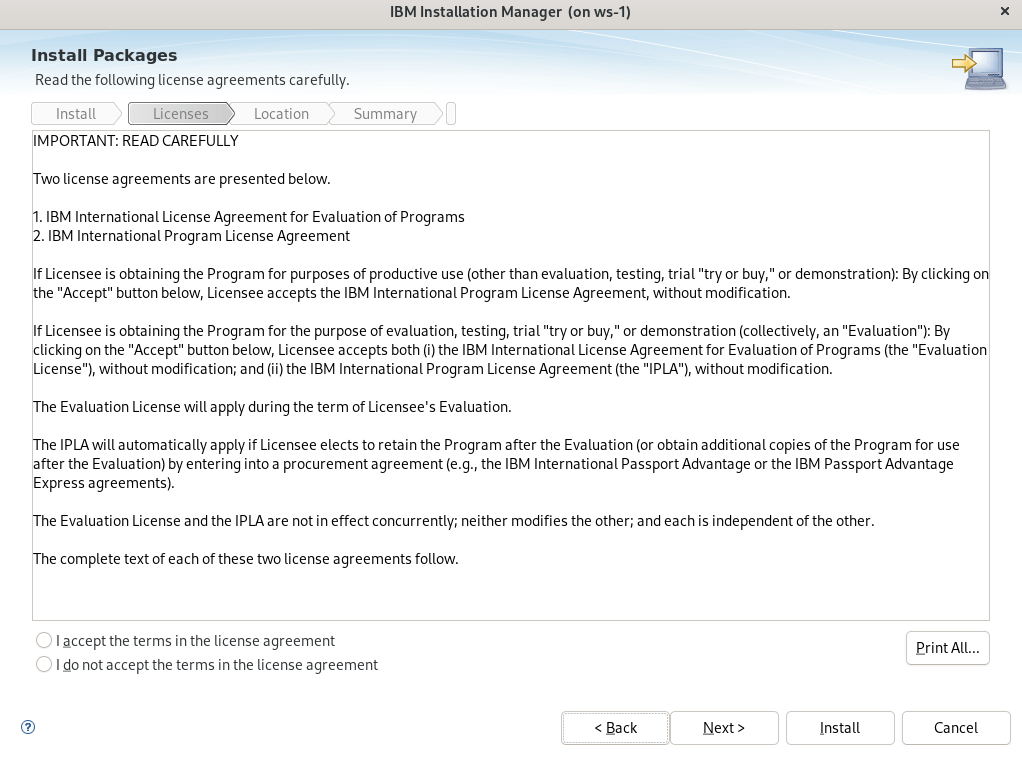
Photo by admingeek from Infotechys
Accept the license agreements and click the Next button to continue.
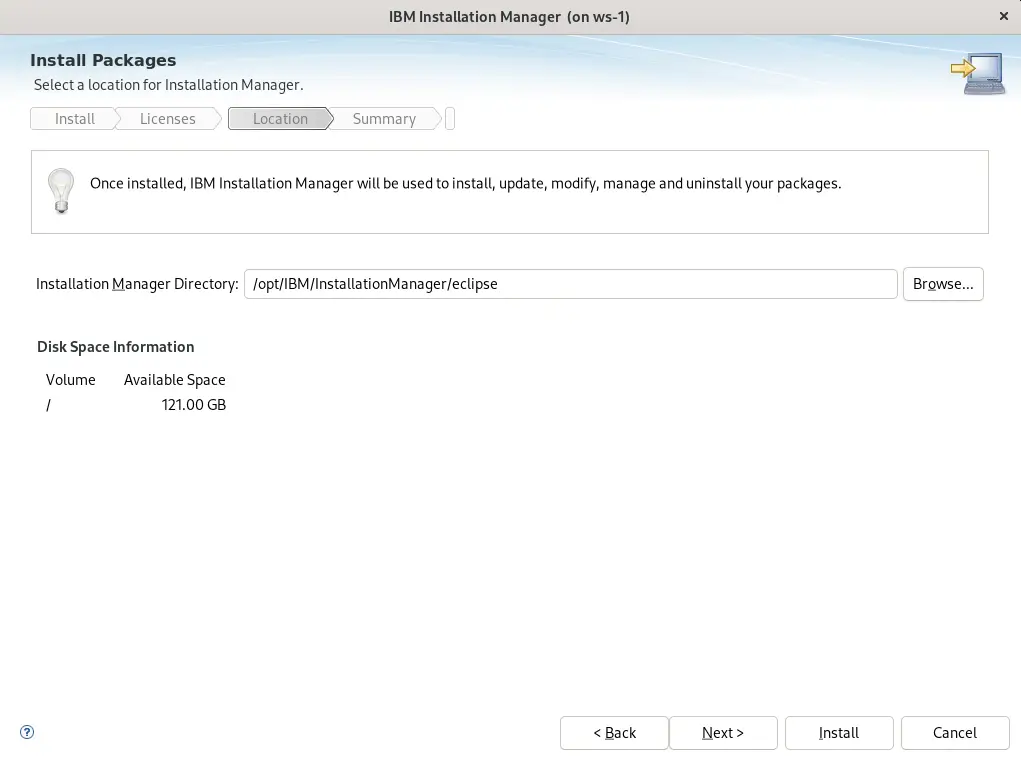
Photo by admingeek from Infotechys
Enter an installation path for the Intstallation Manager or click the Next button to accept the default location under /opt/IBM/InstallationManager/eclipse and continue.
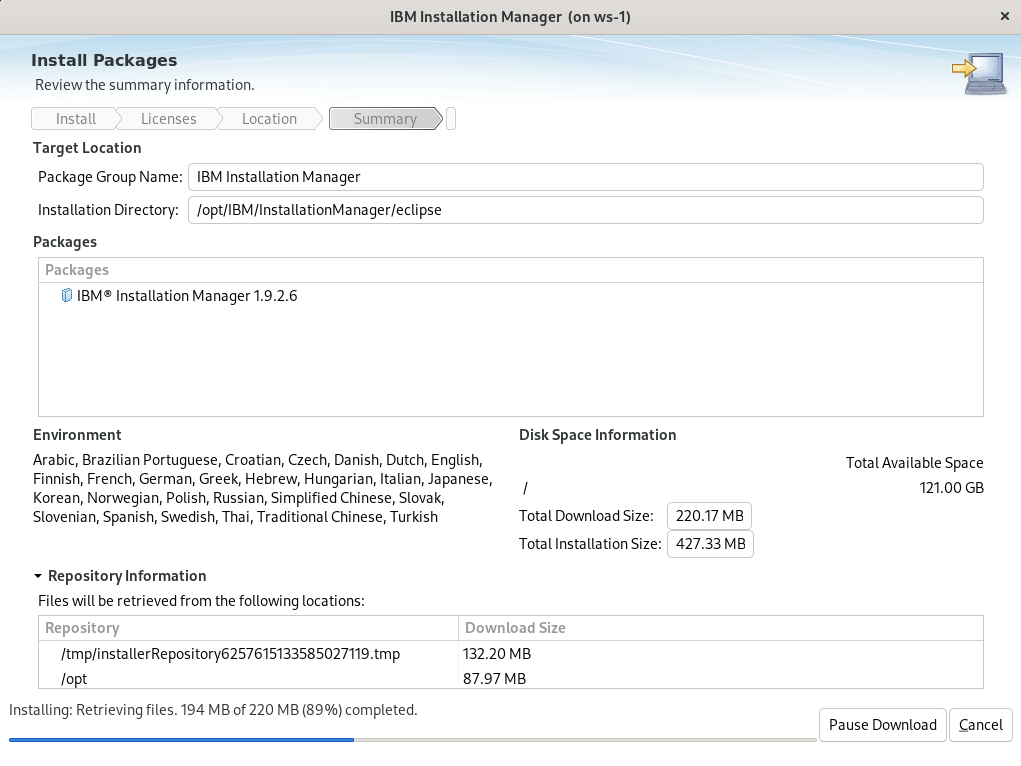
Photo by admingeek from Infotechys
The installation process will begin and complete in a minute or less.
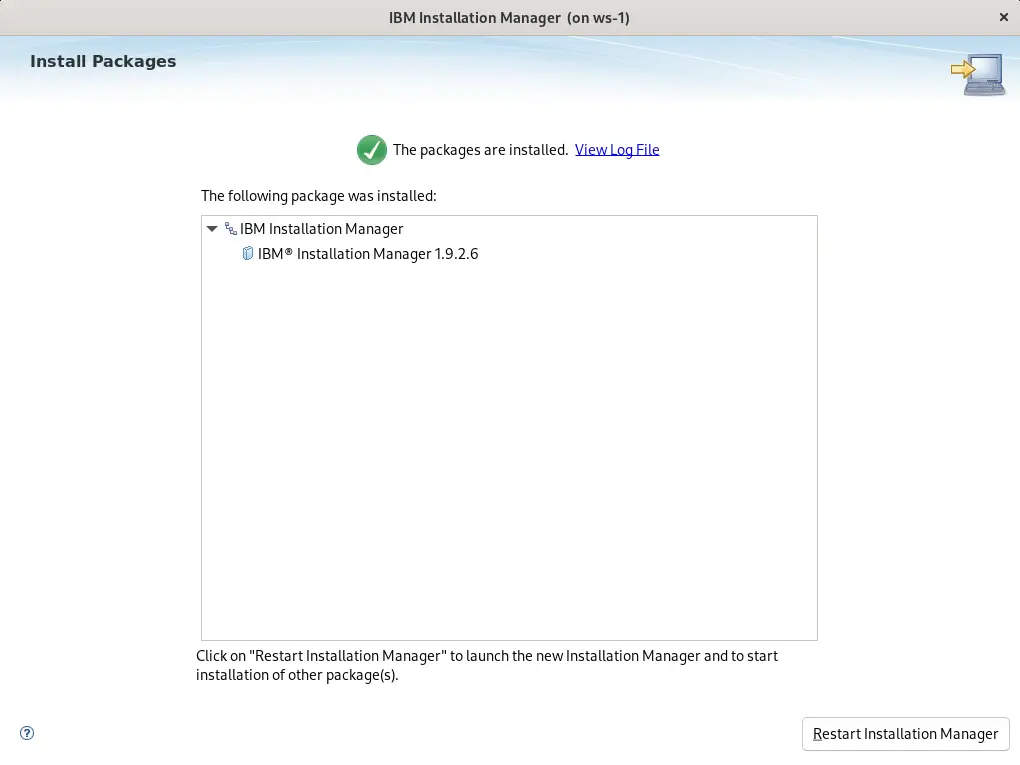
Photo by admingeek from Infotechys
Upon completion, click the Restart Installation Manager button to relaunch the Installation Manager and begin the WebSphere Application Server install.
Follow the steps below to proceed with the WebSphere install.
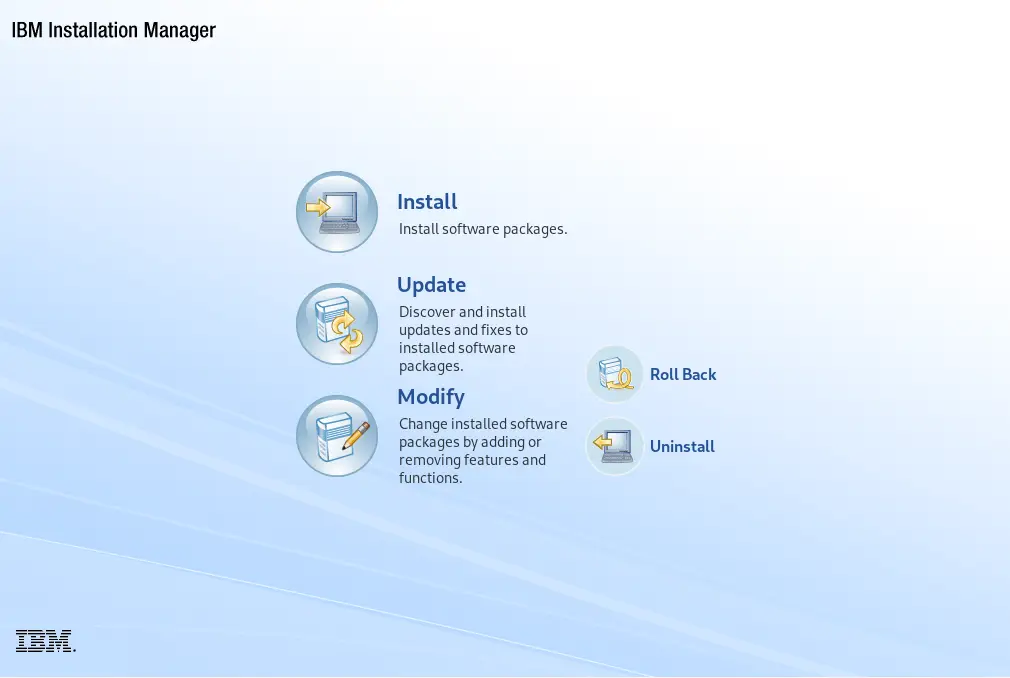
Photo by admingeek from Infotechys
Click Install to proceed.
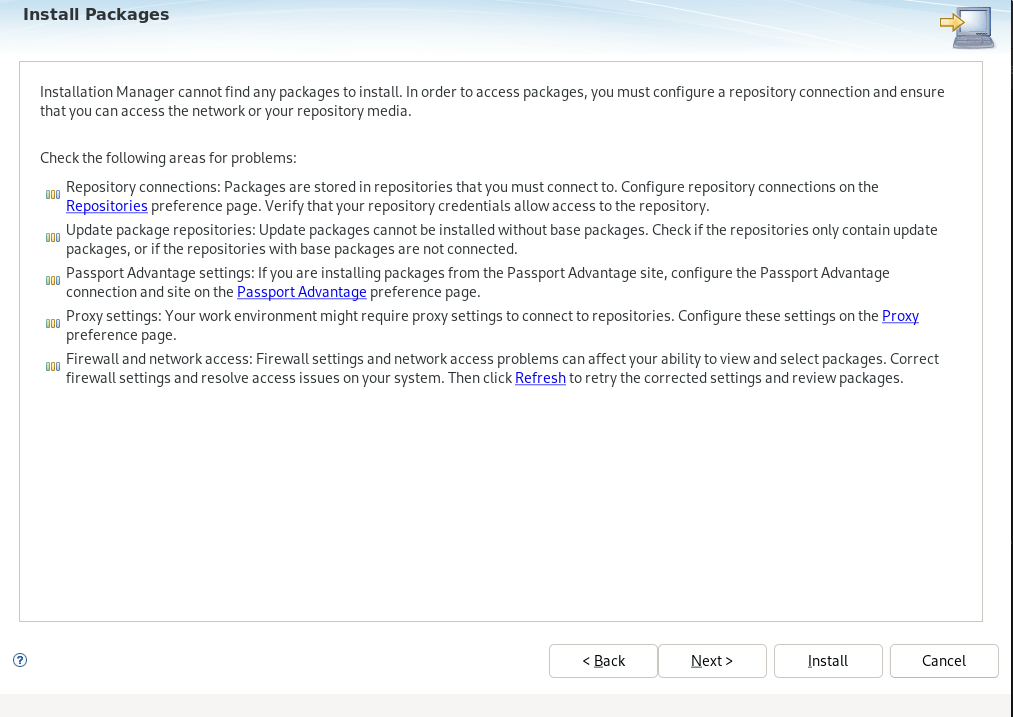
Photo by admingeek from Infotechys
Click the Next button to continue to the prompt where you will enter the link to the WebSphere Application Server repository.
Enter the following URL in the textbox (shown in the image below): https://ibm.com/software/repositorymanager/V9WASND
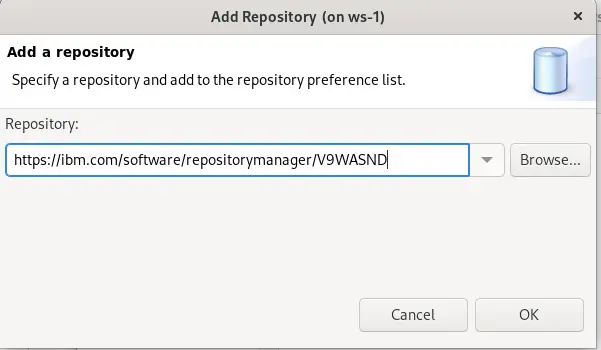
Photo by admingeek from Infotechys
You will be prompted for your IBMid credentials in order to access the respository.
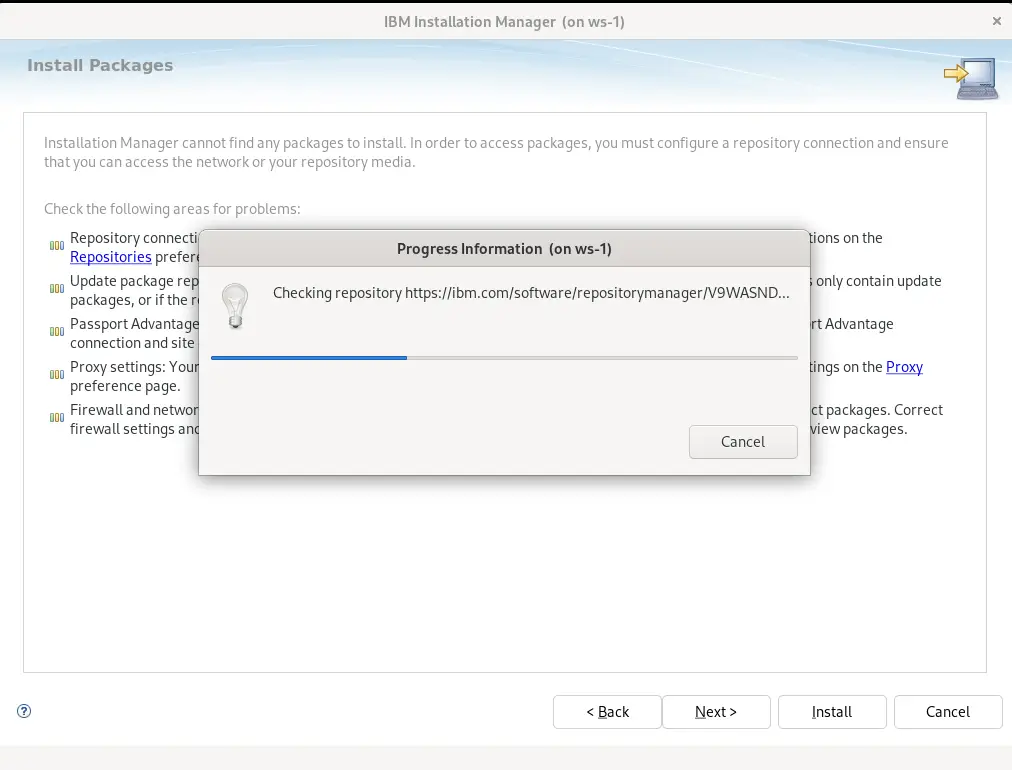
Photo by admingeek from Infotechys
At the Install Packages window, you will be presented with various software packages to choose from. Here are a few of the selections available:
Application Client for IBM WebSphere Application Server
DMZ Secure Proxy Server for IBM WebSphere Application Server
IBM HTTP Server for IBM WebSphere Application Server
IBM WebSphere Application Server for Liberty Network Deployment
For the demonstration purposes, we chose the DMZ Secure Proxy Server option for install. Your selection will be determined by what suits your environment.
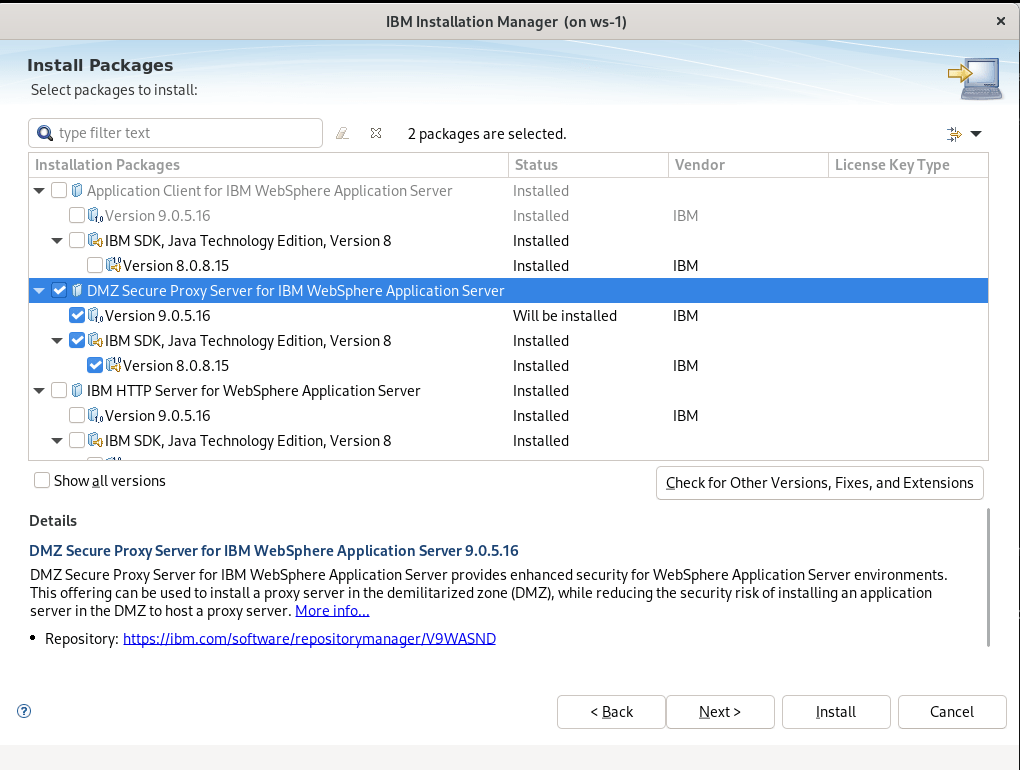
Photo by admingeek from Infotechys
NOTE: Depending on your software selection, you may also be prompted to provide your hostname and port number. We chose to go with the defaults.
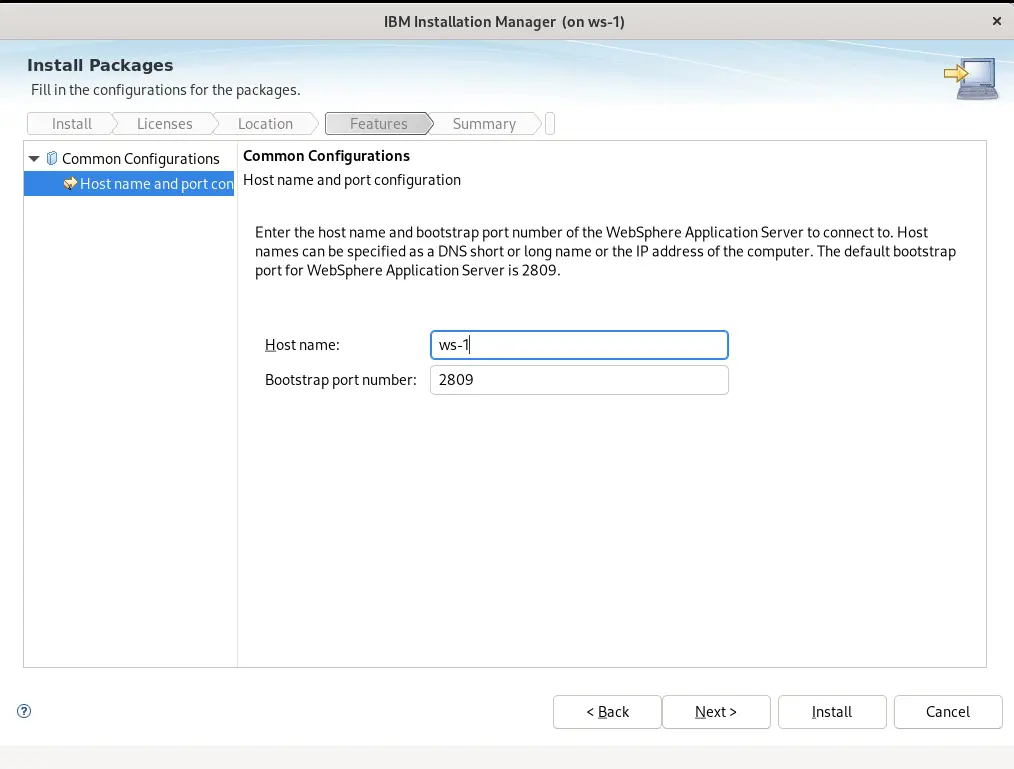
Photo by admingeek from Infotechys
Check the network configuration of your server. Ensure that necessary ports are open for WebSphere communication. WebSphere typically uses ports like 9060 for HTTP, 9043 for HTTPS, and additional ports for various services.
Run the following command(s) on your machine to ensure ports 2809 and 9060 (console) are open:
					[root@ws-1 opt ]# firewall-cmd --permanent --add-port=2809/tcp --add-port=9060/tcp
success
[root@ws-1 opt]# firewall-cmd --reload
success
Repeat the commands (above) for any subsequent ports as needed.
					[root@ws-1 opt]# firewall-cmd --list-all
public (active)
  target: default
  icmp-block-inversion: no
  interfaces: eth0 eth1
  sources:
  services: cockpit dhcpv6-client ssh
  ports: 2809/tcp 9060/tcp
  protocols:
  forward: yes
  masquerade: no
  forward-ports:
  source-ports:
  icmp-blocks:
  rich rules:
Run the firewall-cmd --list-all command to verify settings.
The remainder of this process is straightforward and self-explanatory. Accept license agreements and ensure you have sufficient disk space and system resources (e.g RAM, cores) for the software package you want to install.
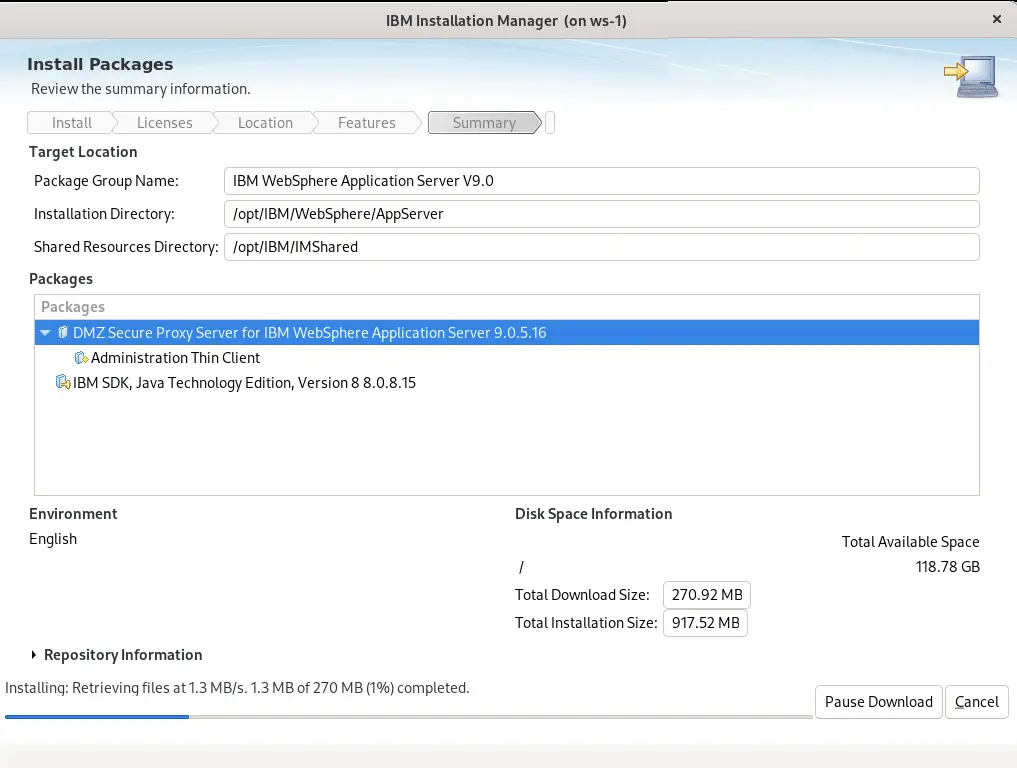
Photo by admingeek from Infotechys
Upon completion, the WebSphere Application server is ready for the final step which involves setting up profiles and customizing according to your specific requirements. The following section provides some basic examples that you can modify as needed to suit your needs.
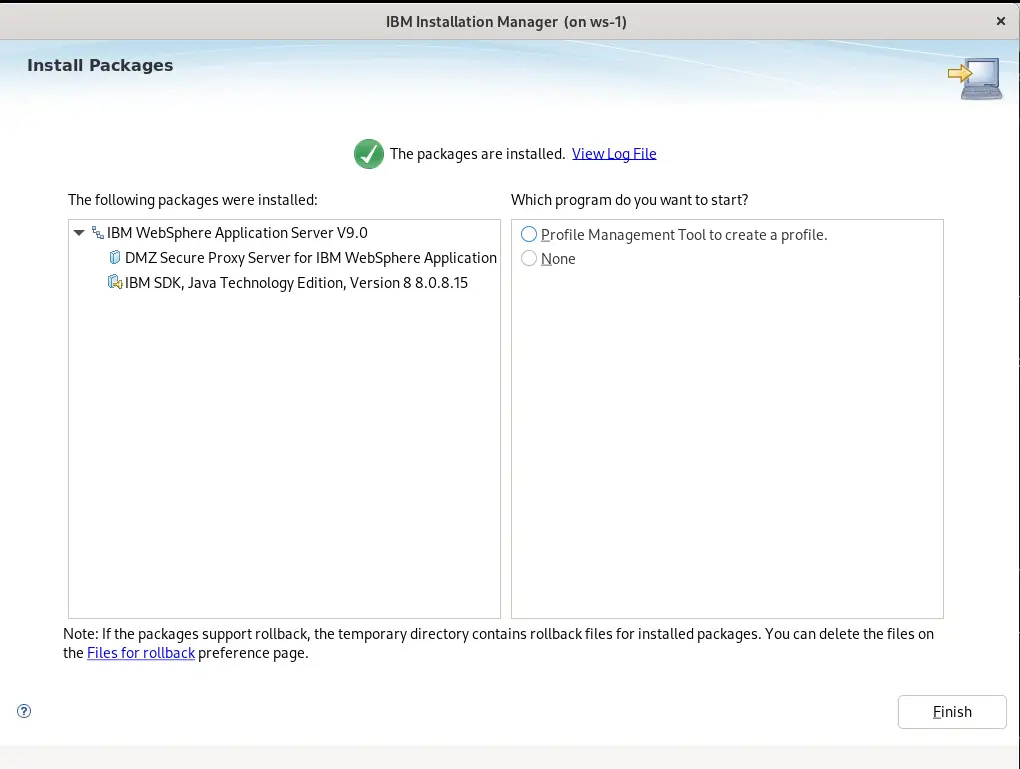
Photo by admingeek from Infotechys
Here’s an example you might use to start the WebSphere Installation with a profile template:
/opt/IBM/WebSphere/AppServer/bin/manageprofiles.sh -create -templatePath /opt/IBM/WebSphere/AppServer/profileTemplates/default -profileName AppSrv01
Here’s what a sample.xml file residing under /opt/IBM/WebSphere/AppServer/profileTemplates/default looks like (below)
					<server>
  <!-- Define the server name -->
  <serverName>MyServer</serverName>

  <!-- Define the node name -->
  <nodeName>MyNode</nodeName>

  <!-- Define the host name -->
  <hostName>localhost</hostName>

  <!-- Define the port number -->
  <serverPort>9080</serverPort>

  <!-- Define the admin console port number -->
  <adminPort>9060</adminPort>

  <!-- Define the JVM settings -->
  <jvmEntries xmi:id="JavaVirtualMachine_1" verboseModeClass="false" verboseModeGarbageCollection="false">
    <classpath>${BOOTCLASSPATH}${PATH_SEPARATOR}${USER_INSTALL_ROOT}/lib/bootstrap.jar${PATH_SEPARATOR}${USER_INSTALL_ROOT}/lib/j2ee.jar${PATH_SEPARATOR}${USER_INSTALL_ROOT}/lib/lmproxy.jar${PATH_SEPARATOR}${USER_INSTALL_ROOT}/lib/urlprotocols.jar</classpath>
    <initialHeapSize>512</initialHeapSize>
    <maximumHeapSize>1024</maximumHeapSize>
  </jvmEntries>

  <!-- Define data source configurations -->
  <dataSource xmi:id="DataSource_1" jdbcDriverRef="Derby Embedded JDBC Driver" jndiName="jdbc/MyDataSource">
    <statementCacheSize>100</statementCacheSize>
    <isolated>false</isolated>
    <logMissingTransactionContext>false</logMissingTransactionContext>
  </dataSource>

  <!-- Define additional configurations -->
  <!-- Add more configurations as needed -->

</server>
This XML snippet represents a simplified server profile configuration. Here’s a breakdown of the key elements:
serverName: Specifies the name of the server.nodeName: Specifies the name of the node where the server resides.hostName: Specifies the host name or IP address of the server.serverPort: Specifies the port number on which the server listens for incoming requests.adminPort: Specifies the port number for accessing the administrative console.jvmEntries: Defines Java Virtual Machine (JVM) settings such as initial and maximum heap sizes.dataSource: Defines a data source configuration, including JDBC driver reference and JNDI name.Additional configurations: You can add more elements to define other aspects of the server configuration, such as security settings, application mappings, and resource environment entries.
This profile template serves as a basis for creating server profiles in WebSphere. You can customize it further according to your specific application requirements and deployment environment.
/opt/IBM/WebSphere/AppServer/bin/startServer.sh server1
Replace server1 with the actual name of your server instance.
/opt/IBM/WebSphere/AppServer/bin/stopServer.sh server1
This command gracefully shuts down the WebSphere Application Server.
Open a web browser and navigate to http://localhost:9060/ibm/console. Log in with the credentials you specified during installation.
WebSphere Console Navigation:
Deploy Applications via WebSphere Console:
/opt/IBM/WebSphere/AppServer/bin/wsadmin.sh -lang jython -c "AdminApp.install('/path/to/your/application.ear', '[ -appname YourAppName -MapWebModToVH [[.* .* default_host]]]')"
Adjust the path to your application and set the desired application name.
Accessing Logs:
/opt/IBM/WebSphere/AppServer/profiles/<YourProfile>/logs directory.SystemOut.log and SystemErr.log for application and server-related information.Monitor Server Performance:
By following these examples, you can start, access, deploy applications, and manage WebSphere on RHEL 9 effectively. Remember that these are basic commands, and you may need to adapt them based on your specific WebSphere configuration and application requirements. Always refer to the official WebSphere documentation for more in-depth information and advanced configurations.
Was this article helpful to you? If so, leave us a comment below and share!
Related Posts

Learn how to install and configure Apache Hadoop on Linux, the open-source framework that revolutionized big data management with its fault-tolerance, scalability, and support for

If you’re a developer or IT professional looking to test and deploy Kubernetes applications, learn how to install Minikube on RHEL9 or CentOS9 with this

In this article, we will examine installing and using Gitlab on Ubuntu server version 20.04. Gitlab community edition or Gitlab CE can be installed by
