HOWTO
In this tutorial, we will review how to install Ubuntu desktop on KVM. For this particular demonstration, we will examine version 20.04 of the operating


In this tutorial, we will review how to install Ubuntu desktop on KVM. For this particular demonstration, we will examine version 20.04 of the operating

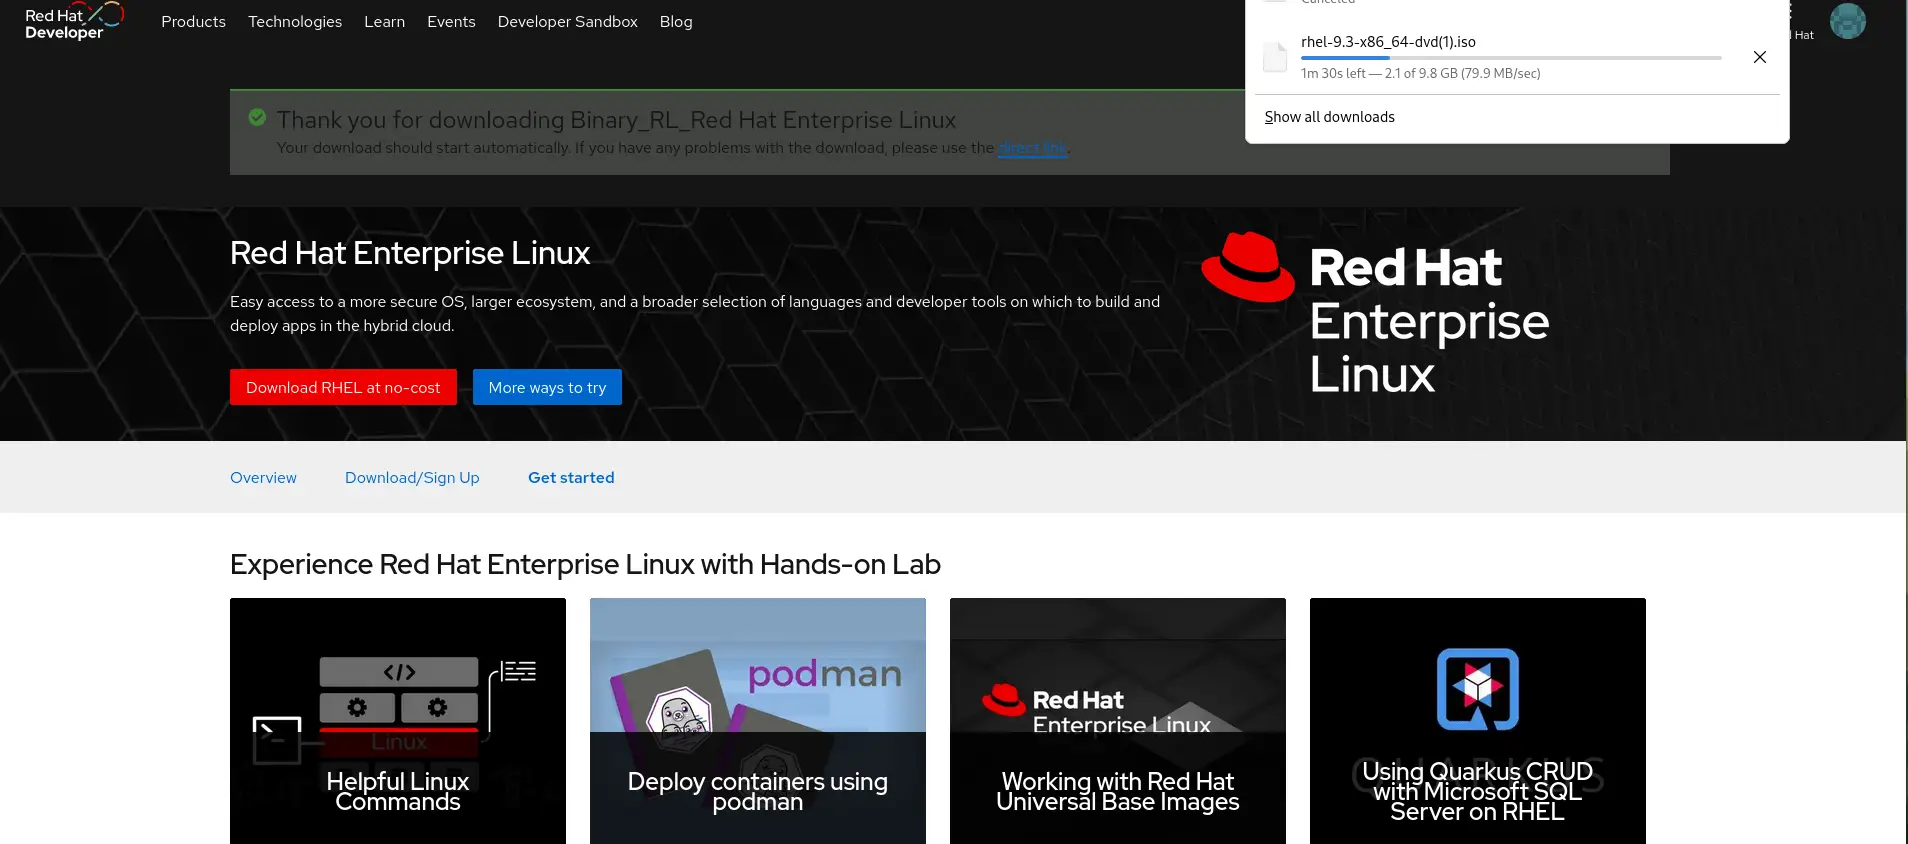
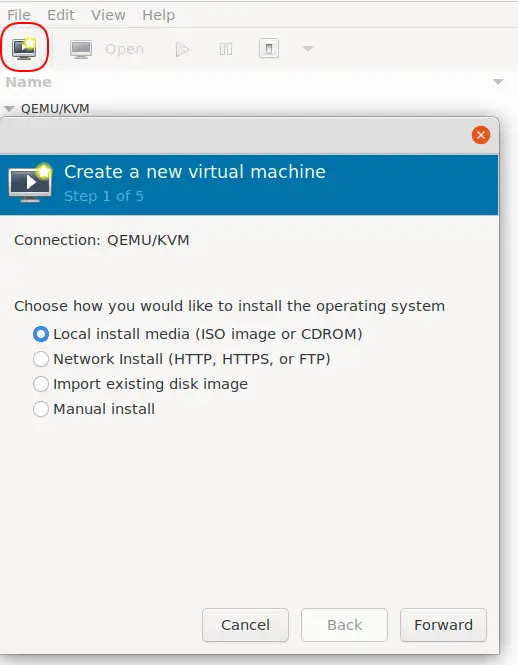
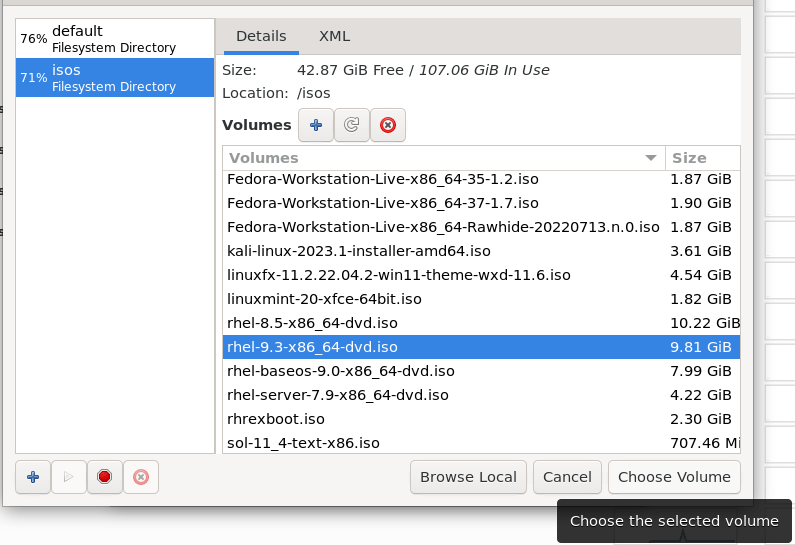
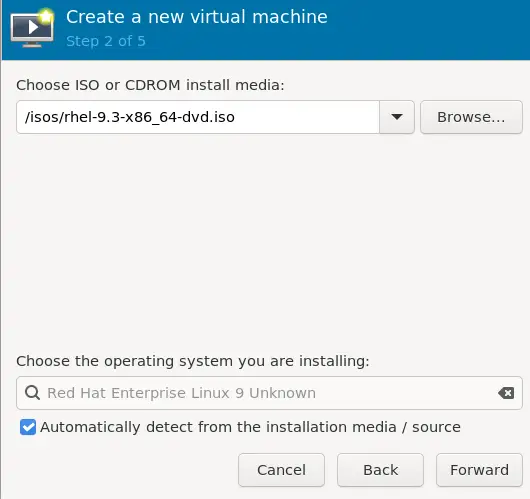
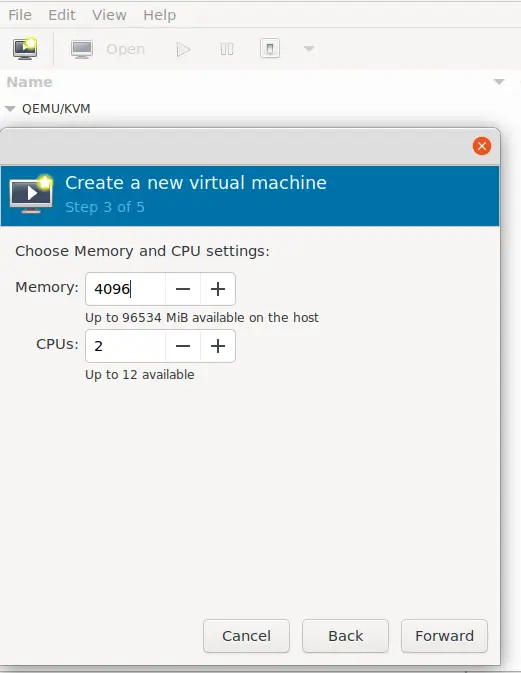
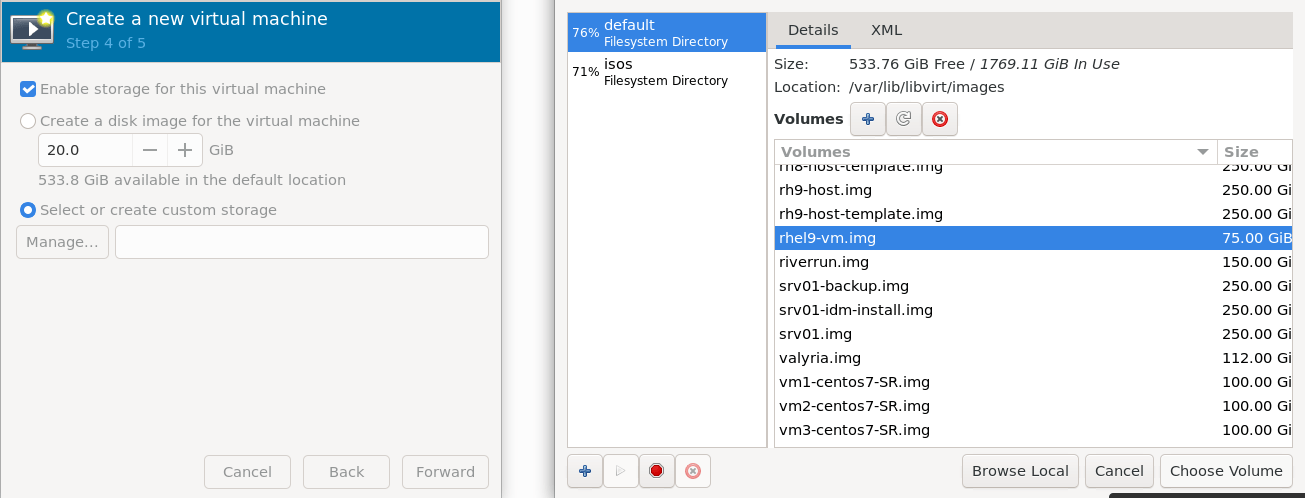
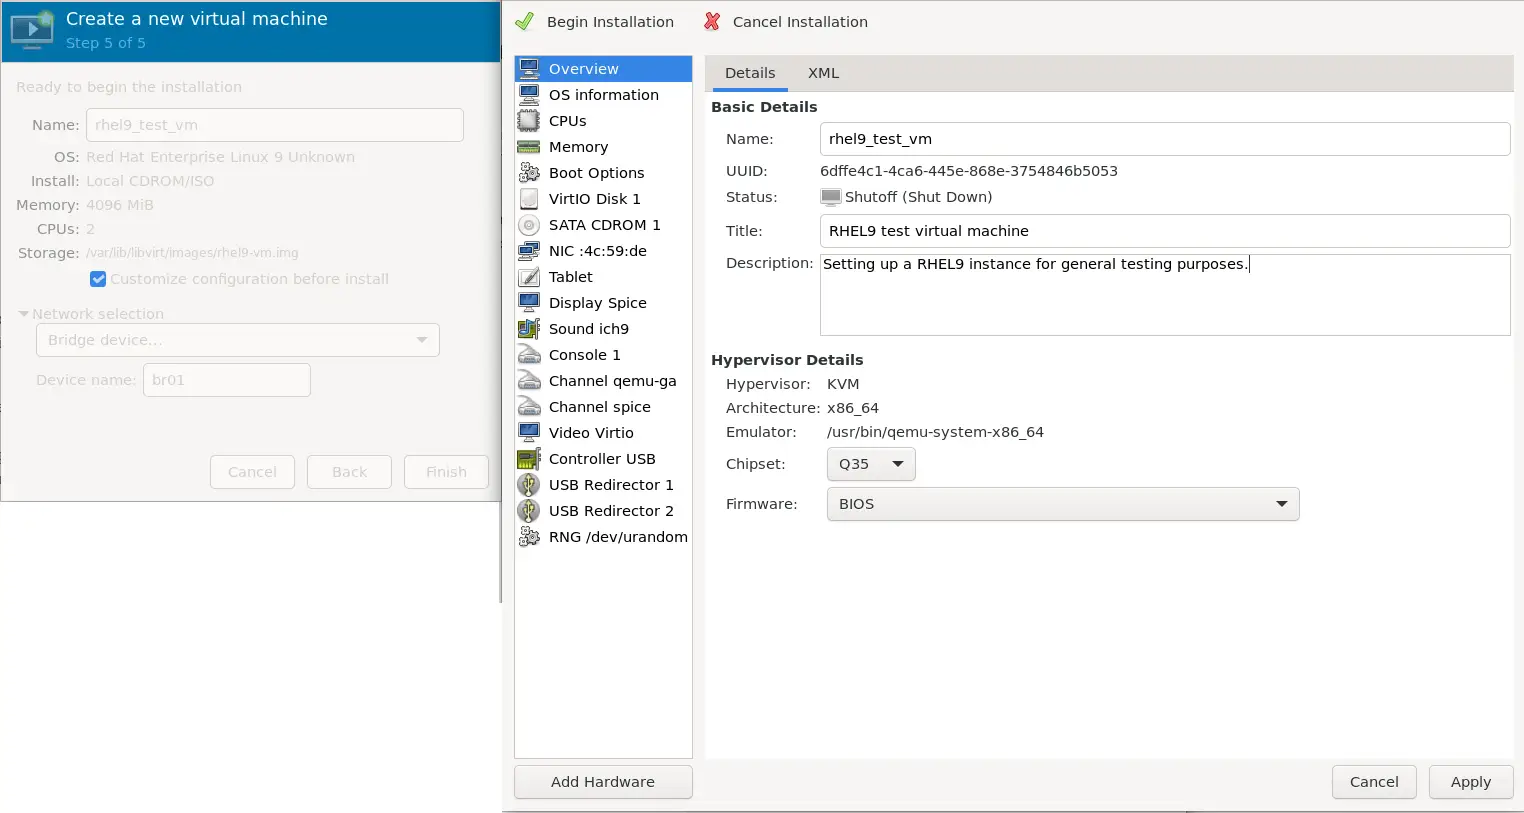
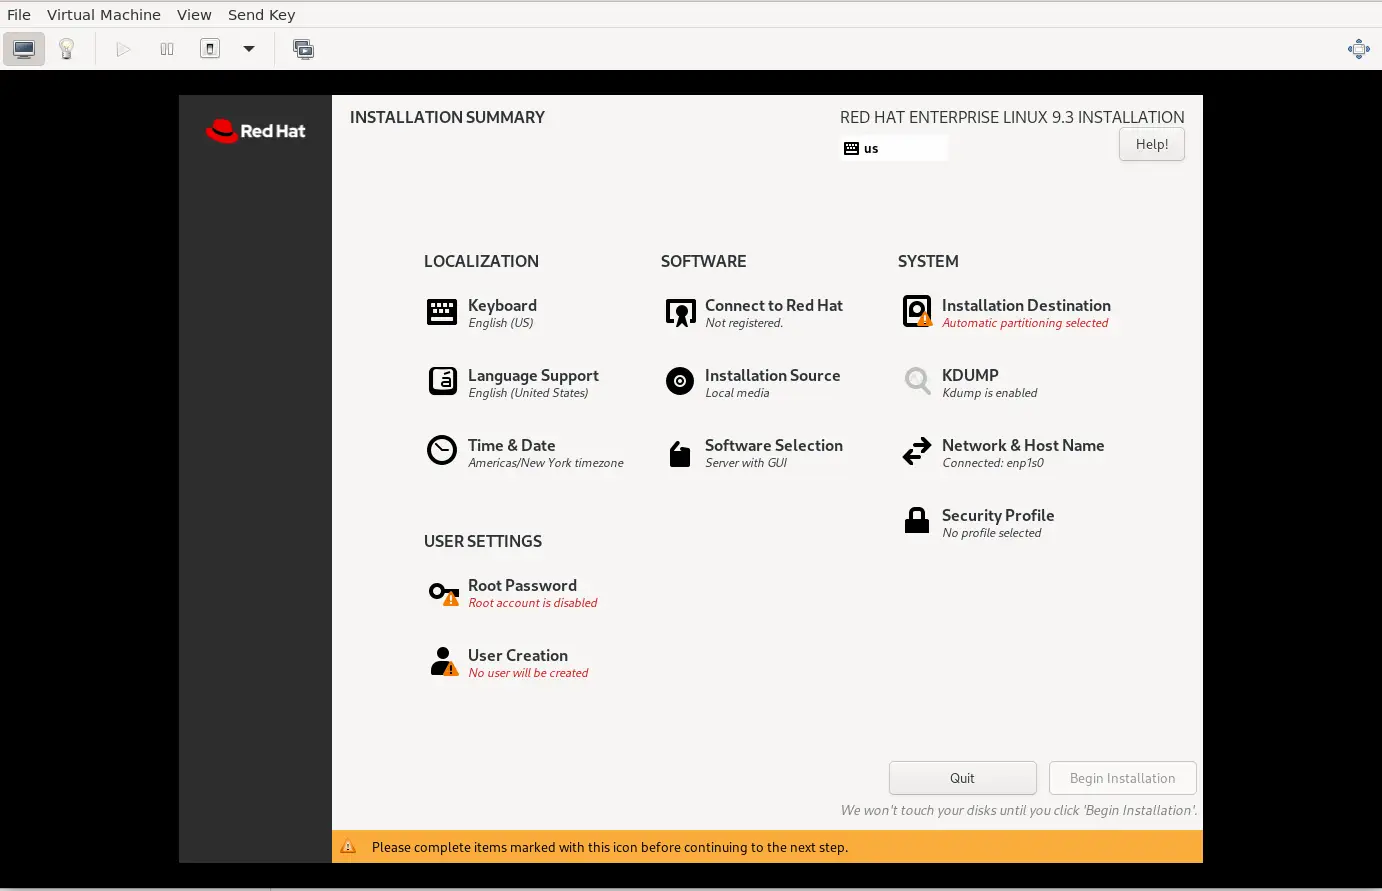
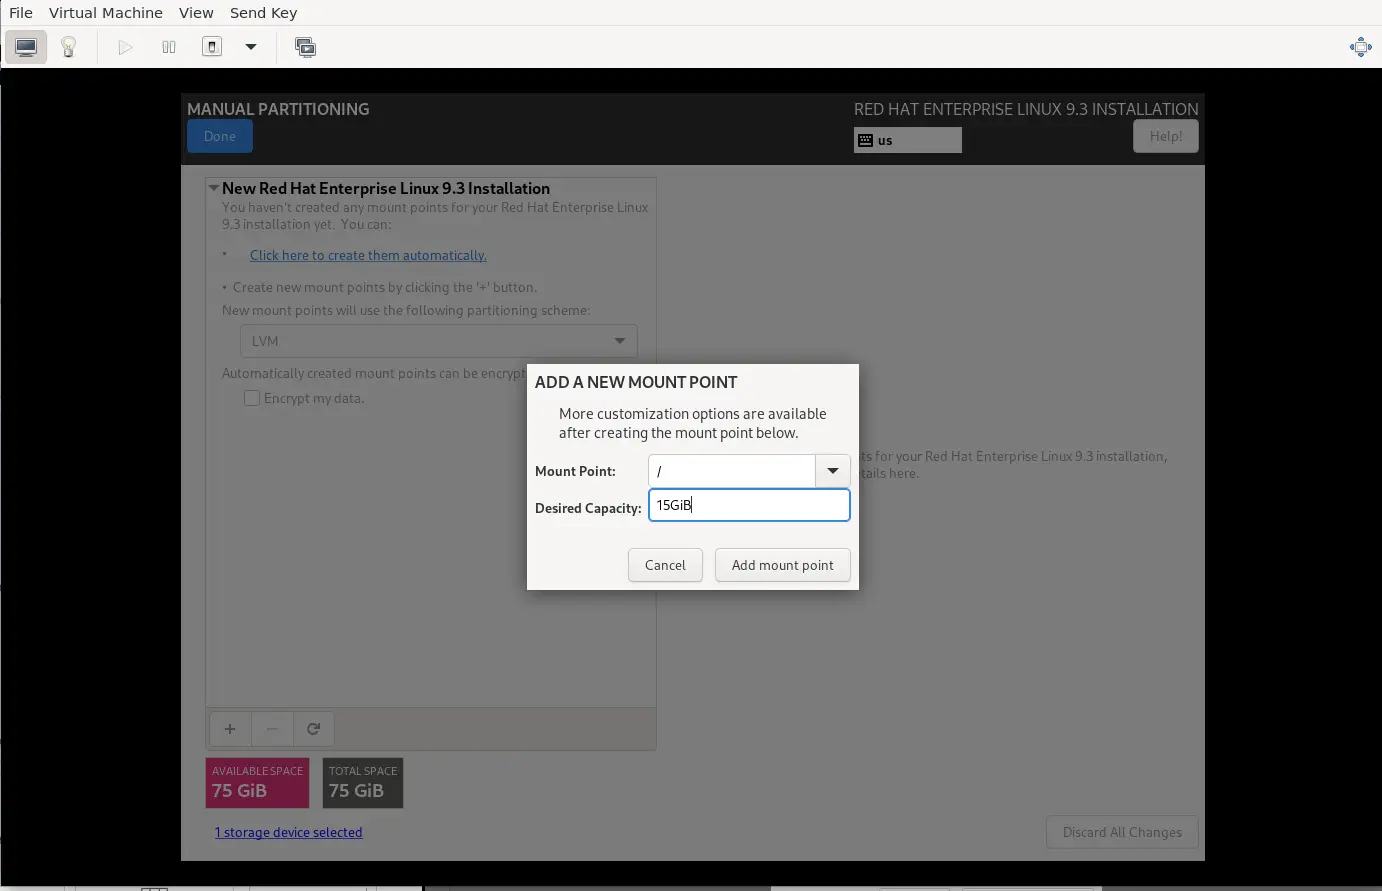
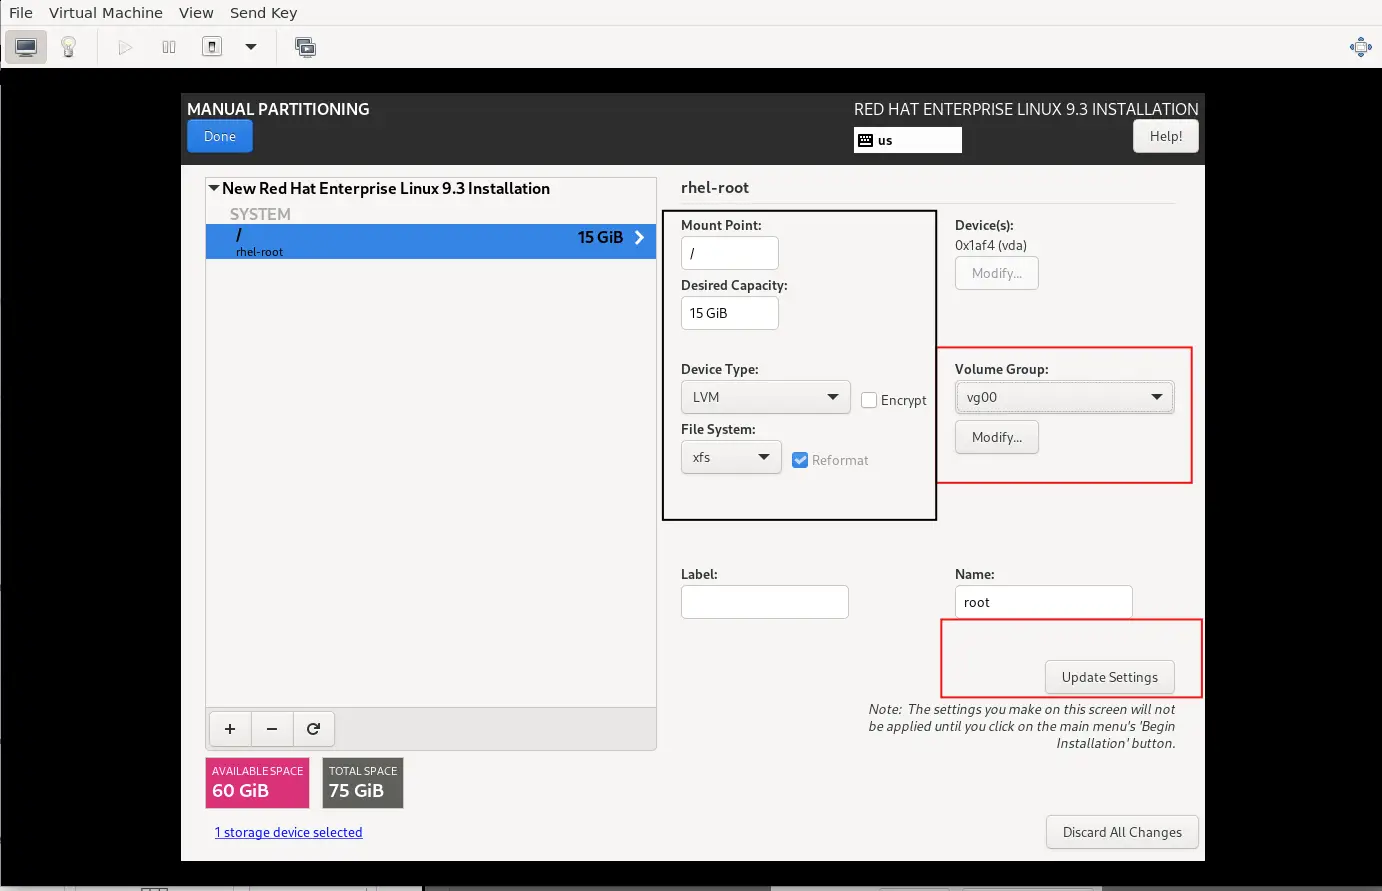
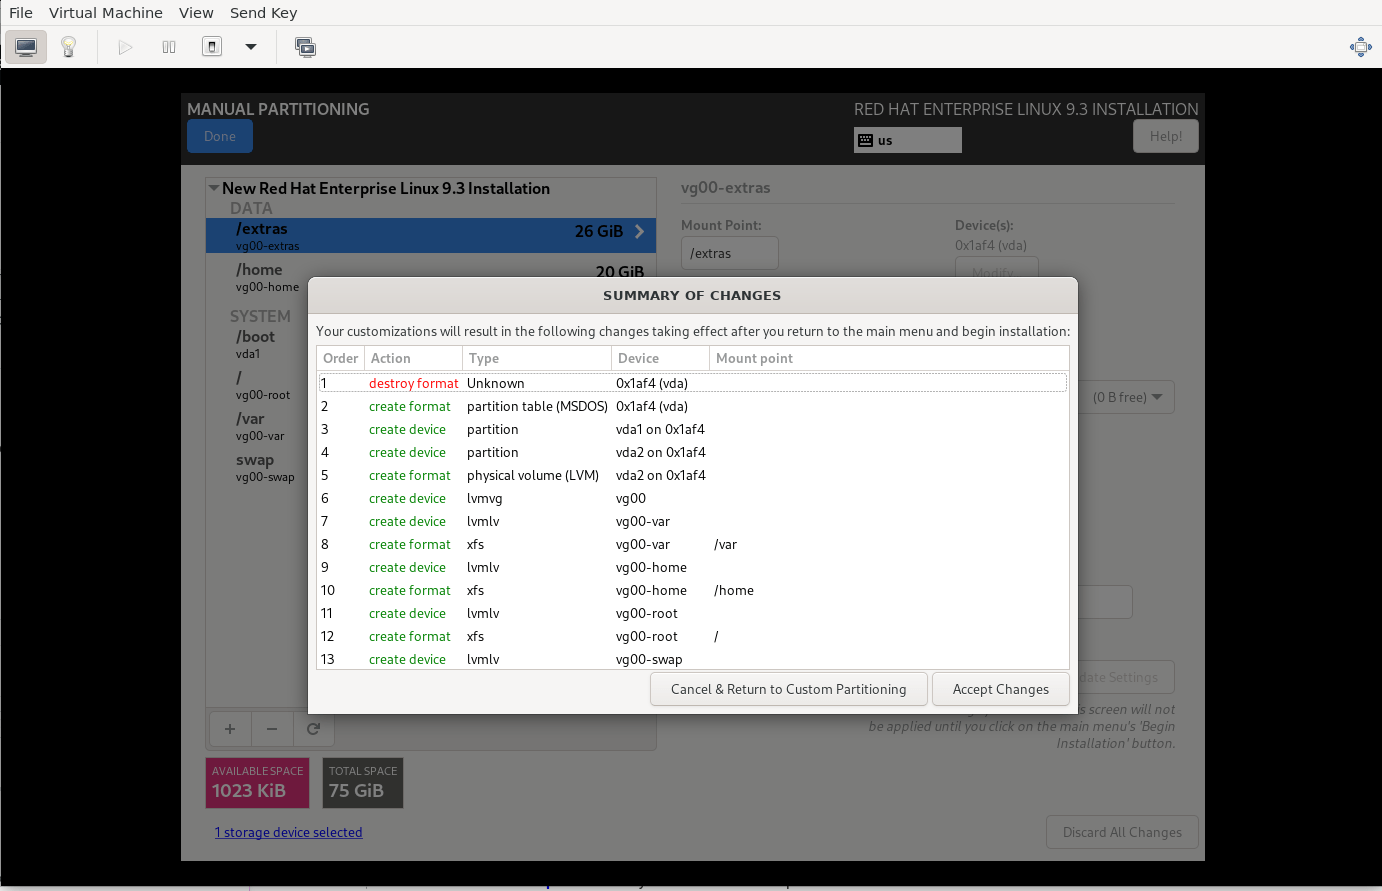
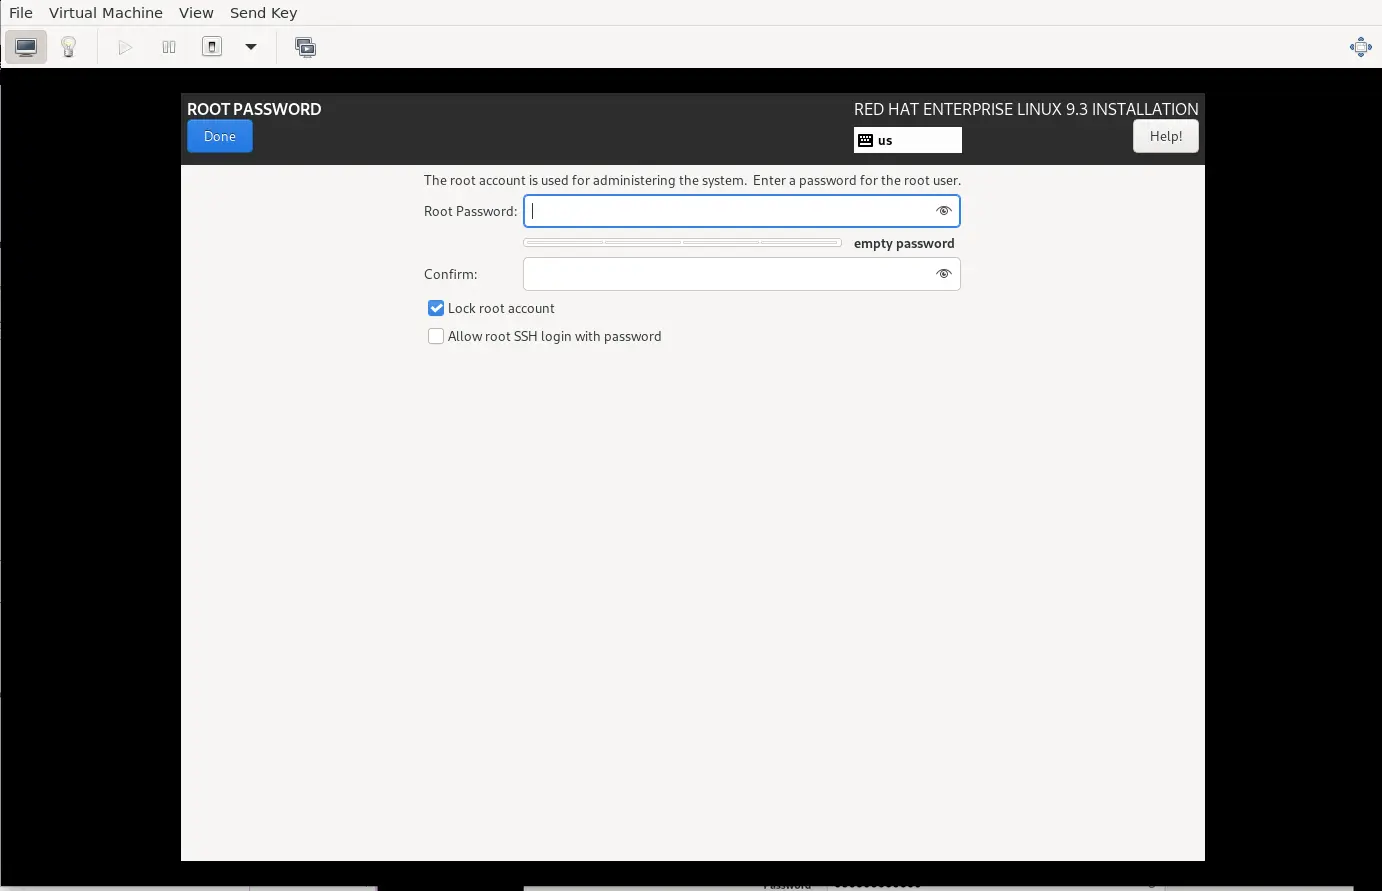
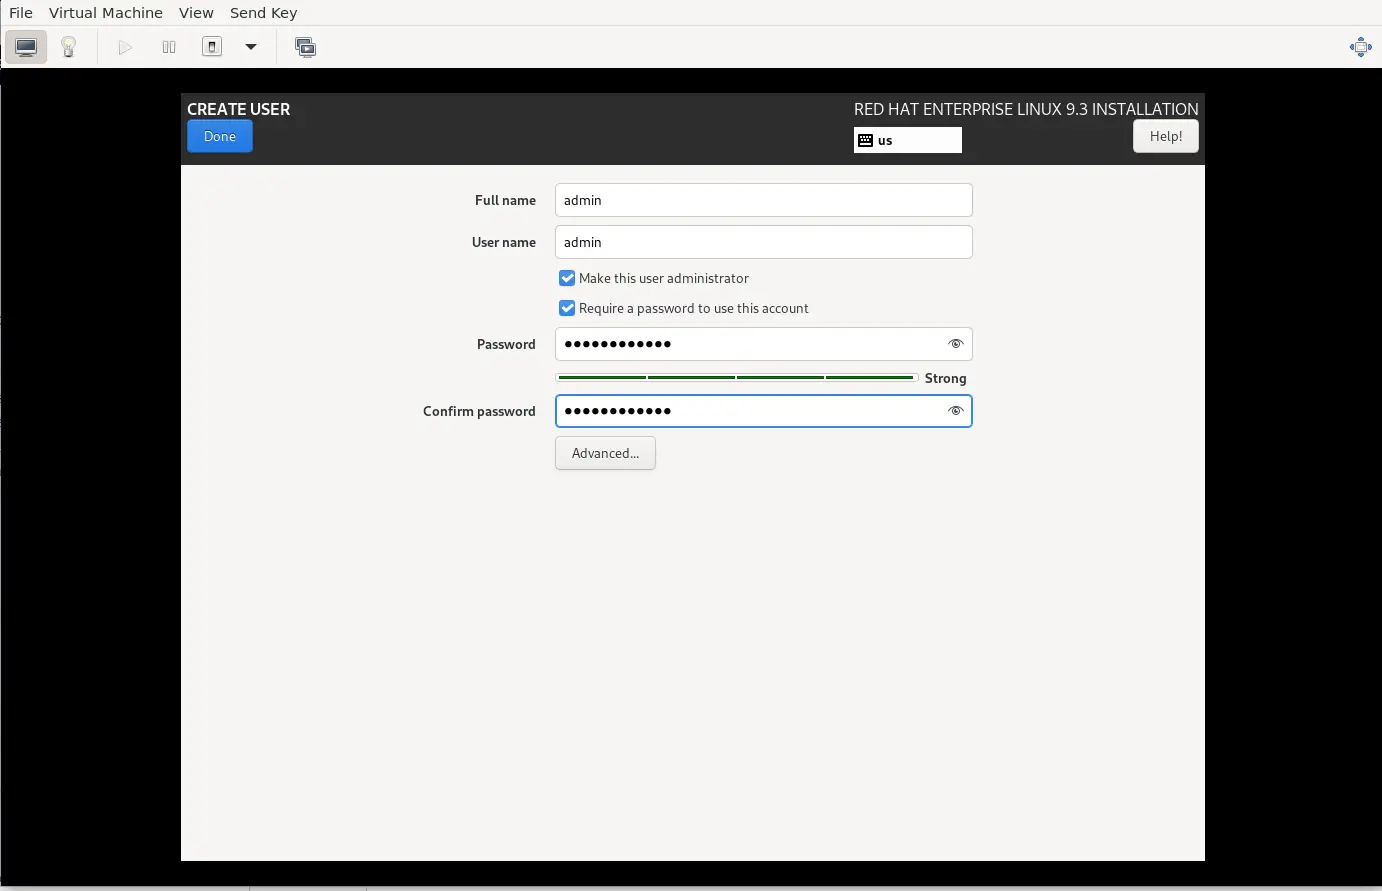
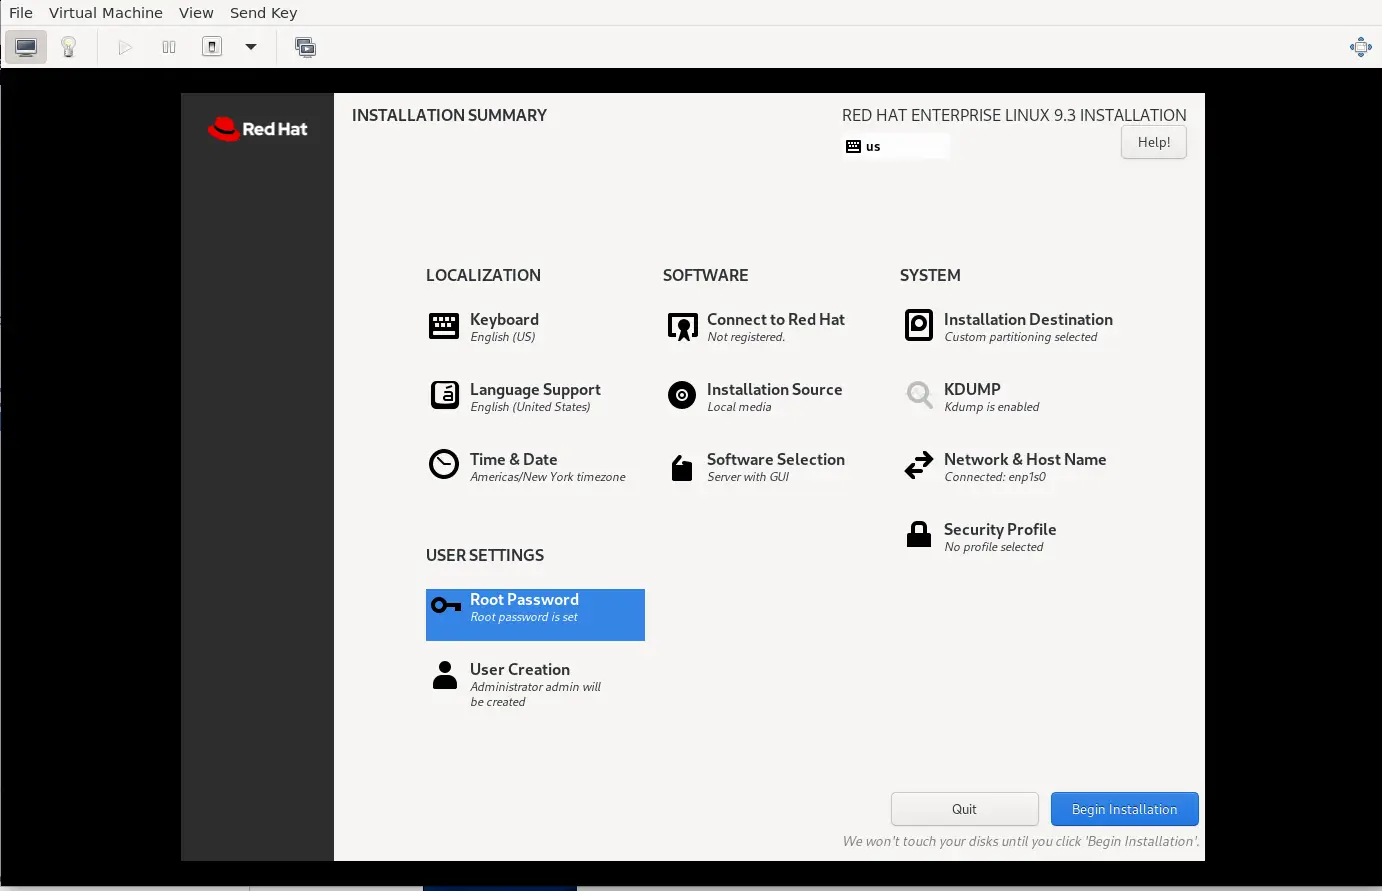
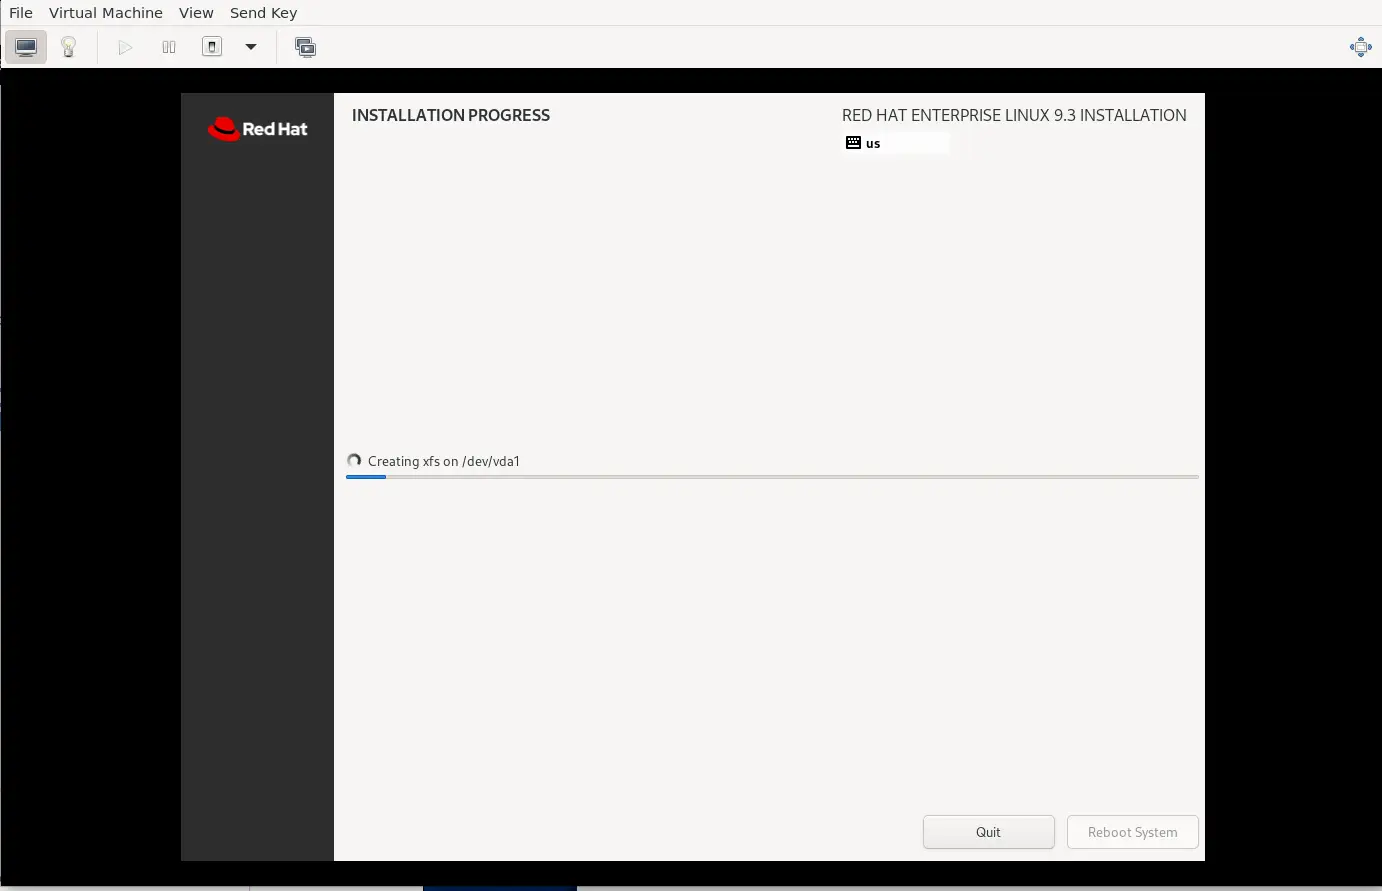
This virt-install setup guide is aimed at Linux professionals who want to create virtual machines in KVM. It provides a step-by-step process for installing Redhat,
In today’s tutorial, we will install CentOS8 on KVM. The install process is fairly straightforward and we will cover it here step-by-step. We will follow