Commands
In this tutorial, we will review the installation procedure for standing up an Ubuntu 20.04 server on KVM. We will focus specifically, on version 20.04


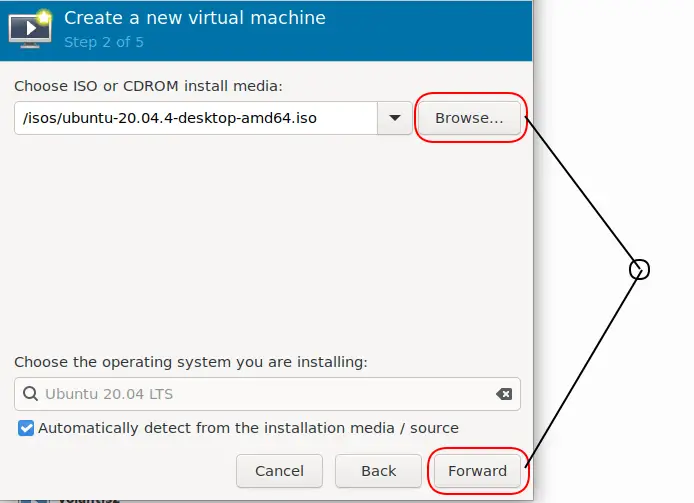
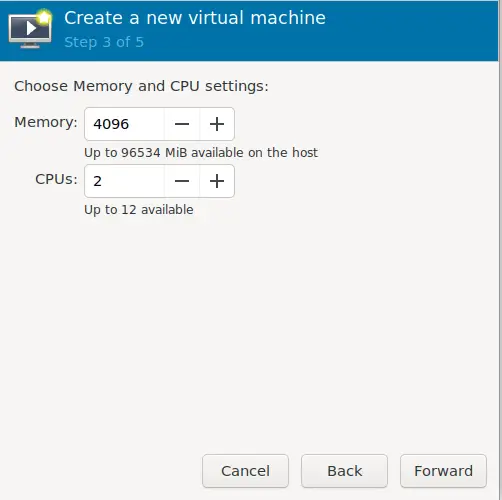
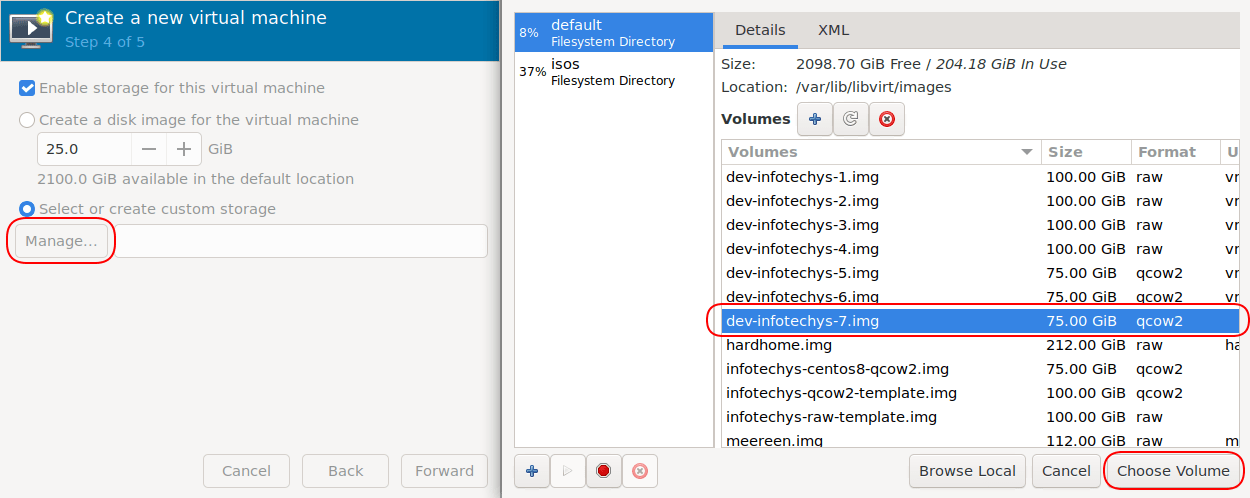
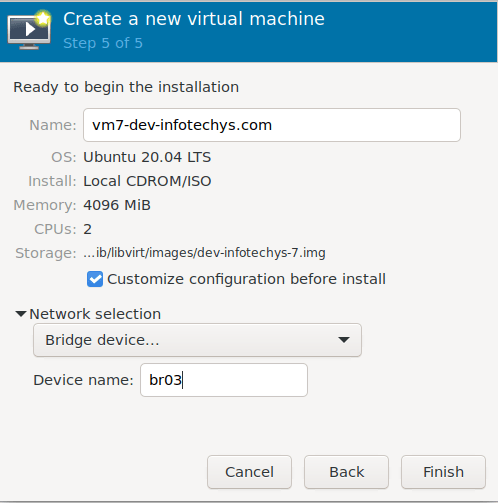
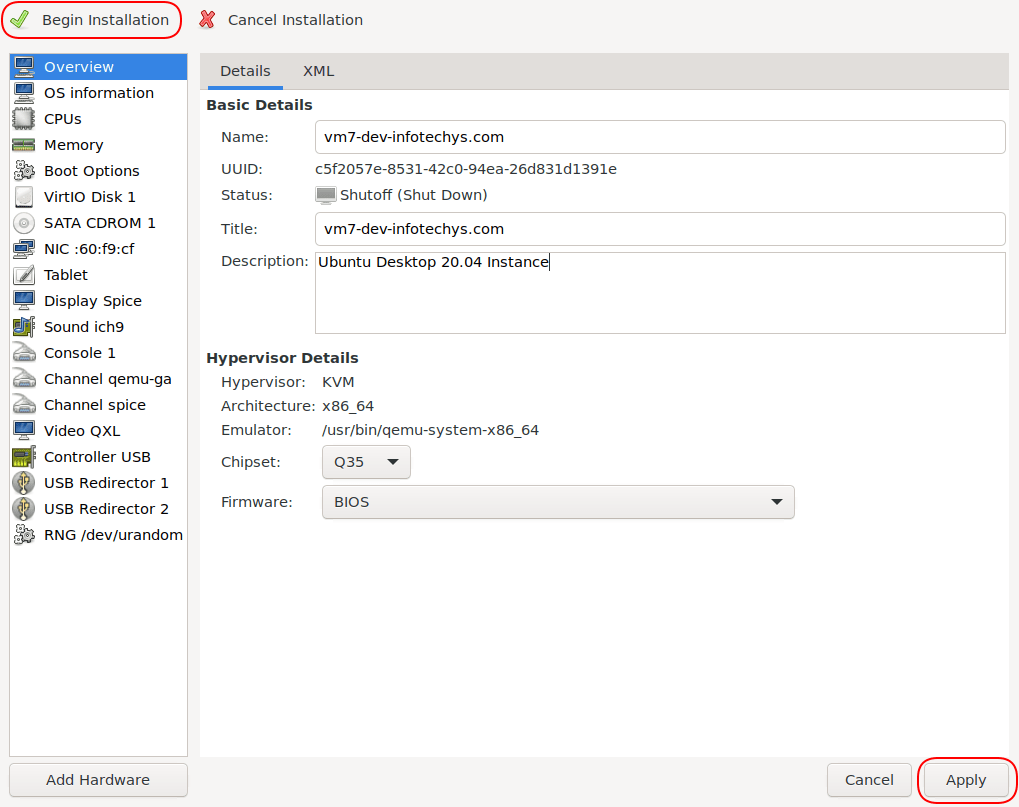

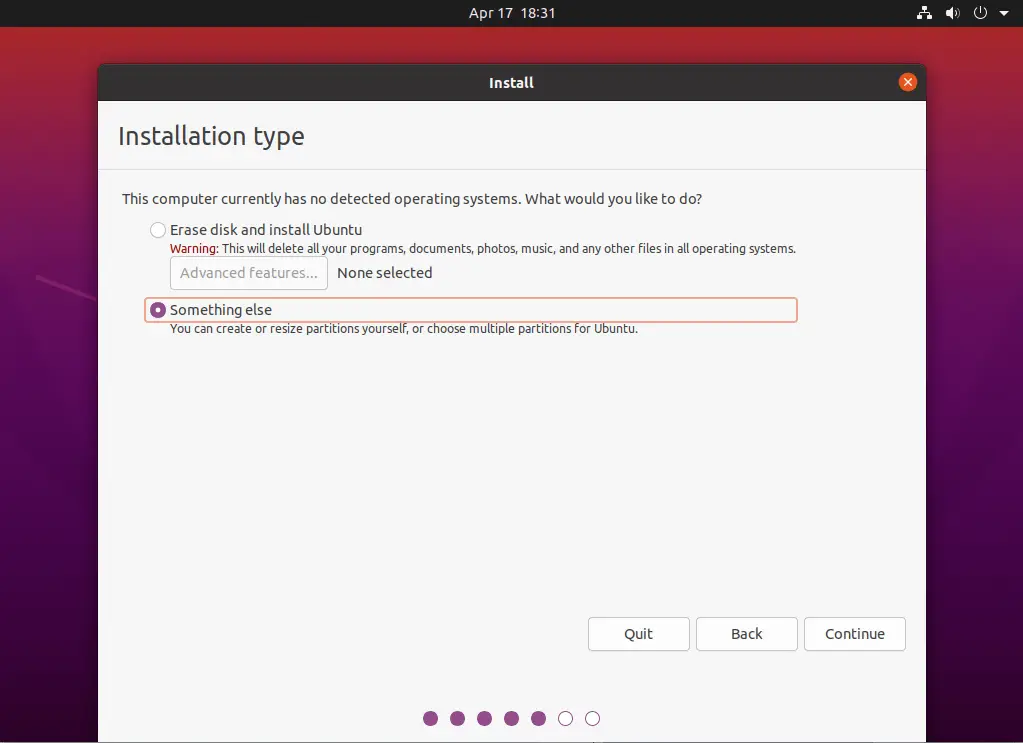
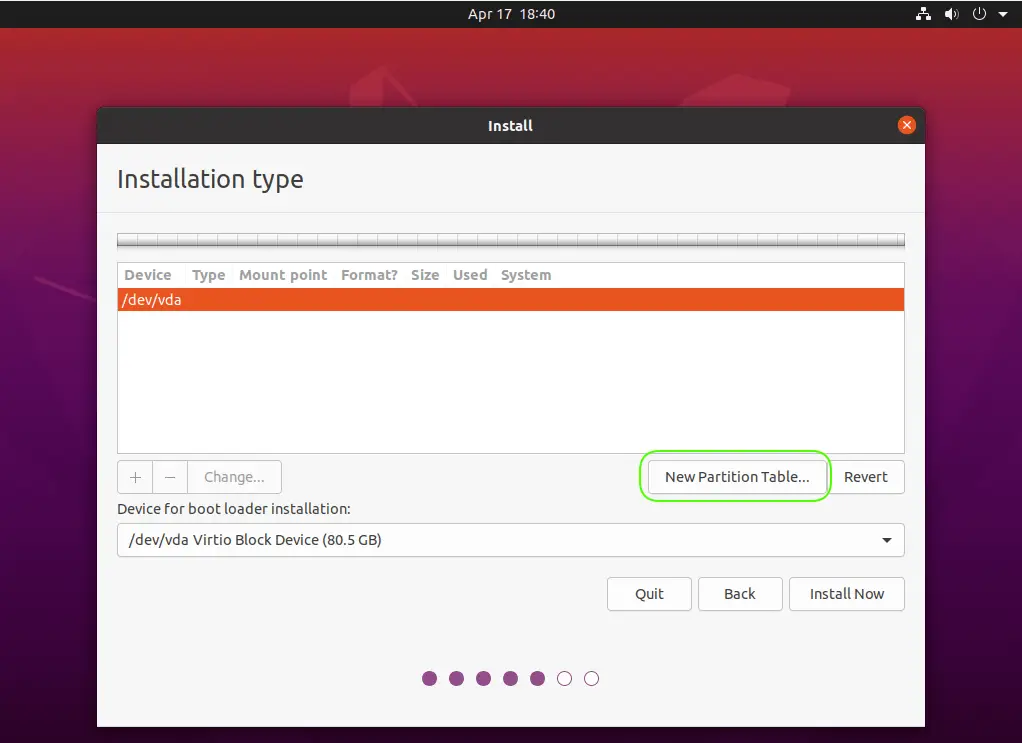
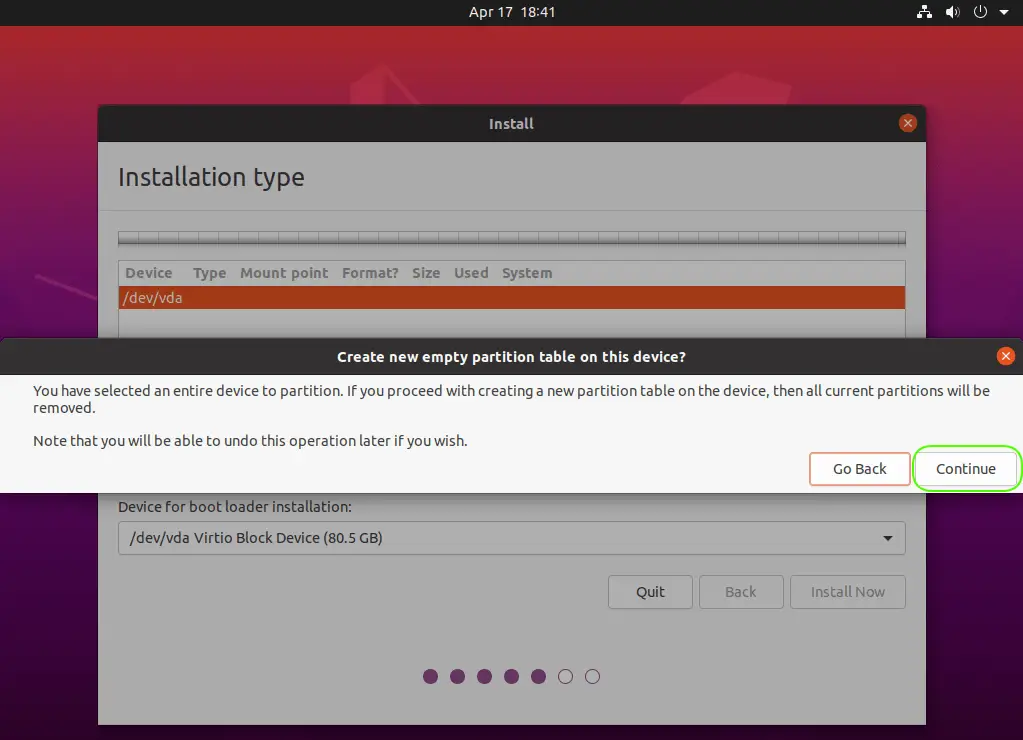
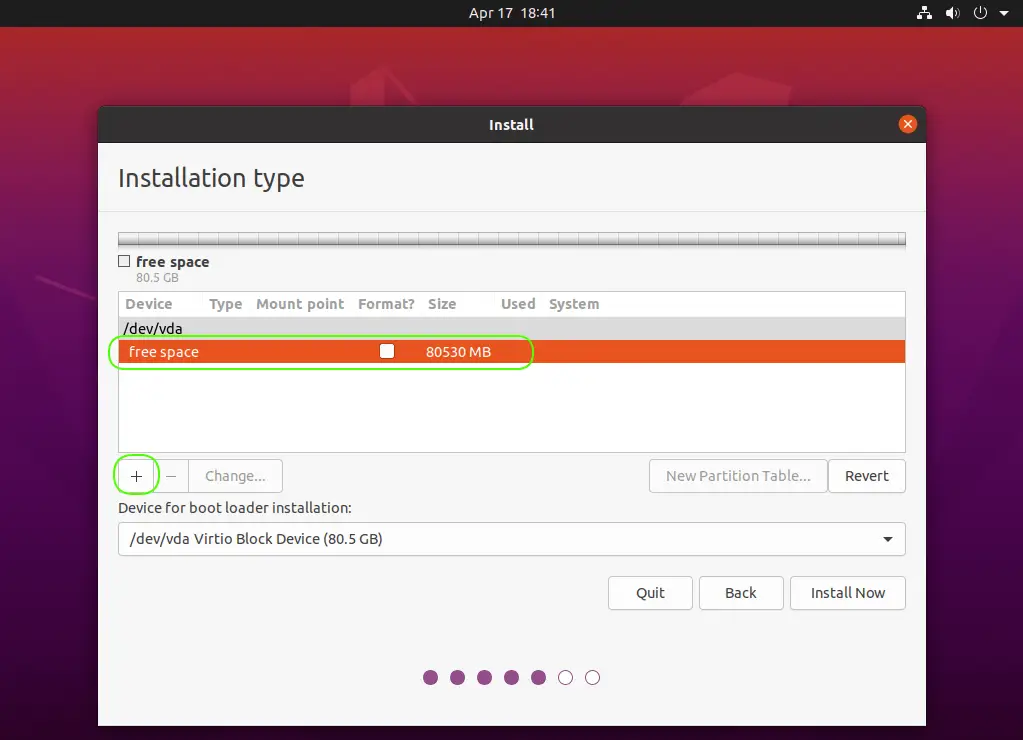
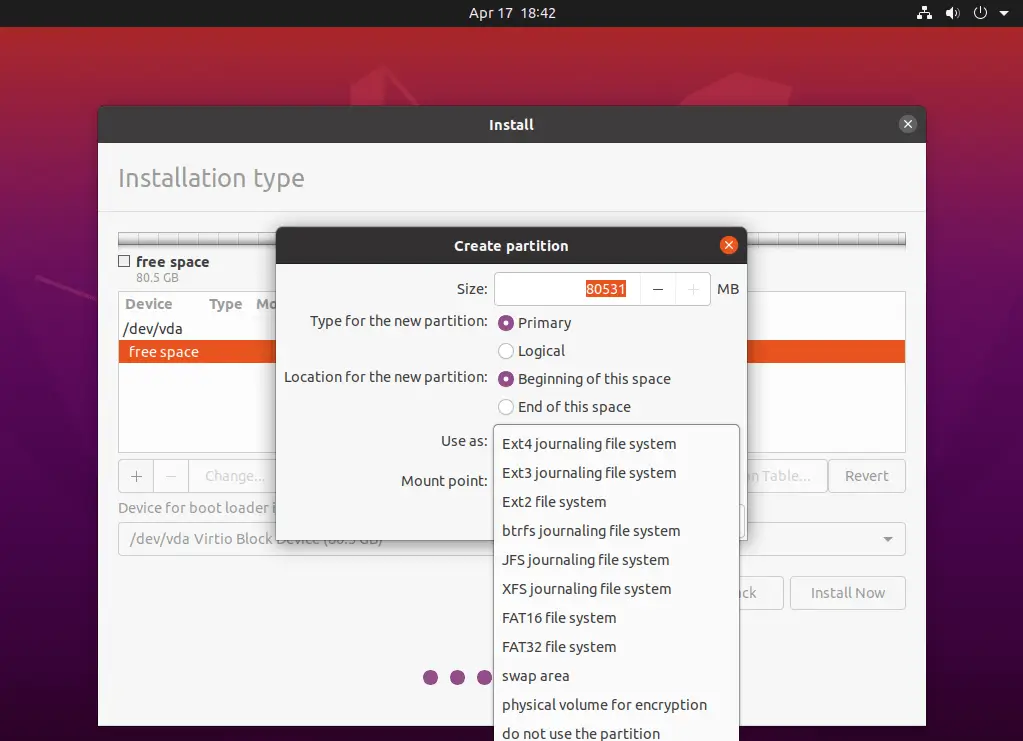
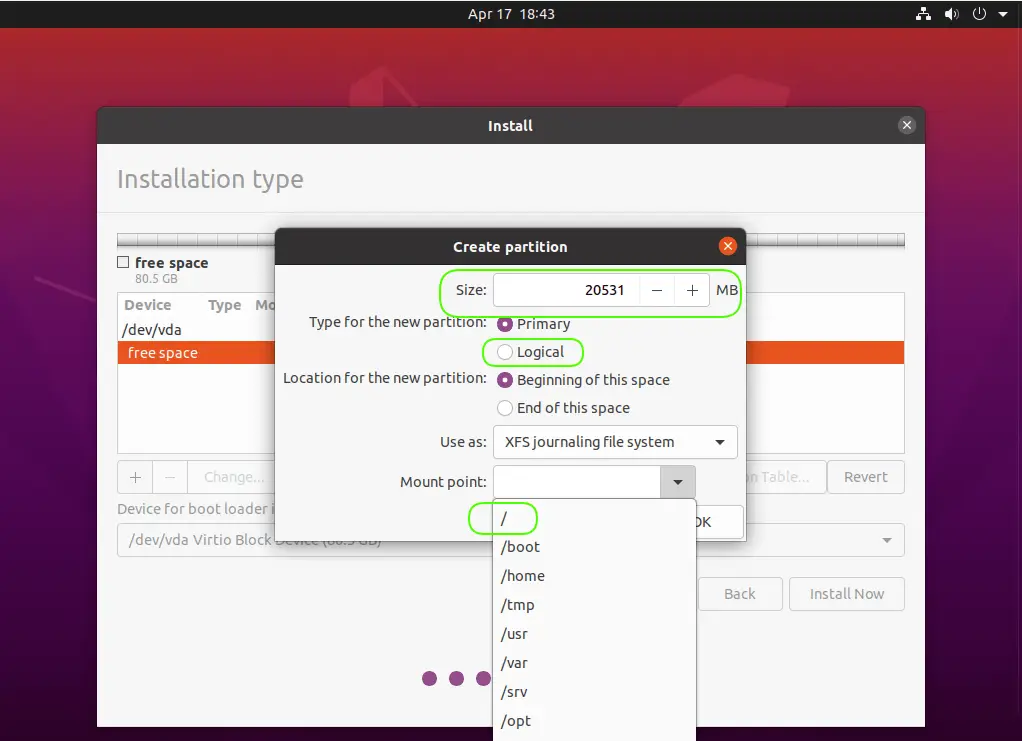
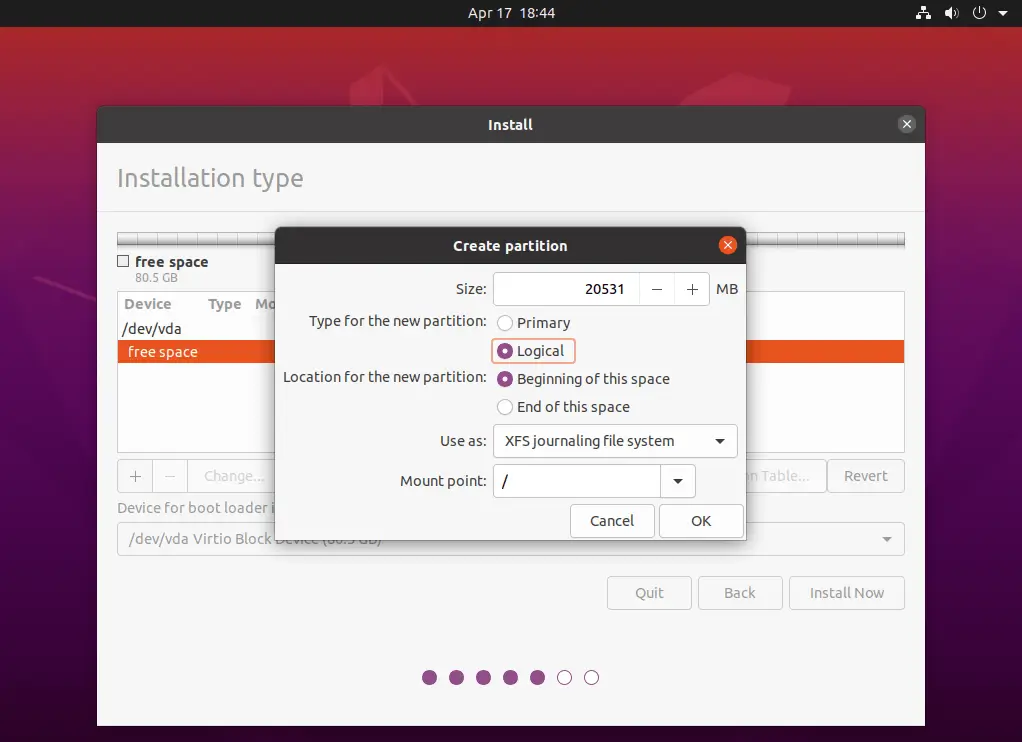
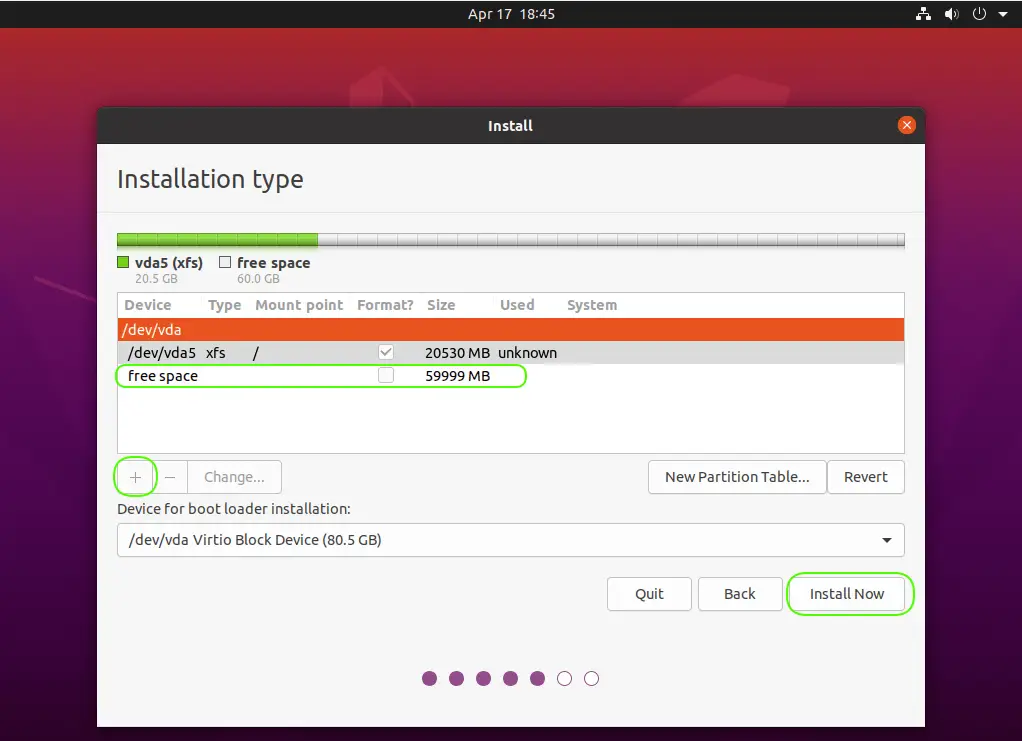
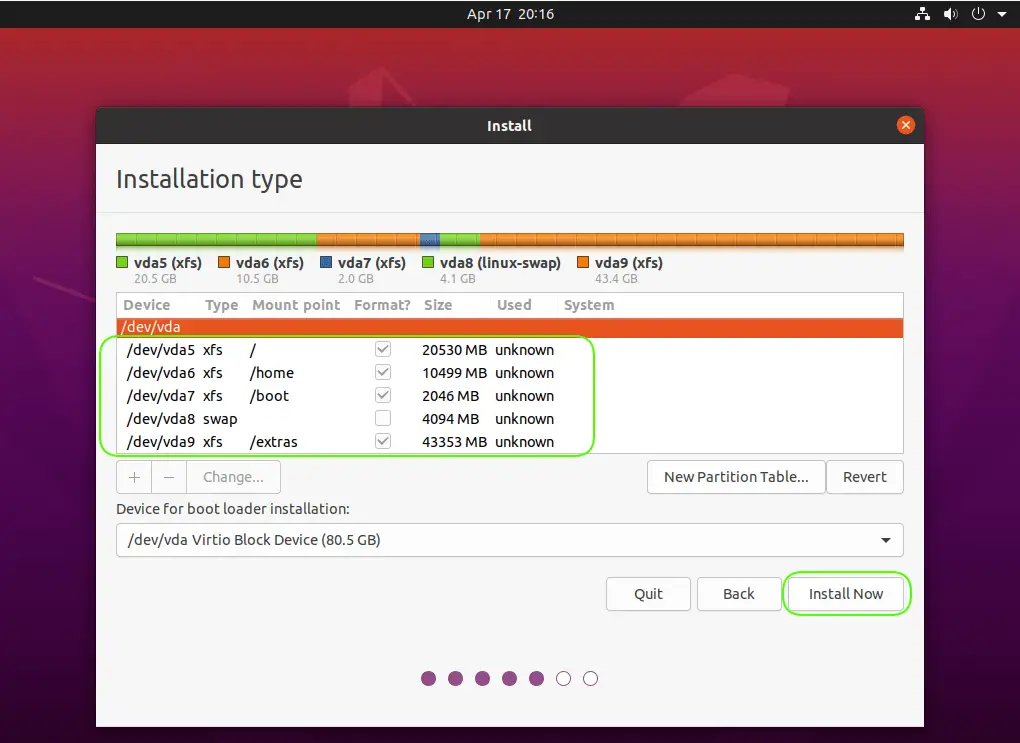
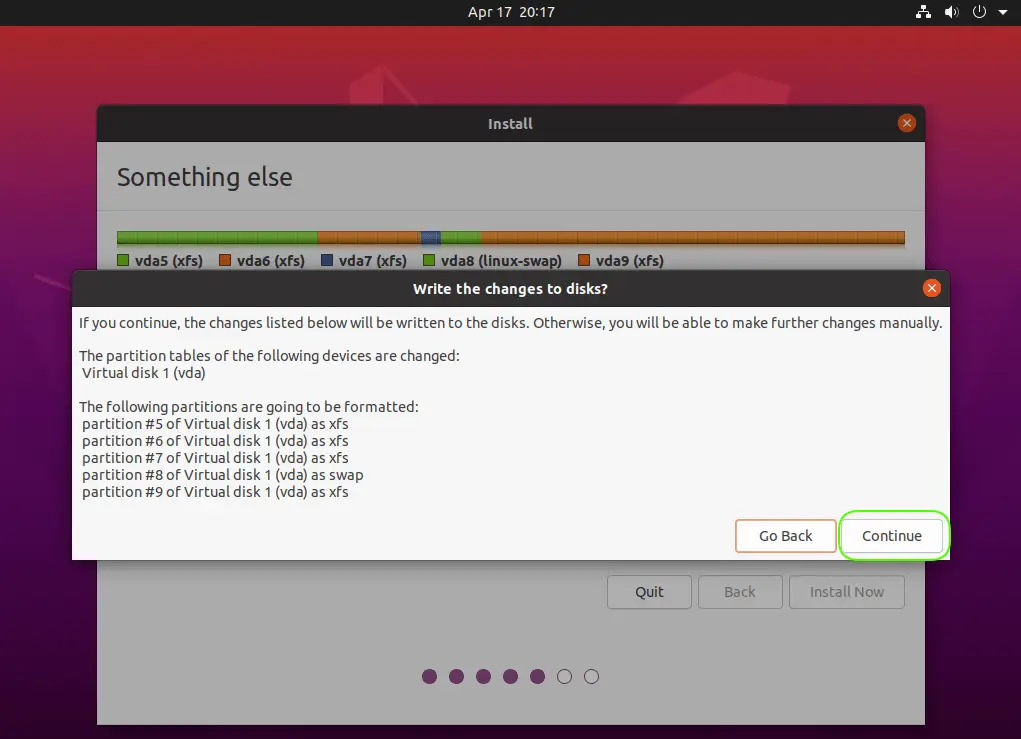
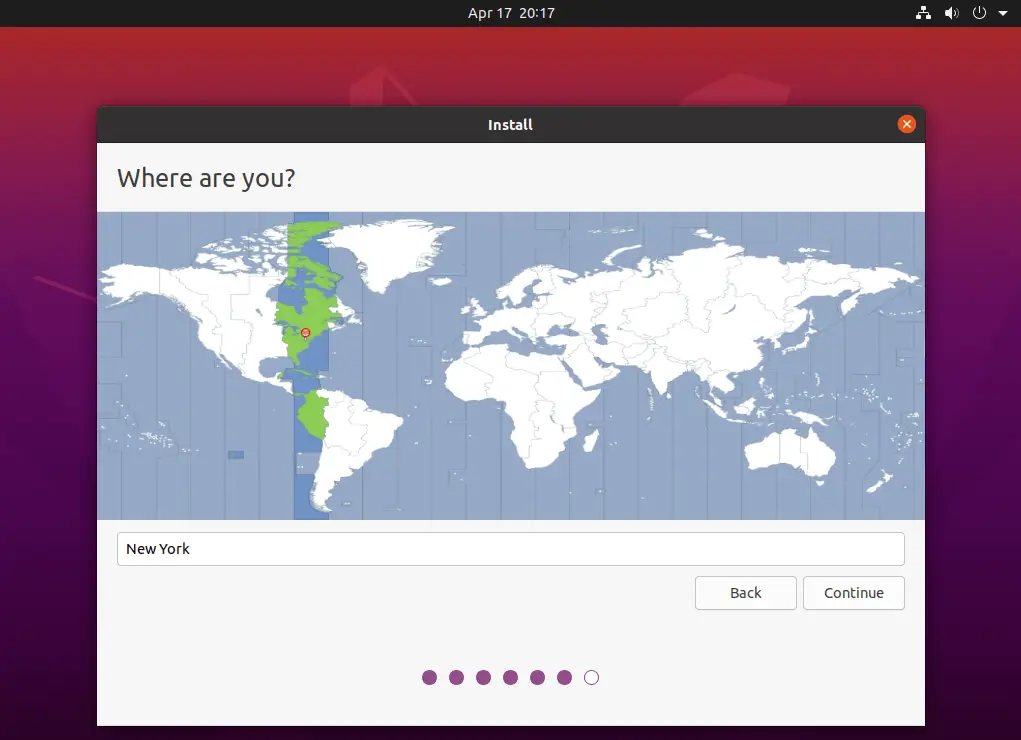
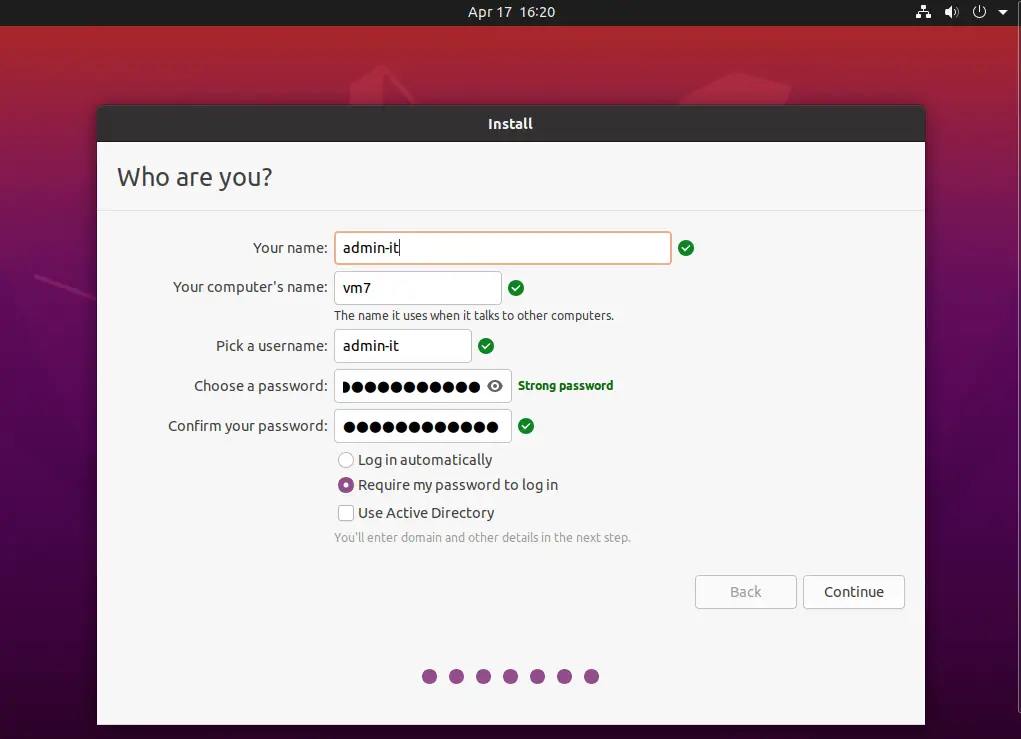
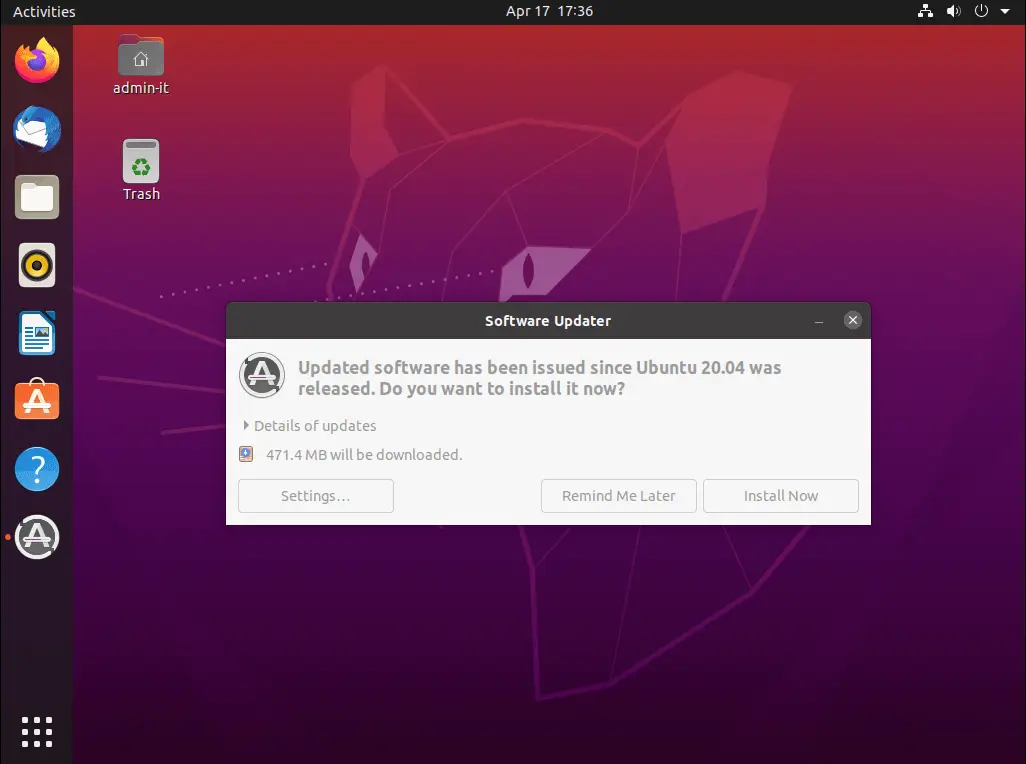
In this tutorial, we will review the installation procedure for standing up an Ubuntu 20.04 server on KVM. We will focus specifically, on version 20.04
In today’s tutorial, we will install CentOS8 on KVM. The install process is fairly straightforward and we will cover it here step-by-step. We will follow

Installing RHEL7 or CentOS7 on a PC is fairly easy to do. In this tutorial, we will review the installation process step-by-step. Today’s focus will