
Commands
In this tutorial, we will review the Arch Linux Installation process on KVM. The installation procedure for Arch Linux is different from your standard Linux


This virt-install setup guide is aimed at Linux professionals who want to create virtual machines in KVM. It provides a step-by-step process for installing Redhat, CentOS, Fedora, and Ubuntu instances using virt-install. The guide also covers best practices for creating virtual machines in KVM and automating the virt-install process with kickstart.
If you’re a Linux professional, you’re probably familiar with KVM, the Kernel-based Virtual Machine, which is an open-source virtualization technology that lets you run multiple virtual machines on a single physical host. To create virtual machines in KVM, you can use the virt-install command-line tool, which makes the process easy and straightforward.
In this article, we’ll walk you through the step-by-step process of creating virtual machines in KVM using virt-install, focusing on four popular Linux distributions: Redhat, CentOS, Fedora, and Ubuntu. We’ll also share some best practices for creating virtual machines in KVM, as well as how to automate the virt-install process with kickstart.
KVM is a virtualization technology that’s built into the Linux kernel, allowing you to run multiple virtual machines on a single physical host. KVM uses hardware virtualization to create virtual machines, which means that each virtual machine has its own virtual CPU, memory, disk, and other hardware resources.
virt-install is a command-line tool that allows you to create and install virtual machines in KVM. With virt-install, you can specify the virtual machine’s hardware configuration, as well as the installation media and other options.
Here’s how to create virtual machines in KVM using virt-install for Redhat, CentOS, Fedora, and Ubuntu.
To create a Redhat virtual machine using virt-install, follow these steps:
Install the virt-install package on your host system: sudo dnf install virt-install
Create a directory for your virtual machine images: mkdir /var/lib/libvirt/images
Download the Redhat installation ISO image and save it to the directory you created in step 2.
Use the virt-install command to create the virtual machine:
This will create a Redhat virtual machine with 2 virtual CPUs, 2GB of memory, a 20GB virtual disk, and the specified installation media. The virtual machine will also be connected to the default network and have a serial console.
					# sudo virt-install \
  --name rhel9-test-instance \
  --memory 2048 \
  --vcpus 2 \
  --disk path=/var/lib/libvirt/images/rhel9.img,size=20 \
  --os-variant rhel9.0 \
  --cdrom /isos/rhel-baseos-9.0-x86_64-dvd.iso \
  --network network=default \
  --graphics none \
  --console pty,target_type=serial
The error message Network not found: no network with matching name ‘default‘ means that the virtual network ‘default’ cannot be found or is not configured correctly. To fix this error, you can try the following steps:
Check the list of available virtual networks using the virsh net-list command. If the ‘default’ network is not listed, you can create it using the virsh net-define /path/to/network-config.xml and virsh net-start default commands.
If the ‘default’ network is listed but not running, you can start it using the virsh net-start default command.
If the ‘default’ network is listed and running, you can verify that it is configured correctly by using the virsh net-info default command.
If none of the above steps work, you can try specifying a different virtual network using the --network network=<network-name> option when running the virt-install command. You can list the available virtual networks using the virsh net-list command.
					# virsh net-list
 Name           State    Autostart   Persistent
-------------------------------------------------
 node-network   active   yes         yes
Based on the output of the virsh net-list command (above), we know to change the virt-install –network option to node-network (below).
					sudo virt-install \
  --name rhel9-test-instance \
  --memory 2048 \
  --vcpus 2 \
  --disk path=/var/lib/libvirt/images/rhel9.img,size=20 \
  --os-variant rhel9.0 \
  --cdrom /isos/rhel-baseos-9.0-x86_64-dvd.iso \
  --network network=node-network \
  --graphics none \
  --console pty,target_type=serial
This will resolve the network error and allow the install to proceed successfully.
					Starting install...
Allocating 'rhel9.img' | 32 MB 00:00:02 ...
Creating domain... | 0 B 00:00:00
Running text console command: virsh --connect qemu:///system console rhel9-test-instance
Connected to domain 'rhel9-test-instance'
Escape character is ^] (Ctrl + ])
Access the virtual machine management interface by running the virt-manager command.
# virt-manager
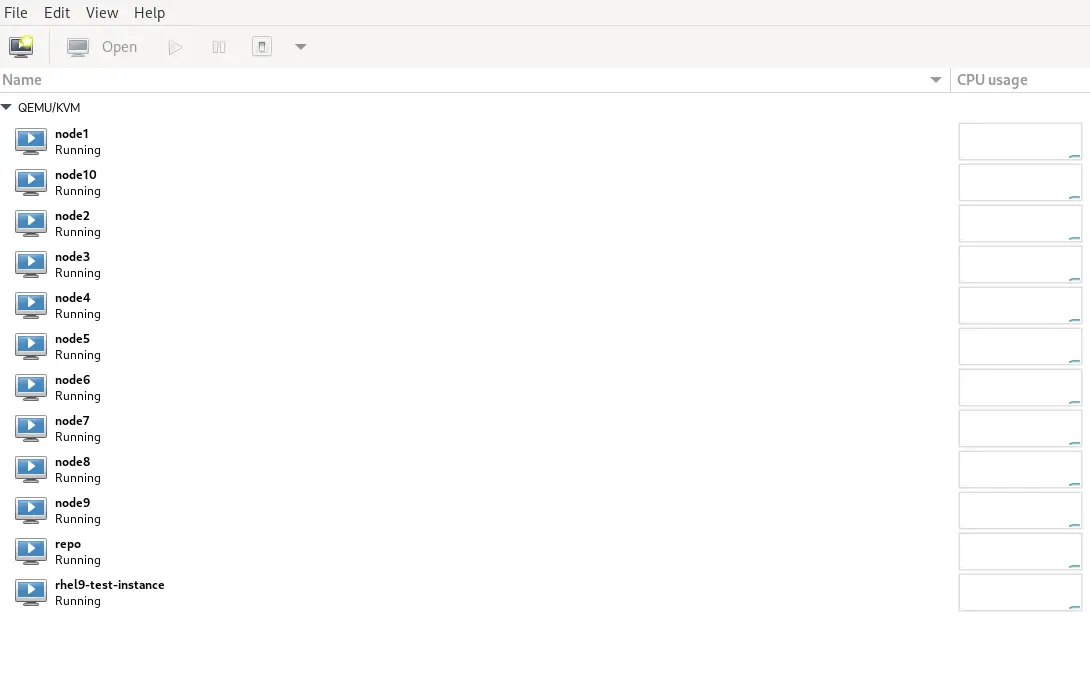
Photo by admingeek from Infotechys
To create a CentOS virtual machine using virt-install, follow these steps:
Install the virt-install package on your host system: sudo dnf install virt-install
Create a directory for your virtual machine images: mkdir /var/lib/libvirt/images
Download the CentOS installation ISO image and save it to the directory you created in step 2.
Use the virt-install command to create the virtual machine:
					sudo virt-install \
  --name centos8 \
  --memory 2048 \
  --vcpus 2 \
  --disk path=/var/lib/libvirt/images/centos8.img,size=20 \
  --os-variant centos8.0 \
  --cdrom /var/lib/libvirt/images/CentOS-8.0.1905-x86_64-dvd1.iso \
  --network network=default \
  --graphics none \
  --console pty,target_type=serial
This will create a CentOS virtual machine with 2 virtual CPUs, 2GB of memory, a 20GB virtual disk, and the specified installation media. The virtual machine will also be connected to the default network and have a serial console.
To create a Fedora virtual machine using virt-install, follow these steps:
Install the virt-install package on your host system: sudo dnf install virt-install
Create a directory for your virtual machine images: mkdir /var/lib/libvirt/images
Download the Fedora installation ISO image and save it to the directory you created in step 2.
Use the virt-install command to create the virtual machine:
					sudo virt-install \
  --name fedora32 \
  --memory 2048 \
  --vcpus 2 \
  --disk path=/var/lib/libvirt/images/fedora32.img,size=20 \
  --os-variant fedora32 \
  --cdrom /var/lib/libvirt/images/Fedora-Server-dvd-x86_64-32-1.6.iso \
  --network network=default \
  --graphics none \
  --console pty,target_type=serial
This will create a Fedora virtual machine with 2 virtual CPUs, 2GB of memory, a 20GB virtual disk, and the specified installation media. The virtual machine will also be connected to the default network and have a serial console.
To create an Ubuntu virtual machine using virt-install, follow these steps:
Install the virt-install package on your host system: sudo apt-get install virtinst
Create a directory for your virtual machine images: mkdir /var/lib/libvirt/images
Download the Ubuntu installation ISO image and save it to the directory you created in step 2.
Use the virt-install command to create the virtual machine:
					sudo virt-install \
  --name ubuntu20 \
  --memory 2048 \
  --vcpus 2 \
  --disk path=/var/lib/libvirt/images/ubuntu20.img,size=20 \
  --os-variant ubuntu20.04 \
  --cdrom /var/lib/libvirt/images/ubuntu-20.04.3-live-server-amd64.iso \
  --network network=default \
  --graphics none \
  --console pty,target_type=serial
This will create an Ubuntu virtual machine with 2 virtual CPUs, 2GB of memory, a 20GB virtual disk, and the specified installation media. The virtual machine will also be connected to the default network and have a serial console.
Here are some best practices for creating virtual machines in KVM:
Use virt-install to create your virtual machines. This ensures that your virtual machines have the correct hardware configuration and are configured properly.
Use separate virtual disks for the operating system and data. This makes it easier to back up and restore your virtual machines.
Use a separate virtual network for your virtual machines. This improves security and makes it easier to manage your virtual machines.
Use virt-manager to manage your virtual machines. This is a graphical tool that makes it easier to manage your virtual machines, monitor their performance, and troubleshoot any issues.
If you need to create multiple virtual machines with the same configuration, you can use kickstart to automate the virt-install process.
Kickstart is a way to automate the installation process of Linux distributions, allowing you to specify the installation options in a single file.
Here’s how to use kickstart to automate the virt-install process:
Create a kickstart file with the installation options for your virtual machines. You can use the Kickstart Configurator tool to create a kickstart file.
Modify the kickstart file to include the virt-install options for creating the virtual machine. Here’s an example of a kickstart file that includes the virt-install options for creating a CentOS virtual machine:
					# Use text mode for the installation
text

# Configure the network
network --bootproto=dhcp --device=eth0

# Define the partition layout
clearpart --all --initlabel
autopart

# Set the root password
rootpw --plaintext password

# Install CentOS with the specified options
install
url --url=http://mirror.centos.org/centos/7/os/x86_64/
lang en_US.UTF-8
keyboard us
timezone America/New_York
auth --useshadow --passalgo=sha512
firewall --disabled
selinux --enforcing
bootloader --location=mbr --append="console=ttyS0,115200n8"

# Create the virtual machine
%post --interpreter=/bin/bash
virt-install \
  --name centos7 \
  --memory 2048 \
  --vcpus 2 \
  --disk path=/var/lib/libvirt/images/centos7.img,size=20 \
  --os-variant rhel7 \
  --location http://mirror.centos.org/centos/7/os/x86_64/ \
  --network network=default \
  --graphics none \
  --console pty,target_type=serial
%end
This kickstart file includes the virt-install options for creating a CentOS virtual machine with 2GB of memory, 2 virtual CPUs, a 20GB virtual disk, and the specified installation media.
Use the virt-install command with the kickstart file to create the virtual machine:
					sudo virt-install \
  --name centos7 \
  --memory 2048 \
  --vcpus 2 \
  --disk path=/var/lib/libvirt/images/centos7.img,size=20 \
  --os-variant rhel7 \
  --location http://mirror.centos.org/centos/7/os/x86_64/ \
  --initrd-inject=/path/to/kickstart.cfg \
  --extra-args="ks=file:/kickstart.cfg console=ttyS0" \
  --network network=default \
  --graphics none \
  --console pty,target_type=serial
This will create a CentOS virtual machine with the specified configuration using the kickstart file to automate the installation process.
KVM is a powerful and flexible virtualization technology that allows you to run multiple operating systems on a single host machine. By using virt-install to create your virtual machines, following best practices for configuration, and automating the process with kickstart, you can easily create and manage your virtual machines in KVM.
Whether you’re a Linux professional or just getting started with virtualization, KVM and virt-install provide a reliable and efficient solution for your virtualization needs.
Related Posts
In this tutorial, we will review the Arch Linux Installation process on KVM. The installation procedure for Arch Linux is different from your standard Linux

In today’s tutorial, we will install CentOS8 on KVM. The install process is fairly straightforward and we will cover it here step-by-step. We will follow

In this article, we will review the process for creating snapshots in KVM. As part of this process, we will learn how to script this