
Commands
Learn about hardening OpenVPN security on RHEL 9 and CentOS 9 with best practices for authentication, encryption, firewall rules, logging, and intrusion detection. Table of Contents Introduction


Learn how to install and configure OpenVPN server on CentOS Stream 9 from scratch. Step‑by‑step guide includes PKI setup, firewall configuration, client .ovpn setup, performance tuning, and troubleshooting tips.
Setting up your own VPN server has never been more essential. With increasing privacy concerns, secure remote access requirements, and growing cyber threats, a virtual private network (VPN) offers a powerful way to protect network traffic and maintain control over your data.
This tutorial walks you through the complete process of installing and configuring an OpenVPN server on CentOS Stream 9, a leading-edge Linux distribution that bridges the gap between Fedora and RHEL. Whether you’re a system administrator, DevOps engineer, or simply a security-conscious user, this guide will help you:
|
|
|
By following this step-by-step walkthrough, you’ll be able to deploy a production-grade VPN server using best practices around encryption, firewall configuration, and client provisioning.
Let’s dive in and set up a rock-solid OpenVPN server on your CentOS Stream 9 environment.
OpenVPN is a proven, flexible, and secure VPN solution compatible across devices. CentOS Stream 9, as a rolling‑release Linux distribution, provides a modern, stable base for long‑term deployments. Together, they deliver:
|
|
|
|
This guide walks you through end‑to‑end setup—package installation, CA setup, server/client configuration, firewall, routing, and testing.
| Requirement | Description |
|---|---|
| VPS or Bare‑Metal Server | CentOS Stream 9 with ≥ 2 GB RAM |
| Root or sudo access | Ability to install packages & modify configs |
| Static IP or DNS record | For VPN clients to connect consistently |
| Basic Linux knowledge | Familiarity with shell, packages, IP routing |
Update your system:
sudo dnf update -y
Install EPEL and OpenVPN:
sudo dnf install -y epel-release
sudo dnf install -y openvpn easy-rsa
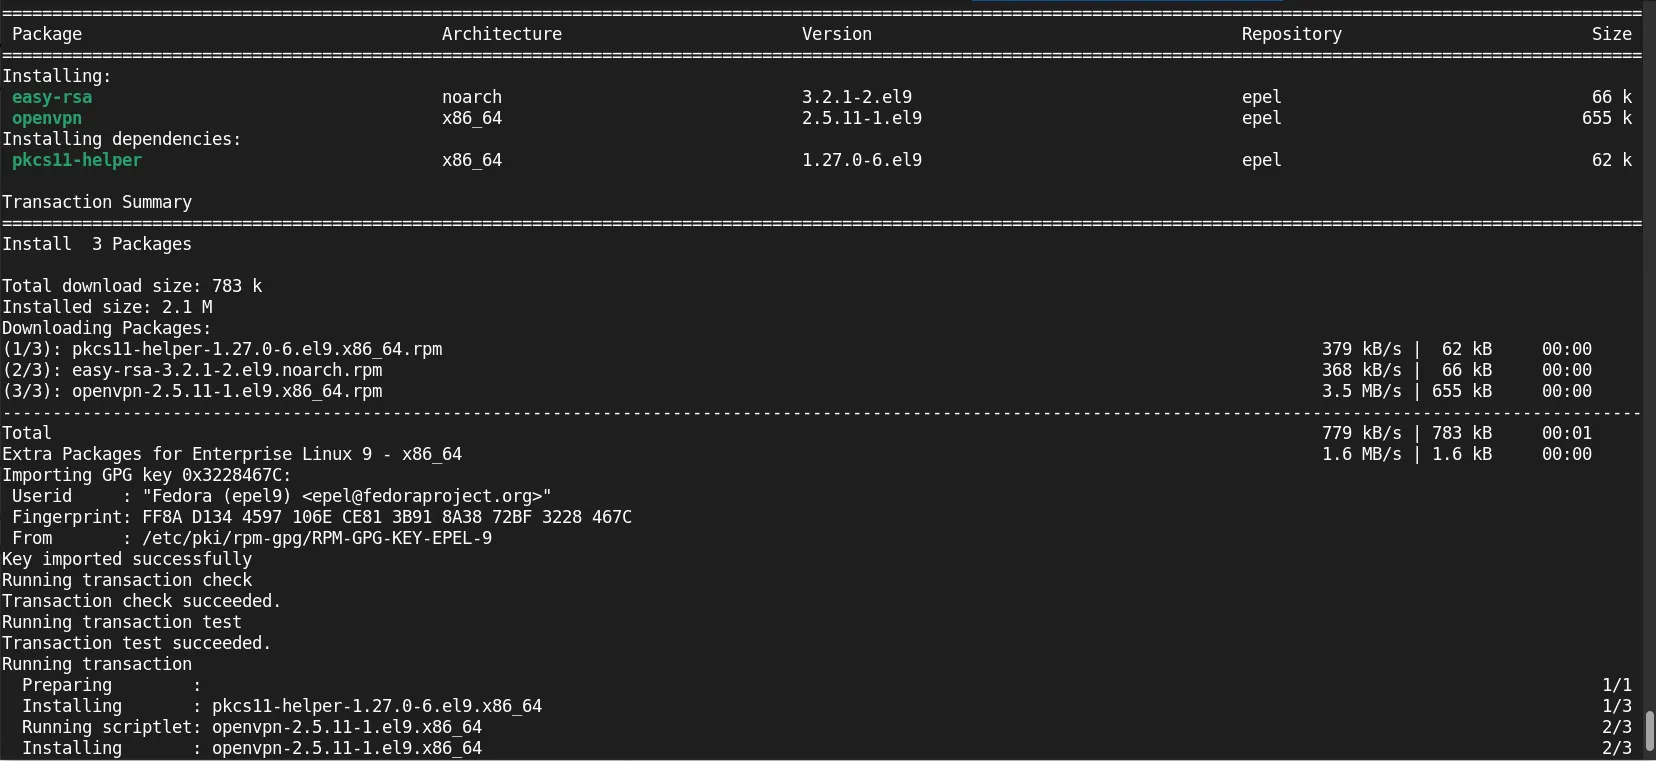
Photo by admingeek from Infotechys
Verify versions:
rpm -qa openvpn easy-rsa firewalld
					firewalld-1.3.4-9.el9.noarch
openvpn-2.5.11-1.el9.x86_64
easy-rsa-3.2.1-2.el9.noarch
Use easy‑rsa to manage certificates (execute the following commands):
cd /etc/openvpn/
sudo mkdir easy-rsa
sudo cp -r /usr/share/easy-rsa/3/* easy-rsa/
cd easy-rsa
sudo chown -R $USER:$USER ./
./easyrsa init-pki
./easyrsa build-ca nopass
					Notice
------
'init-pki' complete; you may now create a CA or requests.

Your newly created PKI dir is:
* /etc/openvpn/easy-rsa/pki

Using Easy-RSA configuration:
* undefined
💡NOTE: The |
Provide a common name or press the [Enter] key to proceed with the default name [Easy-RSA CA]: (e.g. openvpn.dev.naijalabs.net)
					Notice
------
CA creation complete. Your new CA certificate is at:
* /etc/openvpn/easy-rsa/pki/ca.crt

Create an OpenVPN TLS-AUTH|TLS-CRYPT-V1 key now: See 'help gen-tls'

Build-ca completed successfully.
|
|
The CA certificate will be located at pki/ca.crt.
Server Certificate & Key |
./easyrsa gen-req openvpn.dev.naijalabs.net nopass
					Common Name (eg: your user, host, or server name) [openvpn.dev.naijalabs.net]:

Notice
------
Private-Key and Public-Certificate-Request files created.
Your files are:
* req: /etc/openvpn/easy-rsa/pki/reqs/openvpn.dev.naijalabs.net.req
* key: /etc/openvpn/easy-rsa/pki/private/openvpn.dev.naijalabs.net.key
./easyrsa sign-req server openvpn.dev.naijalabs.net
					Please check over the details shown below for accuracy. Note that this request
has not been cryptographically verified. Please be sure it came from a trusted
source or that you have verified the request checksum with the sender.
You are about to sign the following certificate:

  Requested CN:     'openvpn.dev.naijalabs.net'
  Requested type:   'server'
  Valid for:        '825' days


subject=
    commonName                = openvpn.dev.naijalabs.net

Type the word 'yes' to continue, or any other input to abort.
  Confirm requested details: yes
Type “yes” and press the [Enter] key to continue.
					Using configuration from /etc/openvpn/easy-rsa/pki/9e74d413/temp.1.1
Check that the request matches the signature
Signature ok
The Subject's Distinguished Name is as follows
commonName            :ASN.1 12:'openvpn.dev.naijalabs.net'
Certificate is to be certified until Oct 22 01:46:07 2027 GMT (825 days)

Write out database with 1 new entries
Database updated
/usr/bin/which: no bc in (/root/.local/bin:/root/bin:/usr/local/sbin:/usr/local/bin:/usr/sbin:/usr/bin)

Notice
------
Inline file created:
* /etc/openvpn/easy-rsa/pki/inline/private/openvpn.dev.naijalabs.net.inline


Notice
------
Certificate created at:
* /etc/openvpn/easy-rsa/pki/issued/openvpn.dev.naijalabs.net.crt
Client Certificate & Key (e.g., |
Repeat the same commands for the client:
./easyrsa gen-req vpnuser01 nopass
Press the Enter Key to accept default name [ vpnuser01 ] and proceed:
					-----
Common Name (eg: your user, host, or server name) [vpnuser01]:

Notice
------
Private-Key and Public-Certificate-Request files created.
Your files are:
* req: /etc/openvpn/easy-rsa/pki/reqs/vpnuser01.req
* key: /etc/openvpn/easy-rsa/pki/private/vpnuser01.key
Sign the certificate request to generate a client certificate:
./easyrsa sign-req client vpnuser01
Again, type “yes” and press the [Enter] key to continue.
					Notice
------
Inline file created:
* /etc/openvpn/easy-rsa/pki/inline/private/vpnuser01.inline


Notice
------
Certificate created at:
* /etc/openvpn/easy-rsa/pki/issued/vpnuser01.crt
Diffie-Hellman and TLS Auth Key |
Run the following commands to generate the Diffie-hellman and TLS Auth key:
./easyrsa gen-dh
openvpn --genkey --tls-auth /etc/openvpn/easy-rsa/pki/ta.key > /etc/openvpn/easy-rsa/pki/ta.key
These provide forward secrecy and prevent unauthorized connections.
Copy essential files:
sudo cp pki/ca.crt pki/issued/openvpn.dev.naijalabs.net.crt pki/private/openvpn.dev.naijalabs.net.key pki/dh.pem pki/ta.key /etc/openvpn/server/
Create server.conf:
					sudo tee /etc/openvpn/server/server.conf > /dev/null <<EOF
port 1194
proto udp
proto udp6
dev tun
ca /etc/openvpn/easy-rsa/pki/ca.crt
cert /etc/openvpn/easy-rsa/pki/issued/openvpn.dev.naijalabs.net.crt
key /etc/openvpn/easy-rsa/pki/private/openvpn.dev.naijalabs.net.key
dh /etc/openvpn/easy-rsa/pki/dh.pem
tls-auth /etc/openvpn/easy-rsa/pki/ta.key 0
topology subnet
server 10.8.0.0 255.255.255.0
server-ipv6 2001:db8:0:123::/64
push "redirect-gateway def1 bypass-dhcp"
push "route-ipv6 2000::/3"
push "dhcp-option DNS 8.8.8.8"
push "dhcp-option DNS 1.1.1.1"
client-to-client
keepalive 10 120
cipher AES-256-CBC
auth SHA256
user nobody
group nobody
persist-key
persist-tun
status openvpn-status.log
verb 3
EOF
Enable and start the service:
sudo systemctl enable --now openvpn-server@server
Created symlink /etc/systemd/system/multi-user.target.wants/openvpn-server@server.service → /usr/lib/systemd/system/openvpn-server@.service.
Verify it’s running:
sudo systemctl status openvpn-server@server
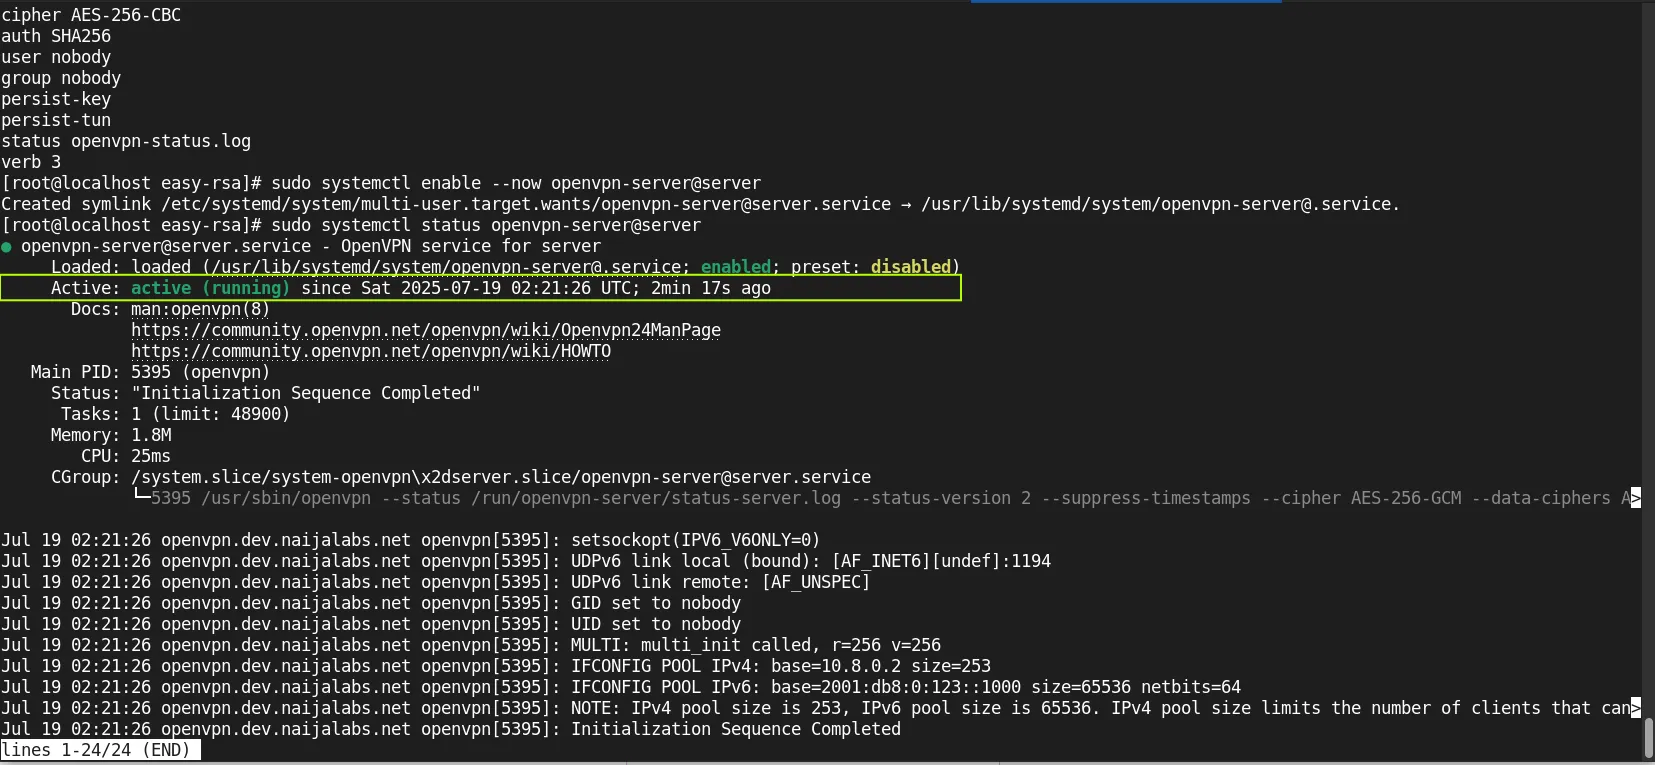
Photo by admingeek from Infotechys
Check for Active: active (running).
Enable forwarding in sysctl:
					sudo tee /etc/sysctl.d/99-openvpn.conf <<EOF
net.ipv4.ip_forward=1
EOF
net.ipv4.ip_forward=1
Update firewalld rules with the following commands:
sudo firewall-cmd --add-service=openvpn --permanent
sudo firewall-cmd --add-masquerade --permanent
sudo firewall-cmd --zone=public --add-port=1194/udp --permanent
sudo firewall-cmd --reload
Verify iptables NAT:
sudo iptables -t nat -L POSTROUTING
					Chain POSTROUTING (policy ACCEPT)
target     prot opt source          destination
MASQUERADE  all  --  10.8.0.0/24    anywhere
Expect a rule like MASQUERADE all -- 10.8.0.0/24 anywhere.
⚠️ If you DO NOT see the expected output–utilize iptables (not recommended for long-term management), you can manually add a rule like this: |
Replace eth0 with your server’s actual network interface (ip a will show you this).
sudo iptables -t nat -A POSTROUTING -s 10.8.0.0/24 -o eth0 -j MASQUERADE
sudo iptables-save
					# Generated by iptables-save v1.8.10 (nf_tables) on Sat Jul 19 02:52:18 2025
*nat
:PREROUTING ACCEPT [0:0]
:INPUT ACCEPT [0:0]
:OUTPUT ACCEPT [0:0]
:POSTROUTING ACCEPT [9:684]
-A POSTROUTING -s 10.8.0.0/24 -o eth0 -j MASQUERADE
COMMIT
# Completed on Sat Jul 19 02:52:18 2025
Create Unified .ovpn File |
On the server:
mkdir -p ~/client-configs/files
Then, populate the base.conf file with the following content (Replace YOUR_SERVER_IP with your actual server’s IP address):
					cat <<EOF > ~/client-configs/base.conf
client
dev tun
proto udp
remote YOUR_SERVER_IP 1194
resolv-retry infinite
nobind
persist-key
persist-tun
remote-cert-tls server
cipher AES-256-CBC
auth SHA256
key-direction 1
verb 3
<ca>
$(< /etc/openvpn/server/ca.crt)
</ca>
<cert>
$(< /etc/openvpn/easy-rsa/pki/issued/vpnuser01.crt)
</cert>
<key>
$(< /etc/openvpn/easy-rsa/pki/private/vpnuser01.key)
</key>
<tls-auth>
$(< /etc/openvpn/server/ta.key)
</tls-auth>
EOF
Next, run the following command to create the actual vpnuser01.ovpn file.
cp ~/client-configs/base.conf ~/client-configs/files/vpnuser01.ovpn
You can now download vpnuser01.ovpn and import it into your client device.
Connect from Linux |
First, install OpenVPN on the client system. Then, reference your .ovpn file with the following commands:
sudo dnf install -y openvpn
sudo openvpn --config client1.ovpn
You should see a similar output (below)
					...omitted for brevity...
2025-07-18 23:39:23 net_addr_v6_add: 2001:db8:0:123::1000/64 dev tun0
2025-07-18 23:39:23 net_route_v4_add: 172.104.252.115/32 via 192.168.1.1 dev [NULL] table 0 metric -1
2025-07-18 23:39:23 net_route_v4_add: 0.0.0.0/1 via 10.8.0.1 dev [NULL] table 0 metric -1
2025-07-18 23:39:23 net_route_v4_add: 128.0.0.0/1 via 10.8.0.1 dev [NULL] table 0 metric -1
2025-07-18 23:39:23 add_route_ipv6(2000::/3 -> 2001:db8:0:123::1 metric -1) dev tun0
2025-07-18 23:39:23 net_route_v6_add: 2000::/3 via :: dev tun0 table 0 metric -1
2025-07-18 23:39:23 Initialization Sequence Completed
Verify Server Listening |
sudo ss -tulnp | grep 1194
Expect OpenVPN binding to udp/1194.
Check Client IP |
curl ifconfig.me
172.104.252.115
Your public IP should match the VPN server. Also, you can verify VPN connection via the browser:

Photo by admingeek from Infotechys
Inspect Logs |
|
|
Common Errors & Fixes |
| Error Message | Solution |
|---|---|
TLS key negotiation failed | Mismatched ta.key or wrong key-direction |
AUTH_FAILED | Incorrect credentials or config mismatch |
| DNS leaks | Ensure push "dhcp-option DNS 1.1.1.1" is correct; test with dig @1.1.1.1 google.com on client |
| Routing fails to local network | Add push "route 192.168.1.0 255.255.255.0" to server.conf |
By completing this guide, you’ve successfully installed and configured an OpenVPN server on CentOS Stream 9, a powerful and reliable platform for secure remote networking. You now have the ability to:
|
|
|
|
OpenVPN is one of the most battle-tested VPN solutions available, and deploying it on a modern enterprise-grade system like CentOS Stream 9 ensures long-term stability and support. Whether you’re managing access for remote teams, securing your home lab, or providing encrypted tunnels for field devices — this setup gives you full control over your VPN infrastructure.
Did you find this article useful? Your feedback is invaluable to us! Please feel free to share your thoughts in the comments section below.
Learn about hardening OpenVPN security on RHEL 9 and CentOS 9 with best practices for authentication, encryption, firewall rules, logging, and intrusion detection. Table of Contents Introduction

Are you concerned about the security of your network? Learn about for network vulnerabilities scanning using NMAP, a powerful tool that can help you identify

Learn how to configure OpenVPN Server on Ubuntu 24.04 for secure remote access. Step-by-step guide with configuration examples, firewall setup, and troubleshooting tips. Table of