| Hostname | IP Address | RAM (GB) | Cores | Storage (GB) | OS |
|---|---|---|---|---|---|
| foreman.dev.naijalabs.net | 192.168.1.217 | 24 | 8 | 650 | CentOS Stream release 9 |
Also, here’s a look at how our Linux server is partitioned:


Learn how to install Foreman with Katello on CentOS Stream 9 in this detailed step-by-step guide. Automate your infrastructure management, content repositories, and software updates efficiently.
If you’re managing a large network infrastructure, automation, and systems management tools are vital for streamlining tasks, patching systems, and managing configurations. Foreman with Katello is one such robust solution that integrates multiple services into a single platform for managing your servers and their lifecycle.
In this guide, we’ll walk you through the process of installing Foreman with Katello on CentOS Stream 9. Whether you are a beginner or an experienced system administrator, this guide will provide you with step-by-step instructions, as well as CLI examples and useful tips to ensure a smooth installation process.
What is Foreman? |
Foreman is an open-source lifecycle management tool that simplifies the management of your infrastructure. It allows for provisioning, configuration management, and monitoring of systems. Foreman integrates with popular configuration management tools such as Puppet, Ansible, and SaltStack, enabling automated and consistent management of servers.
What is Katello? |
Katello is an extension for Foreman that adds content management capabilities. It provides features like content repositories, software updates, and subscription management, making it an essential tool for managing software packages and ensuring that your systems are up to date.
Katello integrates with Red Hat Subscription Manager (RHSM), allowing you to manage both Red Hat and non-Red Hat systems with ease. By combining Foreman and Katello, you gain full control over the lifecycle of your infrastructure, from provisioning to content management.
Before you begin, make sure you have the following:
/var/lib/pulp partition.Note: Syncing package repositories can consume a significant amount of storage. As such, the more resources you can allocate, the better the performance will be. It’s important to adjust this based on your specific requirements and the available resources in your environment. For further details, refer to the Official Foreman Documentation.
For this demonstration, we’ve configured our Linux server as follows:
| Hostname | IP Address | RAM (GB) | Cores | Storage (GB) | OS |
|---|---|---|---|---|---|
| foreman.dev.naijalabs.net | 192.168.1.217 | 24 | 8 | 650 | CentOS Stream release 9 |
Also, here’s a look at how our Linux server is partitioned:
df -Ph
					Filesystem                   Size  Used Avail Use% Mounted on
devtmpfs                     4.0M     0  4.0M   0% /dev
tmpfs                         12G     0   12G   0% /dev/shm
tmpfs                        4.7G  8.7M  4.7G   1% /run
/dev/mapper/centos9_vg-root   25G  2.1G   23G   9% /
/dev/mapper/centos9_vg-home   20G  175M   20G   1% /home
/dev/vda2                    2.0G  405M  1.6G  21% /boot
/dev/mapper/centos9_vg-var    16G  388M   16G   3% /var
tmpfs                        2.4G     0  2.4G   0% /run/user/1000
/dev/mapper/centos9_vg-pulp  383G  2.8G  381G   1% /var/lib/pulp
If you don’t have a DNS setup, add the following content to your /etc/hosts file. ** Replace hostname and IP address with your actual information **
					## Foreman-Katello
192.168.1.217   foreman.dev.naijalabs.net foreman
If you’ve met all the systems requirements, you are now ready to proceed with the install.
Step 1: Configure System Repositories |
To get started with Foreman and Katello, you’ll first need to enable the Foreman repository and the Katello repository on CentOS Stream 9. Start by adding the necessary repositories (starting with Foreman):
sudo dnf install https://yum.theforeman.org/releases/3.13/el9/x86_64/foreman-release.rpm
Then, enable the Katello repository with the following command:
dnf install https://yum.theforeman.org/katello/4.15/katello/el9/x86_64/katello-repos-latest.rpm
Also, enable the Puppet 8 repository:
dnf install https://yum.puppet.com/puppet8-release-el-9.noarch.rpm
Next, enable the EPEL (Extra Packages for Enterprise Linux) repository, which will be used during installation:
sudo dnf install epel-release -y
Update your system to ensure all packages are current:
sudo dnf update -y && sudo systemctl reboot
Finally, verify you have all the right repositories enabled:
sudo dnf repolist --enabled
Your output should look similar to:
					repo id                                                repo name
appstream                                              CentOS Stream 9 - AppStream
baseos                                                 CentOS Stream 9 - BaseOS
candlepin                                              Candlepin: an open source entitlement management system.
epel                                                   Extra Packages for Enterprise Linux 9 - x86_64
epel-cisco-openh264                                    Extra Packages for Enterprise Linux 9 openh264 (From Cisco) - x86_64
epel-next                                              Extra Packages for Enterprise Linux 9 - Next - x86_64
extras-common                                          CentOS Stream 9 - Extras packages
foreman                                                Foreman 3.13
foreman-plugins                                        Foreman plugins 3.13
katello                                                Katello 4.15
pulpcore                                               pulpcore: Fetch, Upload, Organize, and Distribute Software Packages.
puppet8                                                Puppet 8 Repository el 9 - x86_64
Step 2: Install Foreman and Katello |
Now that you have configured the necessary repositories, you can install the Foreman and Katello packages using the following command:
sudo dnf install -y foreman-installer-katello
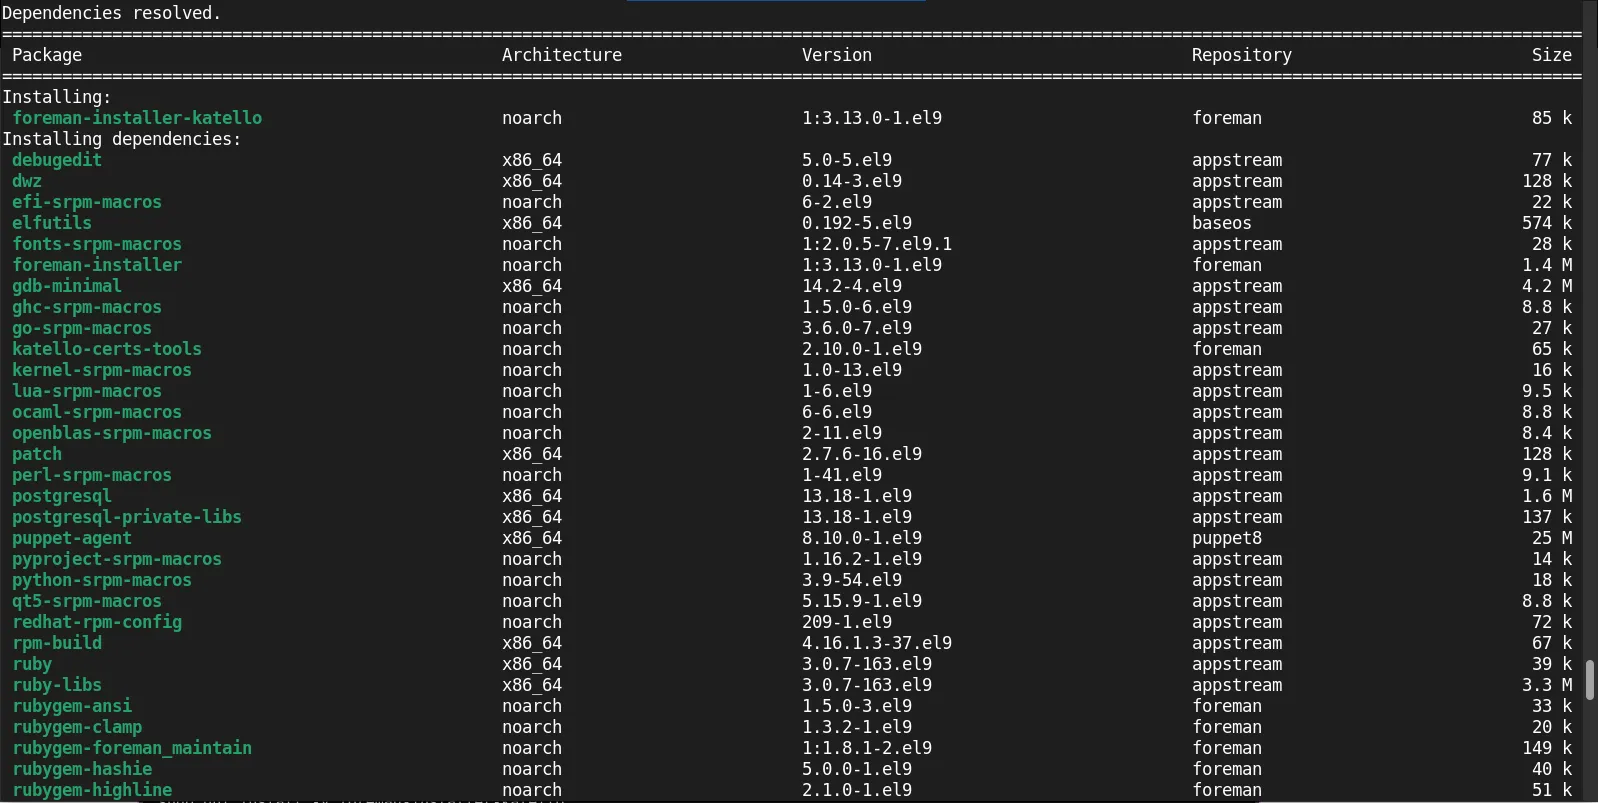
Photo by admingeek from Infotechys
This will install both Foreman and Katello along with all required dependencies.
Step 3: Install the Foreman and Katello Components |
The foreman-installer command is used to install and configure Foreman with the selected options. Run the installer with the –scenario katello flag to install Foreman with Katello:
sudo foreman-installer --scenario katello
This will automatically configure the Foreman server with Katello, including components such as Pulp (for content management), Candlepin (for subscription management), and other related services. The installation process may take several minutes to complete, depending on your system’s resources.
					2025-02-11 00:50:12 [NOTICE] [root] Loading installer configuration. This will take some time.
2025-02-11 00:50:18 [NOTICE] [root] Running installer with log based terminal output at level NOTICE.
2025-02-11 00:50:18 [NOTICE] [root] Use -l to set the terminal output log level to ERROR, WARN, NOTICE, INFO, or DEBUG. See --full-help for definitions.
2025-02-11 00:50:21 [NOTICE] [checks] System checks passed
2025-02-11 00:56:15 [NOTICE] [configure] Starting system configuration.
...omitted for brevity...
Upon completion, you will be presented with a similar output (save your initial credentials in a secure password database):
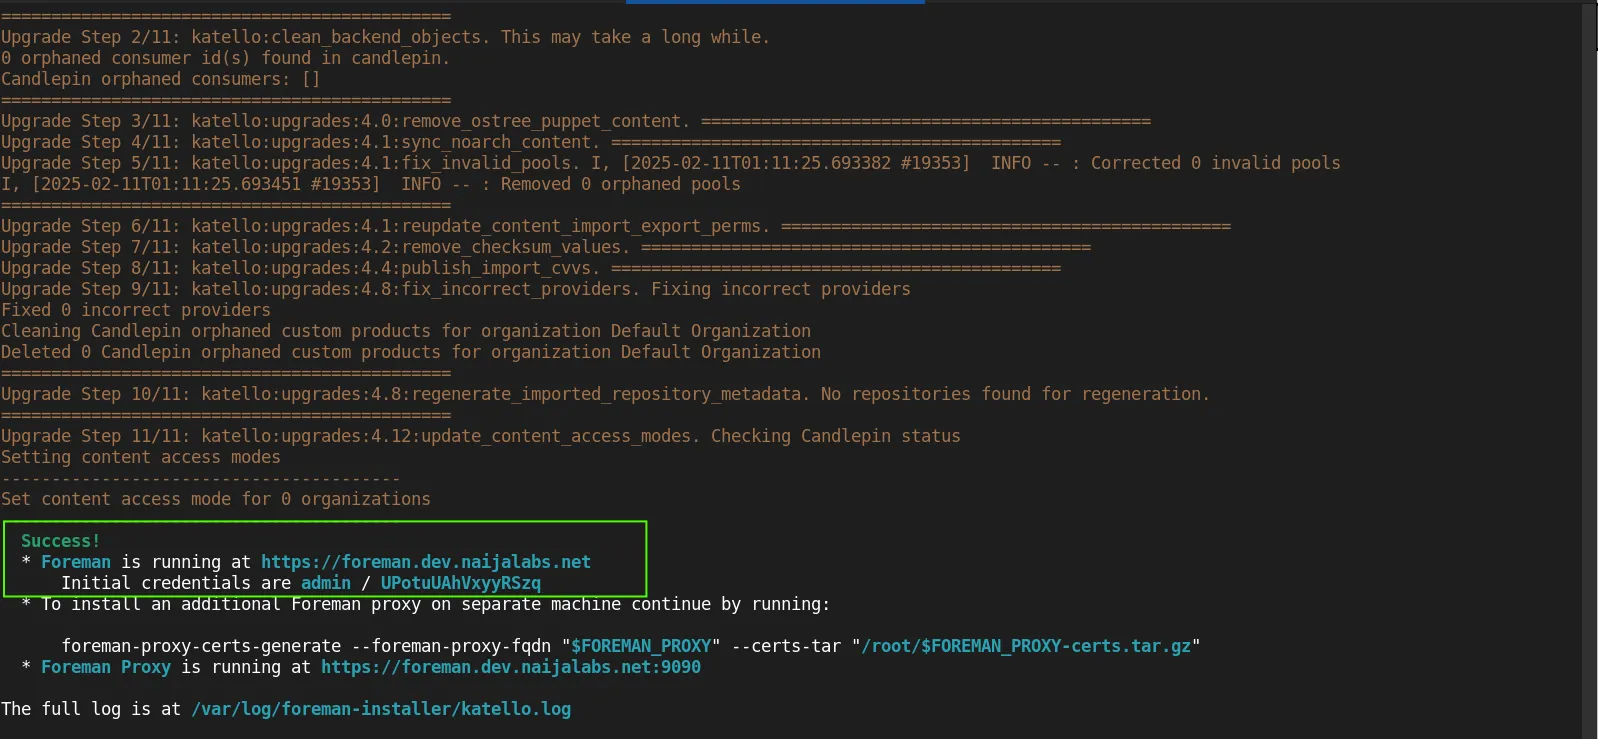
Photo by admingeek from Infotechys
Step 4: Configure Firewall and SELinux |
Once the installation is finished, it’s essential to configure the firewall to allow communication on the necessary ports. Add the required rules using firewalld:
sudo firewall-cmd --permanent --add-port=80/tcp --add-port=53/tcp --add-port=67-69/udp --add-port=443/tcp --add-port=3000/tcp --add-port=3306/tcp --add-port=5910-5930/tcp --add-port=5432/tcp --add-port=8140/tcp --add-port=8443/tcp --add-port=5647/tcp --add-port=9090/tcp ; sudo firewall-cmd --reload
Additionally, you should ensure that SELinux policies are correctly set for Foreman and Katello. If SELinux is in enforcing mode, the installer should have automatically configured it, but if you face issues, you can set SELinux to permissive mode for troubleshooting:
sudo setenforce 0
However, for production systems, it is better to configure SELinux properly rather than disabling it.
Step 5: Access the Foreman Web UI |
After installation, you can access the Foreman web interface via a browser. Open a browser and navigate to your Foreman server’s IP address or domain:
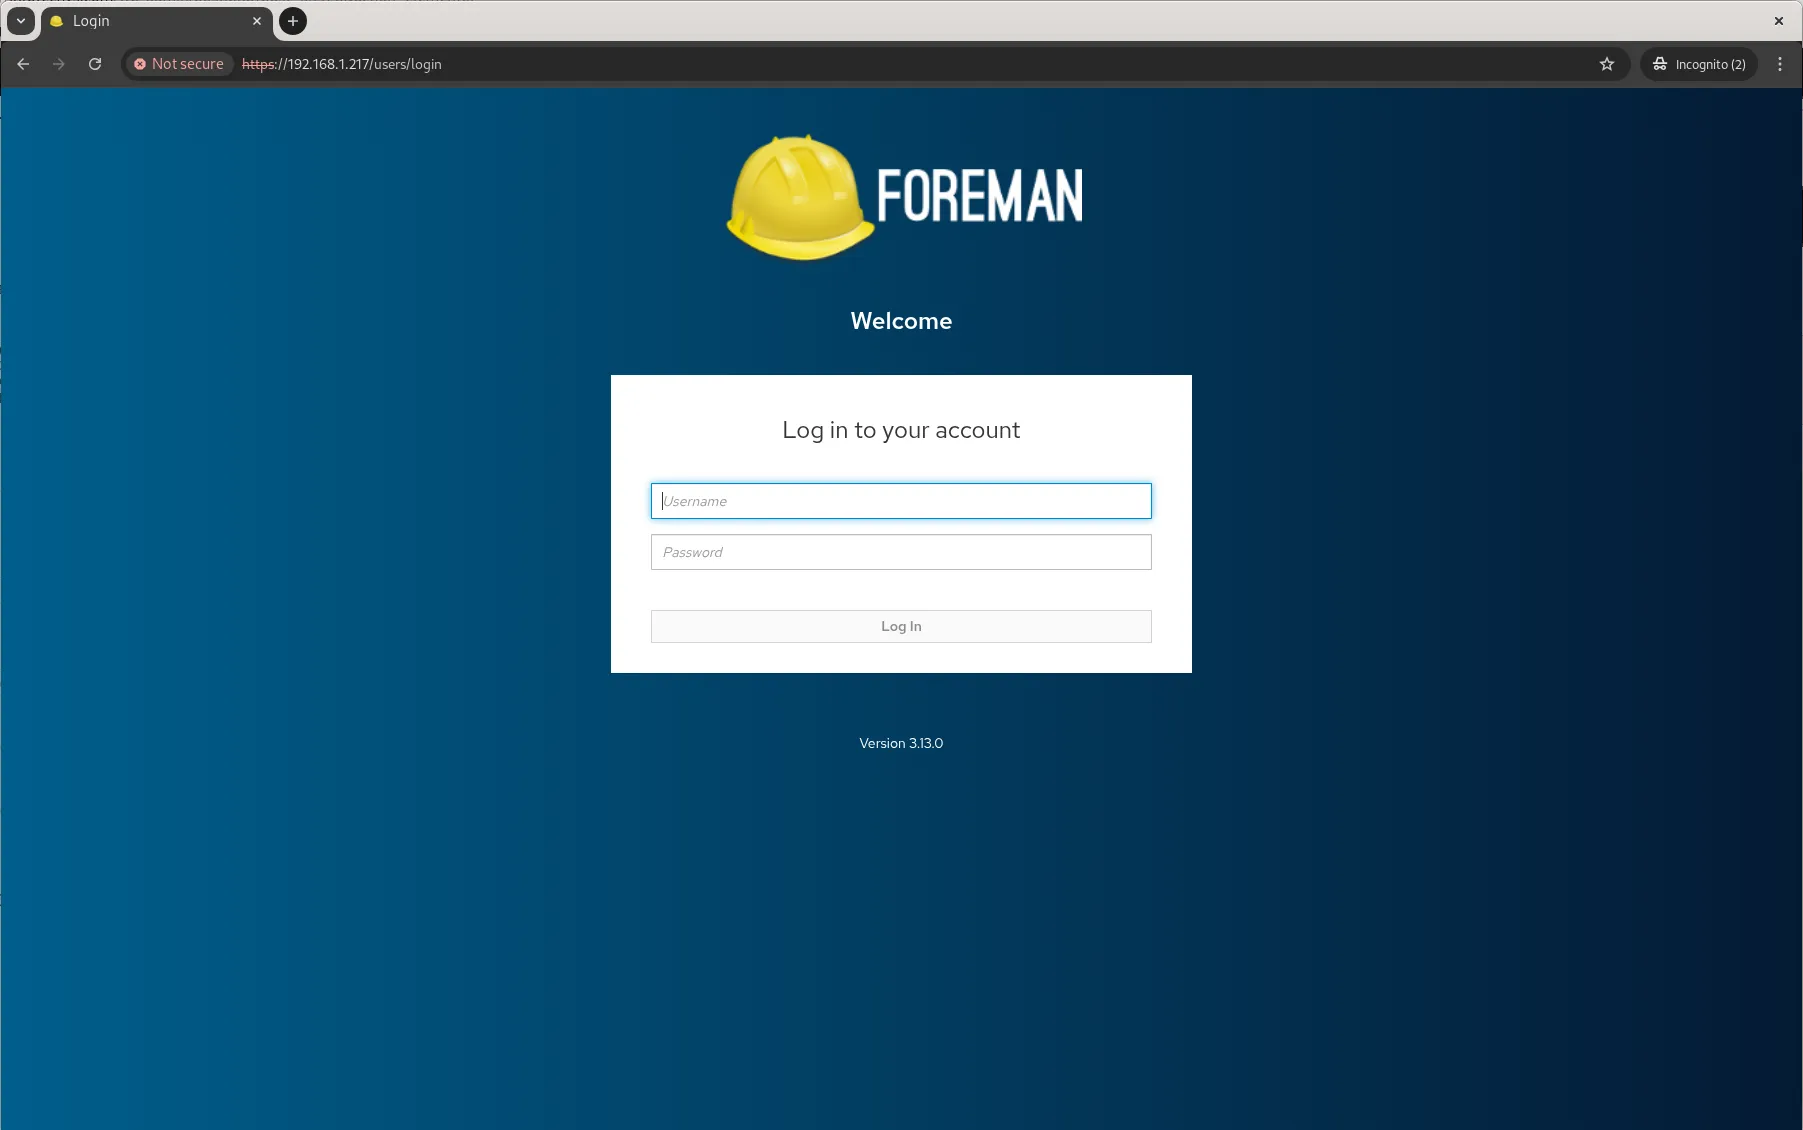
Photo by admingeek from Infotechys
For this installation, our default login credentials are (yours will differ):
adminUPotuUAhVxyyRSzqStep 6: Set Up Foreman |
After logging on, you can begin using Foreman to manage your infrastructure. For example, you can start by creating a host group, defining operating systems, and creating repositories.
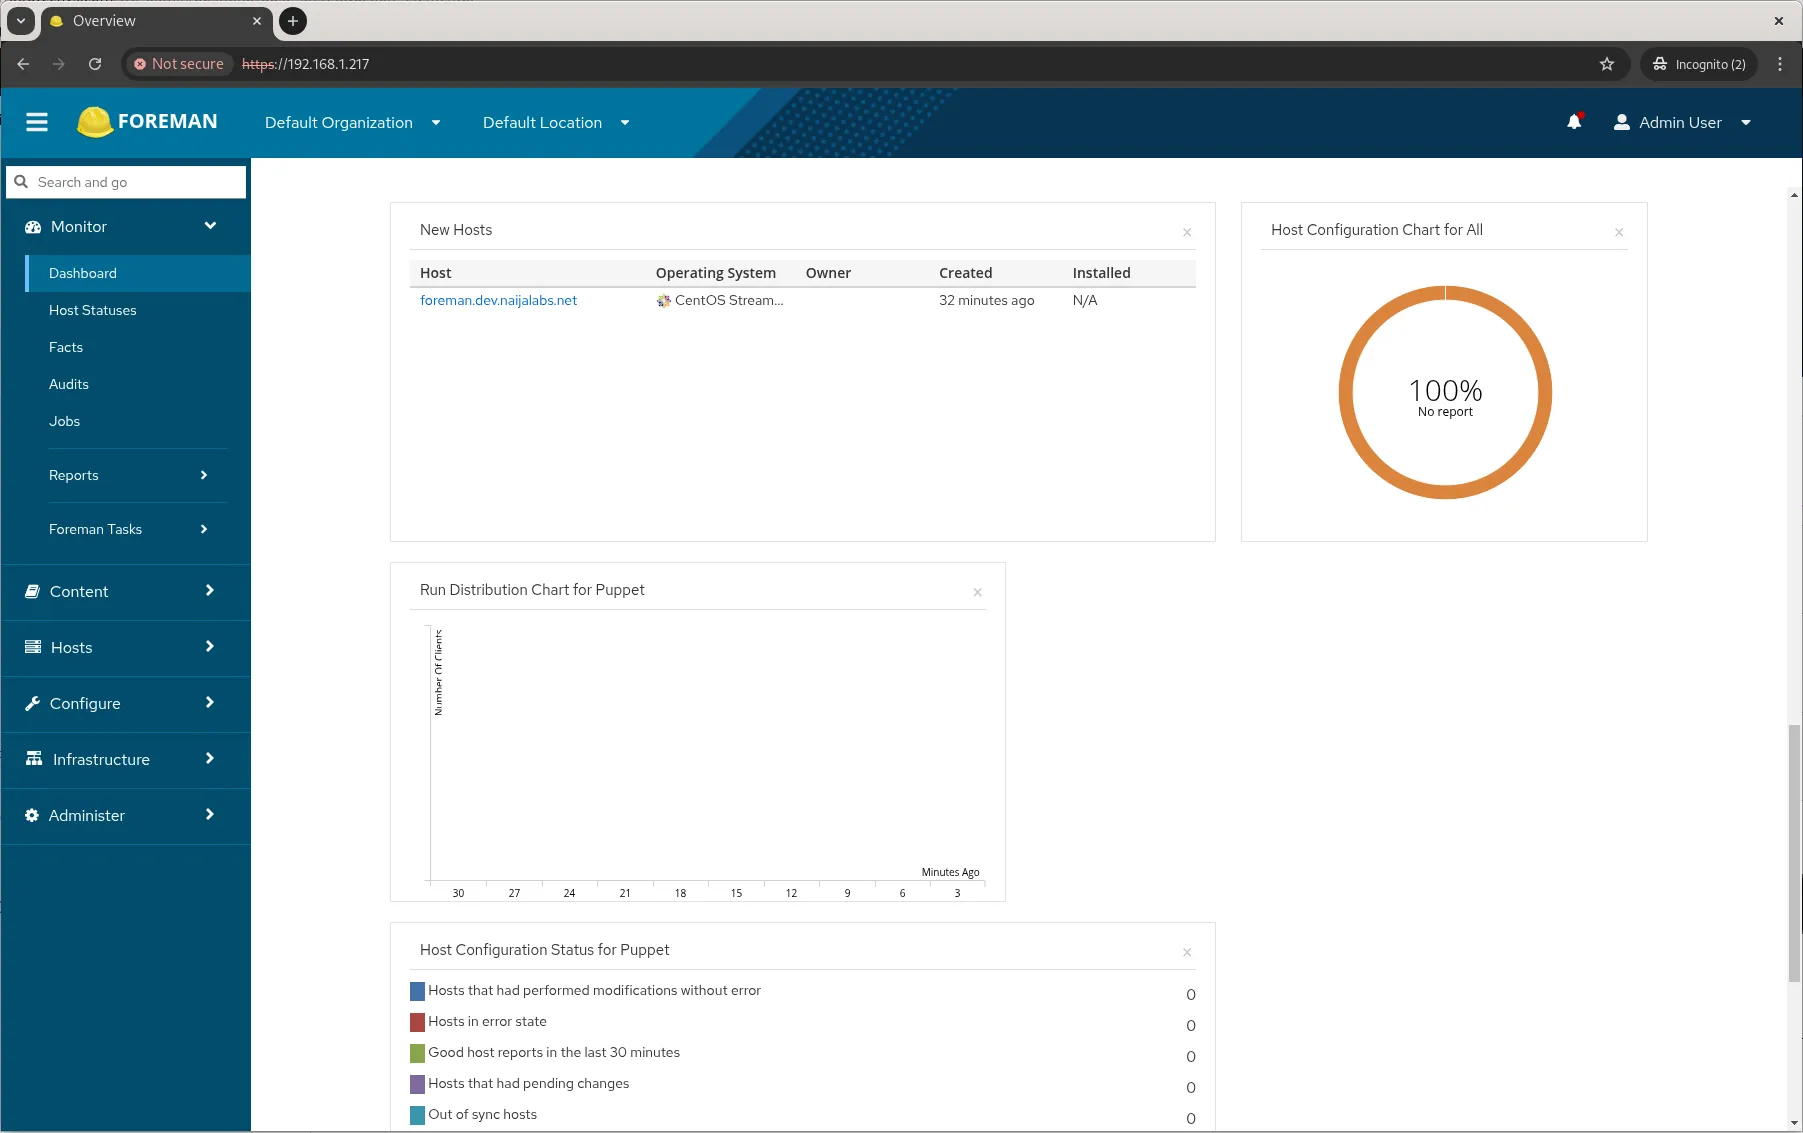
Photo by admingeek from Infotechys
Step 7: Configure Katello Repositories |
Now that Foreman and Katello are set up, you can start configuring your content repositories. To create repositories, you can navigate to Content > Products in the Foreman web interface. Here, you can add repositories such as CentOS or Red Hat repositories. You can create a repository using the CLI by running:
hammer repository create --name=repo-name --product=product-name --content-type=rpm
This process may take some time depending on the size of the repository.
Configure Hosts and Systems |
Once your Foreman and Katello setup is complete, you can begin configuring your hosts and systems. You can use Foreman to provision new systems or manage existing ones. To add a new host to Foreman, you can use the web interface or the hammer CLI:
hammer host create --name=hostname --organization=org_name --location=location_name
This creates a new host and allows you to manage it from the Foreman web interface.
Set Up Puppet or Ansible |
If you wish to integrate Puppet or Ansible with Foreman for configuration management, you can follow the setup guides available on the Official Foreman documentation. This allows you to automate configuration and ensure consistency across your systems.
While the installation process is relatively straightforward, there may be occasional issues. Here are some common troubleshooting tips:
|
|
|
In this guide, we’ve shown you how to install Foreman with Katello on CentOS Stream 9, enabling you to manage your infrastructure’s lifecycle efficiently. By combining the power of Foreman and Katello, you gain centralized control over provisioning, configuration, and software management, saving time and reducing errors in your infrastructure management tasks.
As always, ensure your system is up to date and secure, and remember to take advantage of the powerful features Foreman and Katello offer.
Did you find this article useful? Your feedback is invaluable to us! Please feel free to share this post!
Secure your network and protect your sensitive data by learning how to install SSL certificates on Redhat Satellite 6.10. Table of Contents Introduction In today’s
Looking for a container management tool that integrates seamlessly with systemd? Podman containers with systemd support allow you to easily create, run, manage, and deploy

Learn the five most effective ways for removing a host from Red Hat Satellite, including CLI tools, web interface, and automation tools, to efficiently manage