Commands
In this tutorial, we will review the installation procedure for standing up an Ubuntu 20.04 server on KVM. We will focus specifically, on version 20.04

Looking for a container management tool that integrates seamlessly with systemd? Podman containers with systemd support allow you to easily create, run, manage, and deploy containers using the system’s own process management and networking stack, making it both more secure and simpler to use than Docker. Plus, Podman is OCI-compliant, ensuring that your containers will be portable and run smoothly on any compatible platform.
Podman is a container management tool that allows users to create, run, manage, and deploy containers. It was developed by Red Hat and is an alternative to Docker. Unlike Docker, Podman uses the system’s own process management and networking stack, which makes it more secure and easier to use. Podman also supports the OCI (Open Container Initiative) standard, which ensures that containers are portable and can be run on any OCI-compliant platform.
Podman has several popular features, including:
To run Podman, you need a Linux-based operating system with the following requirements:
Here are the steps to set up and run a container using Podman:
Search for a container image:
$ podman search <image_name>
Pull the container image:
$ podman pull <image_name>
Run the container:
$ podman run --name <container_name> <image_name>
Check the container status:
$ podman ps -a
In this exercise, we will review the steps in the previous section and setup an actual container running Apache web server or http.
First, we search for available http images by running the following command:
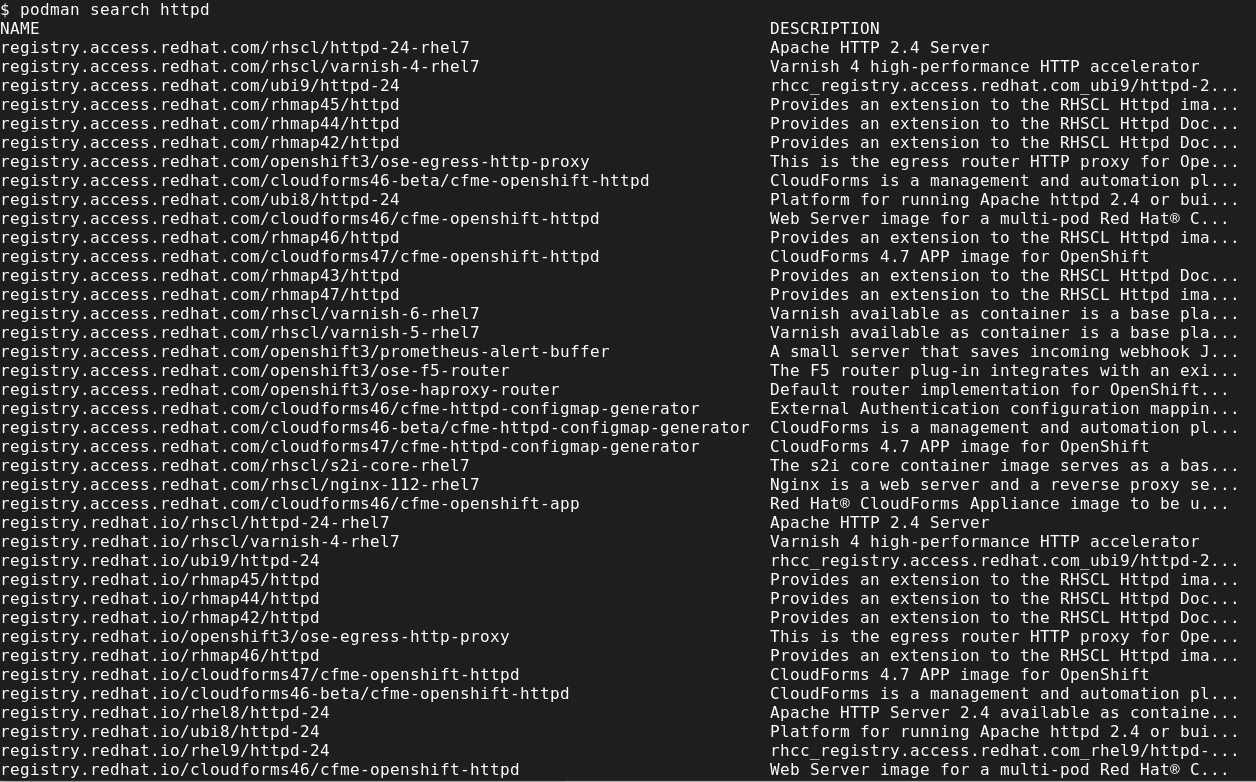
Photo by admingeek from Infotechys
Next, we pull the container image and in this example, we’re going with Red Hat’s Universal Base Image version 9 (ubi9) option or the third on the list (registry.access.redhat.com/ubi9/httpd-24):
					$ podman pull registry.access.redhat.com/ubi9/httpd-24:latest
Trying to pull registry.access.redhat.com/ubi9/httpd-24:latest...
Getting image source signatures
Checking if image destination supports signatures
Copying blob e4f880d62b89 done
Copying blob 2a625e4afab5 done
Copying blob 4a13c0e9217d done
Copying config 870a5c4ea2 done
Writing manifest to image destination
Storing signatures
870a5c4ea287c94603765476aaacde12242265c92a3e4c63ef51b58ecac32967
Now run the podman images command. As you can see (below), the image downloaded successfully.
					$ podman images
REPOSITORY                               TAG    IMAGE ID     CREATED    SIZE
registry.access.redhat.com/ubi9/httpd-24 latest 870a5c4ea287 9 days ago 379 MB
When it comes to running containers, there are a few ways we can achieve this.
The standard method involves entering all of the necessary options for starting the container on the command line (CLI). In this example, our container will be exposed to port 8080 and we will provide a basic index.html file for illustration purposes.
index.html fileFirst, let’s create a directory where we will store our web content (call it webcontent). Then, cd into that directory and create an index.html file.
					$ mkdir webcontent; cd webcontent
$ echo "Hello, world!" > index.html
Run the following command to start the httpd container with the sample index.html file:
$ podman run -d -p 8001:8080 --name web_app1 -v ~/webcontent:/var/www/html:Z registry.access.redhat.com/ubi9/httpd-24:latest
This command creates a simple index.html file with the content “Hello, world!”
This command executes a containerized web application using Podman, a container engine that runs without a daemon. Let’s break it down piece by piece:
podman is the command-line tool used to run, manage, and deploy containers.run is the command that tells Podman to run a container.-d runs the container in detached mode, meaning it runs in the background without showing the output on the terminal.-p 8001:8080 publishes the container’s port 8080 to the host machine’s port 8001.--name web_app1 assigns the name “web_app1” to the container.-v ~/webcontent:/var/www:Z mounts the directory ~/webcontent on the host machine to the directory /var/www inside the container, with the option Z to add a security context to the mounted volume.registry.access.redhat.com/ubi9/httpd-24:latest is the image to be used to create the container, in this case, the Apache HTTP Server version 2.4, built on Red Hat Universal Base Image version 9.Overall, this command creates a containerized web application using the Apache HTTP Server image, mounts a host directory to the container, and maps the container’s port to a port on the host machine.
Run the podman ps command to confirm the container is running:
					$ podman ps
CONTAINER ID IMAGE                                           COMMAND              CREATED        STATUS        PORTS                  NAMES
41d4b2a7499d registry.access.redhat.com/ubi9/httpd-24:latest /usr/bin/run-http... 25 minutes ago Up 25 minutes 0.0.0.0:8001->8080/tcp web_app1
You can test the container to check if HTTP is operational by running the following command (or enter the URL in your browser):
					$ curl http://localhost:8001
Hello World!
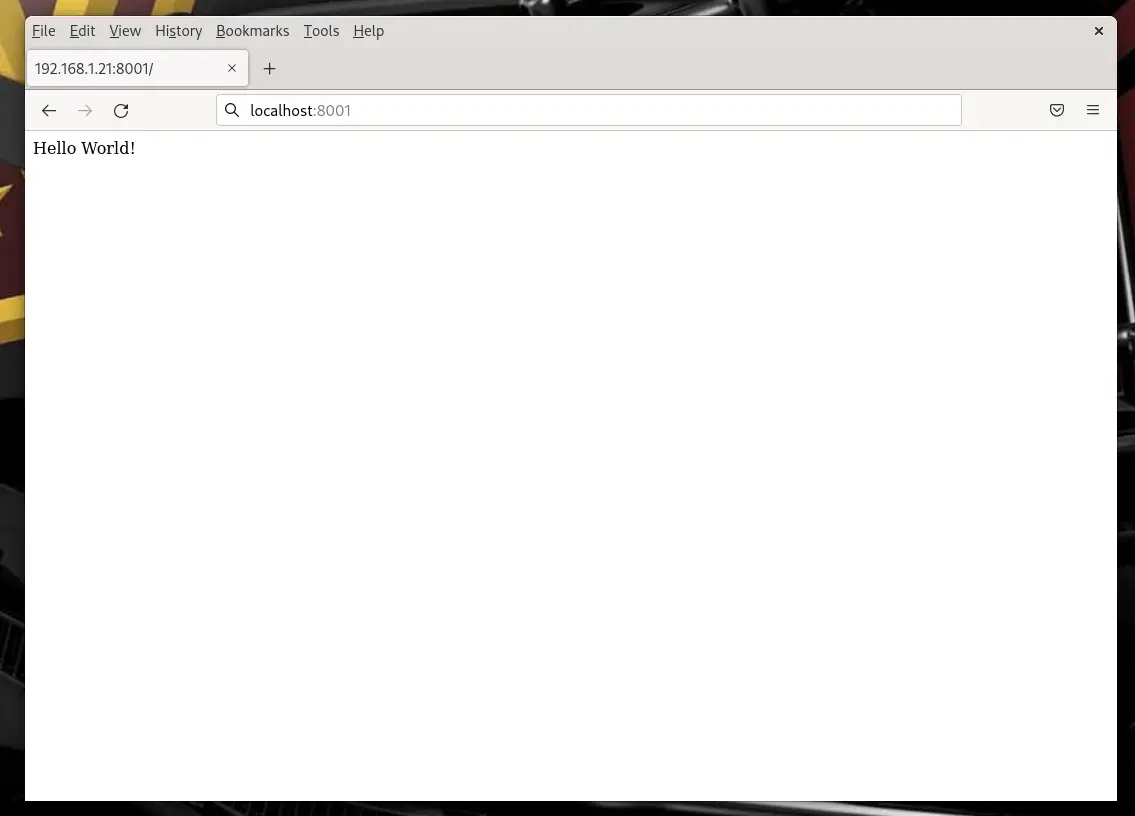
Photo by admingeek from Infotechys
In this example, we will build the same container we used in the previous section, using a Containerfile:
Using your favorite text editor or vim, open a file called Containerfile.
$ vim Containerfile
Insert (copy and paste) the following into the file, then save and quit:
					FROM registry.access.redhat.com/ubi9/httpd-24:latest
COPY ./webcontent /var/www/html
EXPOSE 8080
CMD ["/usr/sbin/httpd", "-D", "FOREGROUND"]
This Containerfile performs the following actions:
FROM instruction to specify the base image.webcontent directory from the build context to the container’s /var/www/html directory.EXPOSE instruction to expose port 8080.CMD instruction to start the Apache HTTP Server and run it in the foreground.To build the container using this Containerfile, you would run the following command:
					$ podman build -t web_app_image .
STEP 1/4: FROM registry.access.redhat.com/ubi9/httpd-24:latest
STEP 2/4: COPY ./webcontent /var/www/html
--> e990b32b61c
STEP 3/4: EXPOSE 8080
--> fdd3147cdbb
STEP 4/4: CMD ["/usr/sbin/httpd", "-D", "FOREGROUND"]
COMMIT web_app_image
--> aaf1b76fc60
Successfully tagged localhost/web_app_image:latest
aaf1b76fc60471cd0cab9d5dfdf449f05b4727d997eee1a0c0a5acb7199ebc82
web_app_image using the current directory (.) as the build context (where your Containerfile is located):
					$ podman images
REPOSITORY              TAG    IMAGE ID     CREATED       SIZE
localhost/web_app_image latest aaf1b76fc604 5 minutes ago 379 MB
registry.access.redhat.com/ubi9/httpd-24 latest 870a5c4ea287 9 days ago 379 MB
You can then run the container with the following command:
$ podman run -d -p 8001:8080 --name web_app1 web_app_image
This runs the container in detached mode, maps port 8080 inside the container to port 8001 on the host machine, assigns the name web_app1 to the container, and uses the web_app_image image that was built in the previous step.
NOTE: If you already have the web_app1 container running, you’ll need to stop it and remove it, in order to run the new build. Or, you can just name the container something else (e.g. web_app2) and map it to a different port (e.g. port 8002).
Containers can run as systemd services and in this section, we will look at how we can achieve this with our already running container from the previous (Verify and test the running container) section.
As a regular non-root user, create a systemd user under the .config directory:
					$ mkdir -pv .config/systemd/user
mkdir: created directory '.config/systemd'
mkdir: created directory '.config/systemd/user'
Now, cd into the ‘.config/systemd/user‘ directory and run the following command to generate systemd files:
					$ podman generate systemd --name web_app1 --files --new
/home/admin/.config/systemd/user/container-web_app1.service
Notice the ‘container-web_app1.service‘ was generated. The –files option dumps the systemd files to your present working directory under .config/systemd/user. The –new option indicates a new or fresh instance of the container will be run each time the command is executed. Now, let’s breakdown what’s inside that file.
					# container-web_app1.service
# autogenerated by Podman 4.4.0
# Fri Mar  3 17:40:55 EST 2023

[Unit]
Description=Podman container-web_app1.service
Documentation=man:podman-generate-systemd(1)
Wants=network-online.target
After=network-online.target
RequiresMountsFor=%t/containers

[Service]
Environment=PODMAN_SYSTEMD_UNIT=%n
Restart=on-failure
TimeoutStopSec=70
ExecStart=/usr/bin/podman run \
	--cidfile=%t/%n.ctr-id \
	--cgroups=no-conmon \
	--rm \
	--sdnotify=conmon \
	--replace \
	-d \
	-p 8001:8080 \
	--name web_app1 \
	-v /home/admin/webcontent:/var/www/html:Z registry.access.redhat.com/ubi9/httpd-24:latest
ExecStop=/usr/bin/podman stop \
	--ignore -t 10 \
	--cidfile=%t/%n.ctr-id
ExecStopPost=/usr/bin/podman rm \
	-f \
	--ignore -t 10 \
	--cidfile=%t/%n.ctr-id
Type=notify
NotifyAccess=all

[Install]
WantedBy=default.target
The service file includes the following configurations:
[Unit] section: includes a description of the service, documentation reference, and dependencies.network-online.target and requires mounts for the %t/containers directory.[Service] section: specifies the environment, restart, timeout, and executable commands for the service.PODMAN_SYSTEMD_UNIT is set to %n, which is the name of the service.ExecStart command runs the container using Podman with specific flags and options, such as a CID file, disabling conmon cgroups, removing the container upon exit, sending notification to conmon, and mapping port 8001 on the host to port 8080 on the container./home/admin/webcontent directory on the host to /var/www/html in the container with the Z option, which sets the SELinux security context.ExecStop command stops the container and the ExecStopPost command removes the container forcefully.Type is set to notify, which means that the service sends a notification when it starts or stops, and the NotifyAccess is set to all, which means that all users can receive notifications.[Install] section: specifies the target where the service should be installed. In this case, it is set to the default target.Run this command to load the newly generated systemd unit files.
$ systemctl --user daemon-reload
Now, enable the systemd container as a service like you normally do when running systemd.
					$ systemctl --user status container-web_app1.service
○ container-web_app1.service - Podman container-web_app1.service
Loaded: loaded (/home/admin/.config/systemd/user/container-web_app1.service; disabled; preset: disabled)
Active: inactive (dead)
Docs: man:podman-generate-systemd(1)

$ systemctl --user enable container-web_app1.service
Created symlink /home/admin/.config/systemd/user/default.target.wants/container-web_app1.service → /home/admin/.config/systemd/user/container-web_app1.service.)
Before starting the container with systemd, make sure to stop the container and verify that it’s stopped–then proceed.
					$ podman ps
CONTAINER ID IMAGE COMMAND CREATED STATUS PORTS NAMES
41d4b2a7499d registry.access.redhat.com/ubi9/httpd-24:latest /usr/bin/run-http... 3 hours ago Up 3 hours 0.0.0.0:8001->8080/tcp web_app1

$ podman stop web_app1
web_app1

$ systemctl --user start container-web_app1.service
If you’ve followed all the steps as outlined correctly, you can perform a final test by rebooting your machine, logging back in, and checking to see if the container instance started automatically post reboot.
Here are some best practices to follow when using Podman:
Podman is a powerful container management tool that allows users to create, run, manage, and deploy containers. Its support for rootless containers, podman-compose, image management, and network management make it a popular alternative to Docker.
To use Podman, you need a modern Linux-based operating system with the necessary requirements. By following best practices like using rootless containers, image registries, and automating container deployment, you can make the most of Podman and ensure that your containerized applications are secure and easily managed.
Running containers as systemd services can further simplify the process of container management and deployment.
Related Posts
In this tutorial, we will review the installation procedure for standing up an Ubuntu 20.04 server on KVM. We will focus specifically, on version 20.04
In this tutorial, we will review the Kubernetes cluster install on CentOS8. This procedure will mirror our previous article about this subject. Install a Kubernetes
In this tutorial, you will learn the process involved with building a docker registry. As part of this process, we will set up a web