
Commands
In this guide, we’ll walk you through the process of installing and configuring MediaWiki on RHEL 9 or CentOS 9, enabling you to create your


Learn how to install Jira on RHEL 9 or CentOS 9 with our step-by-step guide. Enhance your team’s collaboration and productivity with this comprehensive tutorial. Follow along to set up and configure Jira seamlessly.
Installing Jira on RHEL 9 or CentOS 9 can greatly enhance your team’s productivity by providing a seamless platform for collaboration and project management. In this guide, we’ll walk you through the step-by-step process to get Jira up and running on your RHEL 9 or CentOS 9 system.
Before starting, ensure you have the following:
For this demonstration, we’ve configured our RHEL 9 server as follows:
| Hostname | RAM (GB) | Cores | IP Address/OS |
| jira.dev.naijalabs.net | 4 | 2 | 192.168.1.187 / Red Hat Enterprise Linux release 9.4 (Plow) |
Step 1: Update Your System |
First, update your system packages to ensure you have the latest security patches and features.
sudo dnf update -y
Install Essential Packages |
Ensure the following essential packages are installed (required during the installation process):
sudo dnf install wget tar nano vim -y
Vim and Nano are text editors. Choose the one you prefer and ensure it is installed on your machine.
Step 2: Install OpenJDK 11 |
Jira requires Java to run. Install OpenJDK 11, which is compatible with both applications.
sudo dnf install java-11-openjdk-devel -y
Verify the installation by checking the Java version.
java -version
You should see output similar to (below):
					openjdk version "11.0.23" 2024-04-16 LTS
OpenJDK Runtime Environment (Red_Hat-11.0.23.0.9-2) (build 11.0.23+9-LTS)
OpenJDK 64-Bit Server VM (Red_Hat-11.0.23.0.9-2) (build 11.0.23+9-LTS, mixed mode, sharing)
Step 3: Install and Configure PostgreSQL |
Jira supports multiple databases, but PostgreSQL is a popular choice due to its robustness and performance.
Install PostgreSQL |
Install PostgreSQL using the following command:
sudo dnf install postgresql-server postgresql-contrib -y
Initialize the Database |
Initialize the PostgreSQL database cluster.
sudo postgresql-setup --initdb
					 * Initializing database in '/var/lib/pgsql/data'
 * Initialized, logs are in /var/lib/pgsql/initdb_postgresql.log
Start and Enable PostgreSQL |
Start PostgreSQL and enable it to start on boot.
sudo systemctl enable --now postgresql
Created symlink /etc/systemd/system/multi-user.target.wants/postgresql.service → /usr/lib/systemd/system/postgresql.service.
Configure PostgreSQL |
Switch to the PostgreSQL user to configure the database.
sudo -i -u postgres
[postgres@jira ~]$
Create a new PostgreSQL user for Jira and Confluence.
createuser jiraconfuser --pwprompt
Enter password for new role: <enter a password, then press the enter to continue>
Enter it again:
Enter the password again and press the enter key to continue. Then, create a new database for Jira.
createdb jiradb --owner=jiraconfuser
Exit the PostgreSQL user session.
exit
Configure PostgreSQL to Accept Connections |
Edit the pg_hba.conf file to configure PostgreSQL to accept connections.
sudo vim /var/lib/pgsql/data/pg_hba.conf
Add the following lines to the end of the file:
					host    jiradb          jiraconfuser    127.0.0.1/32    md5
host    jiradb          jiraconfuser    ::1/128         md5
Save and exit the file. Then, restart PostgreSQL to apply the changes.
sudo systemctl restart postgresql
Step 4: Download and Install Jira |
Download the latest version of Jira from the official Atlassian website. Use wget to download the installer.
wget https://product-downloads.atlassian.com/software/jira/downloads/atlassian-jira-software-9.12.11-x64.bin
Make the installer executable.
chmod +x atlassian-jira-software-9.12.11-x64.bin
Move the executable to the /opt directory:
sudo mv atlassian-jira-software-9.12.11-x64.bin /opt/
Navigate to the /opt directory and run the executable:
sudo ./atlassian-jira-software-9.12.11-x64.bin
					Unpacking JRE ...
Starting Installer ...

This will install Jira Software 9.12.11 on your computer.
OK [o, Enter], Cancel [c]
Follow the on-screen instructions to complete the installation. Choose the default options for most prompts unless you have specific requirements. Press the [Enter] Key to continue.
					Choose the appropriate installation or upgrade option.
Please choose one of the following:
Express Install (use default settings) [1], Custom Install (recommended for advanced users) [2, Enter], Upgrade an existing Jira installation [3]
For this demonstration, we chose the Express Install option (Press 1 and Enter key):
					Details on where Jira Software will be installed and the settings that will be used.
Installation Directory: /opt/atlassian/jira
Home Directory: /var/atlassian/application-data/jira
HTTP Port: 8080
RMI Port: 8005
Install as service: Yes
Install [i, Enter], Exit [e]
Note the paths to the Home and Installation directories. Press the [Enter] Key to continue.
					Extracting files ...

/opt/atlassian/jira/bin/tcnative-1.dll

The file already exists.

Would you like Setup to overwrite it?
Yes [y], Yes to All [ya], No [n], No to All [na]
If you see this output (above), press the y and Enter key to continue.
					Start Jira Software 9.12.11 now?
Yes [y, Enter], No [n]
The Jira Software will take a few minutes to install and launch. Press the y and Enter key to continue.
					Please wait a few moments while Jira Software starts up.
Launching Jira Software ...

Your installation of Jira Software 9.12.11 is now ready and can be accessed
via your browser.
Jira Software 9.12.11 can be accessed at http://localhost:8080
Finishing installation ...
Replace localhost with the IP address or hostname of your machine. For example our URL looks like this: http://192.168.1.187:8080
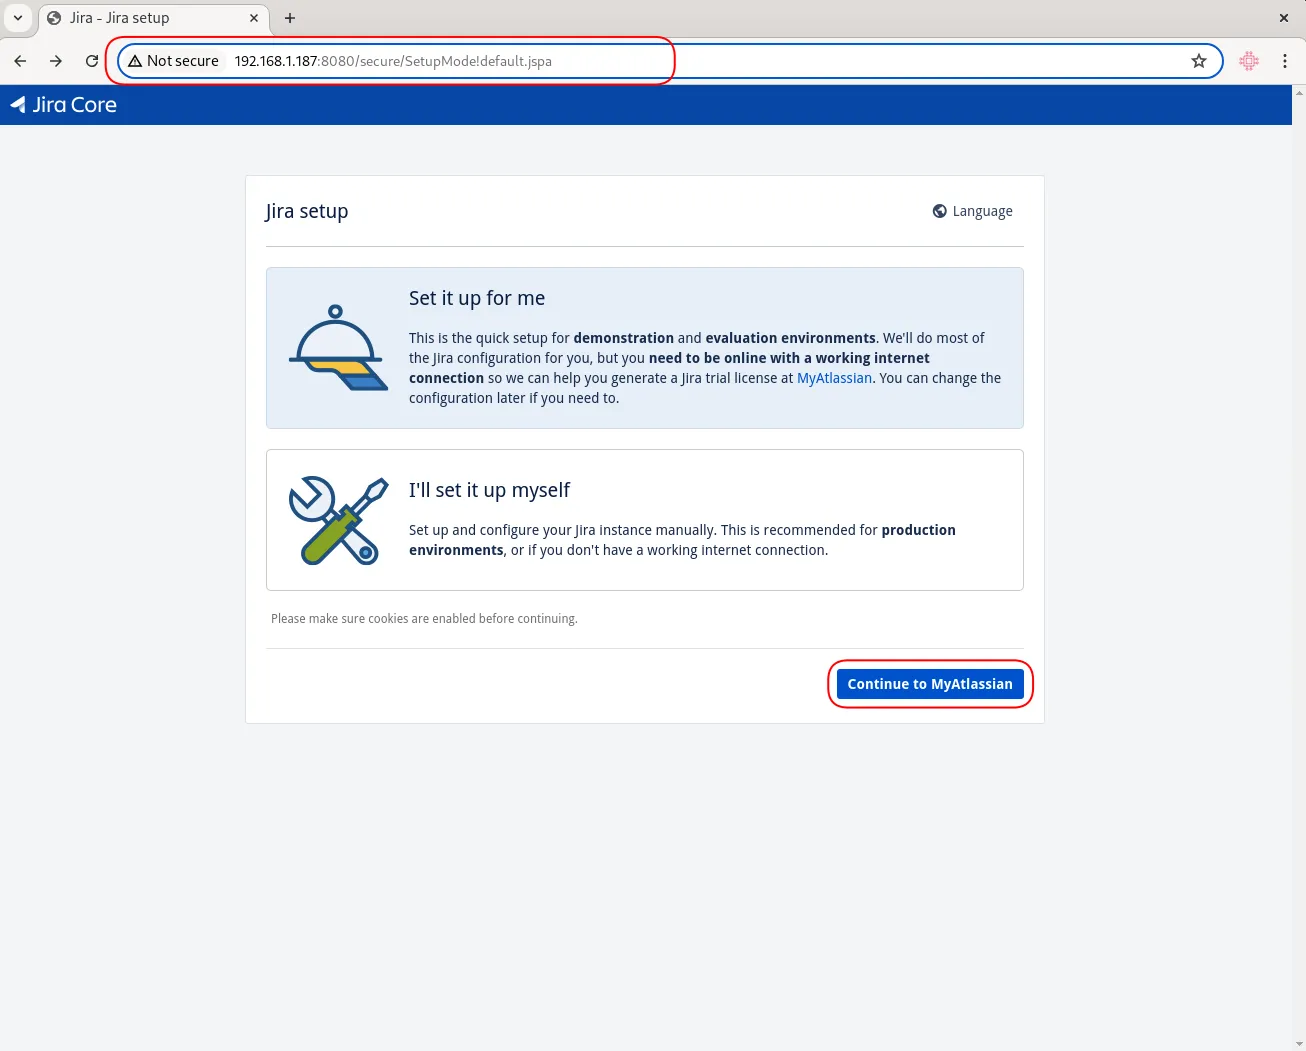
Photo by admingeek from Infotechys
Open Firewall Port 8080 |
Note: Don’t forget to open port 8080 on your firewall to allow access to the web interface (Jira Setup).
sudo firewall-cmd --permanent --add-port=8080/tcp
sudo firewall-cmd --reload
💡Although it’s possible to proceed with the Jira setup without implementing SSL/TLS, it is not recommended from a security standpoint. Jira does support the use of proxies in setting up SSL/TLS but, it prefers to manage SSL/TLS termination directly on the application server to ensure optimal performance and security. In the next section, we will review how to implement SSL/TLS on your Jira instance. |
The correct implementation of SSL/TLS usually involves the entire certificate chain, which includes the server certificate, any intermediate certificates, and the root certificate. Here’s a more detailed look at the process:
Understanding the Certificate Chain |
jira.dev.naijalabs.net). This is the certificate that is installed on your server.Why the Entire Chain is Important |
When a client connects to your server, it needs to verify the server certificate against a trusted CA. The client may not directly trust your server certificate but will trust the root CA. To bridge this gap, intermediate certificates are used. This is why including the entire chain in your configuration is crucial.
Using Only Intermediate CA |
In some cases, if the client already has the root certificate in its trust store, it may only require the intermediate certificate to establish the chain of trust. However, for a robust and universally compatible configuration, it’s recommended to include the entire chain.
Ensure You Have the Required Files |
jira.dev.naijalabs.net.key (the private key)jira.dev.naijalabs.net.crt (the signed certificate)intermediate-ca.crt (the CA’s intermediate certificate)root-ca.crt (the CA’s root certificate)Copy your private key (.key), signed certificate (.crt), intermediate, and root CA certificates to a central location on your Jira instance. For this example, we have copied these files to the /tmp directory on our Jira instance.
Combine Certificates |
Concatenate the server certificate, intermediate certificate(s), and root certificate into a single file.
cat jira.dev.naijalabs.net.crt intermediate-ca.crt root-ca.crt > fullchain.crt
Convert to PKCS12 |
Use OpenSSL to create a PKCS12 file that includes the private key and the full chain of certificates.
sudo openssl pkcs12 -export -in fullchain.crt -inkey jira.dev.naijalabs.net.key -out jira.dev.naijalabs.net.p12 -name jira
					Enter Export Password:
Verifying - Enter Export Password:
Provide an export password (twice) and press the [Enter] key to continue.
Import into Java Keystore |
Convert the PKCS12 file into a Java Keystore.
sudo keytool -importkeystore -srckeystore jira.dev.naijalabs.net.p12 -srcstoretype PKCS12 -destkeystore jira.dev.naijalabs.net.keystore -deststoretype JKS -alias jira
					Importing keystore jira.dev.naijalabs.net.p12 to jira.dev.naijalabs.net.keystore...
Enter destination keystore password:
Re-enter new password:
Enter source keystore password:
Provide destination and source passwords for the keystore.
Verify the Keystore |
Check the contents to ensure all certificates are correctly imported.
sudo keytool -list -v -keystore jira.dev.naijalabs.net.keystore
Enter your keystore password and press the [Enter] key to continue.
					Enter keystore password:
Keystore type: JKS
Keystore provider: SUN

Your keystore contains 1 entry

Alias name: jira
Creation date: Jul 9, 2024
Entry type: PrivateKeyEntry
Certificate chain length: 3
Certificate[1]:
Owner: EMAILADDRESS=info@jira.dev.naijalabs.net, CN=jira.dev.naijalabs.net, OU=Jira Development/Test LAN, O=Jira Web Server Instance, ST=Maryland, C=US
Issuer: CN=Intermediate CA Internal, O=Internal Certificate Authority, L=Laurel, ST=Maryland, C=US
Serial number: 94f6019685db8196059bc7a334d7a07c
Valid from: Tue Jul 09 01:39:41 EDT 2024 until: Wed Jul 09 01:39:41 EDT 2025
Certificate fingerprints:
	 SHA1: D6:45:68:38:91:7E:FD:FE:98:99:E8:6E:55:9F:1D:2A:C0:B5:C1:8D
	 SHA256: 41:9F:24:95:29:50:58:B2:9A:3B:8B:16:0E:39:72:F7:C0:02:5B:2F:24:E0:E2:B5:90:9F:0C:C5:FF:2B:0B:83
Signature algorithm name: SHA256withRSA
Subject Public Key Algorithm: 2048-bit RSA key
Version: 3
...omitted for brevity...
Update the server.xml file to use the newly created keystore:
sudo vim /opt/atlassian/jira/conf/server.xml
Copy and paste the following below the last Connector port entry (ensure your .keystore file is copied to path provided by the keystoreFile variable):
<Connector port="8443" relaxedPathChars="[]|" relaxedQueryChars="[]|{}^\`"<>" protocol="org.apache.coyote.http11.Http11NioProtocol"
maxThreads="150" SSLEnabled="true" scheme="https" secure="true"
clientAuth="false" sslProtocol="TLS"
keystoreFile="/path/to/jira.dev.naijalabs.net.keystore" keystorePass="your_keystore_password" />
Open port 8443 |
Ensure that port 8443 is open to allow HTTPS traffic.
sudo firewall-cmd --permanent --add-port=8443/tcp --add-port=443/tcp
sudo firewall-cmd --reload
💡To avoid having to include |
Here’s how you can do it (if you’re going to be running Jira in a production environment, we recommend using NGINX reverse proxy) :
Ensure Port 443 is Available |
Make sure that port 443 is not being used by another application on your server.
sudo netstat -tuln | grep :443
If port 443 is available, this command will not return any output to your terminal.
Update Jira Configuration for port 443 |
Again, edit the server.xml file located in the Jira installation directory under /opt/atlassian/jira/conf/.
<Connector> element from 8443 to 443. The updated <Connector> configuration might look like this:
<Connector port="443" relaxedPathChars="[]|" relaxedQueryChars="[]|{}^\`"<>" protocol="org.apache.coyote.http11.Http11NioProtocol"
maxThreads="150" SSLEnabled="true" scheme="https" secure="true"
clientAuth="false" sslProtocol="TLS"
keystoreFile="/path/to/jira.dev.naijalabs.net.keystore" keystorePass="your_keystore_password" />
Run Jira as a Privileged User |
Ports below 1024 (including port 443) require root or administrator privileges to bind. This means you need to run Jira with elevated privileges, which can be a security risk. Append the /etc/sysctl.conf file with the following line:
net.ipv4.ip_unprivileged_port_start=80
Save and exit the file. Then, run the following command to apply the change:
$ sudo sysctl -p /etc/sysctl.conf
Restart Jira |
Restart Jira to apply the new SSL/TLS configuration.
sudo /opt/atlassian/jira/bin/stop-jira.sh
sudo /opt/atlassian/jira/bin/start-jira.sh
Congratulations! Your Jira instance is now secure and accessible over HTTPS!
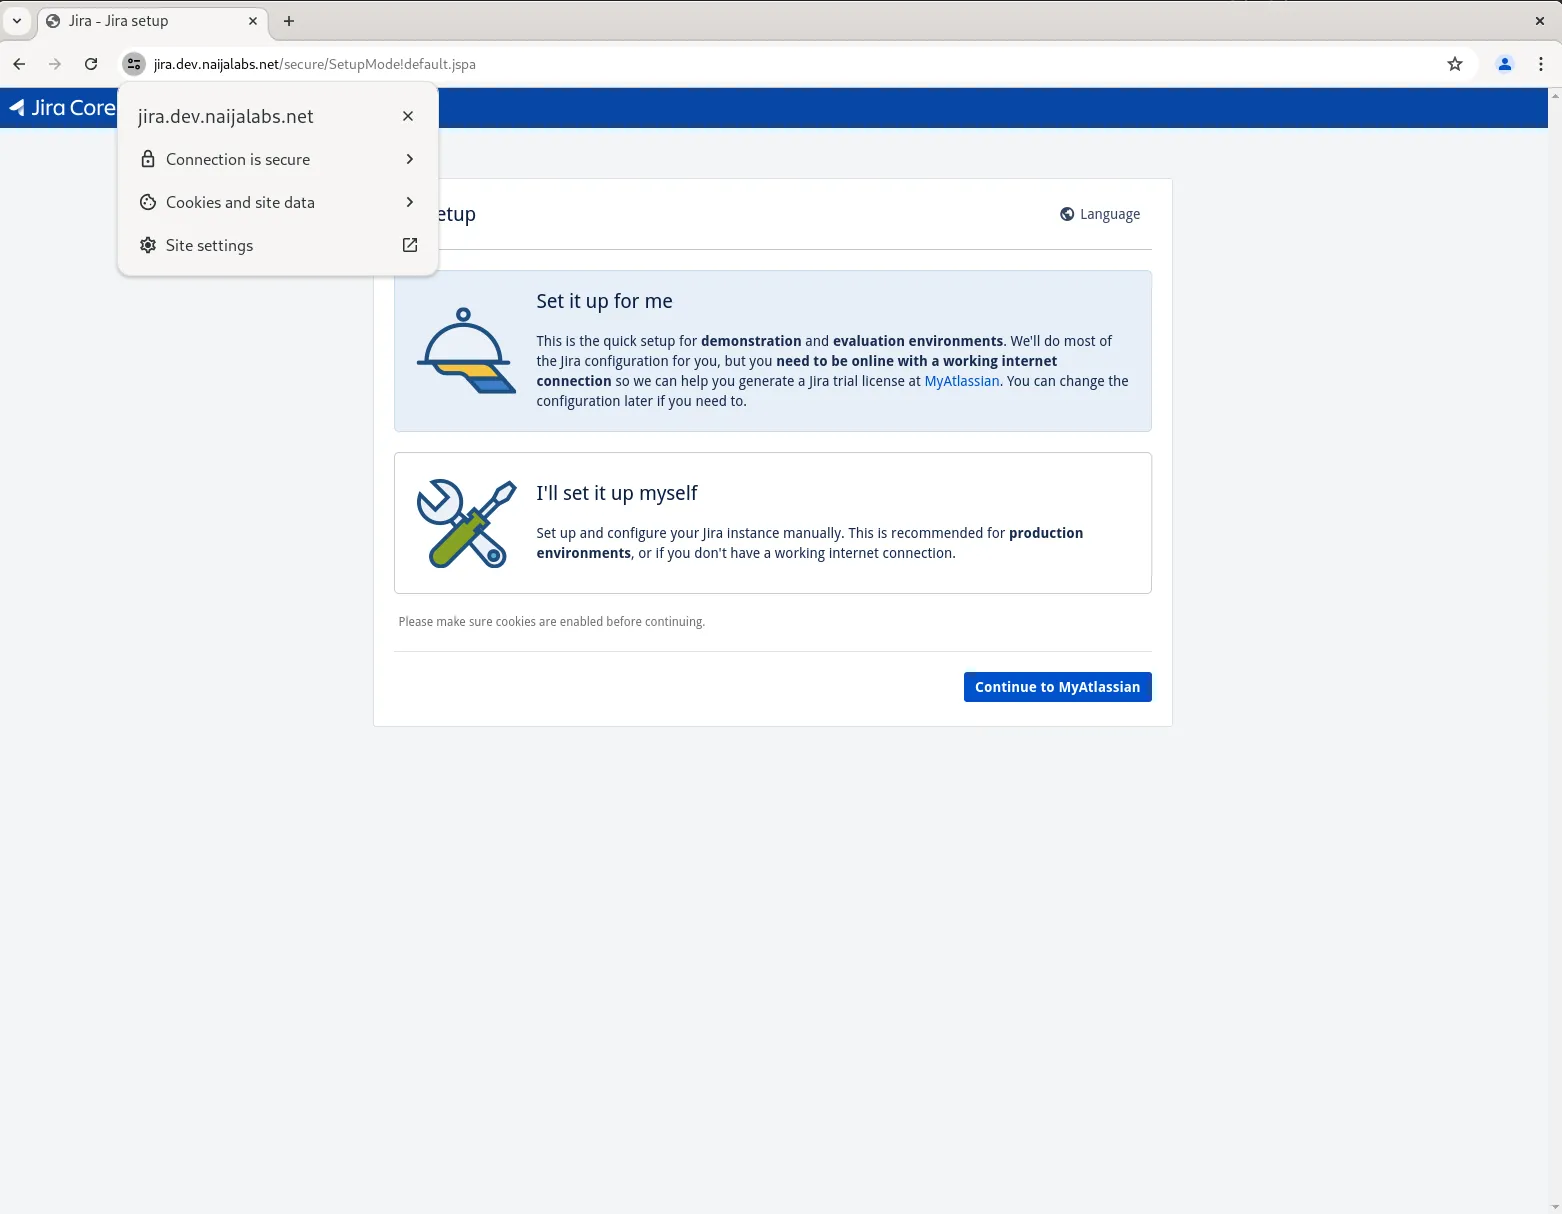
Photo by admingeek from Infotechys
Now, you may proceed with the on-screen instructions to complete the Jira setup. For this demonstration, we went with the expedite “Set it up for me” option. This involves signing up for a trial license, installing the license key, and setting up an administrator account for login access (ensure the login credentials are stored in a safe place). Upon successfully completing these steps, your Jira instance will begin setting up the final backend processes to finish the setup.

Photo by admingeek from Infotechys
Finally, you will be presented with a login screen which requires your administrator account credentials for access.

Photo by admingeek from Infotechys
After installation, you need to configure Jira to connect to the PostgreSQL database. We’ll start by editing the /var/atlassian/application-data/jira/dbconfig.xml file to setup a database connection:
sudo vim /var/atlassian/application-data/jira/dbconfig.xml
By default, Jira setup uses an H2 database. However, for a production environment, it is highly recommended to use a more robust database like PostgreSQL. Copy the original dbconfig.xml file to a backup and replace it’s contents with the following:
					<?xml version="1.0" encoding="UTF-8"?>

<jira-database-config>
  <name>defaultDS</name>
  <delegator-name>default</delegator-name>
  <database-type>postgres72</database-type>
  <schema-name>public</schema-name>
  <jdbc-datasource>
    <url>jdbc:postgresql://localhost:5432/jiradb</url>
    <connection-properties>tcpKeepAlive=true;socketTimeout=240</connection-properties>
    <driver-class>org.postgresql.Driver</driver-class>
    <username>jiraconfuser</username>
    <password>YourStrongPassword</password>
    <pool-min-size>40</pool-min-size>
    <pool-max-size>40</pool-max-size>
    <pool-max-wait>30000</pool-max-wait>
    <min-evictable-idle-time-millis>4000</min-evictable-idle-time-millis>
    <time-between-eviction-runs-millis>5000</time-between-eviction-runs-millis>
    <pool-max-idle>40</pool-max-idle>
    <pool-remove-abandoned>true</pool-remove-abandoned>
    <pool-remove-abandoned-timeout>300</pool-remove-abandoned-timeout>
  </jdbc-datasource>
</jira-database-config>
Save and exit the file. Then, modify the host entry under the “# IPv4 local connections:” section in the pg_hba.conf file:
sudo vim /var/lib/pgsql/data/pg_hba.conf
host all all 127.0.0.1/32 trust
Save and exit the file. Then, restart postgres and Jira.
sudo systemctl reload postgresql; sudo systemctl restart postgresql
sudo /opt/atlassian/jira/bin/stop-jira.sh && sudo /opt/atlassian/jira/bin/start-jira.sh
Run Jira as a systemd service |
Creating a systemd service file for Jira will allow you to manage Jira as a system service, making it easier to start, stop, and monitor. Here’s a step-by-step guide on how to create and configure a systemd service file for Jira:
Step 1: Create the Jira Systemd Service File |
Create a new service file for Jira in the /etc/systemd/system directory:
sudo vim /etc/systemd/system/jira.service
Step 2: Define the Jira Service |
Add the following content to the jira.service file. Adjust the paths to match your Jira installation and home directories:
					[Unit]
Description=Atlassian Jira
After=network.target

[Service]
Type=forking
User=jira2
Group=root
PIDFile=/opt/atlassian/jira/work/catalina.pid
ExecStart=/opt/atlassian/jira/bin/start-jira.sh
ExecStartPost=/usr/bin/echo "Jira started successfully."
ExecStop=/opt/atlassian/jira/bin/stop-jira.sh
ExecStopPost=/usr/bin/echo "Jira stopped."
ExecReload=/bin/kill -s HUP $MAINPID
LimitNOFILE=4096

[Install]
WantedBy=multi-user.target
Step 3: Adjust Permissions |
Ensure the Jira installation directory and the service script are owned by the jira2 user. If the jira2 user does not exist, create it:
sudo useradd -r -m -U -d /opt/atlassian/jira2 -s /bin/bash jira2
Change ownership of the Jira directories to the jira user:
sudo chown -R jira2:root /opt/atlassian/jira
sudo chown -R jira2:root /var/atlassian/application-data/jira
Step 4: Reload Systemd |
Reload the systemd daemon to apply the new service file:
sudo systemctl daemon-reload
Step 5: Enable and Start the Jira Service |
Enable the Jira service to start on boot:
sudo systemctl enable --now jira.service
Created symlink /etc/systemd/system/multi-user.target.wants/jira.service → /etc/systemd/system/jira.service.
Step 6: Verify the Jira Service |
Check the status of the Jira service to ensure it is running correctly:
sudo systemctl status jira.service
					● jira.service - Atlassian Jira
     Loaded: loaded (/etc/systemd/system/jira.service; enabled; preset: disabled)
     Active: active (running) since Thu 2024-07-11 08:12:07 EDT; 1min 25s ago
    Process: 38907 ExecStart=/opt/atlassian/jira/bin/start-jira.sh (code=exited, status=0/SUCCESS)
    Process: 38974 ExecStartPost=/usr/bin/echo Jira started successfully. (code=exited, status=0/SUCCESS)
   Main PID: 38973 (java)
      Tasks: 88 (limit: 23168)
     Memory: 1.6G
        CPU: 2min 14.397s
     CGroup: /system.slice/jira.service
             └─38973 /opt/atlassian/jira/jre//bin/java -Djava.util.logging.config.file=/opt/atlassian/jira/conf/logging.properties
...omitted for brevity...
You should see output indicating that the Jira service is active and running. If there are any errors, review the systemd logs for more information:
sudo journalctl -u jira.service
					Jul 11 08:12:07 jira.dev.naijalabs.net systemd[1]: Starting Atlassian Jira...
Jul 11 08:12:07 jira.dev.naijalabs.net start-jira.sh[38907]: To run Jira in the foreground, start the server with start-jira.sh -fg
Jul 11 08:12:07 jira.dev.naijalabs.net start-jira.sh[38907]: executing as current user
Jul 11 08:12:07 jira.dev.naijalabs.net start-jira.sh[38907]: /opt/atlassian/jira/bin/setenv.sh: line 59: ulimit: open files: cannot
...omitted for brevity...
Now that you’ve enabled Jira to run as a systemd service, it will automatically start whenever your machine is rebooted.
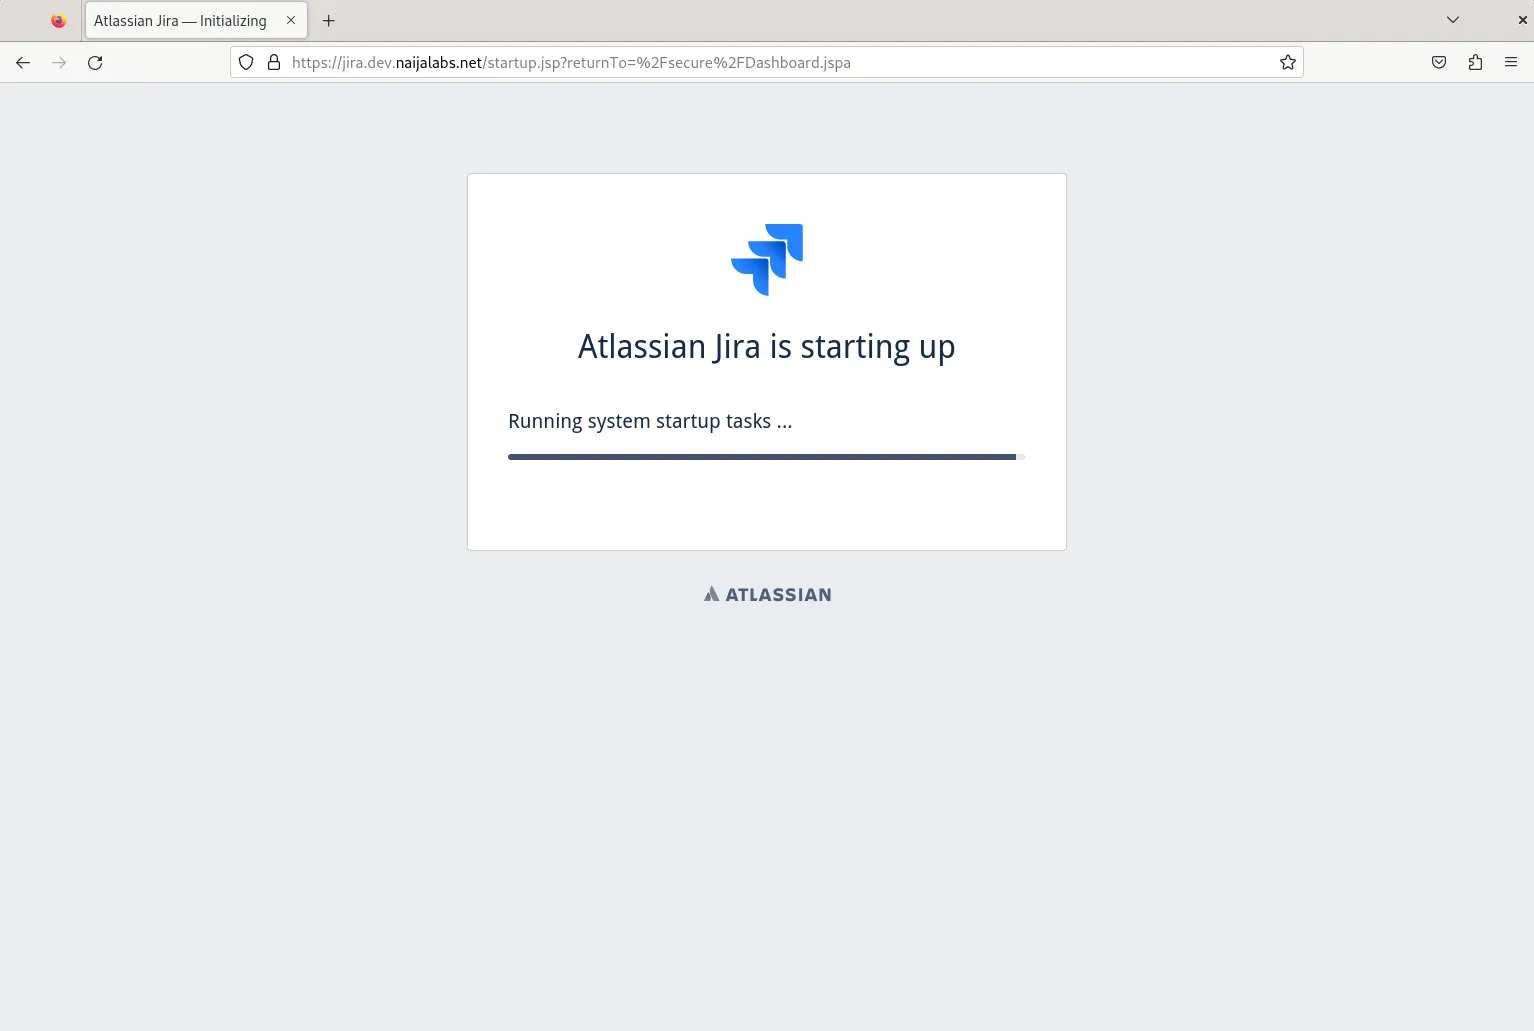
Photo by admingeek from Infotechys
Run Jira behind a NGINX reverse proxy |
Running Jira behind an NGINX reverse proxy can provide additional security, better load balancing, and SSL termination capabilities. This guide will walk you through the steps to configure NGINX as a reverse proxy for Jira on a RHEL 9 or CentOS 9 system.
Step 1: Install NGINX |
First, install NGINX using the package manager.
sudo dnf install nginx -y
Step 2: Configure NGINX |
Create a new configuration file for Jira in the /etc/nginx/conf.d directory.
sudo vim /etc/nginx/conf.d/jira.conf
Add the following configuration to the jira.conf file:
					server {
    listen 80;
    server_name your-domain.com;

    location / {
        proxy_set_header X-Real-IP $remote_addr;
        proxy_set_header X-Forwarded-For $proxy_add_x_forwarded_for;
        proxy_set_header Host $host;
        proxy_set_header X-Forwarded-Proto $scheme;

        proxy_pass http://localhost:8080;
        proxy_redirect off;
    }
}
Replace your-domain.com with your actual domain name and :8080 with whatever port Jira is running on. This configuration sets up NGINX to forward all HTTP traffic to Jira, which is running on port 8080.
Step 3: Enable and Start NGINX |
Enable NGINX to start on boot and start the service:
sudo systemctl enable --now nginx
Step 4: Enable Secure Network Connections |
This command is necessary to configure SELinux settings to allow the web server (NGINX or Apache) to make network connections, which is required for proxying requests to Jira. The httpd_can_network_connect boolean permits HTTPD scripts and modules to initiate network connections, and the nis_enabled boolean is used to enable the use of NIS (Network Information Service) for user authentication, though it’s not typically required for most Jira setups. Setting these booleans ensures the web server can communicate with Jira and other network services securely.
sudo setsebool -P httpd_can_network_connect 1; sudo setsebool -P nis_enabled 1
Step 5: Adjust Jira Configuration |
Update the Jira configuration to be aware of the reverse proxy. Edit the server.xml file in the Jira installation directory:
sudo nano /opt/atlassian/jira/conf/server.xml
Locate the <Connector> element and update it to include the proxyName, proxyPort, and scheme attributes:
<Connector port="8080" relaxedPathChars="[]|" relaxedQueryChars="[]|{}^\`"<>"
maxThreads="150" minSpareThreads="25"
connectionTimeout="20000" enableLookups="false"
maxHttpHeaderSize="8192"
protocol="HTTP/1.1" useBodyEncodingForURI="true"
redirectPort="8443" acceptCount="100"
disableUploadTimeout="true"
bindOnInit="false"
proxyName="your-domain.com" proxyPort="80" scheme="http"/>
Save and close the file.
Step 6: Restart Jira |
Restart the Jira service to apply the changes:
sudo systemctl restart jira
If you have not enabled Jira to run as a systemd service, run the following commands:
sudo /opt/atlassian/jira/bin/stop-jira.sh && sudo /opt/atlassian/jira/bin/start-jira.sh
Step 7: Test the Configuration |
Open your web browser and navigate to http://your-domain.com. You should see the Jira login page, indicating that Jira is successfully running behind the NGINX reverse proxy.
Optional: Enable SSL Using LetsEncrypt |
For better security, you should enable SSL on NGINX. This requires obtaining an SSL certificate, which can be done using LetsEncrypt.
Install Certbot |
Certbot is a tool to obtain and manage SSL certificates from LetsEncrypt.
sudo dnf install certbot python3-certbot-nginx -y
Obtain an SSL Certificate |
Run Certbot to obtain an SSL certificate for your domain:
sudo certbot --nginx -d your-domain.com
Follow the prompts to complete the certificate installation.
Update NGINX Configuration |
Certbot will automatically update your NGINX configuration to use SSL. However, you should verify the configuration by checking the /etc/nginx/conf.d/jira.conf file. It should look something like this:
					server {
    listen 80;
    server_name your-domain.com;
    return 301 https://$host$request_uri;
}

server {
    listen 443 ssl;
    server_name your-domain.com;

    ssl_certificate /etc/letsencrypt/live/your-domain.com/fullchain.pem;
    ssl_certificate_key /etc/letsencrypt/live/your-domain.com/privkey.pem;

    location / {
        proxy_set_header X-Real-IP $remote_addr;
        proxy_set_header X-Forwarded-For $proxy_add_x_forwarded_for;
        proxy_set_header Host $host;
        proxy_set_header X-Forwarded-Proto $scheme;

        proxy_pass http://localhost:8080;
        proxy_redirect off;
    }
}
By following these steps, you have configured Jira to run behind an NGINX reverse proxy on RHEL 9 or CentOS 9. This setup provides better security, load balancing, and the ability to handle SSL termination, enhancing the overall performance and security of your Jira instance.
Installing Jira on RHEL 9 or CentOS 9 involves several steps, but following this guide will help you set them up efficiently. These powerful tools can transform your team’s collaboration and project management, making them worth the effort. For any issues encountered during installation, refer to the additional resources section.
Did you find this article useful? Your feedback is invaluable to us! Please feel free to share your thoughts in the comments section below.
| Step | Command |
|---|---|
| Update System | sudo dnf update -y |
| Install Essential Packages | sudo dnf install wget nano -y |
| Install OpenJDK 11 | sudo dnf install java-11-openjdk-devel -y |
| Install PostgreSQL | sudo dnf install postgresql-server postgresql-contrib -y |
| Initialize Database | sudo postgresql-setup --initdb |
| Start and Enable PostgreSQL | sudo systemctl start postgresql && sudo systemctl enable postgresql |
| Create PostgreSQL User and DB | createuser jiraconfuser --pwprompt && createdb jiradb --owner=jiraconfuser && createdb confluencedb --owner=jiraconfuser |
| Configure PostgreSQL Connections | Edit pg_hba.conf and restart PostgreSQL |
| Download Jira | wget https://product-downloads.atlassian.com/software/jira/downloads/atlassian-jira-software-9.12.11-x64.bin |
| Install Jira | sudo ./atlassian-jira-software-9.12.11-x64.bin |
| Configure Jira Database Connection | Edit dbconfig.xml |
| Start Jira | sudo /opt/atlassian/jira/bin/start-jira.sh |
Here are some helpful links to help you along your journey to mastering the Jira software!
| Atlassian Community | Initiate discussions or get answers to questions from experts in the community. |
| Jira 101 Guide | Official Jira Documentation |
| Jira Troubleshooting Articles | Reference the Jira Troubleshooting Articles Page |
Related Posts
In this guide, we’ll walk you through the process of installing and configuring MediaWiki on RHEL 9 or CentOS 9, enabling you to create your

In this comprehensive guide, we’ll explore step-by-step how to install LAMP stack on Ubuntu 23.10, ensuring you have the foundation to power your web projects

Learn how to effortlessly install GitLab CE on your RHEL 9 or CentOS 9 system with our comprehensive guide. Follow our step-by-step instructions for a