Automating Zabbix Installations Using Ansible simplifies the deployment and configuration of Zabbix, an open-source monitoring solution. This comprehensive guide provides step-by-step instructions, essential YAML configurations,

In this article, we will explore how to implement security warning banners in Zabbix to enhance compliance and user awareness. This step-by-step guide covers creating a banner file and modifying the login page for effective implementation.
In today’s digital landscape, ensuring that your systems are secure and compliant with government regulations is crucial. For organizations using Zabbix for monitoring, implementing a security warning banner is a proactive step to protect sensitive information and inform users of their responsibilities. In this guide, we’ll walk through the steps to create a security warning banner in Zabbix, optimizing the process for ease and effectiveness.
As of this publication, Zabbix does not offer a built-in method for implementing security warning banners. However, creating one is straightforward and simply requires adding a few lines of PHP code, which we’ll detail in this article.
Zabbix is an open-source monitoring tool that allows organizations to monitor their network, servers, applications, and cloud services. Its flexibility and powerful features make it an ideal choice for businesses looking to maintain optimal performance while ensuring security.
Implementing security warning banners in applications such as Zabbix is important for several reasons:
We assume you already have a running instance of Zabbix in your environment. If you need assistance with installation, please refer to our previous articles or consult the Zabbix Documentation.
Step 1: Navigate to the Zabbix Directory |
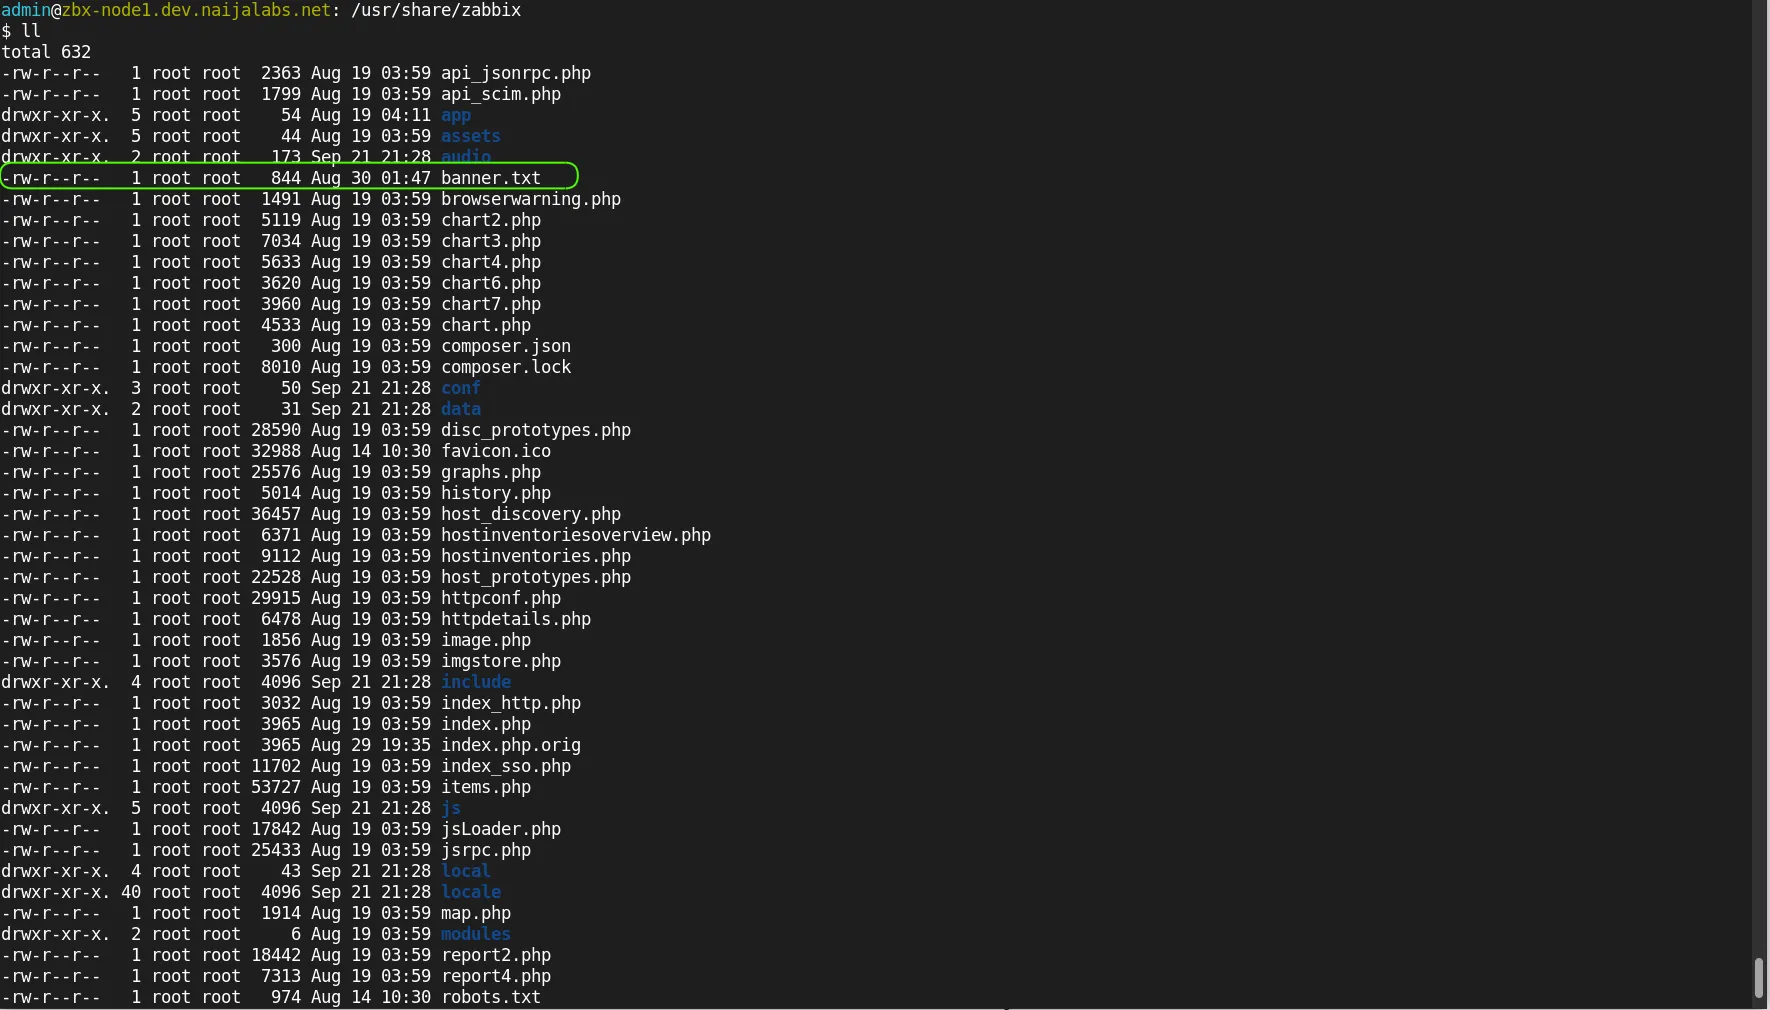
First, access the server where Zabbix is installed. You will need terminal access to perform the following commands. Use the following command to navigate to the Zabbix directory:
$ cd /usr/share/zabbix

Photo by admingeek from Infotechys
Step 2: Create the Banner File |
Next, create a file named banner.txt to store your security warning message.
$ sudo vim banner.txt
Populate the file with the following content:
					________________________________________

You are accessing a U.S. Government (USG) Information System (IS) that is provided for USG-authorized use only.

By using this IS (which includes any device attached to this IS), you consent to the following conditions:

-The USG routinely intercepts and monitors communications on this IS for purposes including, but not limited to, penetration testing, COMSEC monitoring, network operations and defense, personnel misconduct (PM), law enforcement (LE), and counterintelligence (CI) investigations.

-At any time, the USG may inspect and seize data stored on this IS.

-Communications using, or data stored on, this IS are not private, are subject to routine monitoring, interception, and search, and may be disclosed or used for any USG-authorized purpose.
________________________________________
The banner message is sourced from the STIG Viewer page and follows the example provided by the Department of Defense (DoD) security warning banner. Please replace the text with content that aligns with your organization’s standards.
Step 3: Backup the General Login File |
Before making changes to the Zabbix login page, it’s important to back up the original file. Run the following command:
$ sudo cp include/views/general.login.php include/views/general.login.php.bak
The general.login.php file contains the code used to render the Zabbix login page.
Step 4: Edit the Login Page File |
Open the general.login.php file using vim or your preferred text editor:
$ sudo vim include/views/general.login.php
Step 5: Add Code to Load the Banner |
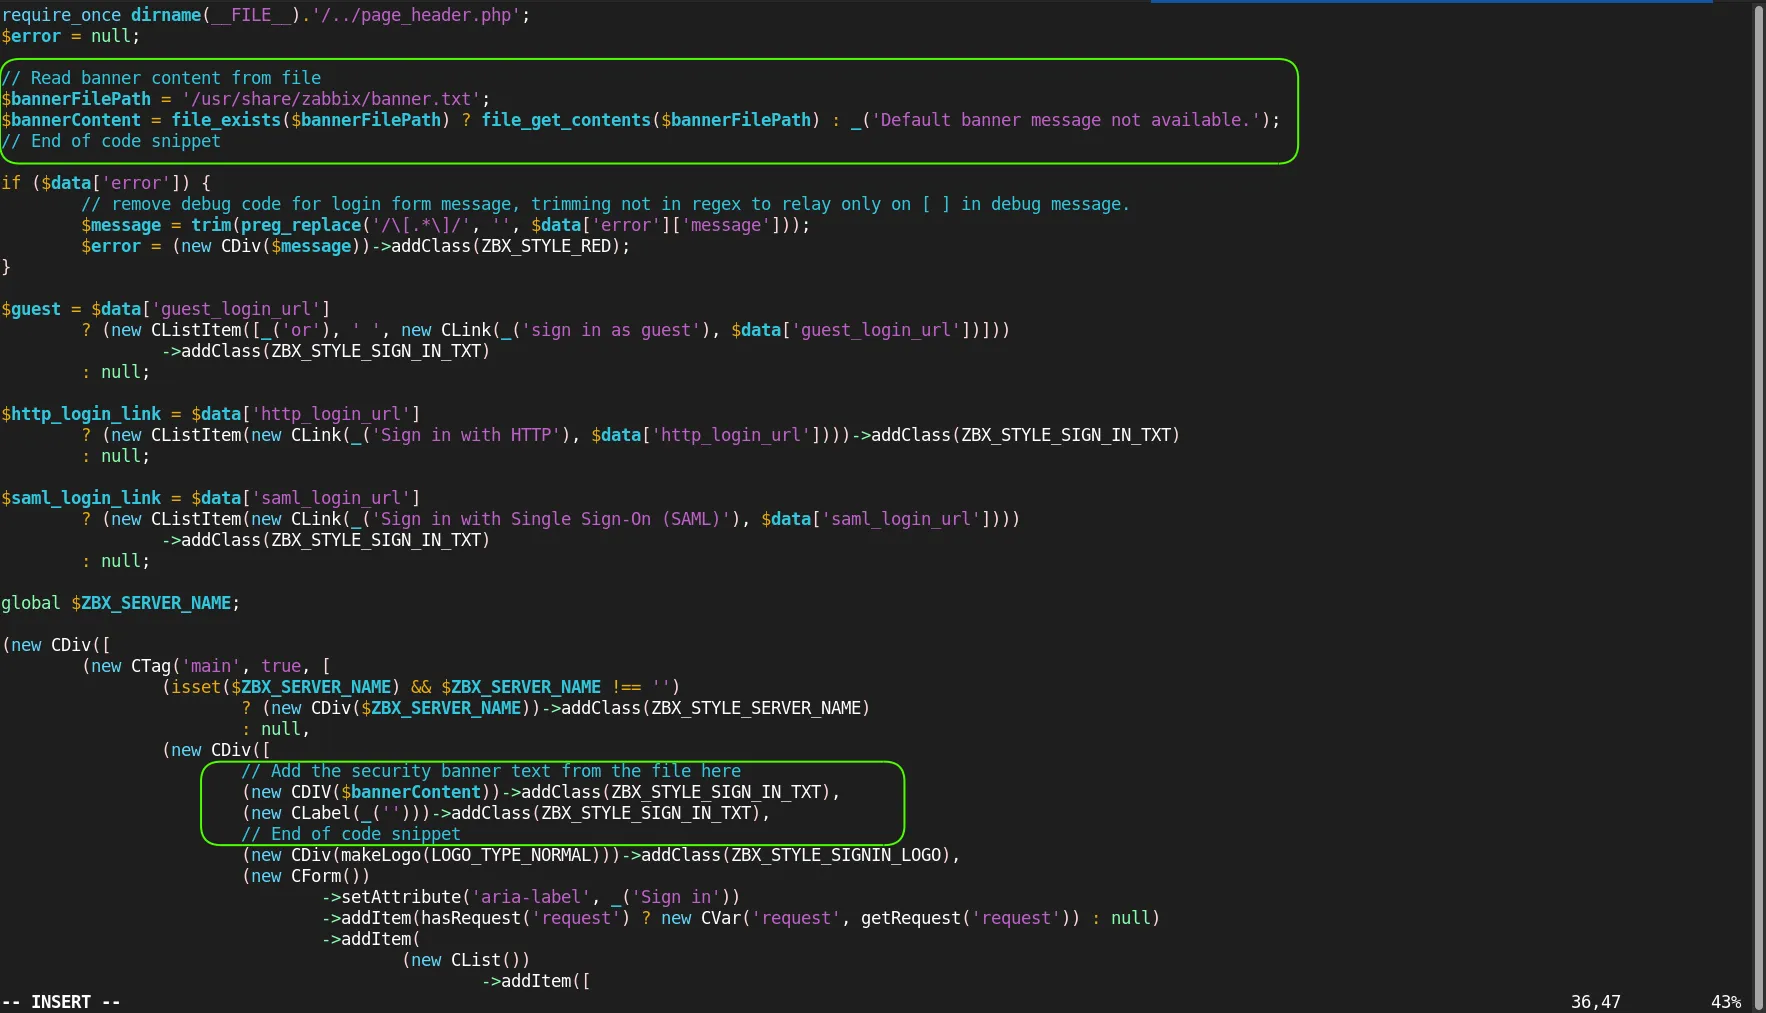
Navigate to line 33 or just below the line that starts with $error = null; and insert the following code snippet to read the banner content from the file:
					// Read banner content from file
$bannerFilePath = '/usr/share/zabbix/banner.txt';
$bannerContent = file_exists($bannerFilePath) ? file_get_contents($bannerFilePath) : _('Default banner message not available.');
// End of code snippet
In vim, you can navigate to the desired line by typing :33 and pressing Enter.
Please Note: The line numbers will vary depending on the version of Zabbix you have installed. For example, on Zabbix 6.4.18, navigate to lines :33 and :61 on Zabbix 7.0.4 it’s lines :28 and :56.
Step 6: Display the Banner on the Login Page |
Now, scroll to line 61, just below the line that starts with (new CDiv([. Add the following lines to include the security banner in the login page:
					// Add the security banner text from the file here
(new CDIV($bannerContent))->addClass(ZBX_STYLE_SIGN_IN_TXT),
(new CLabel(_('')))->addClass(ZBX_STYLE_SIGN_IN_TXT),
// End of code snippet

Photo by admingeek from Infotechys
Step 7: Save and Exit |
Make sure the new code is aligned correctly. Save your changes and exit the editor. In vim, you can do this by pressing ESC, then typing :wq and hitting Enter.
Step 8: Verify the Implementation |
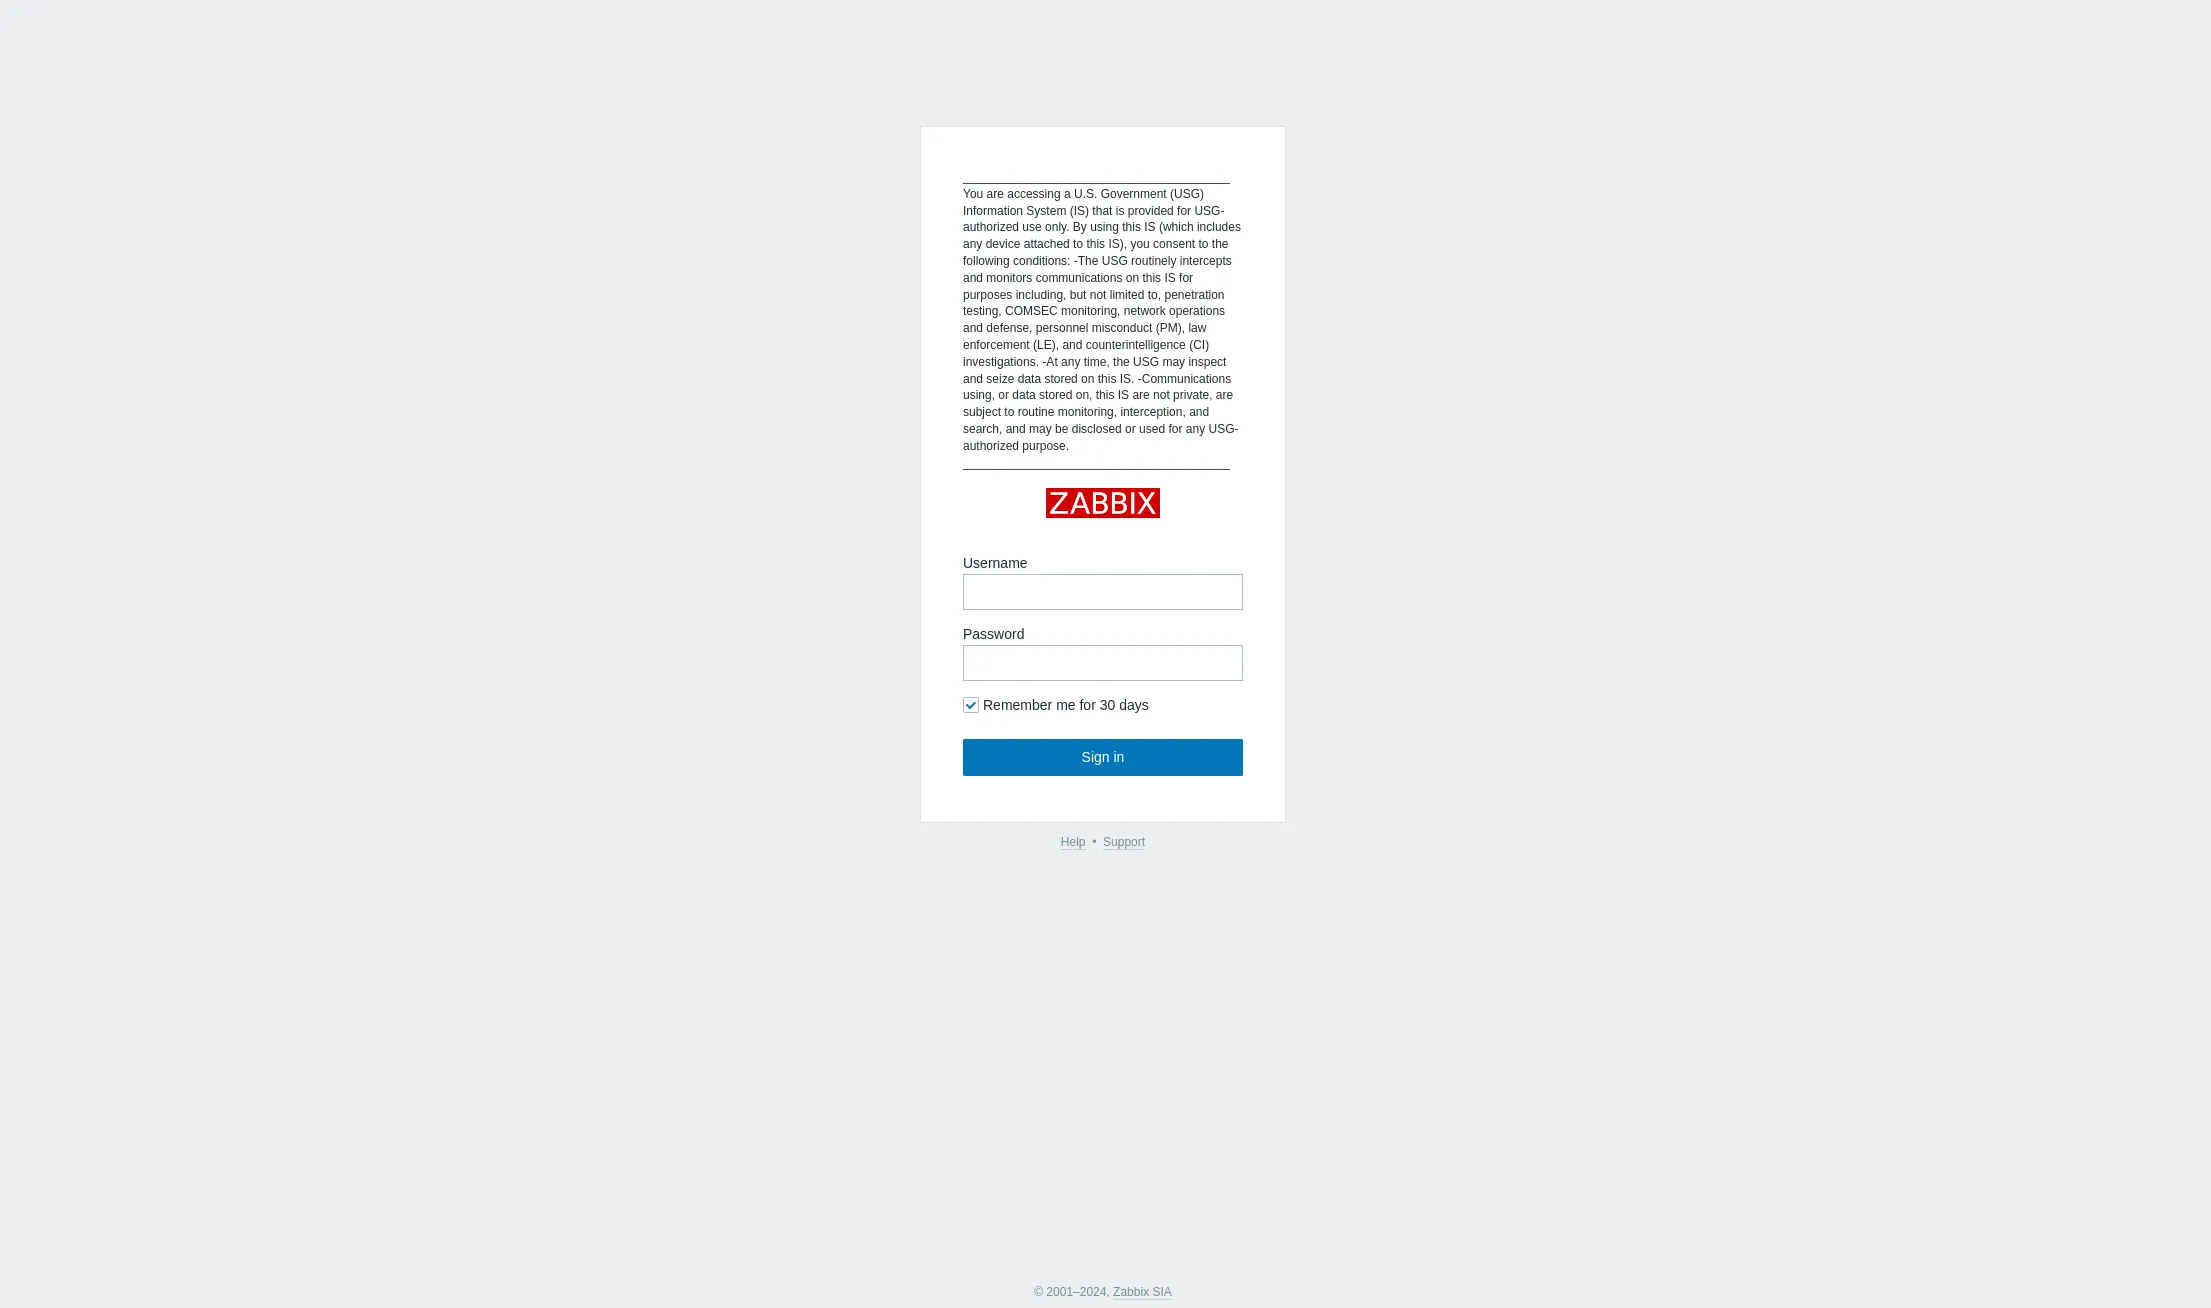
Open your web browser and navigate to your Zabbix login page. You should now see your security warning banner displayed prominently above the login fields.

Photo by admingeek from Infotechys
By implementing a security warning banner in Zabbix, you enhance your organization’s security posture while informing users of their responsibilities. This simple yet effective addition not only helps in compliance but also fosters a culture of security awareness. Follow the steps outlined in this guide to ensure your Zabbix monitoring environment is both secure and compliant.
Did you find this article useful? Your feedback is invaluable to us! Please feel free to share your thoughts in the comments section below.

Automating Zabbix Installations Using Ansible simplifies the deployment and configuration of Zabbix, an open-source monitoring solution. This comprehensive guide provides step-by-step instructions, essential YAML configurations,

Learn how to install Zabbix with PostgreSQL on RHEL 9 | CentOS 9 with our comprehensive step-by-step guide. Follow clear instructions with CLI examples and

This blog post covers how to install and configure Zabbix version 7.0-2 on RHEL 9 in detail, including prerequisites, step-by-step instructions, and troubleshooting tips. Table
