Commands
Learn how to install Podman on Ubuntu 24.04 Server with this comprehensive guide. Discover key features, essential commands, and troubleshooting tips to effectively manage your


Learn how to install Podman on AlmaLinux 9.5 with a step-by-step guide. Set up Podman containers, use Podman Compose, and manage multi-container applications securely.
In the world of containerization, Podman has gained considerable attention as an alternative to Docker due to its daemon-less architecture and enhanced security features. AlmaLinux, a popular RHEL (Red Hat Enterprise Linux) clone, is widely used in server environments, and installing Podman on AlmaLinux 9.5 allows administrators to easily manage containers without the need for a central daemon. In this guide, we will walk through the process of installing Podman on AlmaLinux 9.5, step by step. Additionally, we’ll explore some useful tips, troubleshooting advice, and essential commands to make your containerization experience seamless.
What is Podman? |
Before diving into the installation process, let’s briefly understand what Podman is and why it’s gaining popularity in the world of containerization.
Podman is an open-source container management tool developed by Red Hat. It provides a lightweight, daemon-less, and secure alternative to Docker. Unlike Docker, Podman runs containers without requiring a background service, offering better security by not running as a root user. Its compatibility with Docker images and commands makes transitioning from Docker to Podman easy for developers and system administrators.
Some key features of Podman include:
In this guide, we will focus on the installation of Podman on AlmaLinux 9.5.
Prerequisites for Installing Podman on AlmaLinux 9.5 |
Before proceeding with the installation steps, ensure your system meets the following requirements:
Step 1: Update AlmaLinux 9.5 System |
Before installing any software, it’s always a good practice to update your system. Running outdated packages may lead to compatibility issues. To ensure your AlmaLinux system is up-to-date, execute the following commands:
sudo dnf update -y
This command will update all the packages on your system to their latest versions. After updating, it’s a good idea to reboot your system:
sudo reboot
Step 2: Install Podman from AlmaLinux 9.5 Repositories |
AlmaLinux 9.5 has Podman available directly from the official repositories, making installation easy with the DNF package manager.
Search for Podman package |
sudo dnf search podman
This will show you all available packages related to Podman. Now, let’s install the package.
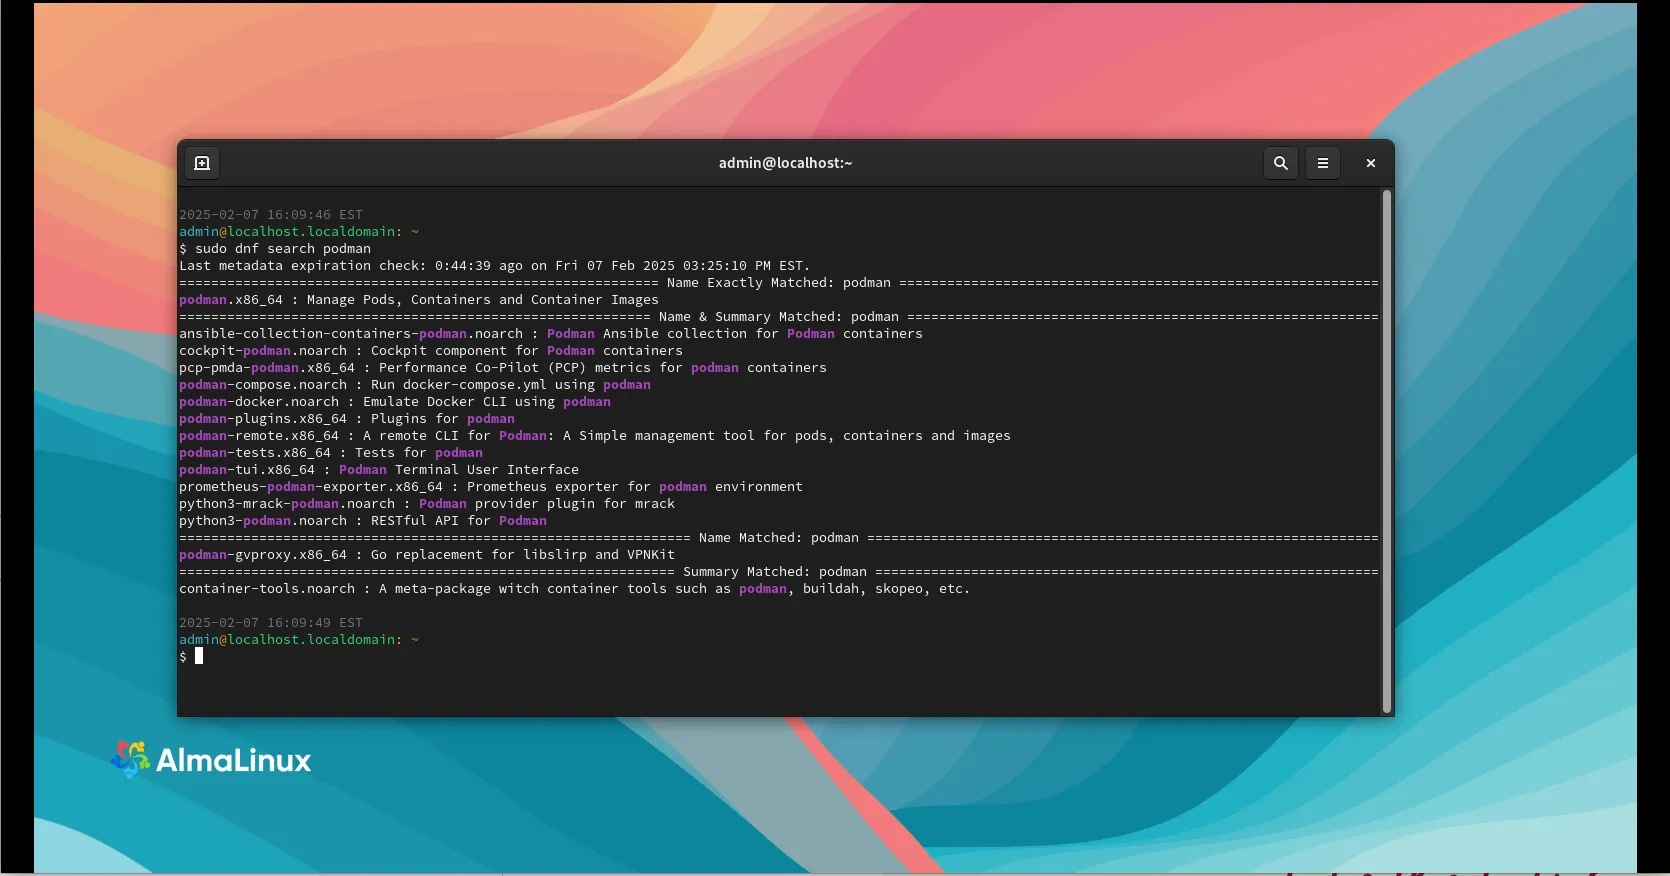
Photo by admingeek from Infotechys
Install Podman |
sudo dnf install -y podman
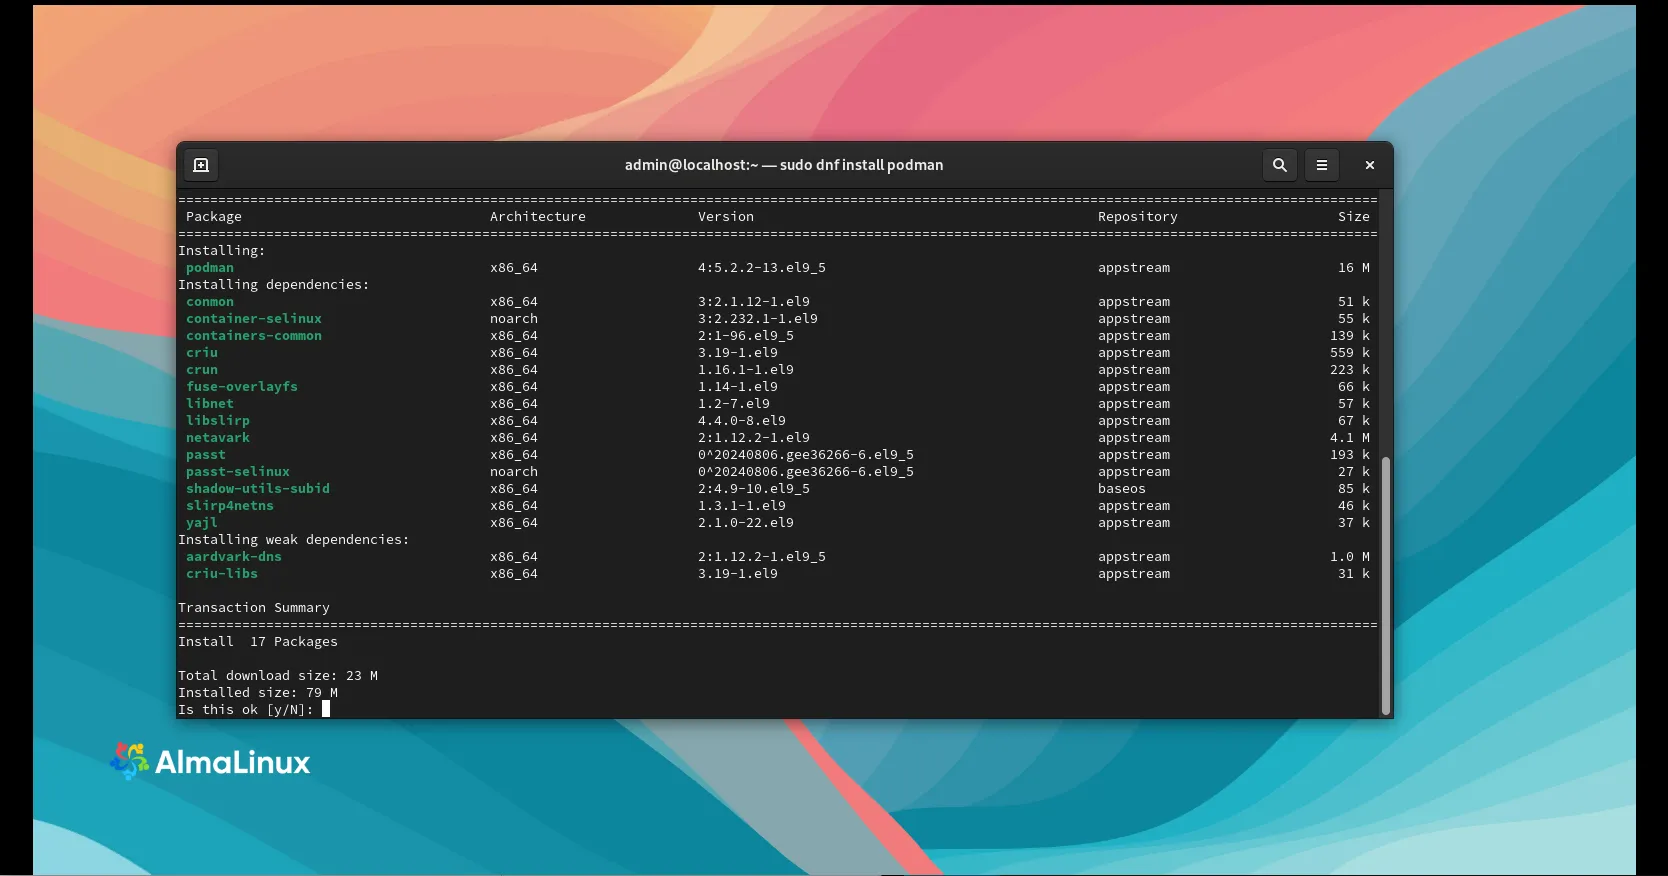
Photo by admingeek from Infotechys
The command will automatically download and install Podman and its dependencies. Once the installation is complete, verify the installation by checking the Podman version:
podman --version
podman version 5.2.2
This will output the installed version of Podman.
Step 3: Configuring Podman on AlmaLinux 9.5 |
By default, Podman is configured to run containers as the root user. However, one of the key features of Podman is that it can run containers in a rootless mode, which means you do not need root privileges to use it.
Run Podman as a Non-Root User |
To run Podman without root privileges, ensure that your user is part of the podman group. To create the group, run:
sudo groupadd podman && sudo usermod -aG podman $(whoami)
Once you add the user to the Podman group, log out and log back in for the changes to take effect.
Verify Rootless Mode |
To verify that you can use Podman in rootless mode, try running a simple container:
podman run --rm -it alpine
					Resolved "alpine" as an alias (/etc/containers/registries.conf.d/000-shortnames.conf)
Trying to pull docker.io/library/alpine:latest...
Getting image source signatures
Copying blob 1f3e46996e29 done   |
Copying config b0c9d60fc5 done   |
Writing manifest to image destination
/ # cat /etc/os-release
NAME="Alpine Linux"
ID=alpine
VERSION_ID=3.21.2
PRETTY_NAME="Alpine Linux v3.21"
HOME_URL="https://alpinelinux.org/"
BUG_REPORT_URL="https://gitlab.alpinelinux.org/alpine/aports/-/issues"
/ #
This command will pull the Alpine Linux image and run it in an interactive terminal session. Once done, the container will be automatically removed (--rm).
Step 4: Using Podman for Basic Container Management |
Now that Podman is installed and configured, let’s dive into some basic commands that will help you get started.
| Command | Description |
|---|---|
podman pull <image> | Pulls an image from a container registry. |
podman run <image> | Runs a container from a pulled image. |
podman ps | Lists running containers. |
podman ps -a | Lists all containers (including stopped ones). |
podman stop <container_id> | Stops a running container. |
podman rm <container_id> | Removes a container. |
podman images | Lists available images. |
podman rmi <image_id> | Removes an image from your system. |
For example, to pull and run a simple nginx container, use the following commands:
podman pull nginx && podman run -d -p 8080:80 nginx
					✔ docker.io/library/nginx:latest
Trying to pull docker.io/library/nginx:latest...
Getting image source signatures
Copying blob 6c78b0ba1a32 done   |
Copying blob c29f5b76f736 done   |
Copying blob 24ff42a0d907 done   |
Copying blob e19db8451adb done   |
Copying blob c558df217949 done   |
Copying blob 976e8f6b25dd done   |
Copying blob 84cade77a831 done   |
Copying config 97662d2441 done   |
Writing manifest to image destination
97662d24417b316f60607afbca9f226a2ba58f09d642f27b8e197a89859ddc8e
8dd1ae6f1c3ce0b83518eb5eea2016e4e096d2cb2d7c6140f5bfae9924aa1289
This will pull the nginx image and run it in detached mode (-d) while mapping port 8080 on the host to port 80 on the container.
Note: To access via a web browser, make sure the firewall is configured correctly by enabling firewall-cmd and opening ports 8080/tcp and 80/tcp.
sudo firewall-cmd --permanent --add-port=8080/tcp --add-port=80/tcp; sudo firewall-cmd --reload
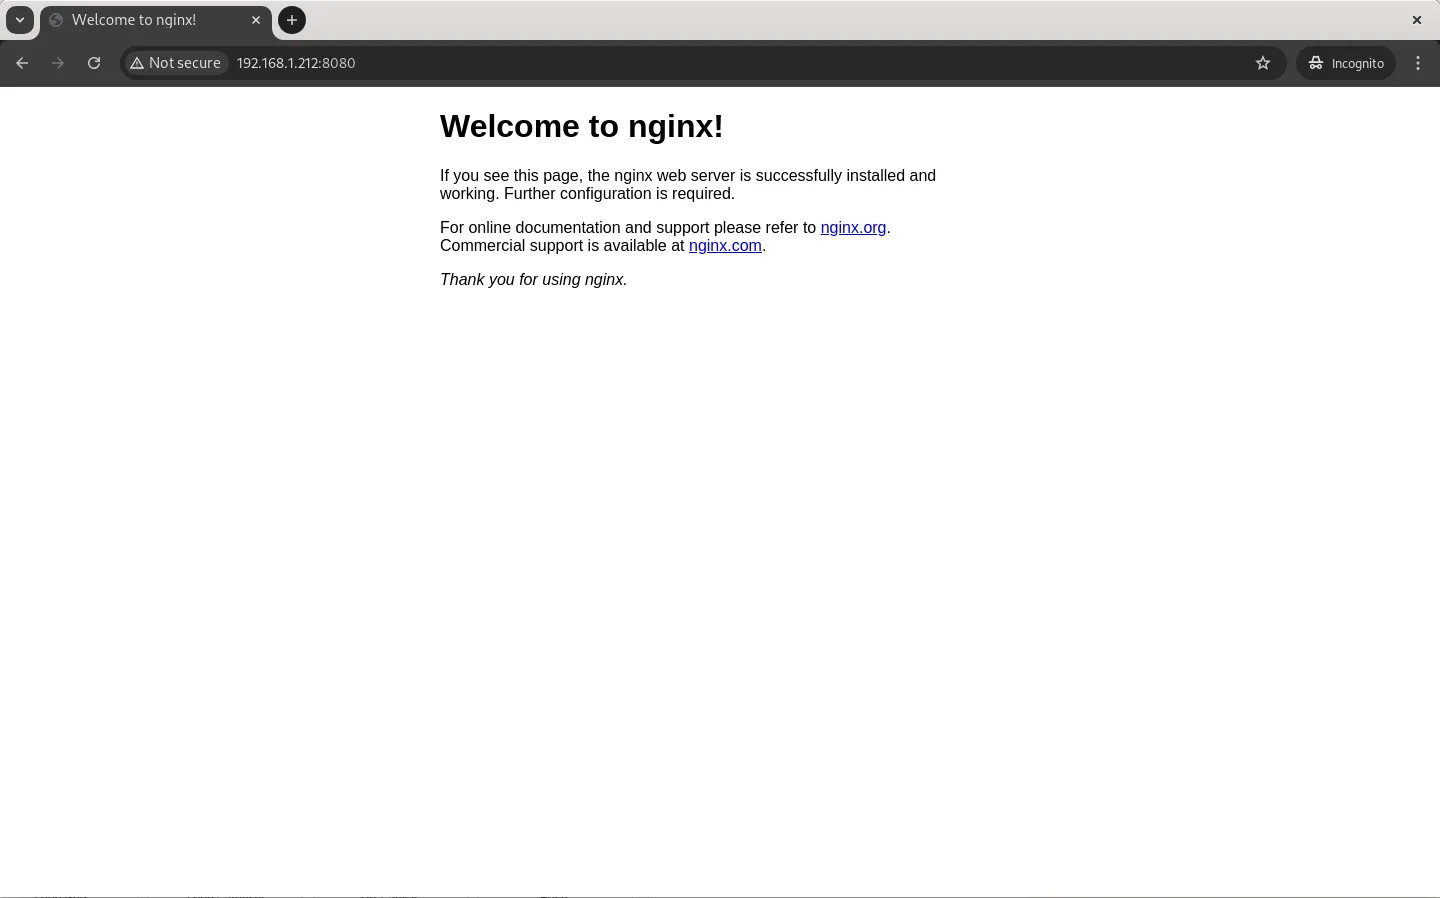
Photo by admingeek from Infotechys
Step 5: Installing Podman Compose for Multi-Container Applications |
Podman supports multi-container applications through Podman Compose, a tool similar to Docker Compose. It allows you to define and manage multi-container environments with ease.
To install Podman Compose, follow these steps:
Install pip (Python’s package manager) |
sudo dnf install python3-pip -y
Install Podman Compose using pip |
pip3 install podman-compose
					Defaulting to user installation because normal site-packages is not writeable
Collecting podman-compose
  Downloading podman_compose-1.3.0-py2.py3-none-any.whl (41 kB)
     |████████████████████████████████| 41 kB 52 kB/s
Collecting python-dotenv
  Downloading python_dotenv-1.0.1-py3-none-any.whl (19 kB)
Requirement already satisfied: pyyaml in /usr/lib64/python3.9/site-packages (from podman-compose) (5.4.1)
Installing collected packages: python-dotenv, podman-compose
Successfully installed podman-compose-1.3.0 python-dotenv-1.0.1
Verify the installation |
podman-compose --version
					podman-compose version 1.3.0
podman version 5.2.2
Now you can use Podman Compose to manage multi-container applications with a podman-compose.yml file, just like Docker Compose.
Step 6: Running Containers with Podman on AlmaLinux 9.5 |
Once you’ve installed Podman and Podman Compose, you can easily deploy containers. Here’s an example of a basic Podman Compose setup.
Create a directory for your project:
mkdir my_project && cd my_project
Create a podman-compose.yml file:
vim podman-compose.yml
					version: '3'
services:
  web:
    image: nginx:latest
    ports:
      - "8080:80"
Run the application with:
podman-compose up -d
					d087b6010e6686ca0426cbff9f1c3aa9b4aec8138c7e7c7c244bcaf71c8a0b5a
73dc82f924dd38b3f79d7e0ba58525ca01ea05c78eb125e6b2d6fce1b6325665
my_project_web_1
This will start the Nginx container and expose it on port 8080 of your host system.
Podman Daemon Issues |
Since Podman doesn’t rely on a daemon, if you encounter any issues related to container management, make sure that you are using the correct user privileges (rootless mode) and that there are no conflicting processes running.
Error: “Podman not found” |
If Podman is not found after installation, ensure that the correct path is added to your system’s PATH variable. Verify this by running:
echo $PATH
If Podman is not in the PATH, you may need to source your profile configuration:
source ~/.bash_profile
Podman is a powerful, secure, and efficient tool for container management, offering a versatile alternative to Docker. By installing Podman on AlmaLinux 9.5, you are empowering your system with a modern approach to containerization that is both secure and lightweight. Whether you’re using it in rootless mode or integrating it with Podman Compose for multi-container applications, Podman provides all the functionality you need for container orchestration.
With the simple commands and steps outlined in this guide, you can easily start using Podman on AlmaLinux 9.5 and take advantage of its benefits for your development and production environments.
Did you find this article useful? Your feedback is invaluable to us! Please feel free to share this post!
Learn how to install Podman on Ubuntu 24.04 Server with this comprehensive guide. Discover key features, essential commands, and troubleshooting tips to effectively manage your
Discover how to enhance Podman container management with systemd using Quadlets in this comprehensive guide. Learn about the benefits, setup process, and performance improvements, along
This guide examines how to setup an HTTPS server using Podman, a containerization tool, thereby fortifying a secure and streamlined hosting environment for your web