Commands
In this comprehensive guide, we’ll walk you through the process of creating and deploying a LAMP stack on Minikube, a tool that enables you to

Step‑by‑step guide to installing Minikube on CentOS Stream 10: Docker or KVM2 setup, prerequisites, kubectl, starting a local Kubernetes cluster, dashboard, and troubleshooting.
CentOS Stream 10 brings updated kernels (v6.x) and enterprise‑grade stability. Running Minikube, the local Kubernetes environment, on this modern base gives you a solid platform to experiment with container orchestration, CI pipelines, and microservice deployments—all on the edge of enterprise Linux.
| Component | Minimum Requirement | Recommendation |
|---|---|---|
| CPU | 2 cores | 4 cores (or more) |
| RAM | 2 GB | 4 GB or higher |
| Disk space | ≥ 20 GB | 20–40 GB (depending on workloads) |
| Container runtime | Docker, Podman, or CRI‑O | Docker or KVM2 driver |
| Virtualization | KVM2 (preferred) | libvirt + KVM / Docker engine |
|
| Hostname | minikube.dev.naijalabs.net |
| IP address | 192.168.1.230 |
| RAM | 8 |
| Cores | 4 |
| Docker Version | Docker version 28.3.2, build 578ccf6 |
| Kubectl Version | { “clientVersion”: { “major”: “1”, “minor”: “31”, “gitVersion”: “v1.31.0”, “gitCommit”: “9edcffcde5595e8a5b1a35f88c421764e575afce”, “gitTreeState”: “clean”, “buildDate”: “2024-08-13T07:37:34Z”, “goVersion”: “go1.22.5”, “compiler”: “gc”, “platform”: “linux/amd64” }, “kustomizeVersion”: “v5.4.2” } |
| Kubernetes Version | v1.32.0 |
| Minikube Version | v1-36.0 (latest as of date of this publication) |
Update your system packages:
sudo dnf update -y
Install prerequisites including conntrack (mandatory for Kubernetes networking):
sudo dnf install -y conntrack dnf-utils epel-release
While Minikube supports other runtimes, Docker is widely supported:
sudo dnf config-manager --add-repo https://download.docker.com/linux/centos/docker-ce.repo
sudo dnf install -y docker-ce docker-ce-cli containerd.io docker-buildx-plugin docker-compose-plugin
sudo systemctl enable --now docker
sudo usermod -aG docker $(whoami)
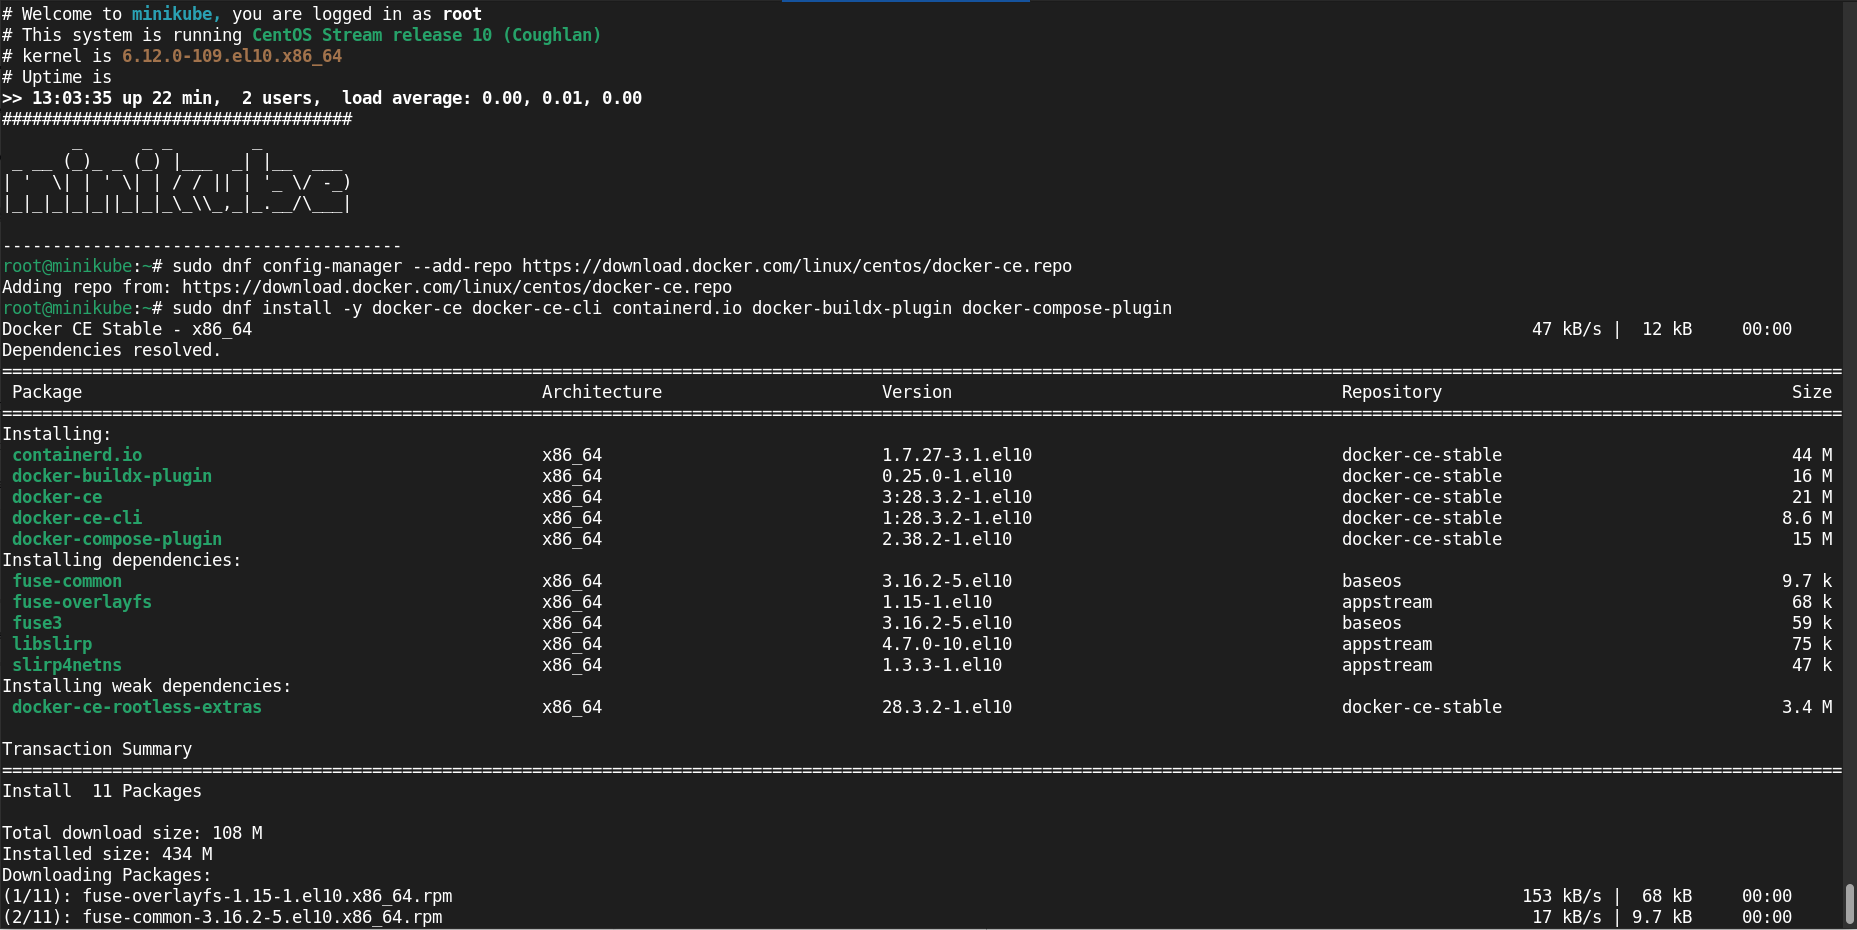
Photo by admingeek from Infotechys
Log out and back in (or newgrp docker) to apply group membership. Verify with:
docker version
					Client: Docker Engine - Community
 Version:           28.3.2
 API version:       1.51
 Go version:        go1.24.5
 Git commit:        578ccf6
 Built:             Wed Jul  9 16:14:56 2025
 OS/Arch:           linux/amd64
 Context:           default

Server: Docker Engine - Community
 Engine:
  Version:          28.3.2
  API version:      1.51 (minimum version 1.24)
  Go version:       go1.24.5
  Git commit:       e77ff99
  Built:            Wed Jul  9 16:13:19 2025
  OS/Arch:          linux/amd64
  Experimental:     false
 containerd:
  Version:          1.7.27
  GitCommit:        05044ec0a9a75232cad458027ca83437aae3f4da
 runc:
  Version:          1.2.5
  GitCommit:        v1.2.5-0-g59923ef
 docker-init:
  Version:          0.19.0
  GitCommit:        de40ad0
For better isolation and performance, use the kvm2 driver:
sudo dnf install -y libvirt qemu-kvm virt-install libguestfs-tools bridge-utils
sudo systemctl enable --now libvirtd
					Created symlink '/etc/systemd/system/multi-user.target.wants/libvirtd.service' → '/usr/lib/systemd/system/libvirtd.service'.
Created symlink '/etc/systemd/system/sockets.target.wants/libvirtd.socket' → '/usr/lib/systemd/system/libvirtd.socket'.
Created symlink '/etc/systemd/system/sockets.target.wants/libvirtd-ro.socket' → '/usr/lib/systemd/system/libvirtd-ro.socket'.
Created symlink '/etc/systemd/system/sockets.target.wants/libvirtd-admin.socket' → '/usr/lib/systemd/system/libvirtd-admin.socket'.
sudo usermod -aG libvirt $(whoami)
Then install the KVM driver:
curl -Lo docker-machine-driver-kvm2 https://storage.googleapis.com/minikube/releases/latest/docker-machine-driver-kvm2
chmod +x docker-machine-driver-kvm2
sudo mv docker-machine-driver-kvm2 /usr/bin/
This ensures Minikube can use KVM2 instead of Docker containers.
kubectlDownload and install the Kubernetes CLI tool:
curl -LO "https://storage.googleapis.com/kubernetes-release/release/$(curl -s https://storage.googleapis.com/kubernetes-release/release/stable.txt)/bin/linux/amd64/kubectl"
chmod +x kubectl
sudo mv kubectl /usr/bin/
kubectl version --client -o json
					{
  "clientVersion": {
    "major": "1",
    "minor": "31",
    "gitVersion": "v1.31.0",
    "gitCommit": "9edcffcde5595e8a5b1a35f88c421764e575afce",
    "gitTreeState": "clean",
    "buildDate": "2024-08-13T07:37:34Z",
    "goVersion": "go1.22.5",
    "compiler": "gc",
    "platform": "linux/amd64"
  },
  "kustomizeVersion": "v5.4.2"
}
Optional alias to run with minikube kubectl:
echo 'alias kubectl="minikube kubectl --"' >> ~/.bashrc
source ~/.bashrc
This combination lets you manage your cluster conveniently.
Install the latest Minikube binary:
curl -Lo minikube https://storage.googleapis.com/minikube/releases/latest/minikube-linux-amd64
chmod +x minikube
sudo mv minikube /usr/bin/
minikube version
					minikube version: v1.36.0
commit: f8f52f5de11fc6ad8244afac475e1d0f96841df1-dirty
💡If you’d like to install a different version of minikube (e.g. v1.35.0). Download that specific version by running the following command and complete Step 5 again: |
curl -Lo minikube https://storage.googleapis.com/minikube/releases/v1.35.0/minikube-linux-amd64
Verify minikube version after install:
minikube version
					minikube version: v1.35.0
commit: dd5d320e41b5451cdf3c01891bc4e13d189586ed-dirty
minikube start
To start minikube with preferred specifications:
minikube delete
					🔥  Deleting "minikube" in kvm2 ...
💀  Removed all traces of the "minikube" cluster.
minikube start --driver=kvm2 --cpus=3 --memory=4096 --disk-size=20GB
					😄  minikube v1.35.0 on Centos 10 (kvm/amd64)
✨  Using the kvm2 driver based on user configuration
👍  Starting "minikube" primary control-plane node in "minikube" cluster
🔥  Creating kvm2 VM (CPUs=3, Memory=4096MB, Disk=20480MB) ...
❗  Failing to connect to https://registry.k8s.io/ from inside the minikube VM
💡  To pull new external images, you may need to configure a proxy: https://minikube.sigs.k8s.io/docs/reference/networking/proxy/
🐳  Preparing Kubernetes v1.32.0 on Docker 27.4.0 ...
    ▪ Generating certificates and keys ...
    ▪ Booting up control plane ...
    ▪ Configuring RBAC rules ...
🔗  Configuring bridge CNI (Container Networking Interface) ...
🔎  Verifying Kubernetes components...
    ▪ Using image gcr.io/k8s-minikube/storage-provisioner:v5
🌟  Enabled addons: default-storageclass, storage-provisioner
🏄  Done! kubectl is now configured to use "minikube" cluster and "default" namespace by default
Check basic status:
minikube status
					minikube
type: Control Plane
host: Running
kubelet: Running
apiserver: Running
kubeconfig: Configured
kubectl get nodes
					    > kubectl.sha256:  64 B / 64 B [-------------------------] 100.00% ? p/s 0s
    > kubectl:  54.67 MiB / 54.67 MiB [----------] 100.00% 178.67 MiB p/s 500ms
NAME       STATUS   ROLES           AGE    VERSION
minikube   Ready    control-plane   4m1s   v1.32.0
kubectl cluster-info
					Kubernetes control plane is running at https://192.168.39.235:8443
CoreDNS is running at https://192.168.39.235:8443/api/v1/namespaces/kube-system/services/kube-dns:dns/proxy

To further debug and diagnose cluster problems, use 'kubectl cluster-info dump'.
Use the Kubernetes UI dashboard:
minikube addons enable dashboard
					💡  dashboard is an addon maintained by Kubernetes. For any concerns contact minikube on GitHub.
You can view the list of minikube maintainers at: https://github.com/kubernetes/minikube/blob/master/OWNERS
    ▪ Using image docker.io/kubernetesui/dashboard:v2.7.0
    ▪ Using image docker.io/kubernetesui/metrics-scraper:v1.0.8
💡  Some dashboard features require the metrics-server addon. To enable all features please run:

	minikube addons enable metrics-server

🌟  The 'dashboard' addon is enabled
minikube dashboard --url
This outputs a URL such as:
http://127.0.0.1:XXXXX/api/v1/namespaces/kubernetes-dashboard/services/https:kubernetes-dashboard:/proxy/
Open it in your browser to monitor deployments visually.
Deploy Nginx: |
kubectl create deployment nginx --image=nginx
kubectl get pods
Expose the deployment: |
kubectl create service nodeport nginx --tcp=80:80
minikube service nginx --url
View the service logs: |
kubectl logs deployment/nginx
These steps validate that your local cluster is functional.
To manage resource usage: |
minikube stop
minikube delete
kubectl delete all --all -n <namespace>
More Useful Commands: |
minikube config set memory 4096
minikube config set cpus 2
minikube ip
minikube ssh
minikube addons list
Use the commands listed (above) as a cheat sheet for further interaction.
|
|
|
Installing Minikube on CentOS Stream 10 delivers a robust local Kubernetes environment with modern kernel support, enterprise-grade stability, and flexibility. Key steps include:
|
|
|
|
|
|
|
By following this structured approach, you’ll quickly have a running, local Kubernetes cluster suitable for development, learning, CI pipelines, and more.
Did you find this article helpful? Your feedback is invaluable to us! Feel free to share this post with those who may benefit, and let us know your thoughts in the comments section below.
In this comprehensive guide, we’ll walk you through the process of creating and deploying a LAMP stack on Minikube, a tool that enables you to

Learn how to install Minikube on Ubuntu 24.04 with this comprehensive step-by-step guide. Discover prerequisites, installation methods, resource management, and troubleshooting tips to set up
Discover the best operating systems for Kubernetes clusters, including popular Linux distributions, container-optimized OS, and Windows Server. Learn their benefits and make an informed choice for