Commands
In today’s tutorial, we will install CentOS8 on KVM. The install process is fairly straightforward and we will cover it here step-by-step. We will follow


In this tutorial, we’ll guide you through the step-by-step install of Kali Linux on KVM. The process is super simple, and we’ll present it in a format similar to the one used in the “Install RHEL9 on KVM” article.
Installing Kali Linux on KVM (Kernel-based Virtual Machine) allows you to set up a powerful and flexible penetration testing platform within a virtualized environment. KVM is a virtualization solution for Linux that leverages the hardware virtualization extensions of modern CPUs to provide efficient and reliable virtualization. Kali Linux, a Debian-based distribution specifically designed for digital forensics and penetration testing, offers a comprehensive suite of tools for security professionals.
To install Kali Linux on KVM, you’ll need to set up a virtual machine (VM) using KVM and then install Kali Linux as the guest operating system. This process involves creating a VM configuration, allocating resources such as CPU cores and memory, configuring storage, and installing Kali Linux from an ISO image.
By running Kali Linux on KVM, you can easily manage multiple virtual machines, test various security tools and techniques, and conduct security assessments in a controlled environment. This setup provides the flexibility to customize your virtual environment according to your specific testing requirements while ensuring isolation from your host system. Additionally, it facilitates the creation of snapshots and backups, allowing you to revert to previous states or experiment without affecting your primary system.
Before installing Kali Linux on KVM, it’s essential to perform several pre-installation checks to ensure a smooth installation process and optimal performance. Here’s a comprehensive list of pre-installation checks:
Verify that your CPU supports hardware virtualization extensions (Intel VT-x or AMD-V). You can usually find this information in your system’s BIOS settings. Ensure that virtualization support is enabled.
Ensure that your host system has enough CPU cores, RAM, and disk space to accommodate the Kali Linux VM. Kali Linux typically requires a minimum of 2 CPU cores, 2 GB of RAM, and 20 GB of disk space, but allocating more resources can improve performance.
Make sure that KVM is installed and properly configured on your Linux host system. You can install KVM and related packages using your distribution’s package manager (e.g., apt for Debian-based systems, dnf for Fedora-based systems).
If you plan to run virtual machines within the Kali Linux VM (nested virtualization), ensure that nested virtualization support is enabled in your KVM configuration. This allows the Kali Linux VM to host additional VMs.
Ensure that your host system has an active internet connection, as you may need to download updates or additional packages during the installation process. Also, configure networking settings for the Kali Linux VM, such as selecting the appropriate network interface and setting up IP addressing.
If you’re installing Kali Linux on a system with existing data, consider backing up important files and settings to prevent data loss during the installation process.
Familiarize yourself with the official documentation and installation guides for installing Kali Linux on KVM. This will help you understand the installation process, troubleshoot common issues, and make informed decisions during installation. By completing these pre-installation checks, you can ensure that your system is properly configured and prepared for installing Kali Linux on KVM. This helps minimize potential issues and ensures a successful installation experience.
Now that you have an overview of the prerequisites for a successful Kali Linux installation, let’s delve into a comprehensive step-by-step guide.
Download the latest Kali Linux ISO image from the official website or a trusted mirror. Verify the integrity of the downloaded ISO using checksums to ensure that it hasn’t been tampered with. Run the following command to download the ISO image from the command line:
$ wget https://cdimage.kali.org/kali-2023.4/kali-linux-2023.4-installer-amd64.iso
On your KVM host (as the root user), go to the /var/lib/libvirt/images directory and generate a qcow2 image.
# cd /var/lib/libvirt/images
This image will serve as the storage medium for installing Kali Linux. In this example, we’ve allocated 75GB of storage space for our image.
# sudo qemu-img create -f qcow2 kali-vm.img 75G
Now that we’ve downloaded the latest Kali Linux iso (as of the date of this publication) and created a qcow2 image, we can proceed with the install:
Firstly, launch the virt-manager on your KVM host as the root user.
# virt-manager
Click the monitor icon (circled in red) to launch the “Create a new virtual machine” dialog window.
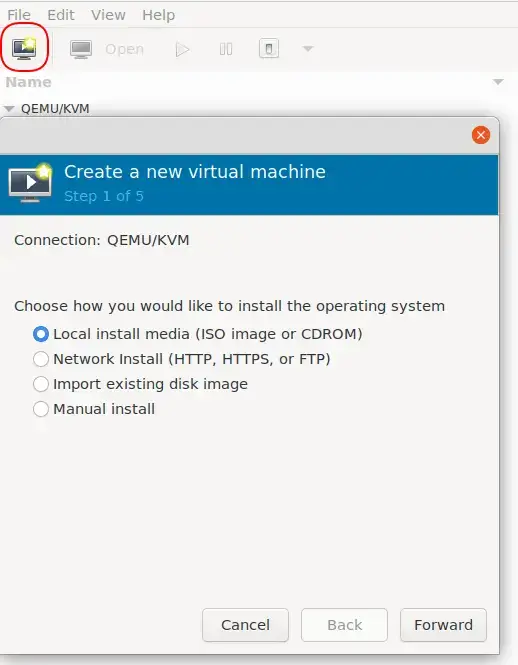
Photo by admingeek from Infotechys
Afterward, a prompt will emerge, offering you the option to choose your preferred method for installing the operating system. Since we have the ISO downloaded locally, we’ll select the primary choice, which is highlighted: “Local install media (ISO image or CDROM).” Then, proceed by clicking the [Forward] button.
Note: If you encounter difficulties launching virt-manager, two potential issues may be at play at this stage:
The virt-manager package may not be installed on your system.
The xorg-x11-xauth package is absent and must be installed to enable X11 forwarding.
If xorg-x11-xauth is installed, ensure that you correctly forwarded X11 when connecting via SSH to your KVM host.
Navigate to the location of your kali Linux iso and select it– then click the “Choose Volume” button to continue. We stored our iso under /isos on the KVM host.
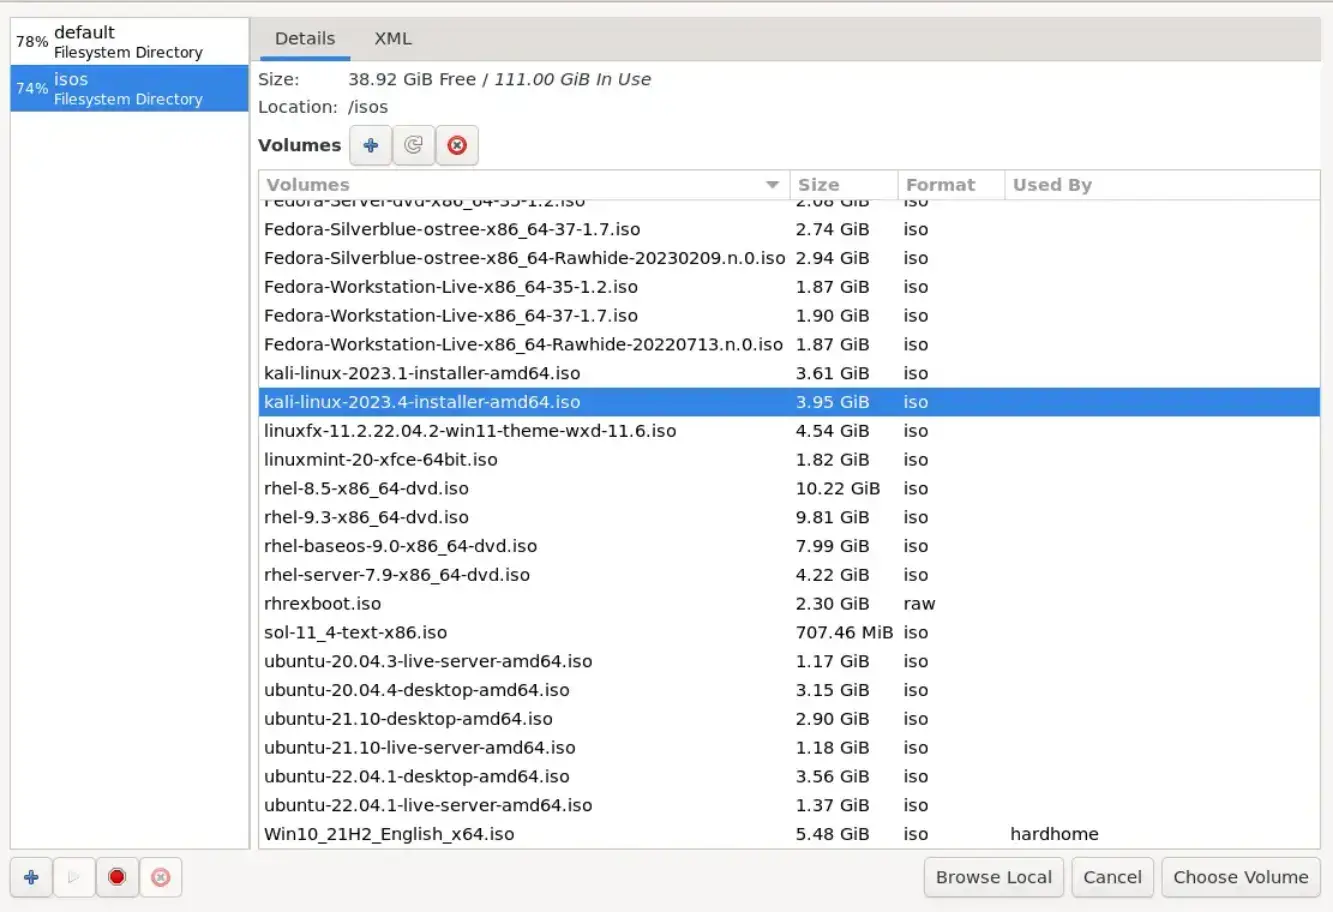
Photo by admingeek from Infotechys
Click the “Forward” button to proceed.

Photo by admingeek from Infotechys
Note: In the “Choose the operating system you are installing:” textbox, select “generic OS” as KVM (as of the date of this publication) does not detect the Kali Linux ISO.
In the third step of the five-step process, you’ll be prompted to configure the memory and CPU settings for your Kali Linux instance. In this demonstration, we’ve set the RAM to 4096 MB (4GB) and allocated 2 CPUs or cores. Proceed by clicking the “Forward” button.
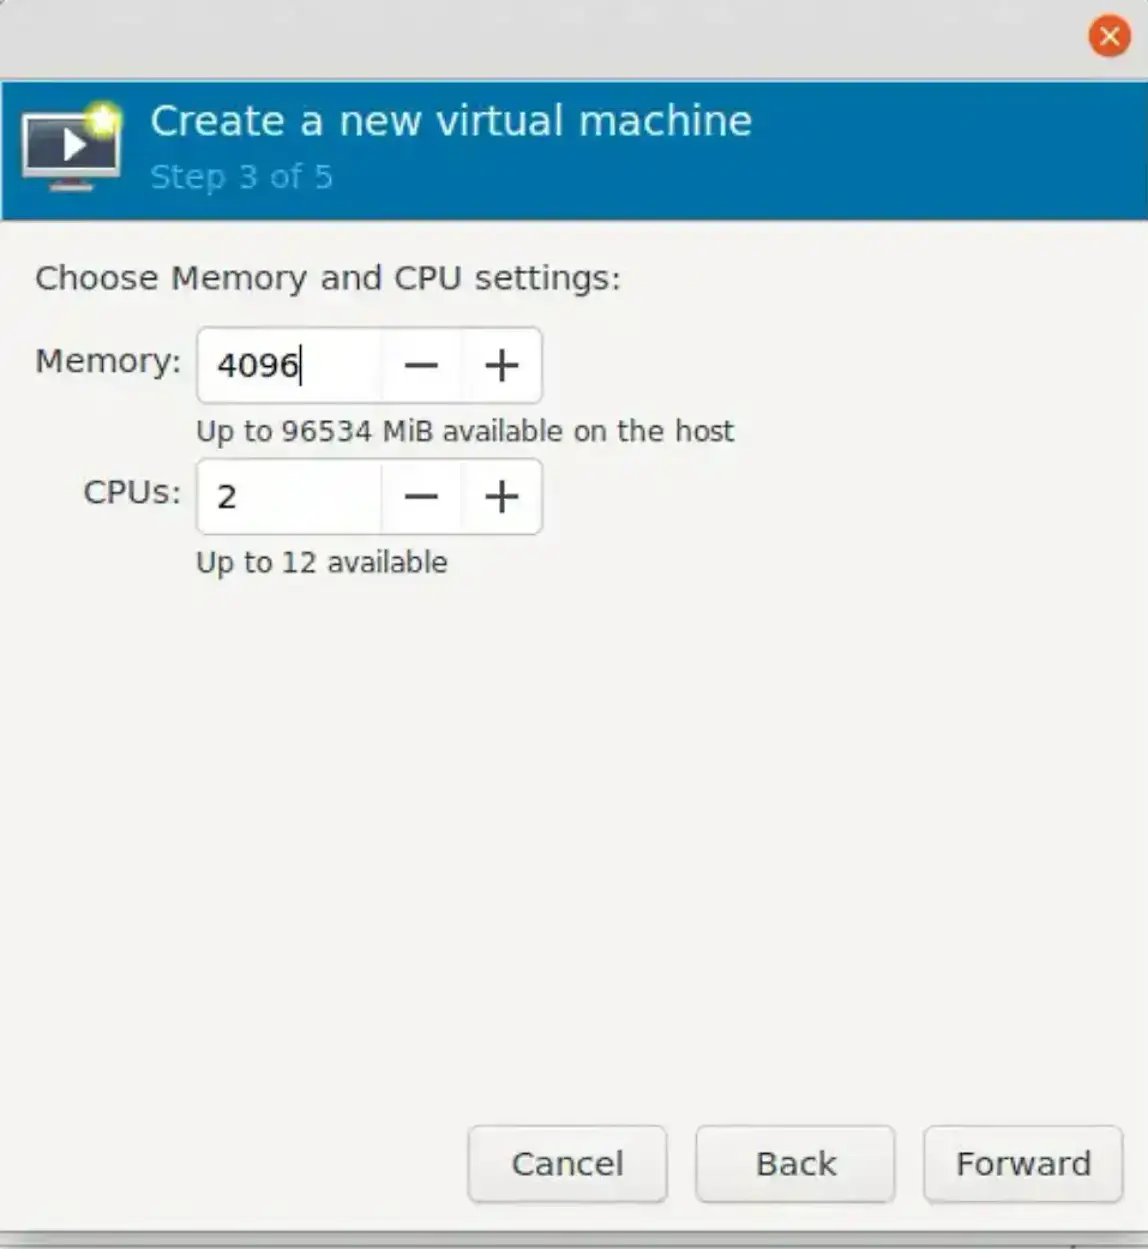
Photo by admingeek from Infotechys
In the fourth step of the five-step process, you’ll be asked to determine how you want to configure a disk image for your Kali Linux virtual machine. Note that the “Create a disk image” option is preselected, but we won’t choose this as we’ve previously generated a qcow2 disk image (kali-vm.img) that we intend to use.
Instead, opt for the “Select or create custom option” beneath it and click the [Manage] button to proceed. This action will open another window displaying the contents of /var/lib/libvirt/images. Choose your qcow2 image and click the [Choose Volume] button to proceed.
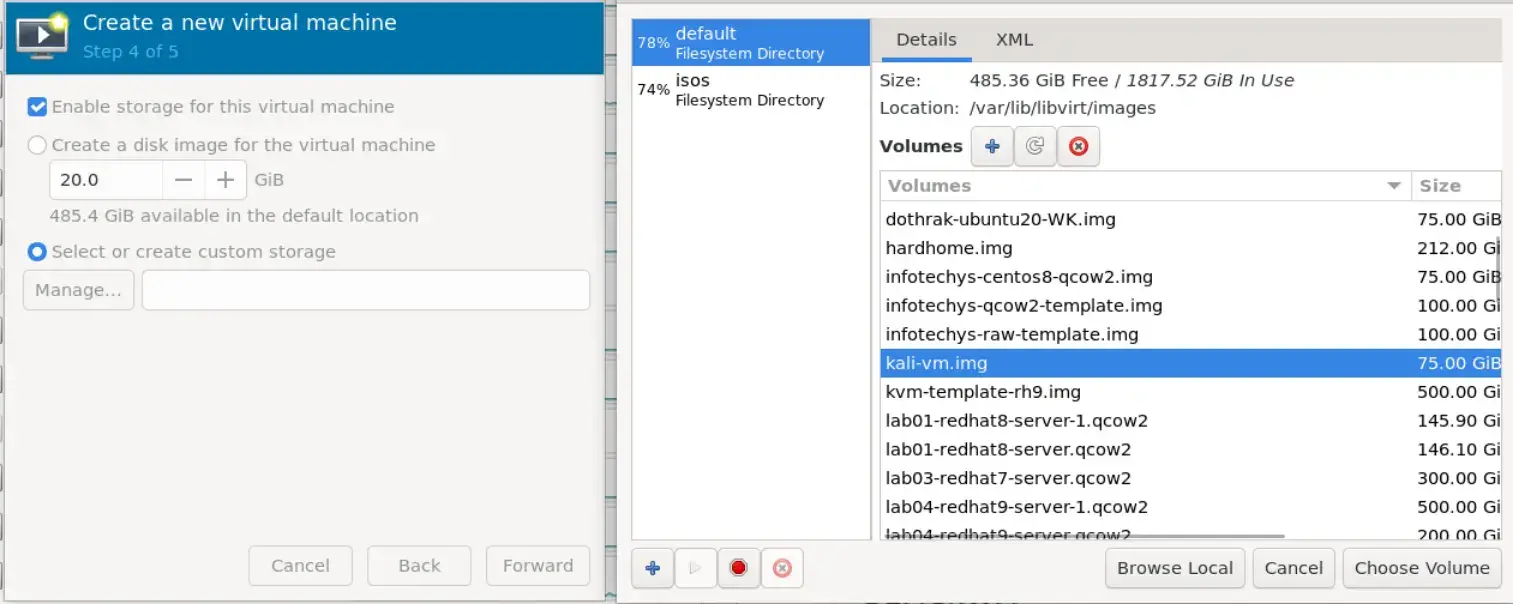
Photo by admingeek from Infotechys
In the fifth and final step, we are almost ready to initiate the installation, with just a few remaining administrative tasks to address. Initially, assign a name to your Kali Linux instance. In our case, we chose kali_linux_test_vm, but feel free to select a name that suits your preferences. Subsequently, enable the “Customize configuration before Install” option by checking the corresponding checkbox. This step ensures that we can verify all configurations before proceeding with the installation.
Lastly, from the dropdown menu, opt for the “Bridge device” option and input the details of your bridge interface. In our KVM host, the bridge interface is br01, but your interface may vary. Conclude by clicking the [Finish] button to proceed.
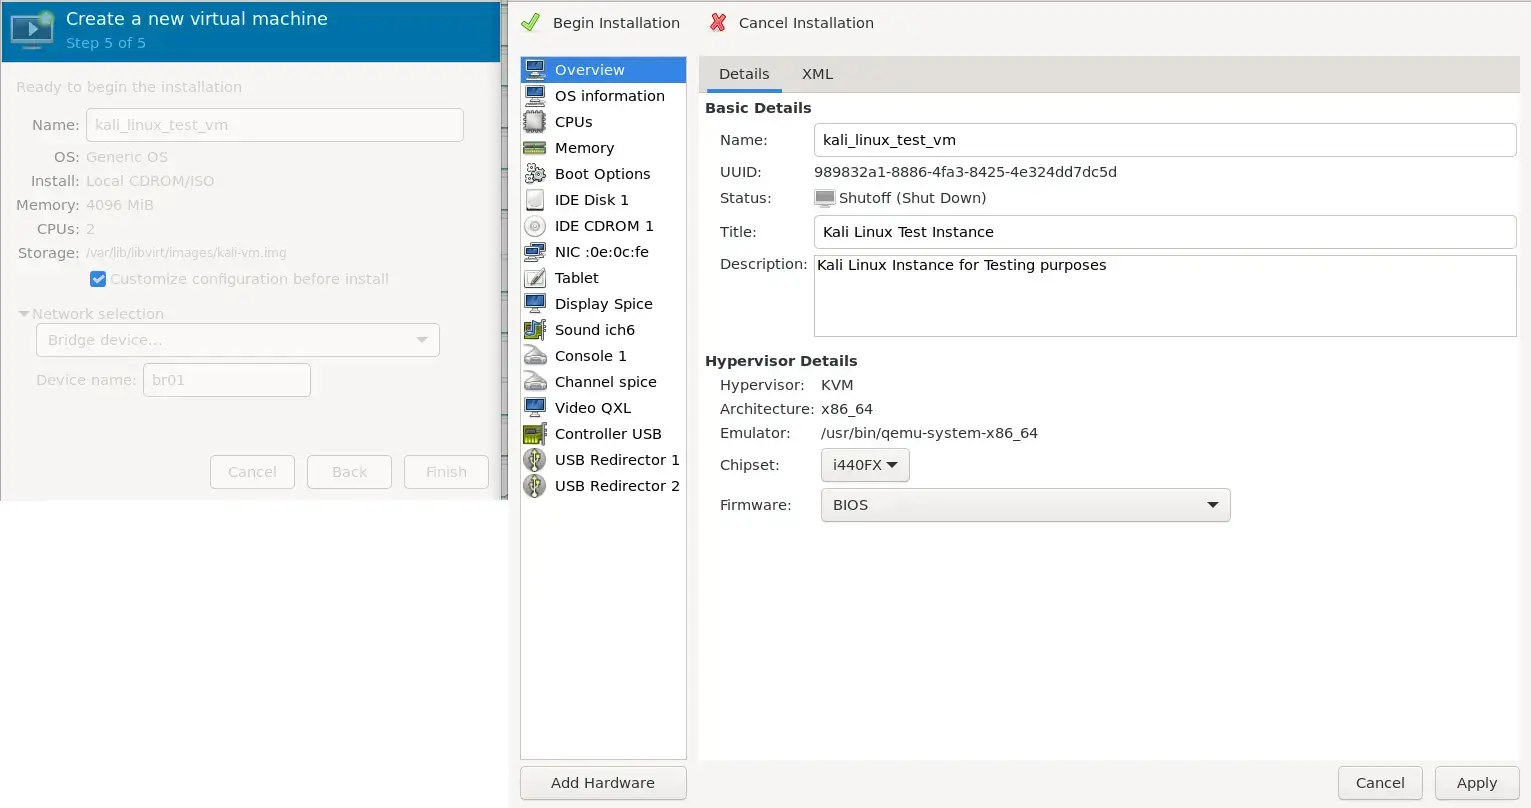
Photo by admingeek from Infotechys
As evident in the above screenshot, all configurations appear satisfactory. We’ve also included a brief note in the description textbox to specify the type of VM we are constructing. Now, we are prepared to move forward with the Kali Linux Installer segment. Click the [Begin Installation – Green Check mark] button to proceed with the “Graphical Install“.
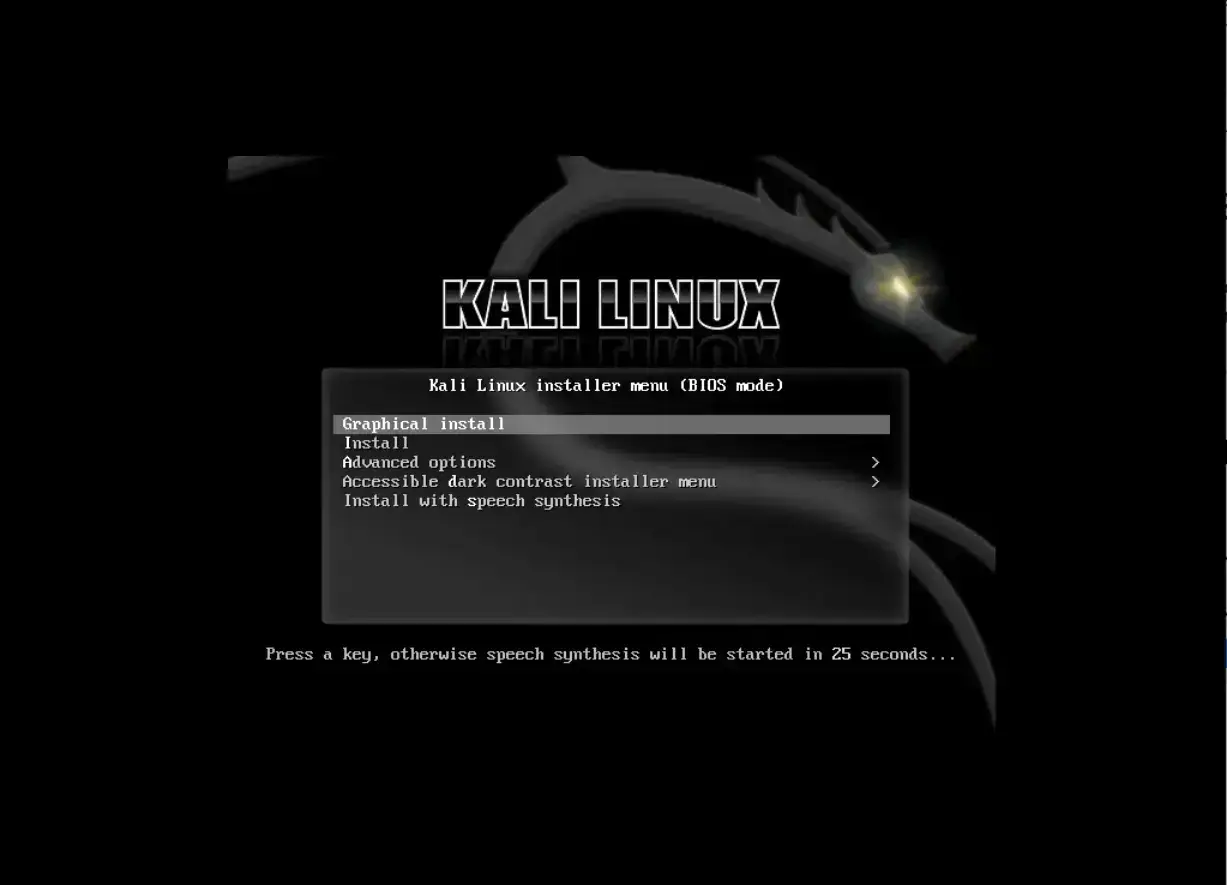
Photo by admingeek from Infotechys
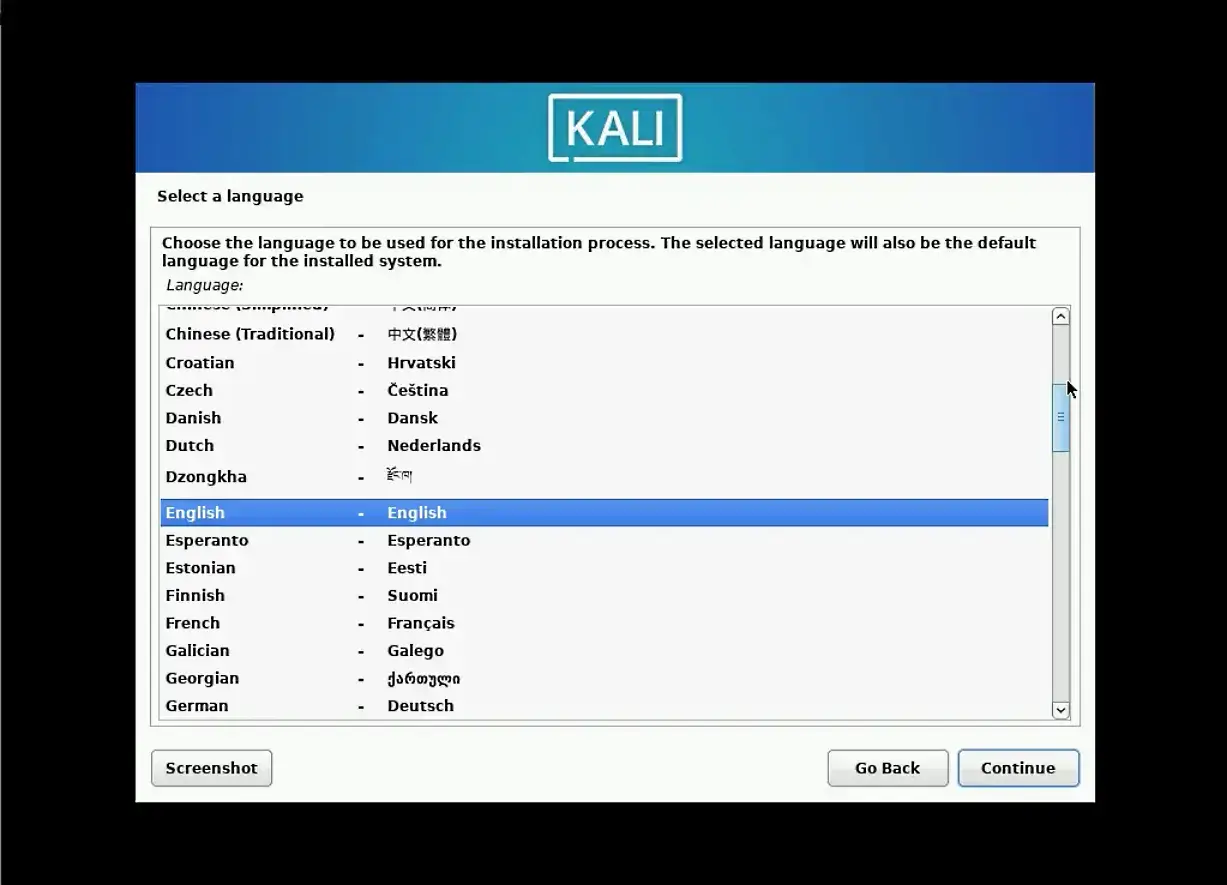
Photo by admingeek from Infotechys
Select your region and continue:

Photo by admingeek from Infotechys
Pick your keyboard configuration and continue:
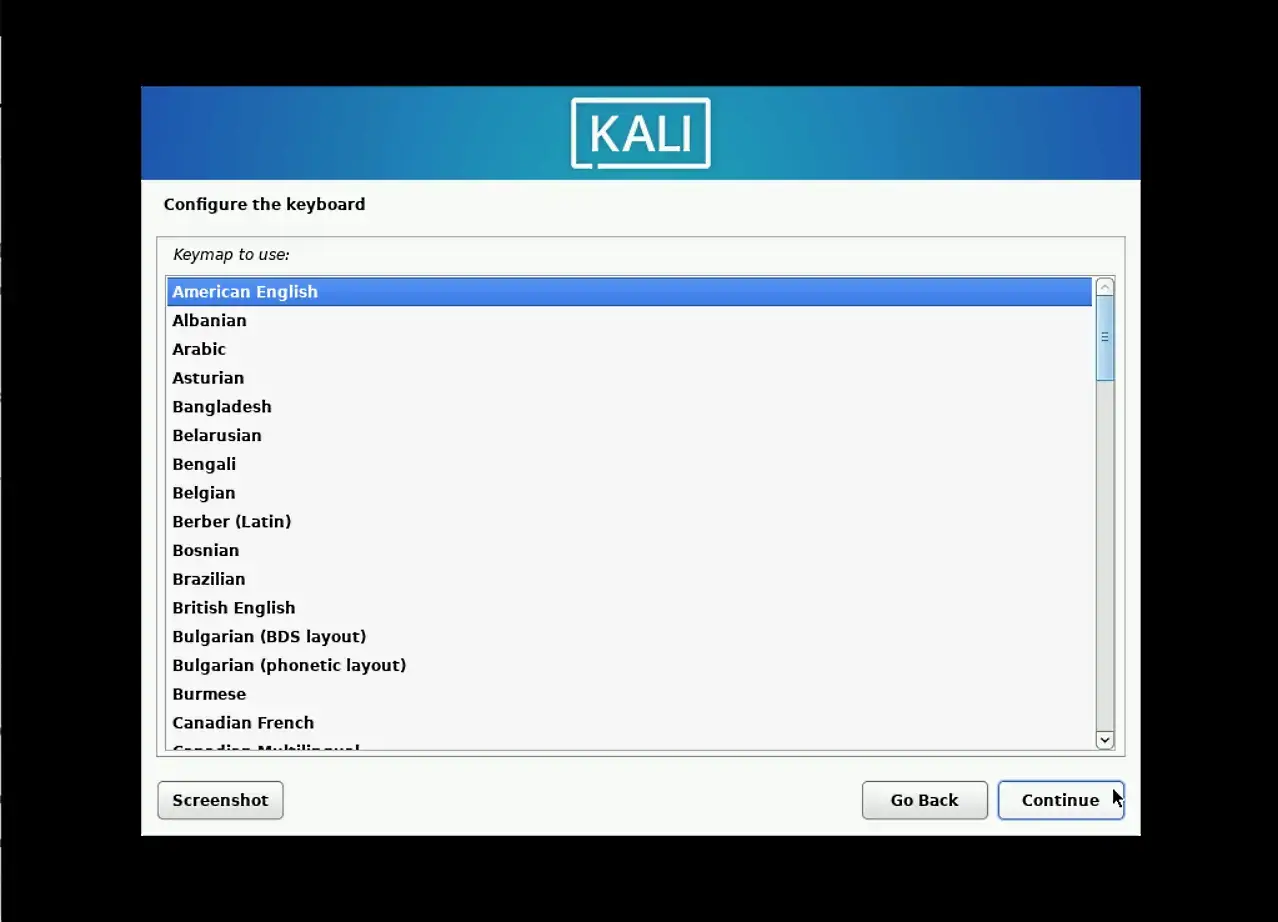
Photo by admingeek from Infotechys
The installer will automatically identify and mount the installation media, load installer components, and configure a DHCP network for your machine.
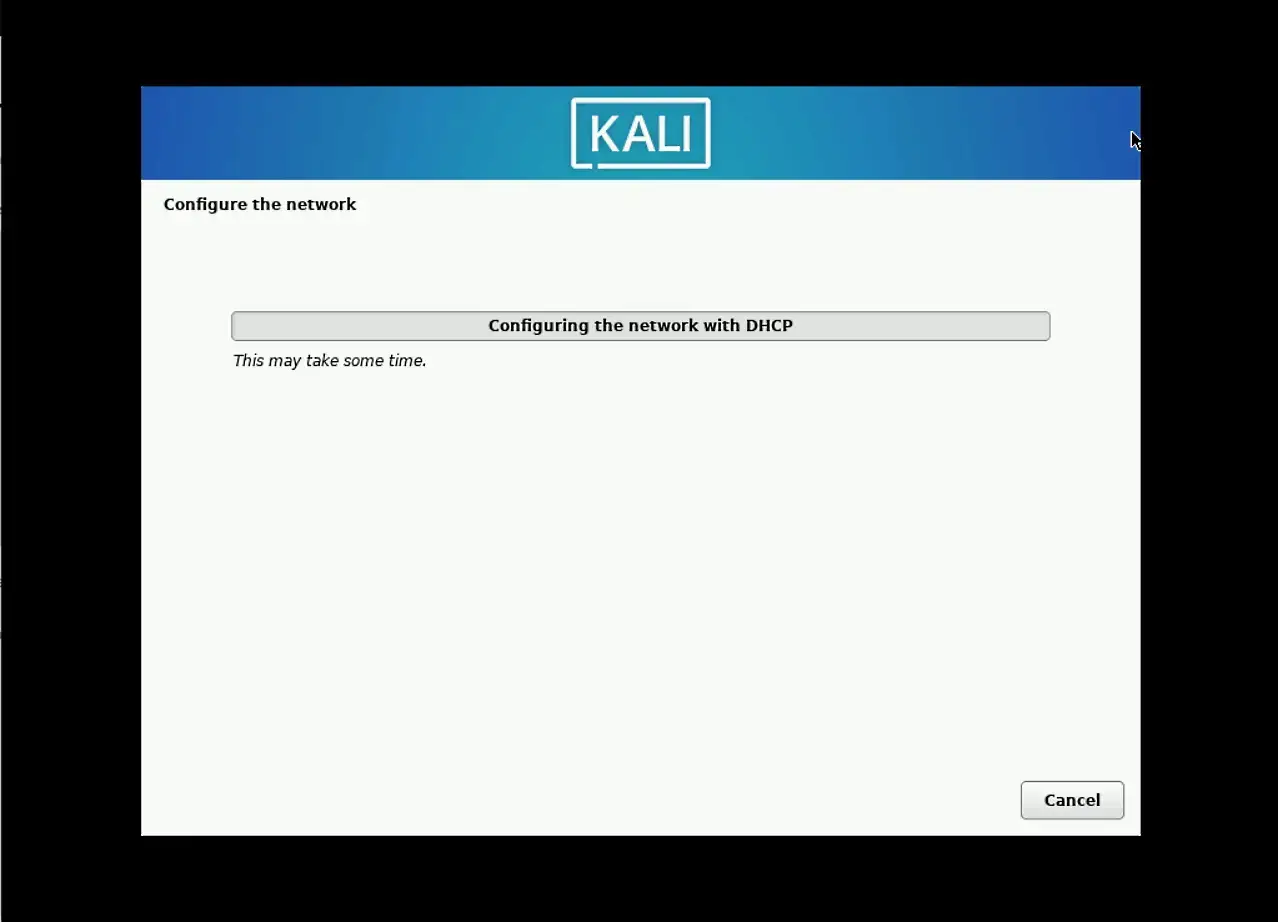
Photo by admingeek from Infotechys
You’ll be asked to enter a hostname for your machine. We’ll choose “kali-test.localdomain“. Enter your desired hostname and proceed.

Photo by admingeek from Infotechys
Next, you’ll be prompted to choose a username for a user account. Please note that the “admin” username is reserved for system purposes and cannot be used. In our case, we selected “xadmin” as the username. Enter your preferred username and proceed.
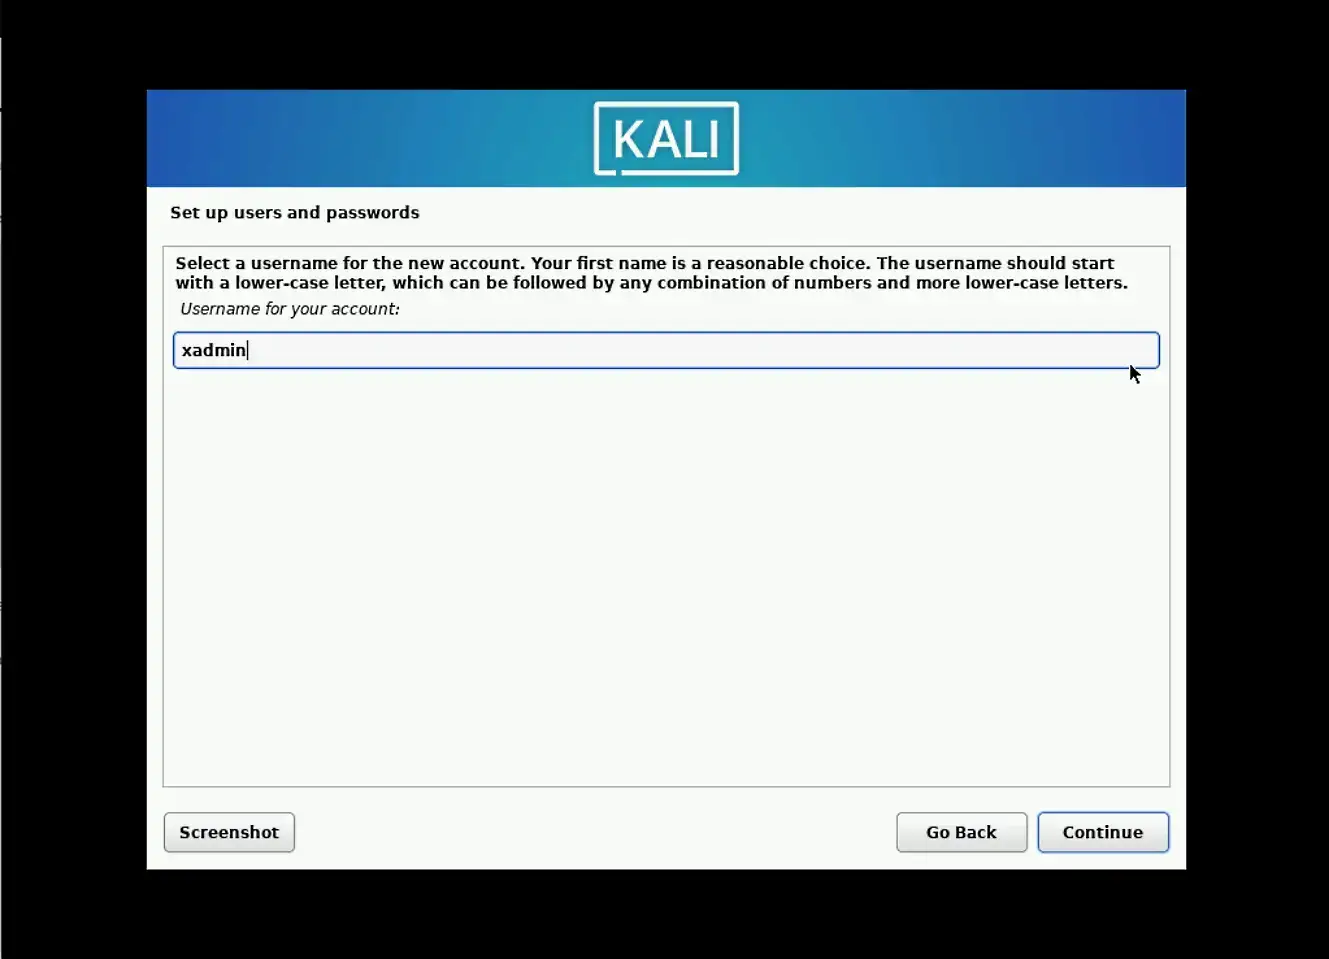
Photo by admingeek from Infotechys
Enter a password for your new user account and proceed:
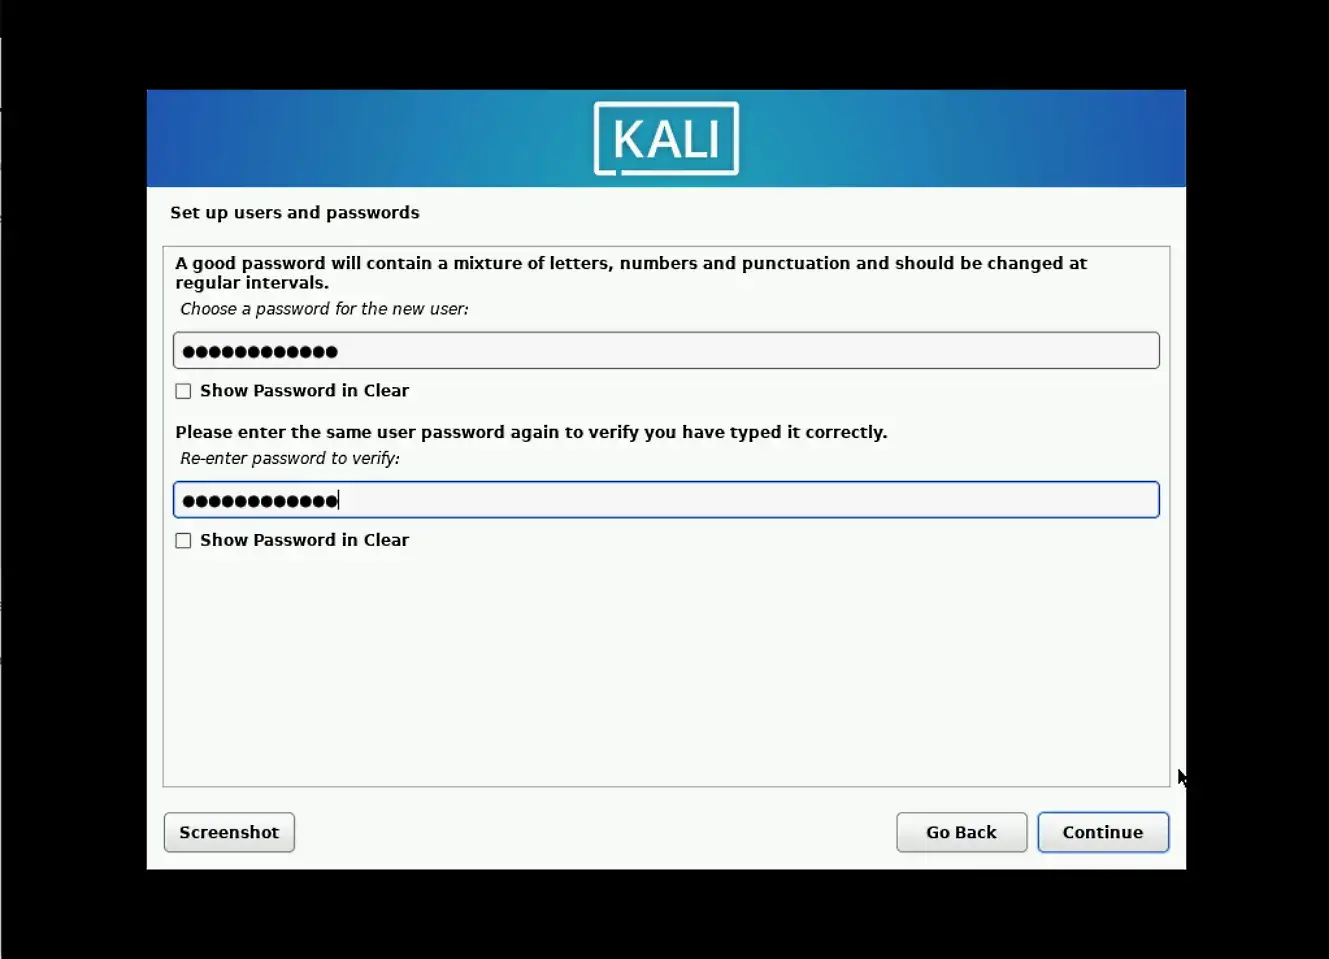
Photo by admingeek from Infotechys
Choose your timezone and continue: This is how the installer determines how to configure your system clock.
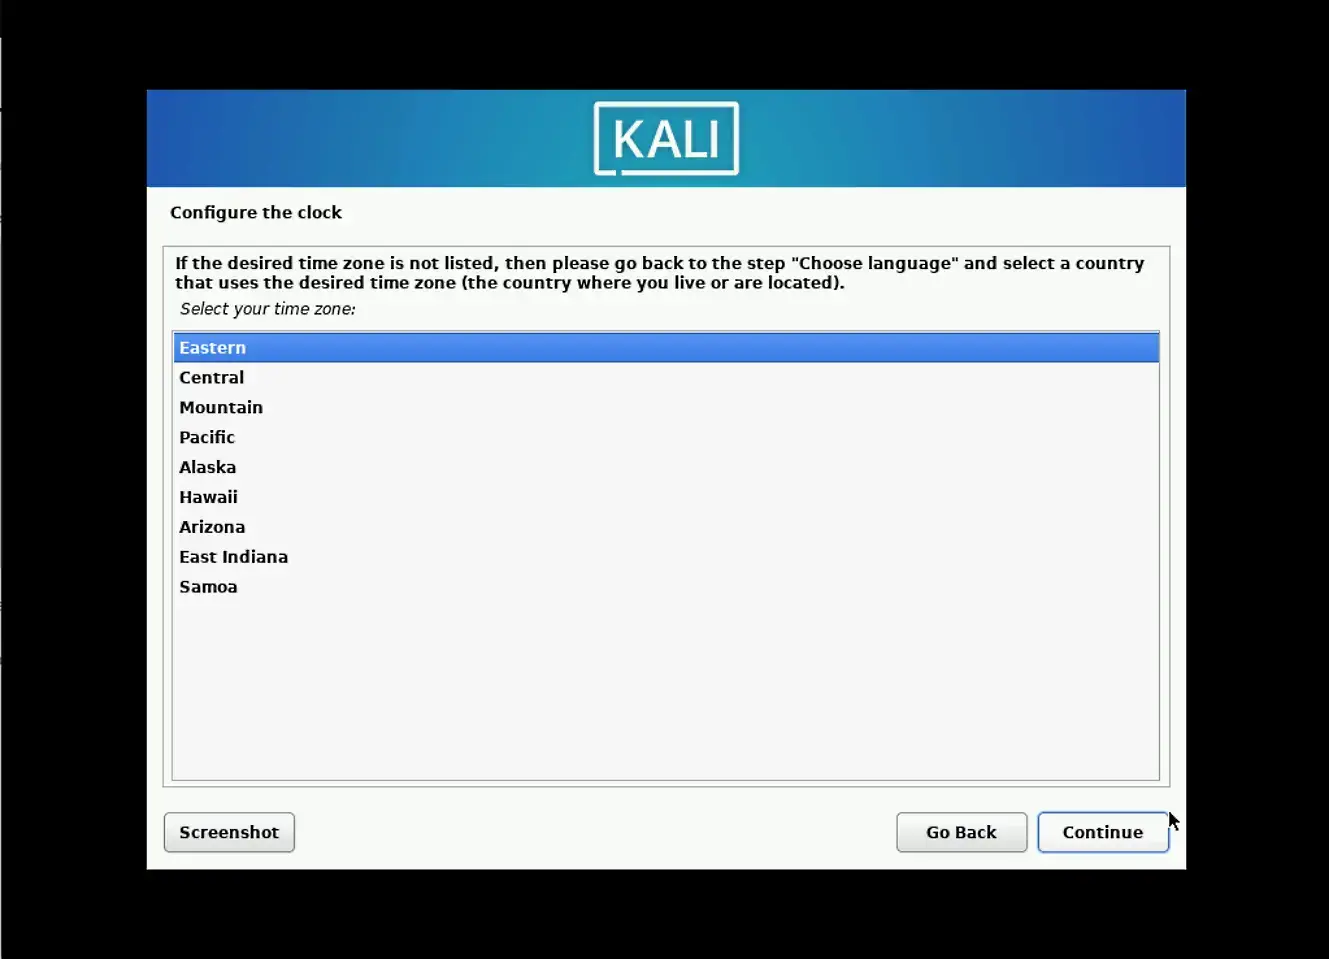
Photo by admingeek from Infotechys
During this stage of the installation process, the installer will further detect the resources you initially specified for your machine, including any allocated disks or storage. You’ll then be prompted to choose how you want to partition your disk. In our case, we chose the guided setup, utilizing all available space and employing LVM (Logical Volume Manager) for partitioning. Select your preferred option and continue.
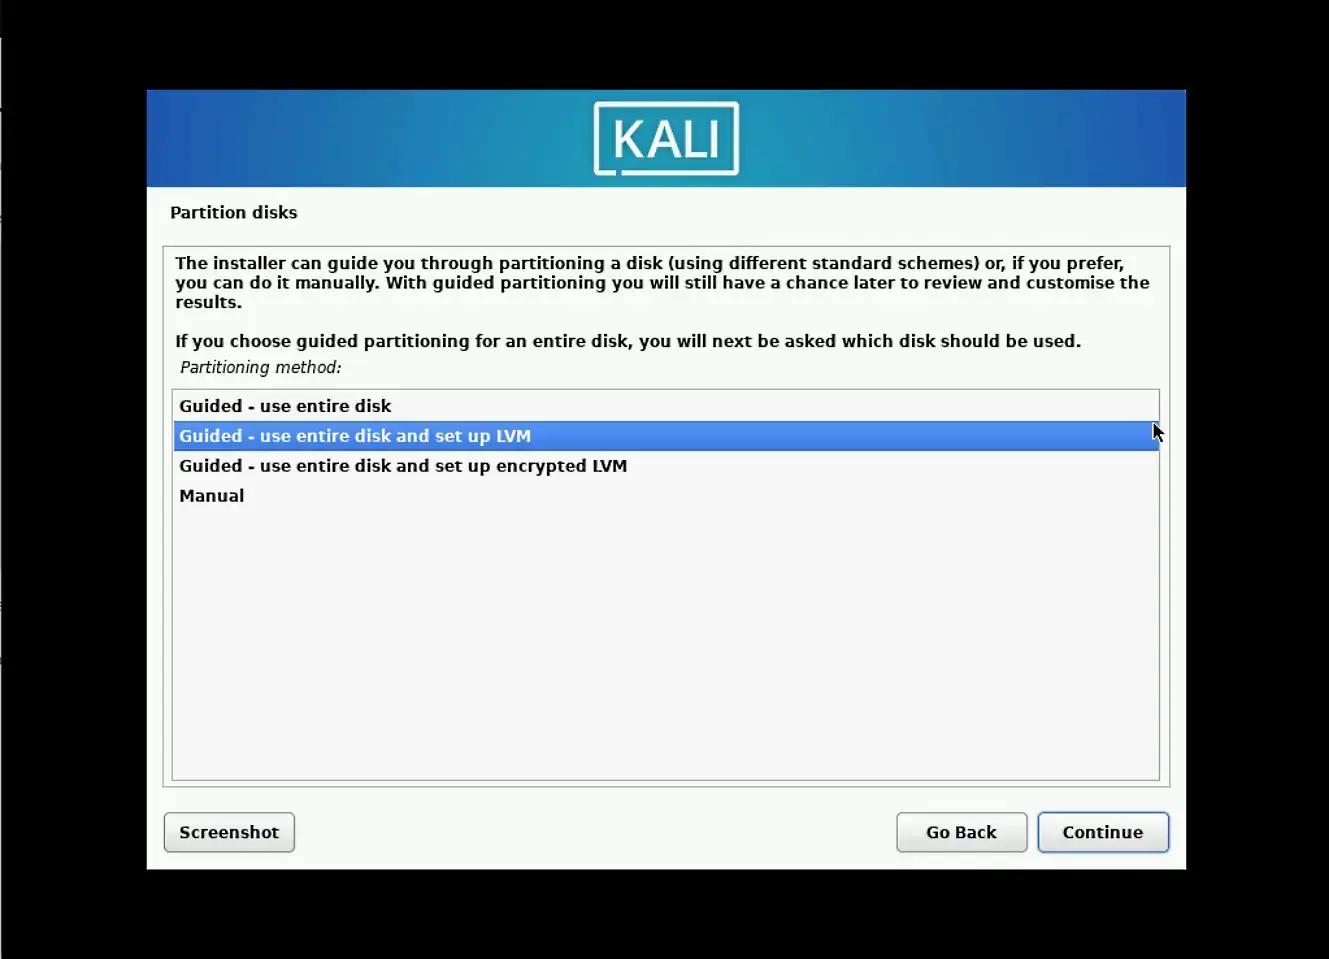
Photo by admingeek from Infotechys
Moreover, during the disk partitioning process, you’ll be prompted to decide how partitions should be separated. We chose to separate critical partitions such as /var, /home, etc. It’s considered a best practice to separate these partitions so that any issues that may arise in the future can be isolated to a specific partition without affecting the entire system.
Photo by admingeek from Infotechys
You’ll encounter a few more prompts to confirm the amount of disk space you’d like to allocate for storage (assuming you’ve already chosen to use the entire disk) and to confirm the changes before initiating the formatting process. Simply click the “Yes” and “Continue” button each time to proceed.

Photo by admingeek from Infotechys
Now we’ve reached the Software Selection section of the installation. Here, you’ll be asked to choose your preferred desktop environment and review the default packages and tools that will be installed. Select your environment based on your preference and proceed.
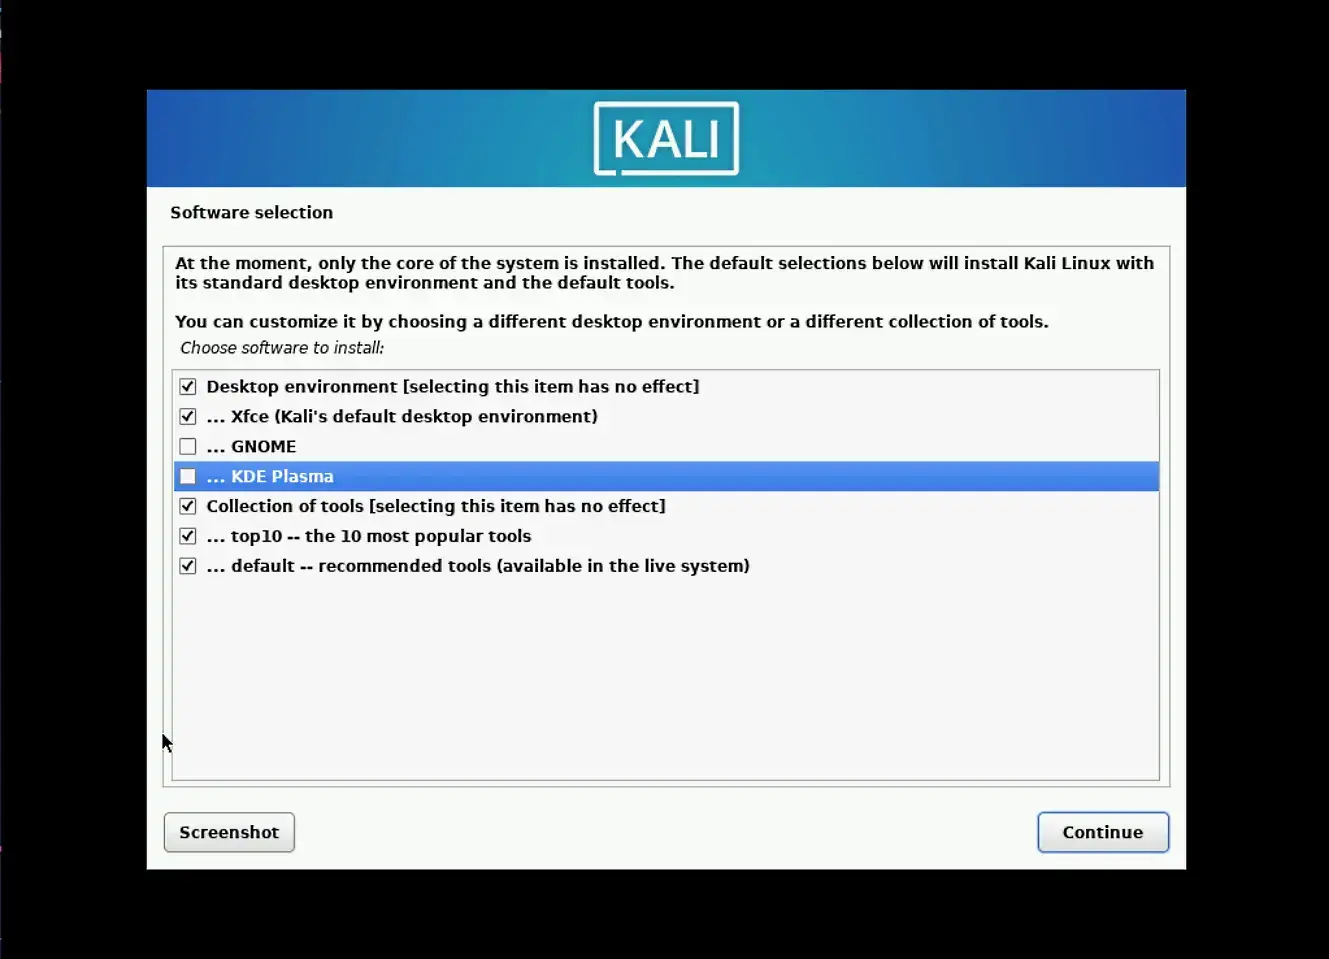
Photo by admingeek from Infotechys
Packages will be installed according to your selection. This is an opportune moment to step away and grab a coffee or snack, as it will take some time to install the base packages.
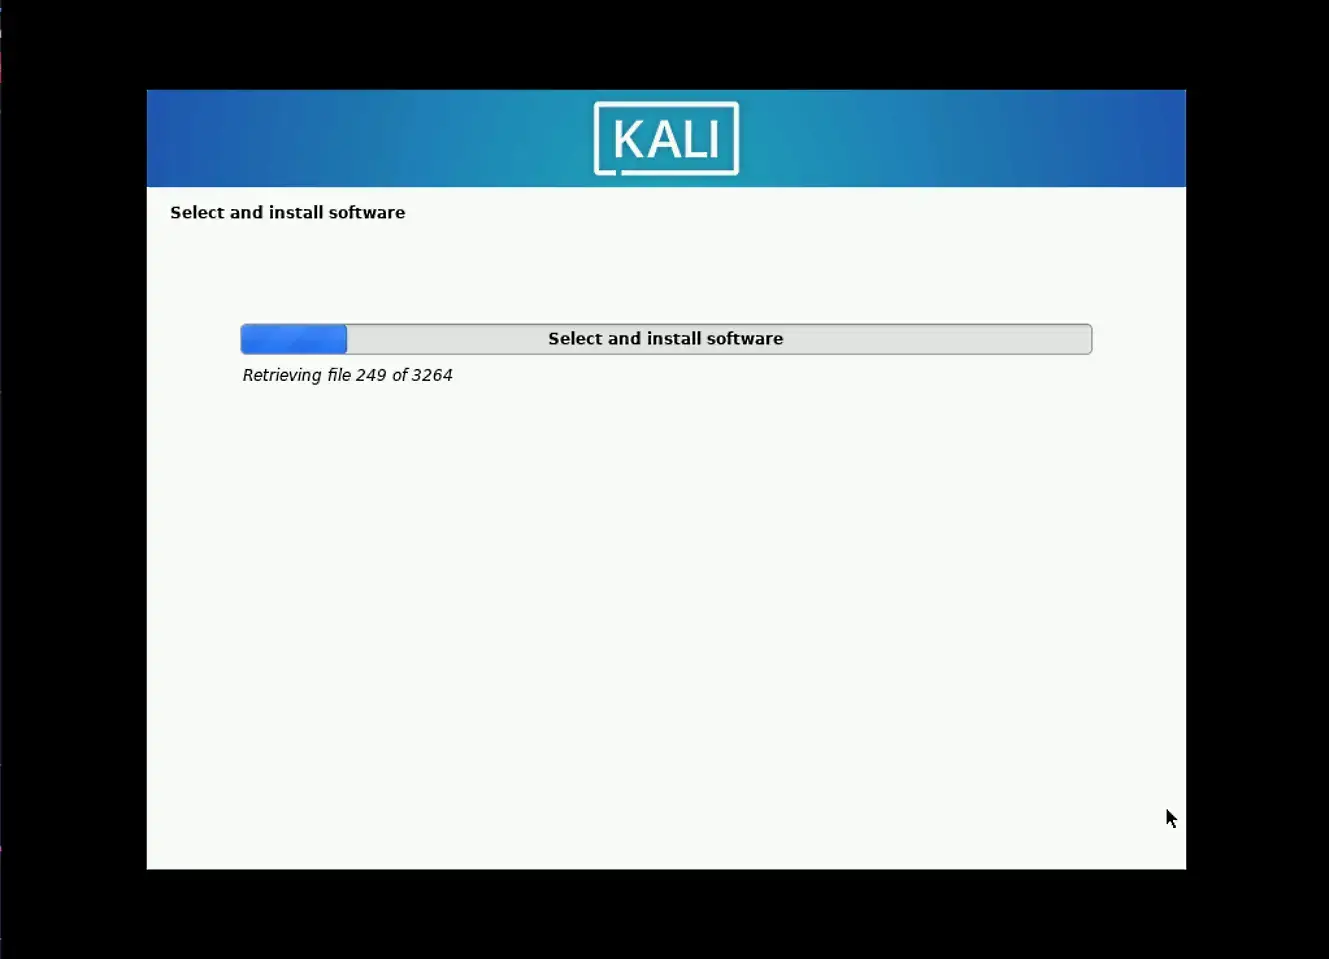
Photo by admingeek from Infotechys
During the package installation, you will be prompted to select a display manager (gdm, lightdm, sddm). Make a selection or click continue to proceed with the default (gdm):
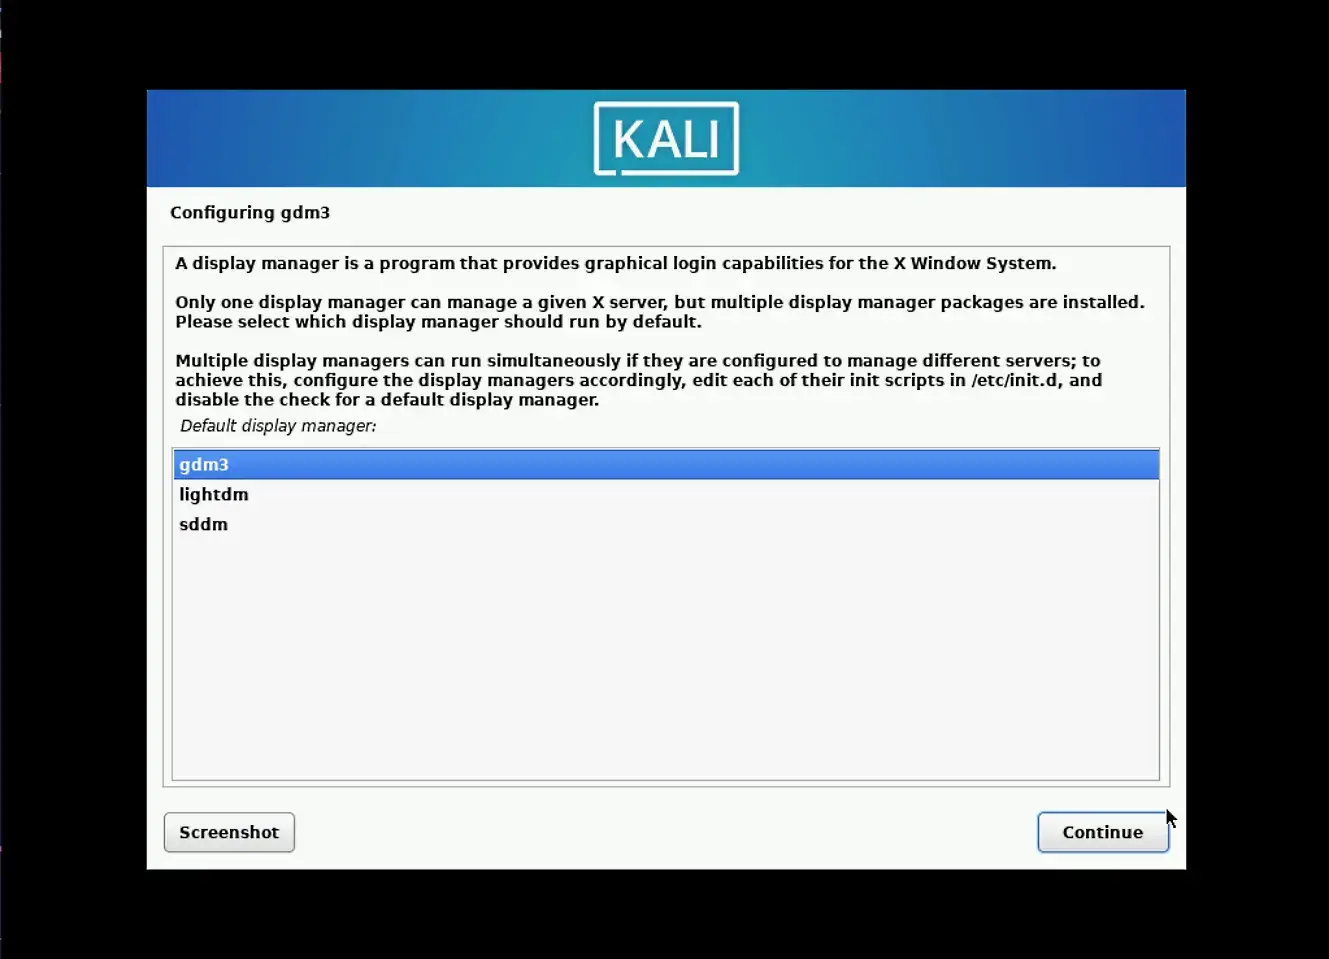
Photo by admingeek from Infotechys
The package installation process will continue for several more minutes before prompting you to specify how GRUB will be installed. Choose the primary disk (/dev/sda in this case) and click the “Continue” button to proceed.
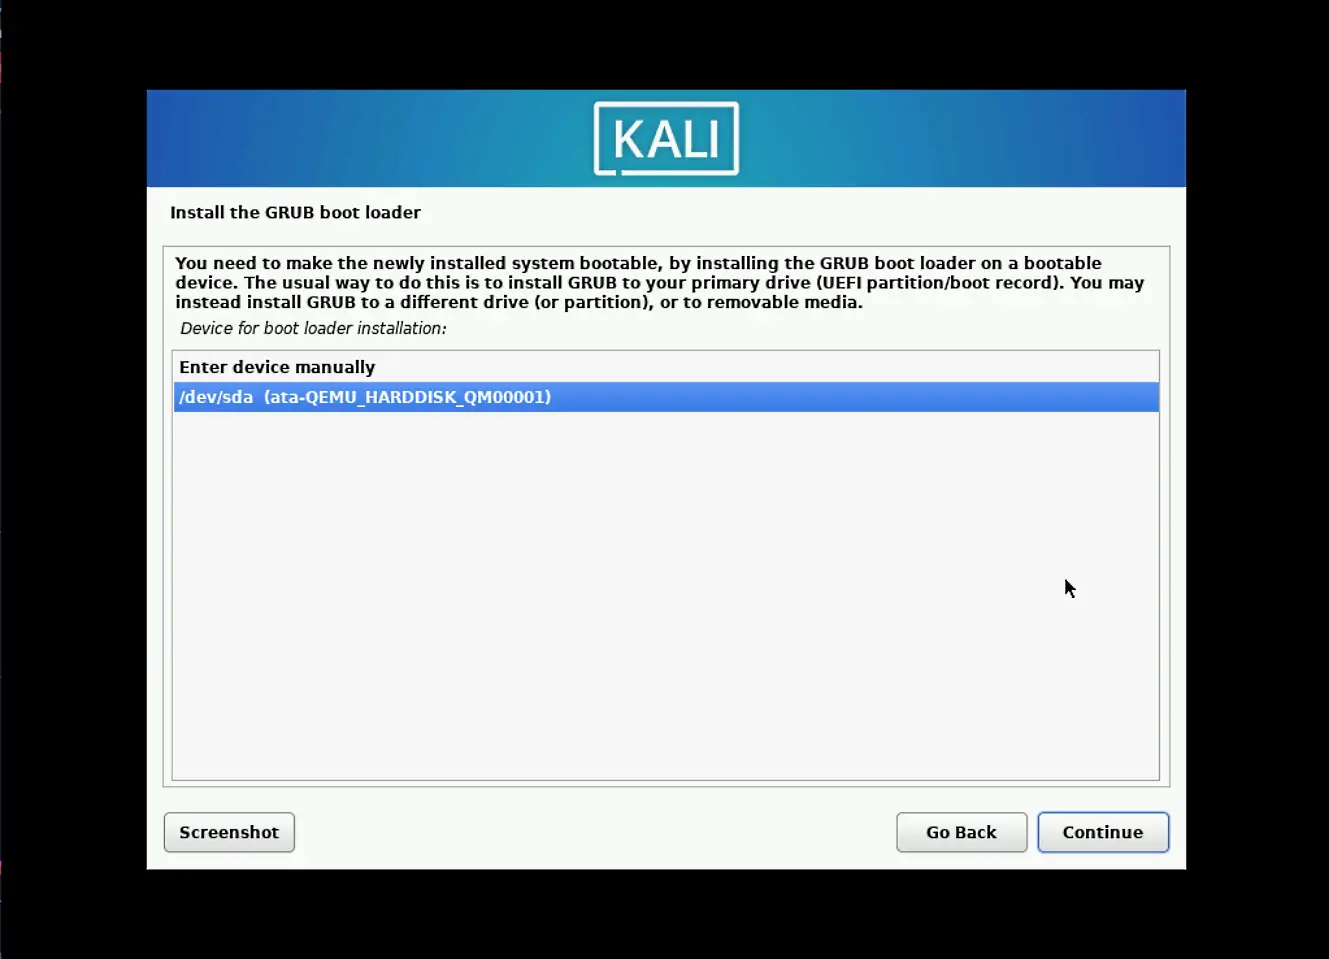
Photo by admingeek from Infotechys
Finally, you will arrive at the end of the installation where you will be prompted to reboot your machine. Click the continue button to proceed:
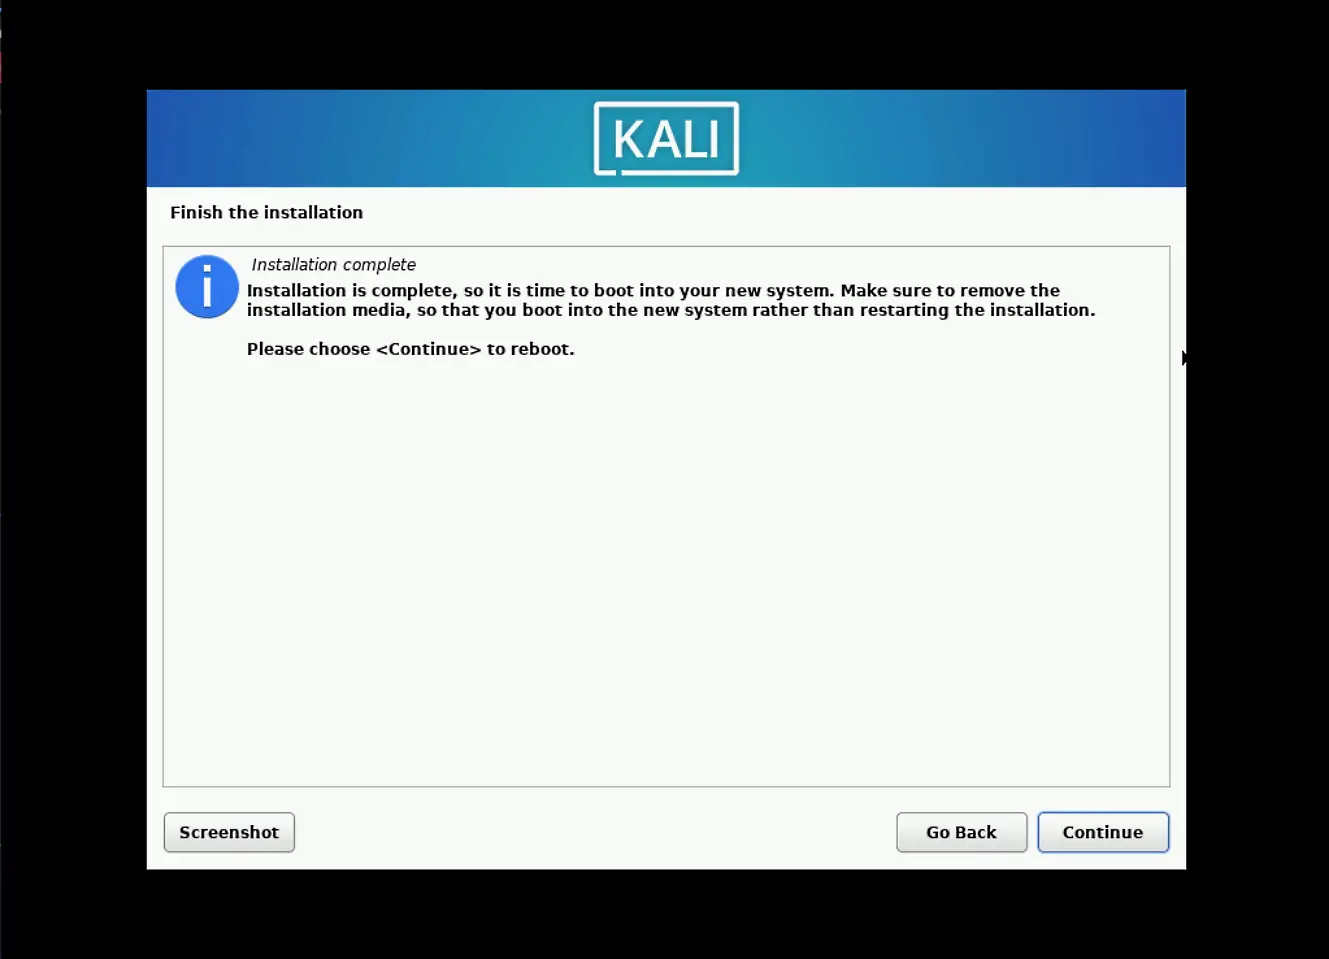
Photo by admingeek from Infotechys
Congratulations! You’ve successfully installed Kali Linux on KVM. You can now proceed with entering your user account credentials and start exploring the desktop environment.

Photo by admingeek from Infotechys
For optimal performance and security, it’s recommended to update your system using the following command(s) and then reboot your machine.
$ sudo apt update -y; sudo apt upgrade -y
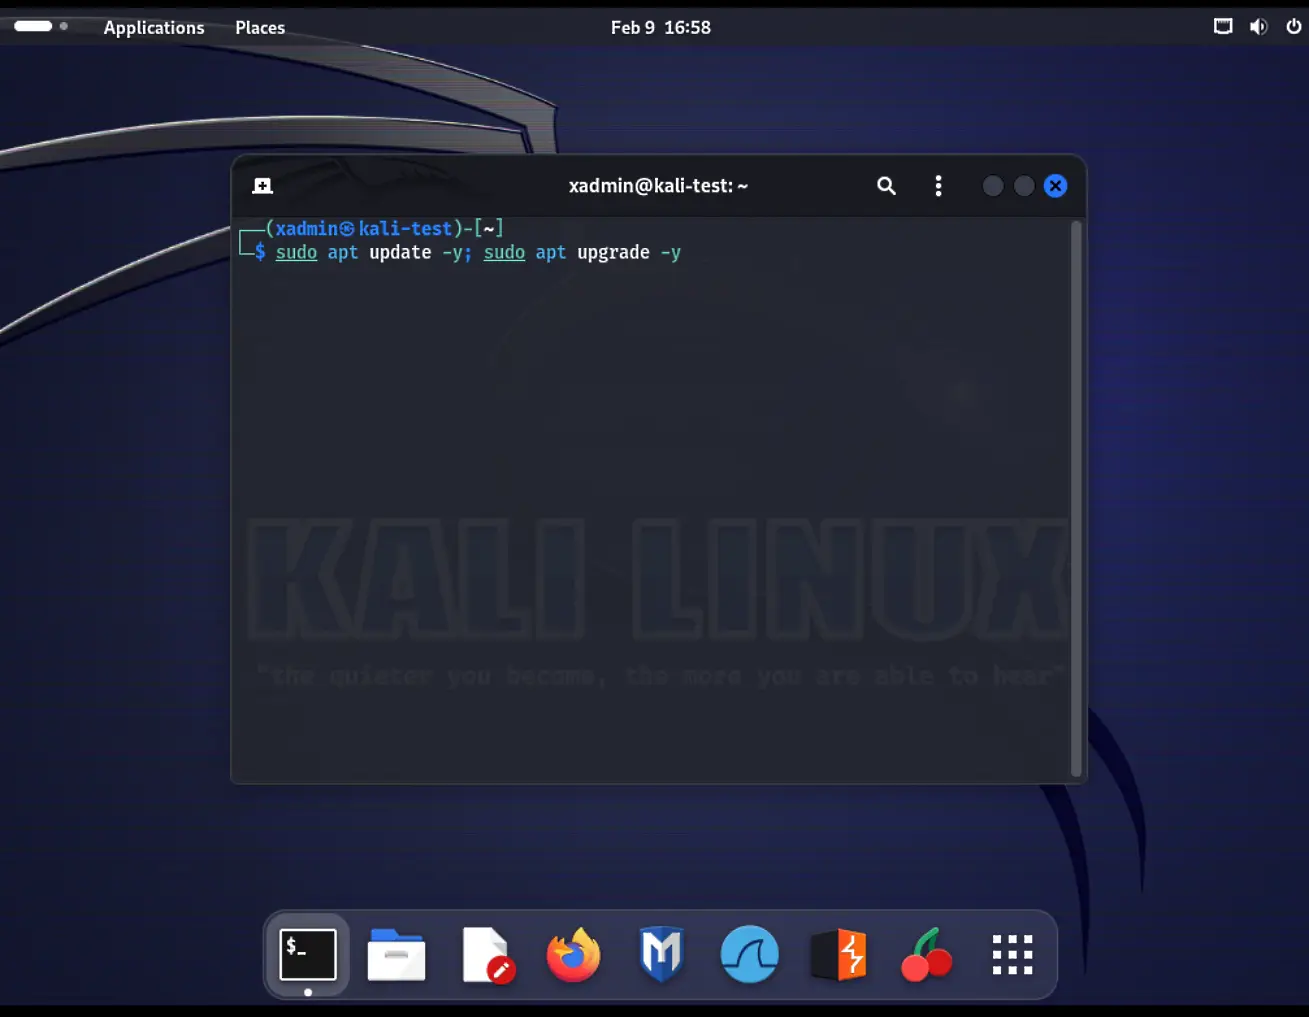
Photo by admingeek from Infotechys
In conclusion, installing Kali Linux on KVM provides a robust platform for conducting penetration testing and security assessments within a virtualized environment. By following the step-by-step instructions outlined here, you can set up Kali Linux with ease, leveraging its comprehensive suite of tools and features for digital forensics and cybersecurity. From configuring the virtual machine to selecting software packages and desktop environments, each step is carefully explained to ensure a successful installation process. With Kali Linux up and running on KVM, you’re well-equipped to enhance your security testing capabilities and bolster your cybersecurity defenses.
Did you find this article useful? Your feedback is invaluable to us! Please feel free to share your thoughts in the comments section below.
Related Posts
In today’s tutorial, we will install CentOS8 on KVM. The install process is fairly straightforward and we will cover it here step-by-step. We will follow

In this blog post, we’ll explore the 10 major differences between Ubuntu 20.04 and its latest iteration, Ubuntu 22.04, shedding light on the advancements that await

In this blog post, we’ll delve into the 10 major differences between Red Hat and Kali Linux, shedding light on their unique features, use cases,