HOWTO
In this tutorial, we will review how to install Ubuntu desktop on KVM. For this particular demonstration, we will examine version 20.04 of the operating


In this tutorial, we will review how to install Ubuntu desktop on KVM. For this particular demonstration, we will examine version 20.04 of the operating
In this tutorial, we will review the Kubernetes cluster install on CentOS8. This procedure will mirror our previous article about this subject. Install a Kubernetes

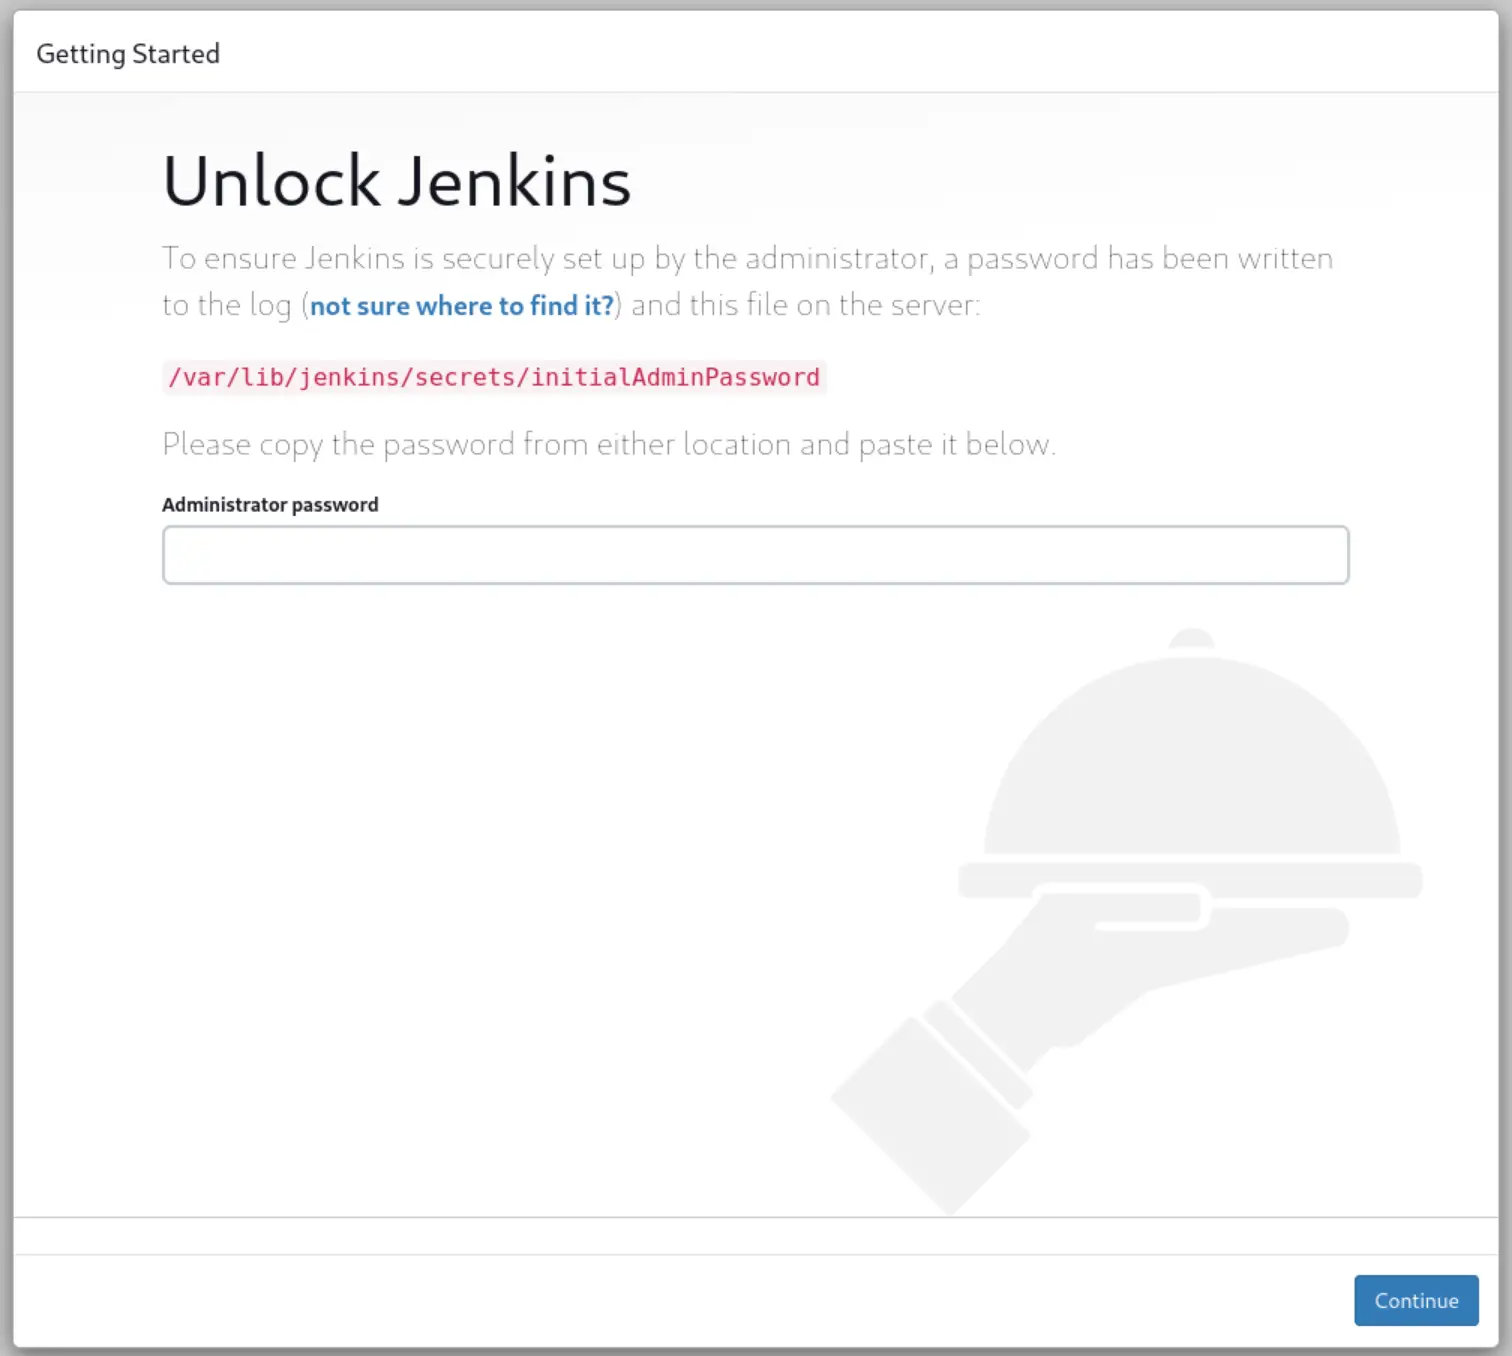
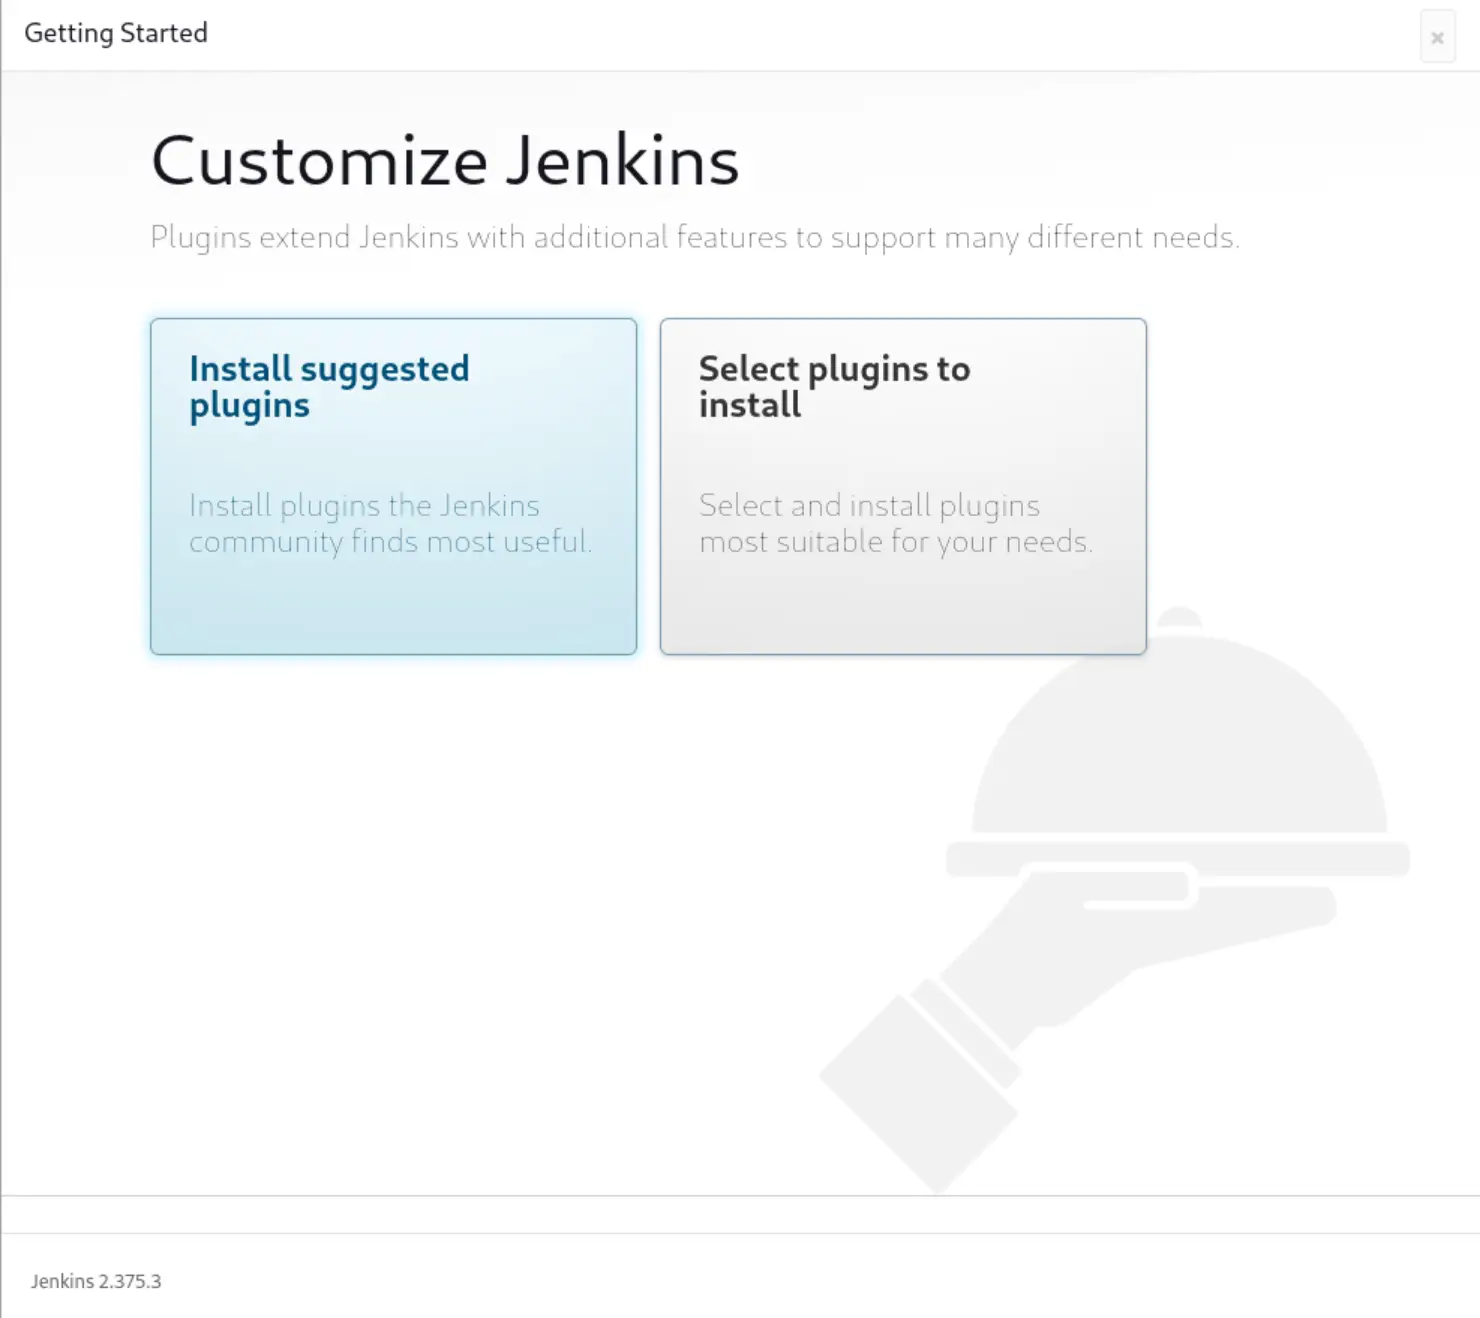
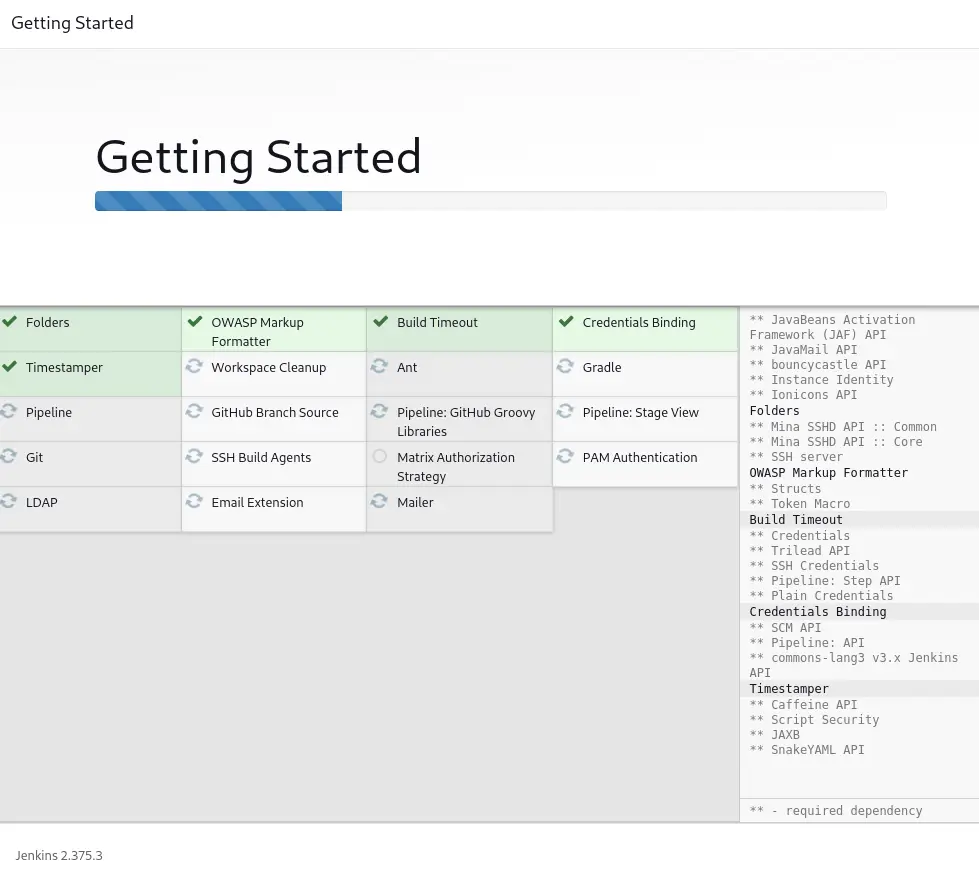
Want to secure your Jenkins environment and protect sensitive data? Learn how to install SSL certificates on Jenkins and enhance the security of your continuous