In this article, we will review how to install Gedit on RHEL8 or CentOS8. Whether you’re a developer, writer, or simply someone who frequently works

In this guide, we will walk you through the step-by-step process to install Gping on RHEL9 or CentOS9. We will also review some usage examples to gain a better understanding.
In the fast-paced world of server management, having a reliable tool for measuring network latency is crucial. Gping or Graphical ping, a modern replacement for the traditional ping command, offers advanced features and a user-friendly interface.
Before we dive into the installation process, ensure that your RHEL 9 or CentOS 9 system is up-to-date. Open a terminal and run the following commands:
					$ sudo dnf install https://dl.fedoraproject.org/pub/epel/epel-release-latest-9.noarch.rpm -y

$ sudo dnf update -y
The first command (above) installs the Extra Packages for Enterprise Linux (EPEL) repostory (which contains Snap), and the second command updates your system.
					$ sudo dnf info snapd
Updating Subscription Management repositories.
Available Packages
Name         : snapd
Version      : 2.58.3
Release      : 1.el9
Architecture : x86_64
Size         : 15 M
Source       : snapd-2.58.3-1.el9.src.rpm
Repository   : epel
Summary      : A transactional software package manager
URL          : https://github.com/snapcore/snapd
License      : GPLv3
Description  : Snappy is a modern, cross-distribution, transactional package manager
             : designed for working with self-contained, immutable packages.
Snap streamlines applications by bundling all dependencies into a single build, ensuring compatibility across various Linux distributions. It facilitates automatic updates and seamless rollbacks. You can easily discover and install Snap from the Snap Store, a thriving platform with millions of users. Snap is supported on Red Hat Enterprise Linux (RHEL) versions 9, 8, and RHEL 7 starting from the 7.6 release.
To install Gping using Snap, run the following command:
$ sudo dnf install snapd
With Snap successfully installed, it’s essential to enable the Snap daemon, or snapd, to start automatically upon reboot and activate its running status. Execute the following command to achieve both tasks:
					$ sudo systemctl enable --now snapd.socket
Created symlink /etc/systemd/system/sockets.target.wants/snapd.socket → /usr/lib/systemd/system/snapd.socket.
NOTE: Also, run this command (below) to symlink /var/lib/snapd/snap to /snap.
$ sudo ln -s /var/lib/snapd/snap /snap
Skipping this step will lead to the display of the following error message:
					$ sudo snap install gping
error: too early for operation, device not yet seeded or device model not acknowledged
Now that your system is prepared, install Gping using the following command:
$ sudo snap install gping
This command will automatically download and install Gping along with its dependencies.
Once the installation is complete, verify that Gping is installed correctly by running:
					$ which gping
/var/lib/snapd/snap/bin/gping
The which command displays the path to the Gping executable (shown above).
Now, let’s explore some examples of Gping in action.
Gping offers various options to tailor your network latency measurements. Here are some examples:
$ gping infotechys.com
$ gping -c 10 example.com
$ gping -i 2 example.com
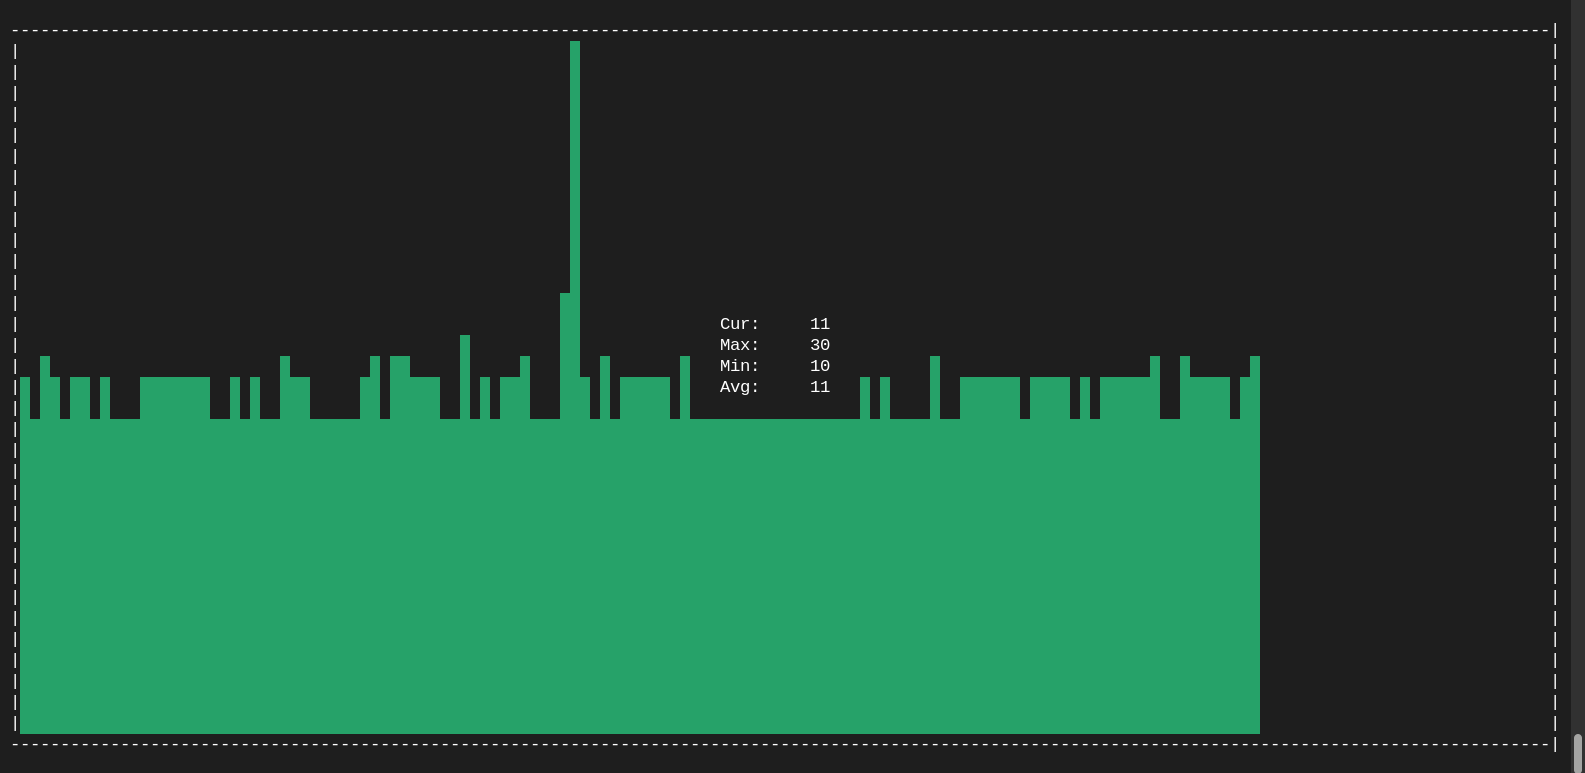
These are just a few examples. You can supply Gping with nearly any parameter you would use for a standard ping command. The unique feature of Gping lies in its graphical presentation.
Gping displays results in a graphical format, making it easy to interpret latency patterns. Use the graphical output to identify variations and potential issues in your network.

Photo by admingeek from Infotechys
By following this guide, you’ve successfully installed and started using Gping on your RHEL 9 or CentOS 9 system. This powerful tool not only simplifies network latency measurements but also provides valuable insights for optimizing your server performance. Incorporate Gping into your routine monitoring tasks to ensure a responsive and efficient network infrastructure.
Was this article helpful to you? If so, leave us a comment below and share!
Related Posts

In this article, we will review how to install Gedit on RHEL8 or CentOS8. Whether you’re a developer, writer, or simply someone who frequently works

Learn about installing and using PostgreSQL on CentOS 8 with this step-by-step guide and take your data management to the next level! Table of Contents

In this tutorial, we will install Komodo Editor on CentOS8. Granted, it can be installed on any Linux distribution (rpm-based or Debian distro). However, we
