
HOWTO
When it comes to popular text editors for Linux, text editors are like wallets. Everybody’s got one and more importantly, everyone’s choice of a text


When it comes to popular text editors for Linux, text editors are like wallets. Everybody’s got one and more importantly, everyone’s choice of a text

In this tutorial, we will install Komodo Editor on CentOS8. Granted, it can be installed on any Linux distribution (rpm-based or Debian distro). However, we
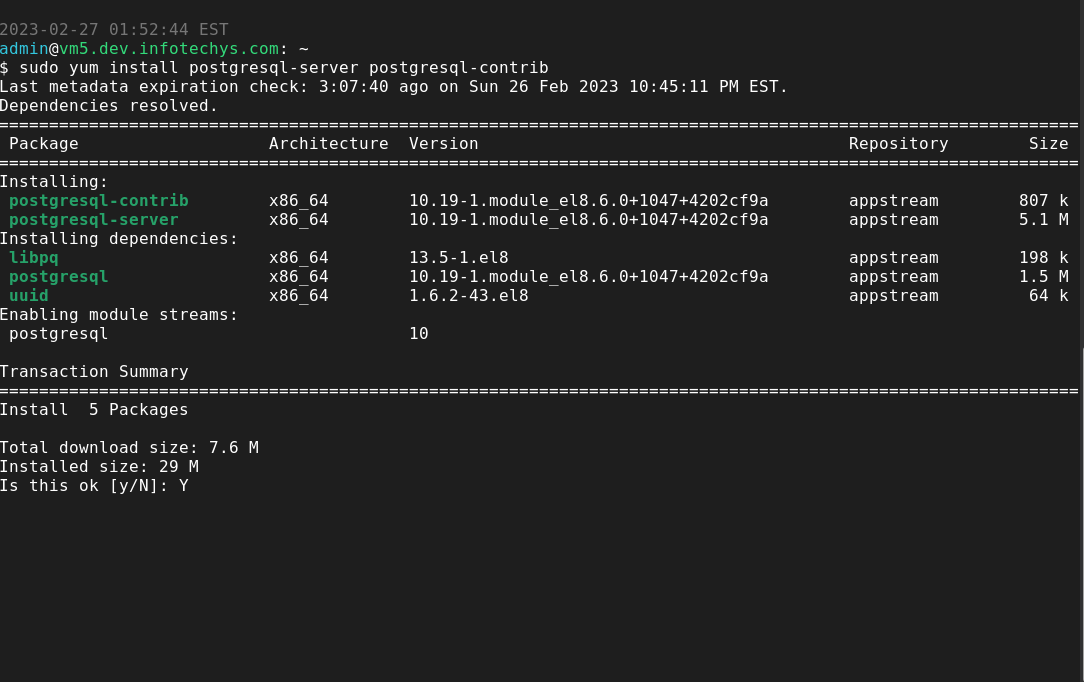
In this tutorial, we will install gedit on CentOS7. We are going to use yum for the installation so it’s a straightforward process. The same