
Commands
Looking to establish a reliable and secure web presence? Learn how to Install Apache web server on CentOS and unlock the potential of your website


Learn how to install Apache Guacamole on RHEL 9 or CentOS 9 using Ansible roles for automated, secure, and efficient remote desktop access. Step-by-step guide with CLI examples.
Apache Guacamole is a powerful, clientless remote desktop gateway that allows you to access your desktops or servers using a web browser. As an open-source software, it supports multiple protocols, including VNC, RDP, and SSH. This post will guide you through installing Apache Guacamole on RHEL 9 or CentOS 9, using Ansible Roles. By using Ansible, you can automate the deployment and ensure consistency across multiple systems.
In this post, we’ll cover:
Apache Guacamole is a web-based remote desktop gateway that supports several protocols, including:
With Guacamole, you can access any machine (Windows, Linux, etc.) using a browser without needing any client-side software. It is especially useful in environments where remote access to multiple systems needs to be streamlined, secure, and cross-platform.
Why Apache Guacamole? |
Prerequisites |
Before diving into the installation process, make sure you have the following prerequisites:
For this demonstration, we’ve configured our RHEL 9 instance as follows:
| Hostname | RAM | Cores | OS |
| ansible.dev.naijalabs.net (management node) | 4 | 2 | Red Hat Enterprise Linux release 9.5 (Plow) |
| guacamole.dev.naijalabs.net (target) | IP: 192.168.1.155 | 8 | 4 | Red Hat Enterprise Linux release 9.5 (Plow) |
Ansible uses a role-based structure to organize tasks into reusable units. For this guide, we’ll be leveraging an existing Ansible role for installing Apache Guacamole. If you’ve already patched your systems and installed Ansible on your management node, proceed to Step #3.
Step 1: Update Your Machine |
It’s good practice to ensure your machines are patched and up-to-date before proceeding with this install. If you’re machines are already patched, skip this step and proceed to Step #2. To update and reboot your system, run the following commands:
sudo dnf update -y && sudo systemctl reboot
Step 2: Installing Ansible on RHEL 9 / CentOS 9 |
If you don’t already have Ansible installed on your management node, run these commands:
sudo dnf install epel-release -y && sudo dnf install ansible -y
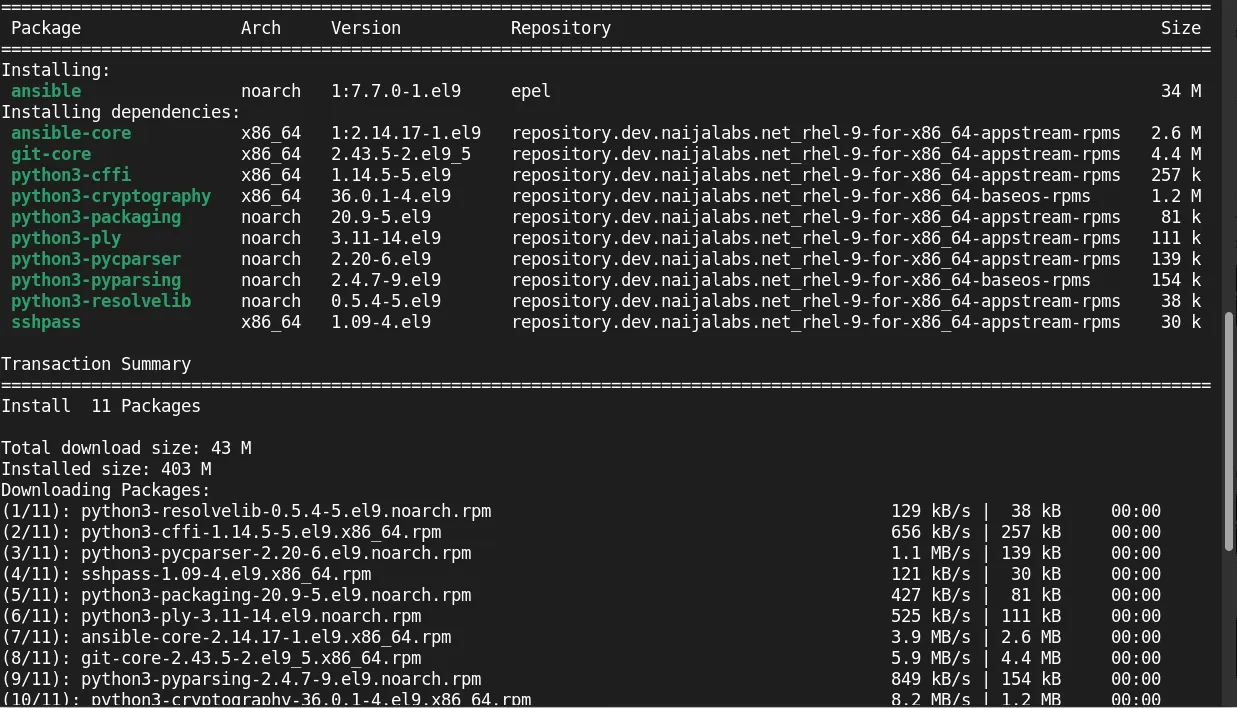
Photo by admingeek from Infotechys
Verify the installation:
ansible --version
					ansible [core 2.14.17]
  config file = /etc/ansible/ansible.cfg
  configured module search path = ['/home/admin/.ansible/plugins/modules', '/usr/share/ansible/plugins/modules']
  ansible python module location = /usr/lib/python3.9/site-packages/ansible
  ansible collection location = /home/admin/.ansible/collections:/usr/share/ansible/collections
  executable location = /usr/bin/ansible
  python version = 3.9.21 (main, Dec  5 2024, 00:00:00) [GCC 11.5.0 20240719 (Red Hat 11.5.0-2)] (/usr/bin/python3)
  jinja version = 3.1.2
  libyaml = True
Step 3: Prepare the Environment |
On your management node, start by creating a directory to store your Ansible playbooks and roles. For example, create a guacamole-rhel9 directory.
mkdir -p ~/guacamole-rhel9 && cd ~/guacamole-rhel9
Inside of the guacamole-rhel9 directory, create a basic directory structure to house the Ansible roles using the following command:
ansible-galaxy init guacamole
- Role guacamole was created successfully
Run the tree command to view the directory structure:
tree guacamole
					guacamole
├── defaults
│   └── main.yml
├── files
├── handlers
│   └── main.yml
├── meta
│   └── main.yml
├── README.md
├── tasks
│   └── main.yml
├── templates
├── tests
│   ├── inventory
│   └── test.yml
└── vars
    └── main.yml

8 directories, 8 files
Step 4: Define Role Metadata |
In the meta/main.yml, you should define the role’s metadata, such as dependencies and author information.
guacamole/meta/main.yml– using your preferred text editor. Then, save and exit the file. Repeat for the other YAML files.
vim guacamole/meta/main.yml
					galaxy_info:
  author: Your Name
  description: "An Ansible role to install and configure Apache Guacamole"
  company: Your Company (optional)
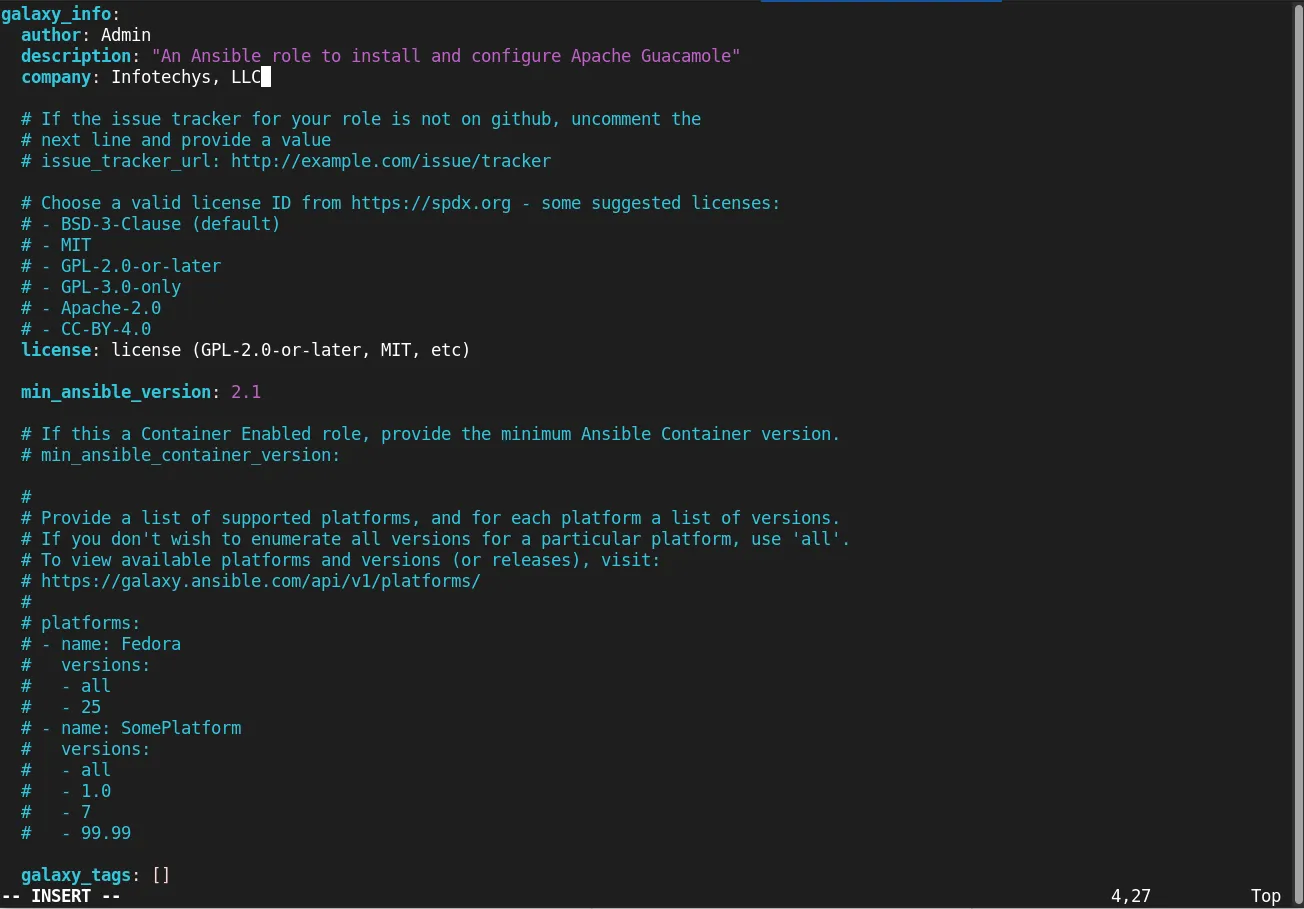
Photo by admingeek from Infotechys
Step 5: Define Default Variables |
The defaults/main.yml file will hold any default configuration options. These variables can be overridden by other parts of your playbook or inventory.
guacamole/defaults/main.yml
vim guacamole/defaults/main.yml
					---
# defaults file for guacamole

# Default Guacamole configuration variables
guacamole_java_package: "java-17-openjdk"
guacamole_dependencies:
  - autoconf
  - automake
  - libtool
  - epel-release
  - git
  - gcc
  - gcc-c++
  - make
  - cairo
  - cairo-devel
  - libpng-devel
  - libjpeg-devel
  - libssh2-devel
  - libvncserver-devel
  - cmake
  - libusb1-devel
  - freerdp
  - pango-devel
guacamole_version: "1.5.5"  # Can be set to a specific version if needed

# Define MySQL Database variables
mysql_hostname: "127.0.0.1"
mysql_port:     "3306"
mysql_database: "guacamole_db"
mysql_username: "guacamole_user"
Important Note: In today’s digital landscape, ensuring strong password security is crucial. To meet the necessary requirements, replace mysql_password with your unique password. Failure to meet the password requirements may cause issues with your playbook, particularly in the section related to the MySQL database. For reference, consider the example password below while following these guidelines.
| Criteria | Description | Example |
|---|---|---|
| Length | The password is 12 characters long, which is often considered a good minimum length for security. | 12 characters |
| Uppercase Letters | It includes uppercase letters, which increase complexity and security. | “Y”, “O”, “H”, “V”, “M”, “X” |
| Lowercase Letters | It contains lowercase letters, adding variety and strength. | “t”, “q”, “e” |
| Numbers | It includes numbers, making it harder to guess. | “2” |
| Special Characters | It includes a special character, which strengthens the password by increasing unpredictability. | “:” |
| Variety | The password mixes different character types (letters, numbers, special characters) for enhanced security. | Uppercase, lowercase, numbers, special character |
If you’re setting a password policy, it’s good to make sure it includes a mix of these elements (uppercase, lowercase, numbers, and special characters) and meets the required length for strength.
Securing Sensitive Data (e.g. passwords) |
secrets.yml), not in plaintext within vars/main.yml or defaults/main.yml.vars_files in the playbook to reference the encrypted vault file.
ansible-vault create guacamole/vars/secrets.yml
					New Vault password:
Confirm New Vault password:
You will be prompted to enter and confirm a password to secure access to the file. Be sure to input all sensitive variables you’ll need to reference during the playbook execution. In this example, we’ve included the root password for the MySQL database.
mysql_password: "tYOHVqe:r2MX"
Save and exit the file. You’ll also need to store the secret password in a hidden vault-password file to avoid being prompted for it each time you run the playbook.
vim .vault-password
your-vault-password
Again, save and exit the file. Now, let’s move on to the main tasks section. We’ll revisit how to reference the secrets.yml file at the end of this tutorial, when it’s time to run the playbook.
Step 6: Define the Tasks |
The primary responsibilities for this role are outlined in the tasks/main.yml file, which contains the steps to install and configure Guacamole. The tasks are divided into four sections (and a reference to the secrets.yml), each addressing a different component involved in setting up Guacamole on your RHEL 9 or CentOS 9 system:
The tasks include:
install_dependencies.yml: Handles the installation of all necessary package dependencies for Guacamole’s installation and configuration.
mysql_db_install.yml: Manages the setup and configuration of the MySQL database.
guacamole.yml: Contains the core tasks for installing and configuring the Guacamole server and its features.
firewall.yml: Ensures the proper network ports are open to facilitate smooth operation and accessibility of Guacamole.
Let’s begin by referencing these different tasks in the main.yml file. Using your preferred text editor, open the guacamole/tasks/main.yml file and populate it with the following content:
vim guacamole/tasks/main.yml
					---
# Main playbook for setting up Guacamole

- name: Install package dependencies
  include_tasks: install_dependencies.yml

- name: Set up MySQL Database
  include_tasks: mysql_db_install.yml

- name: Install and configure Guacamole server
  include_tasks: guacamole.yml

- name: Configure firewall settings
  include_tasks: firewall.yml
Next, let’s rinse and repeat for the YAML files included in the guacamole/tasks/main.yml:
install_dependencies.yml |
vim guacamole/tasks/install_dependencies.yml
					---
# tasks file for installing guacamole dependent packages
- name: Install libuuid-devel dependency
  dnf:
    name: libuuid-devel
    state: present

- name: Install necessary dependencies for Guacamole
  dnf:
    name: "{{ item }}"
    state: present
  loop: "{{ guacamole_dependencies }}"
mysql_db_install.yml |
Important Note: The mysql_native_password authentication plugin has been deprecated starting from MySQL 8.0.34. It is disabled by default in MySQL 8.4 and has been removed entirely as of MySQL 9.0.0. This means that, moving forward, users will need to use more secure authentication methods, such as caching_sha2_password, which is the default authentication plugin in MySQL 8.0 and later versions. Make sure to maintain the correct indentation when copying and pasting content. Incorrect indentation will lead to errors in execution!!
If you’re running MySQL 8.0.34 or later and need to support older clients or applications, you may need to explicitly enable the mysql_native_password plugin for certain users (which we have in this case). However, it’s recommended to update your applications to support the more secure caching_sha2_password plugin to ensure compatibility with newer MySQL versions.
					---
# tasks for downloading, installing and provisioning MySQL Databases
- name: Install python3-PyMySQL
  dnf:
    name: python3-PyMySQL
    state: present

- name: Download and install the MySQL repository package
  shell: |
    sudo dnf install -y https://dev.mysql.com/get/mysql84-community-release-el9-1.noarch.rpm
    sudo dnf install -y mysql-community-server mysql-community-devel

- name: Start MySQL service
  service:
    name: mysqld
    state: started
    enabled: yes

- name: Get temporary root password from log
  command: "sudo grep 'temporary password' /var/log/mysqld.log"
  register: temp_root_password

- name: Extract the temporary password using regex
  set_fact:
    temp_password: "{{ (temp_root_password.stdout | regex_search('generated for root@localhost: (.+)', '\\1'))[0] }}"

- name: Debug the extracted password
  debug:
    msg: "Temporary password is: {{ temp_password }}"

- name: Check if /root/.my.cnf exists
  stat:
    path: /root/.my.cnf
  register: my_cnf_file

- name: Update MySQL root Password
  shell: |
    mysql -u root -p"{{ temp_password }}" --connect-expired-password -e "ALTER USER 'root'@'localhost' IDENTIFIED BY '{{ mysql_password }}';"
  when: my_cnf_file.stat.exists == False

- name: Create the MySQL (my.cnf) config file
  copy:
    dest: /root/.my.cnf
    content: |
      [client]
      user=root
      password={{ mysql_password }}

- name: Append the MySQL Configuration file
  lineinfile:
    path: /etc/my.cnf
    line: "{{ item }}"
  loop:
    - "mysql_native_password=ON"

- name: Restart MySQL service
  service:
    name: mysqld
    state: restarted
    enabled: yes

- name: Remove anonymous MySQL users
  mysql_user:
    name: ''
    host: '%'
    state: absent
    login_user: root
    login_password: "{{ mysql_password }}"

- name: Remove test database
  mysql_db:
    name: test
    state: absent
    login_user: root
    login_password: "{{ mysql_password }}"

- name: Flush MySQL privileges
  mysql_query:
    query: "FLUSH PRIVILEGES;"
    login_user: root
    login_password: "{{ mysql_password }}"

- name: Ensure MySQL is running
  service:
    name: mysqld
    state: started
    enabled: yes
guacamole.yml |
vim guacamole/tasks/guacamole.yml
					---
# tasks file for installing and configuring guacamole
- name: Ensure guacamole database exists
  mysql_db:
    name: guacamole_db
    state: present
  register: result_db

- name: Ensure guacamole user exists
  mysql_user:
    name: guacamole_user
    password: "{{ mysql_password }}"  # Replace this with the desired password
    priv: "guacamole_db.*:ALL"
    host: "localhost"
    state: present
  register: result_user

- name: Install Java OpenJDK
  dnf:
    name: "{{ guacamole_java_package }}"
    state: present

- name: Install Apache Tomcat
  dnf:
    name: tomcat
    state: present

- name: Start and enable Tomcat service
  systemd:
    name: tomcat
    state: started
    enabled: yes

- name: Clone Guacamole server from GitHub
  shell: |
    if [ ! -d /opt/guacamole-server ]; then
      git clone https://github.com/apache/guacamole-server.git /opt/guacamole-server
    fi

- name: Run autoreconf to generate configure script
  shell: autoreconf -fi
  args:
    chdir: /opt/guacamole-server

- name: Build and install Guacamole server
  shell: |
    cd /opt/guacamole-server
    autoreconf -fi
    ./configure --with-init-dir=/etc/init.d --with-ssh --with-vnc --with-freerdp
    make
    sudo make install
  args:
    creates: /usr/local/bin/guacd

- name: Clone FreeRDP Development Package from GitHub
  shell: |
    if [ ! -d /opt/FreeRDP ]; then
      git clone https://github.com/FreeRDP/FreeRDP.git /opt/FreeRDP
    fi

- name: Build and install FreeRDP
  shell: |
    cd /opt/FreeRDP
    git checkout tags/2.10.0
    cmake -DCMAKE_BUILD_TYPE=Release .
    make
    sudo make install

- name: Ensure /etc/guacamole directory exists
  file:
    path: /etc/guacamole
    state: directory
    mode: '0755'

- name: Create guacamole.properties file
  template:
    src: guacamole.properties.j2
    dest: /etc/guacamole/guacamole.properties

- name: Create user-mapping.xml file for user connections
  template:
    src: user-mapping.xml.j2
    dest: /etc/guacamole/user-mapping.xml

- name: Create guacd service file for systemd
  template:
    src: guacd.service.j2
    dest: /etc/systemd/system/guacd.service

- name: Update the system’s cache of installed libraries
  shell: sudo ldconfig

- name: Create the required Guacamole directories
  file:
    path: "/etc/guacamole/{{ item }}"
    state: directory
  loop:
    - extensions
    - lib

- name: Create the config file for guacd
  copy:
    dest: /etc/guacamole/guacd.conf
    content: |
      [daemon]
      pid_file = /var/run/guacd.pid
      #log_level = debug

      [server]
      #bind_host = localhost
      bind_host = 127.0.0.1
      bind_port = 4822

      #[ssl]
      #server_certificate = /etc/ssl/certs/guacd.crt
      #server_key = /etc/ssl/private/guacd.key

- name: Reload systemd to recognize new service
  shell: |
    sudo systemctl daemon-reload

- name: Enable and start guacd service
  systemd:
    name: guacd
    enabled: yes
    state: started

- name: Download Guacamole client WAR file
  get_url:
    url: "https://downloads.apache.org/guacamole/{{ guacamole_version }}/binary/guacamole-{{ guacamole_version }}.war"
    dest: "/tmp/guacamole-{{ guacamole_version }}.war"

- name: Move the Guacamole WAR file to the Tomcat webapps directory
  shell: sudo mv /tmp/guacamole-{{ guacamole_version }}.war /var/lib/tomcat/webapps/guacamole.war

- name: Check if MySQL Connector is installed
  stat:
    path: /etc/guacamole/lib/mysql-connector-j.jar
  register: mysql_connector_stat

- name: Remove existing symbolic link if it exists
  file:
    path: /etc/guacamole/lib/mysql-connector-j.jar
    state: absent
  when: mysql_connector_stat.stat.exists

- name: Download MySQL Connector/J for Guacamole
  shell: |
    sudo dnf install -y https://dev.mysql.com/get/Downloads/Connector-J/mysql-connector-j-9.2.0-1.el9.noarch.rpm
    cd /etc/guacamole/lib && sudo ln -s /usr/share/java/mysql-connector-j.jar

- name: Download JDBC auth plugin for Guacamole
  get_url:
    url: "https://downloads.apache.org/guacamole/{{ guacamole_version }}/binary/guacamole-auth-jdbc-{{ guacamole_version }}.tar.gz"
    dest: "/tmp/guacamole-auth-jdbc-{{ guacamole_version }}.tar.gz"

- name: Extract JDBC auth plugin
  unarchive:
    src: "/tmp/guacamole-auth-jdbc-{{ guacamole_version }}.tar.gz"
    dest: "/tmp/"
    remote_src: yes

- name: Move the MySQL JDBC plugin to the extensions directory
  shell: |
    sudo mv /tmp/guacamole-auth-jdbc-{{ guacamole_version }}/mysql/guacamole-auth-jdbc-mysql-{{ guacamole_version }}.jar /etc/guacamole/extensions/

- name: Append the MySQL properties to the guacamole.properties file
  lineinfile:
    path: /etc/guacamole/guacamole.properties
    line: "{{ item }}"
  loop:
    - "mysql-hostname: {{ mysql_hostname }}"
    - "mysql-port: {{ mysql_port }}"
    - "mysql-database: {{ mysql_database }}"
    - "mysql-username: {{ mysql_username }}"
    - "mysql-password: {{ mysql_password }}"

- name: Import the database schemas for Guacamole
  shell: |
    cat /tmp/guacamole-auth-jdbc-{{ guacamole_version }}/mysql/schema/*.sql | sudo mysql -u root -p'{{ mysql_password }}' guacamole_db --force
  become: yes
  become_user: root

- name: Configure SELinux contexts
  shell: |
    sudo ausearch -c 'Catalina-utilit' --raw | audit2allow -M my-Catalinautilit
    sudo semodule -X 300 -i my-Catalinautilit.pp
    sudo ausearch -c 'java' --raw | audit2allow -M my-java
    sudo semodule -X 300 -i my-java.pp
    sudo setsebool -P domain_can_mmap_files 1
    sudo setsebool -P tomcat_can_network_connect_db 1
    sudo /sbin/restorecon -v /var/lib/tomcat/webapps/guacamole.war

- name: Reload systemd once again
  shell: |
    sudo systemctl daemon-reload

- name: Restart Tomcat and guacd services
  systemd:
    name: "{{ item }}"
    state: restarted
  loop:
    - tomcat
    - guacd

- name: Clean up temporary files
  file:
    path: "/tmp/{{ item }}"
    state: absent
  loop:
    - "guacamole-auth-jdbc-{{ guacamole_version }}.tar.gz"
    - "guacamole-auth-jdbc-{{ guacamole_version }}"
firewall.yml |
vim guacamole/tasks/firewall.yml
					---
- name: Open multiple firewall ports and reload firewall
  shell: |
    sudo firewall-cmd --permanent --add-port={{ item }}/tcp
    sudo firewall-cmd --reload
  with_items:
    - 8080
    - 3306
    - 5900
    - 5901
    - 3389
    - 8443
    - 22  # You can add more ports here as needed
  loop_control:
    loop_var: item  # Customizing the loop variable name if necessary
To run Guacamole with the VNC, RDP, and SSH features, the following ports need to be open on your firewall to allow proper communication:
| Service | Port | Protocol | Description |
|---|---|---|---|
| Guacamole (HTTP) | 8080 | TCP | Default port for accessing the Guacamole web interface. |
| Guacamole (HTTPS) | 8443 | TCP | If using HTTPS to secure the Guacamole web interface. |
| VNC | 5900–5901 (or higher) | TCP | Default port for VNC access. Typically, VNC server listens on port 5900 or 5901 for the first session. |
| RDP | 3389 | TCP | Default port for RDP (Remote Desktop Protocol) connections. |
| SSH | 22 | TCP | Default port for SSH (Secure Shell) connections. |
By ensuring these ports are open, you’ll be able to access and use VNC, RDP, and SSH through the Guacamole interface on your server.
Step 7: Add Handlers (Optional) |
Handlers are used for actions that should be run when certain tasks change, such as restarting services:
vim guacamole/handlers/main.yml
					---
# handlers file for guacamole

- name: restart guacd
  systemd:
    name: guacd
    state: restarted

- name: restart tomcat
  systemd:
    name: tomcat
    state: restarted
Step 8: Add Templates |
The templates/ directory will contain the Jinja2 templates for files like guacamole.properties and user-mapping.xml. These templates will be used to create the actual configuration files on the target machine.
guacamole/templates/guacamole.properties.j2 |
vim guacamole/templates/guacamole.properties.j2
					guacd-hostname: localhost
guacd-port: 4822
user-mapping: /etc/guacamole/user-mapping.xml
guacamole/templates/user-mapping.xml.j2 |
Customize this file to fit the specific needs of your environment.
vim guacamole/templates/user-mapping.xml.j2
					<user-mapping>
    <!-- User with VNC connection -->
    <authorize username="guacadmin" password="password">
        <connection name="VNC-Desktop">
            <protocol>vnc</protocol>
            <param name="hostname">192.168.1.10</param>
            <param name="port">5901</param>
        </connection>
    </authorize>

    <!-- User with RDP connection -->
    <authorize username="guacadmin" password="password">
        <connection name="Windows-Server">
            <protocol>rdp</protocol>
            <param name="hostname">192.168.1.20</param>
            <param name="port">3389</param>
            <param name="username">Administrator</param>
            <param name="password">windows_password</param>
        </connection>
    </authorize>

    <!-- User with SSH connection -->
    <authorize username="guacadmin" password="password">
        <connection name="SSH-Server">
            <protocol>ssh</protocol>
            <param name="hostname">192.168.1.30</param>
            <param name="port">22</param>
            <param name="username">root</param>
            <param name="password">ssh_password</param>
        </connection>
    </authorize>
</user-mapping>
guacamole/templates/guacd.service.j2 |
In recent versions of Red Hat, including RHEL 8 and CentOS 8 or higher, systemd has replaced the older /etc/init.d for service management. As a result, we’ll need to create a configuration file to manage the guacd.service using systemctl. This will allow us to control the Guacamole daemon (guacd) with systemd, ensuring proper startup, shutdown, and status checks.
					[Unit]
Description=Guacamole Proxy Daemon
Documentation=https://guacamole.apache.org/
After=network.target

[Service]
Type=forking
PIDFile=/run/guacd.pid
ExecStart=/usr/local/sbin/guacd -p /run/guacd.pid
ExecStop=/bin/kill -s TERM $MAINPID
ExecReload=/bin/kill -s HUP $MAINPID
Restart=on-failure
User=root
Group=root

[Install]
WantedBy=multi-user.target
Step 9: Create Test Files |
You can define a test playbook and inventory to test the role.
guacamole/tests/inventory |
vim guacamole/tests/inventory
					[guacamole_servers]
192.168.1.155 ansible_ssh_user=admin
guacamole/tests/test.yml |
vim guacamole/tests/test.yml
					---
- name: Test Guacamole Role
  hosts: guacamole_servers
  become: true
  roles:
    - guacamole
Step 10: Create and Run the Playbook |
Now, you can create a guacamole_install.yml in the root of your project to run the role. Here’s how your directory structure should look:
					.
├── guacamole
│   ├── defaults
│   │   └── main.yml
│   ├── files
│   ├── handlers
│   │   └── main.yml
│   ├── meta
│   │   └── main.yml
│   ├── README.md
│   ├── tasks
│   │   ├── firewall.yml
│   │   ├── guacamole.yml
│   │   ├── install_dependencies.yml
│   │   ├── main.yml
│   ├── templates
│   │   ├── guacamole.properties.j2
│   │   ├── guacd.service.j2
│   │   └── user-mapping.xml.j2
│   ├── tests
│   │   ├── inventory
│   │   └── test.yml
│   └── vars
│   │   ├── secrets.yml
│   │   └── main.yml
└── guacamole_install.yml
vim guacamole_install.yml
The guacamole_install.yml playbook is where you will define the hosts, roles, and any specific variables required for the playbook to run (e.g., vars_files: secrets.yml).
					---
- name: Install and configure Apache Guacamole
  hosts: guacamole_servers
  vars_files:
    - guacamole/vars/secrets.yml
  become: true
  roles:
    - guacamole
To execute the playbook, run the following command:
ansible-playbook -i guacamole/tests/inventory guacamole_install.yml -K --vault-password-file .vault-password
BECOME password:
You will be prompted to enter the sudo password for your ansible user (e.g. admin for this demonstration). Enter your password and press [Enter] key to proceed.
Step 11: Monitor the Installation |
You should see output similar to the following:

Photo by admingeek from Infotechys
Once the playbook finishes, Apache Guacamole will be installed and running on your server.
Step 12: Verify Installation |
To verify that Apache Guacamole is installed successfully:
http://<your-server-ip>:8080/guacamole 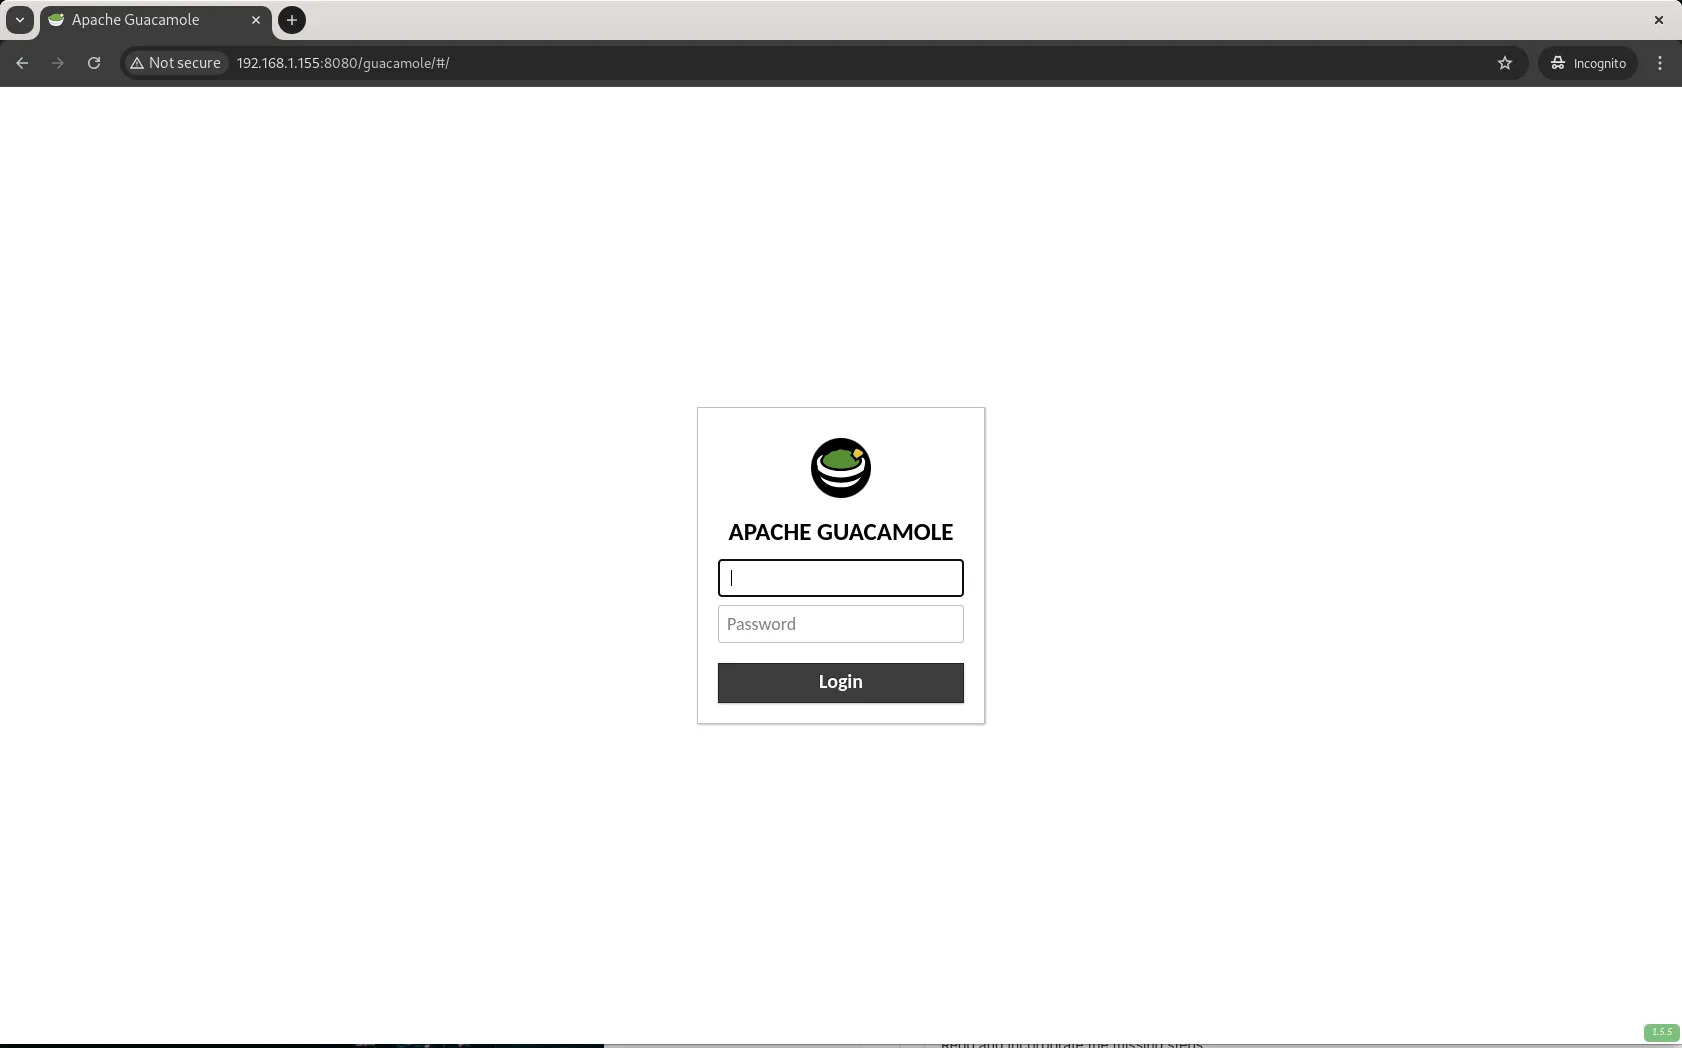
Photo by admingeek from Infotechys
Guacamole Service Not Starting |
If Guacamole fails to start, you can check the service status using the following command:
sudo systemctl status guacd
You can also check the running status of tomcat with the following command:
sudo systemctl status tomcat
However, most issues you encounter can typically be diagnosed by running the journalctl command or by searching the /var/log/messages file for entries related to Guacamole.
sudo journalctl -u guacd
sudo cat /var/log/messages | grep guac
| Resource | Description |
|---|---|
| Official Apache Guacamole Documentation | This page contains the Official Apache Guacamole manual. |
| Ansible Documentation | A great resource for comprehensive Ansible documentation. It contains installation guides, examples, and best practices. |
This guide walked you through the process of creating a well-structured Ansible role for installing Apache Guacamole on RHEL 9 or CentOS 9. By organizing the role with separate directories for tasks, variables, templates, and handlers, we can make the playbook more modular, reusable, and maintainable.
The steps in this role will:
Install required dependencies and Apache Tomcat.
Download and build the Guacamole server.
Configure Guacamole properties and set up user-mapping for multiple protocols (VNC, RDP, SSH).
Using Ansible roles in this manner simplifies large-scale deployments, making it easier to manage and update configurations. Did you find this article useful? Your feedback is invaluable to us! Please feel free to share this article! Thanks!
Looking to establish a reliable and secure web presence? Learn how to Install Apache web server on CentOS and unlock the potential of your website

In this step-by-step guide, we’ll review how to install Apache Guacamole on Fedora 37, enabling you to set up your own remote desktop gateway effortlessly.

Learn how to install NICE DCV on RHEL 9 with our step-by-step guide. This tutorial covers prerequisites, installation, SSL setup, and optimization tips for secure