
Commands
Learn how to install the LAMP stack on RHEL 9 | CentOS 9 using Podman with our comprehensive guide. Follow step-by-step instructions to set up

Learn how to install and configure Podman on CentOS Stream 10 with this step-by-step guide. Discover the key commands, configurations, and troubleshooting tips to get started with container management.
In today’s world of containerized applications and microservices, Podman has emerged as a powerful, secure, and lightweight container management tool. Unlike Docker, Podman doesn’t require a daemon to run and offers enhanced security features, making it a go-to choice for container orchestration, especially on Linux systems.
If you’re running CentOS Stream 10 and want to leverage Podman for managing your containers, this comprehensive step-by-step guide will walk you through the installation process, configuration, and best practices to get Podman up and running on your system.
Before diving into the installation and configuration, it’s essential to understand why Podman is gaining so much traction.
|
|
|
|
Given these advantages, it’s clear why you might prefer Podman for container management on CentOS Stream 10.
Before you install and configure Podman, ensure your CentOS Stream 10 system is up to date. You’ll also need root (administrator) privileges to install software packages.
Update your CentOS system |
sudo dnf update -y
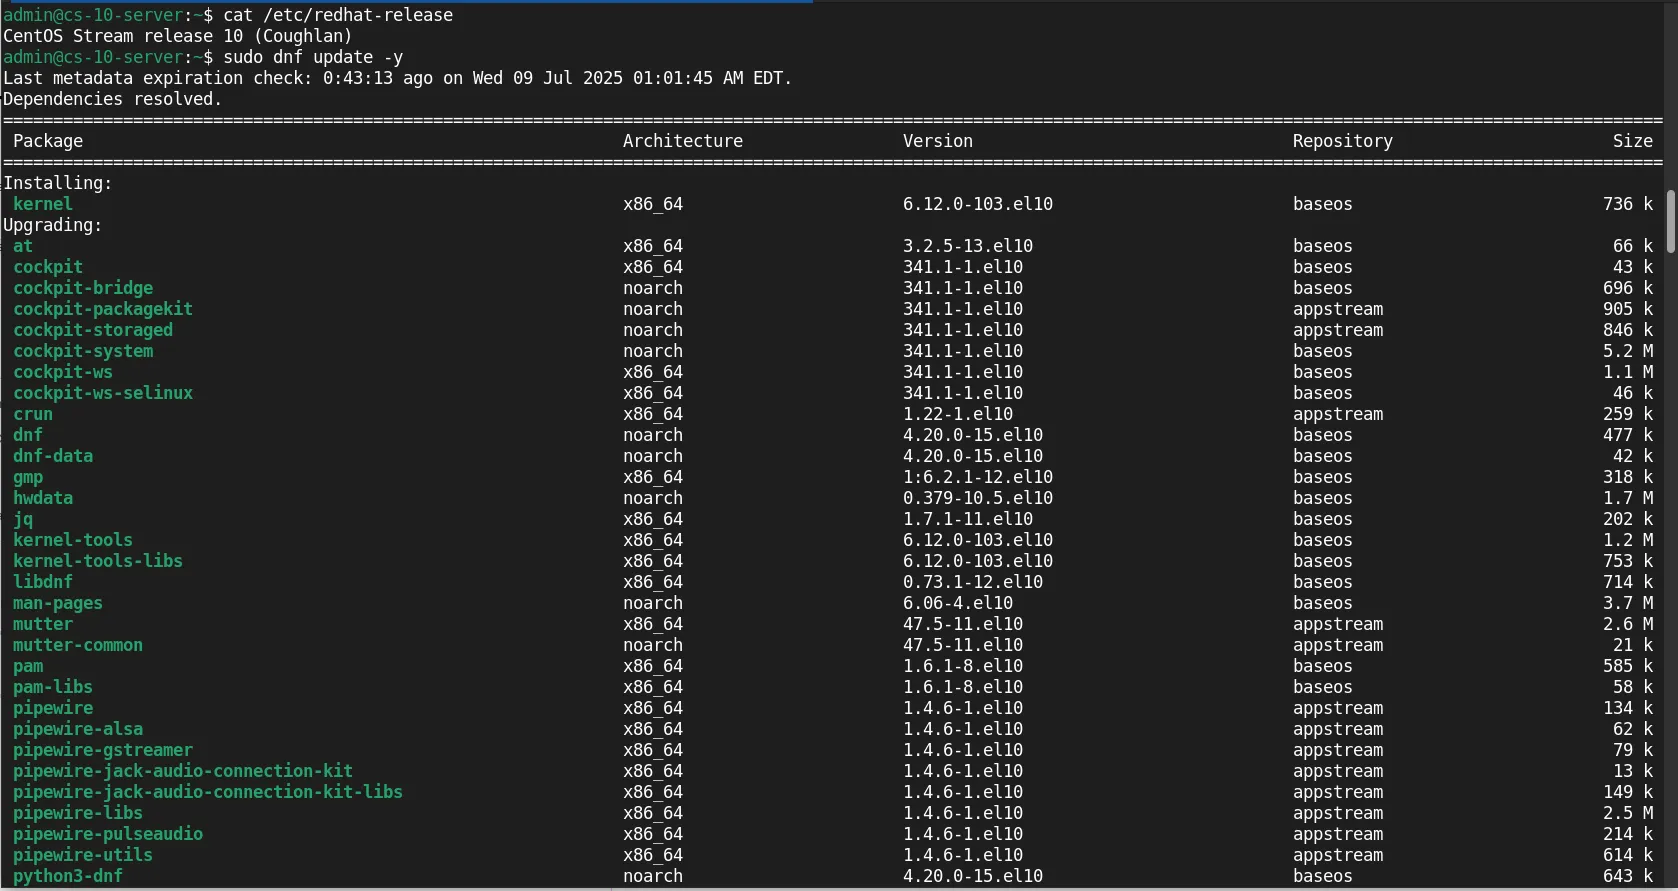
Photo by admingeek from Infotechys
Verify your system version (optional): |
cat /etc/centos-release
CentOS Stream release 10 (Coughlan)
CentOS Stream 10 provides an easy way to install Podman through its official repositories. By default, the non-minimal versions (e.g. server, server with GUI, workstation, etc.) include Podman. Follow these steps to install Podman (if it’s not already installed):
Install Podman using DNF |
Use the following command to install Podman:
sudo dnf install -y podman
This command will download and install Podman, as well as its required dependencies. Once the installation is complete, verify that Podman is correctly installed by running:
podman --version
podman version 5.5.1
Install Podman-Compose (Optional) |
If you’re accustomed to Docker Compose and want to manage multi-container applications, you can install Podman-Compose. While it’s not natively packaged with CentOS, it can be installed via Python’s package manager pip.
pip install podman-compose
💡Python’s package manager |
Once installed, you can use podman-compose commands in the same way you would use docker-compose.
After installing and verifying the installation, give it a test run.
Test the Podman Installation |
Check if Podman can run containers by pulling and running a test image:
podman run hello-world
This command downloads the hello-world image from the container registry and runs it as a container. If you see the “Hello Podman World” message, your installation was successful!
					Resolved "hello-world" as an alias (/etc/containers/registries.conf.d/000-shortnames.conf)
Trying to pull quay.io/podman/hello:latest...
Getting image source signatures
Copying blob 81df7ff16254 done   |
Copying config 5dd467fce5 done   |
Writing manifest to image destination
!... Hello Podman World ...!

         .--"--.
       / -     - \
      / (O)   (O) \
   ~~~| -=(,Y,)=- |
    .---. /`  \   |~~
 ~/  o  o \~~~~.----. ~~
  | =(X)= |~  / (O (O) \
   ~~~~~~~  ~| =(Y_)=-  |
  ~~~~    ~~~|   U      |~~

Project:   https://github.com/containers/podman
Website:   https://podman.io
Desktop:   https://podman-desktop.io
Documents: https://docs.podman.io
YouTube:   https://youtube.com/@Podman
X/Twitter: @Podman_io
Mastodon:  @Podman_io@fosstodon.org
After installation, you’ll likely need to adjust certain configuration settings to meet your needs. Below are a few key configuration steps.
Configure Rootless Containers |
Podman allows users to run containers as non-root users, making it a secure option for daily operations. However, if you need to enable rootless containers, ensure that your user has the required settings:
Create a Podman user namespace |
sudo usermod -aG podman $(whoami)
Verify the user namespace |
podman info --format "{{.Host}}"
🛑 As of Podman 5.0 version, running rootless Podman although functional, still has its shortcomings. Run the |
Configure Storage Settings |
Podman uses various storage backends for container images. The default backend is overlay2, but you can customize this according to your needs. To change storage settings, edit the Podman configuration file:
sudo vim /usr/share/containers/containers.conf
Here you can adjust settings like:
|
|
Example:
					[storage]
  driver = "overlay2"
  graphroot = "/var/lib/containers/storage"
Enable SELinux Support for Podman (Optional) |
CentOS Stream 10 comes with SELinux enabled by default. Podman integrates with SELinux, but sometimes you might run into issues if your SELinux policy isn’t configured properly. To allow Podman to work smoothly with SELinux, follow these steps:
Check if SELinux is Enabled |
sestatus
					SELinux status:                 enabled
SELinuxfs mount:                /sys/fs/selinux
SELinux root directory:         /etc/selinux
Loaded policy name:             targeted
Current mode:                   enforcing
Mode from config file:          enforcing
Policy MLS status:              enabled
Policy deny_unknown status:     allowed
Memory protection checking:     actual (secure)
Max kernel policy version:      33
If SELinux is enabled, you may need to adjust its policies. You can use semanage to manage these policies.
Now that Podman is installed and configured, let’s see how to run containers.
Run a Container |
You can pull and run containers just like you would with Docker. Here’s an example of running a simple nginx container:
podman run -d --name nginx-container -p 8080:80 nginx
					✔ docker.io/library/nginx:latest
Trying to pull docker.io/library/nginx:latest...
Getting image source signatures
Copying blob 23e05839d684 done   |
Copying blob 3da95a905ed5 done   |
Copying blob 9bbbd7ee45b7 done   |
Copying blob 6c8e51cf0087 done   |
Copying blob 48670a58a68f done   |
Copying blob ce7132063a56 done   |
Copying blob ee95256df030 done   |
Copying config 9592f5595f done   |
Writing manifest to image destination
5265828bd59a80000f154792e8982f7ee81ef0d766bae754b440a2f8d2d00feb
This command runs the nginx container in detached mode, mapping port 8080 on your host machine to port 80 in the container.
💡To view the NGINX welcome page from a browser and confirm it’s functioning, use the firewall-cmd command to open port 8080. |
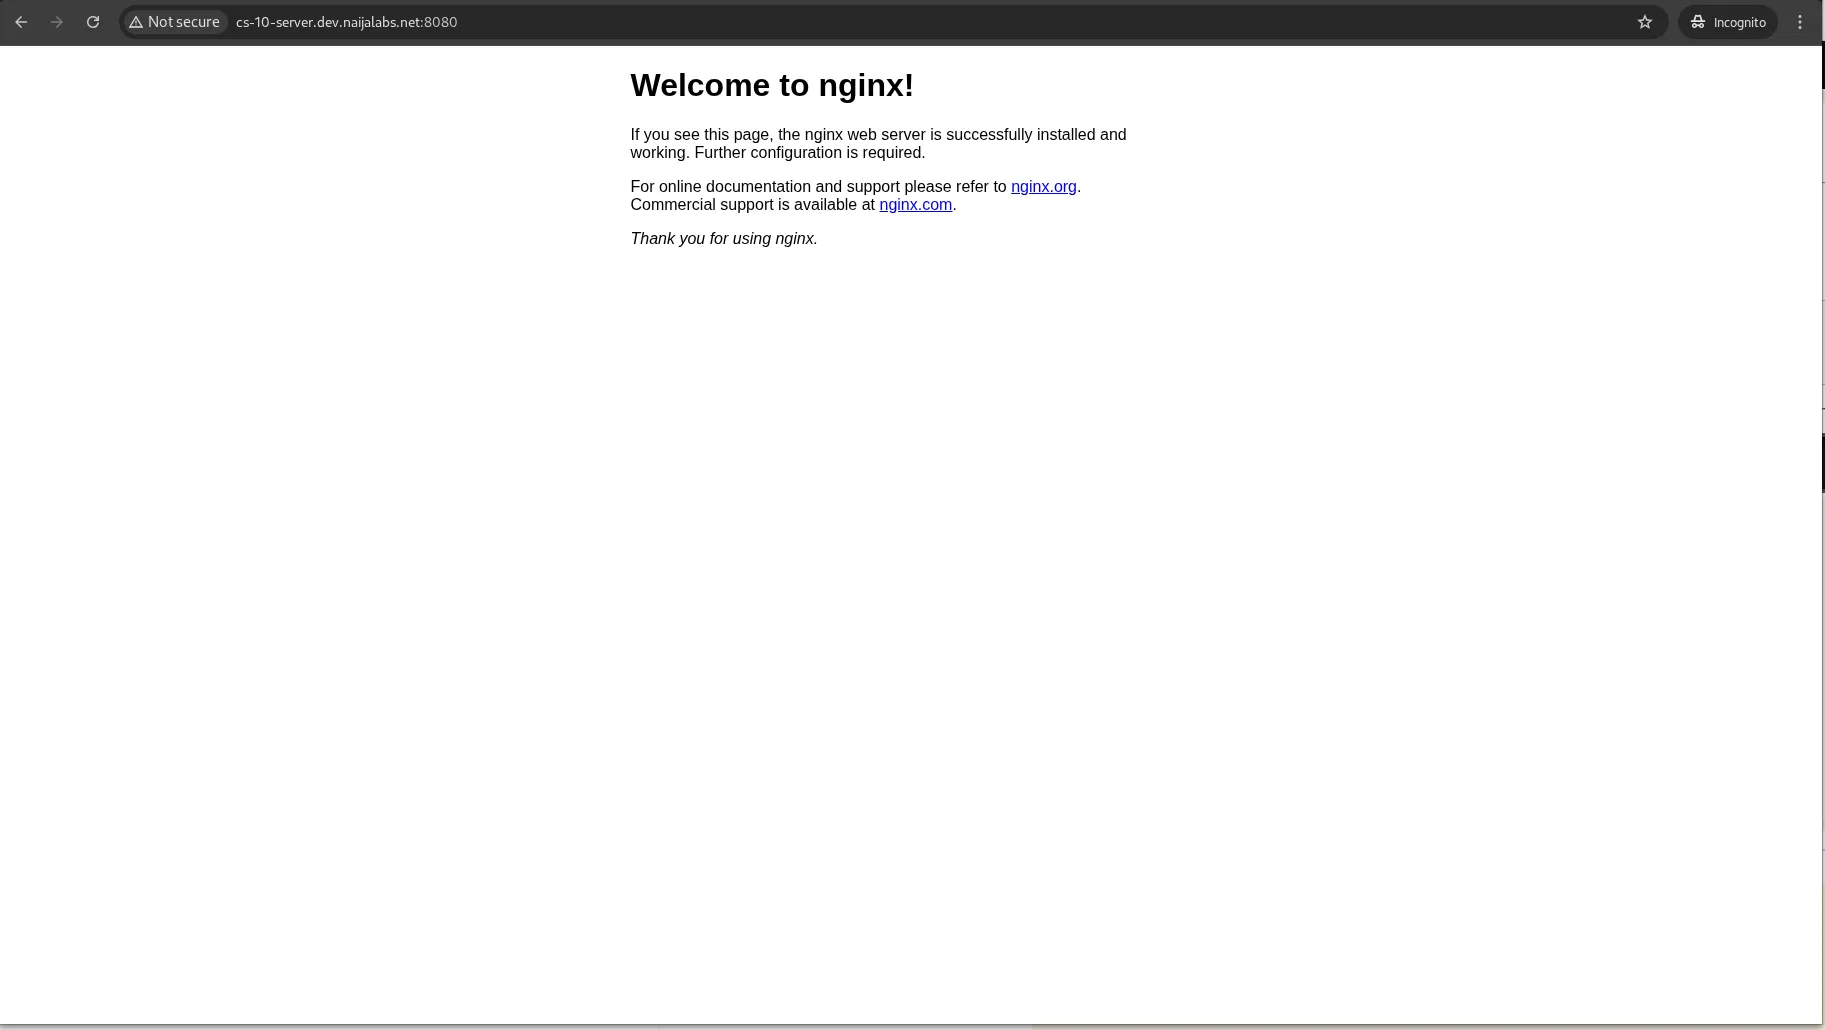
Photo by admingeek from Infotechys
List Running Containers |
To see all the containers running on your system, use:
podman ps
If you want to list all containers (including stopped ones), use:
podman ps -a
					CONTAINER ID  IMAGE                           COMMAND               CREATED            STATUS                        PORTS                 NAMES
afa994c21ab4  quay.io/podman/hello:latest     /usr/local/bin/po...  About an hour ago  Exited (0) About an hour ago                        intelligent_einstein
5265828bd59a  docker.io/library/nginx:latest  nginx -g daemon o...  20 minutes ago     Up 20 minutes                 0.0.0.0:8080->80/tcp  nginx-container
Stop and Remove Containers |
To stop a container, run:
podman stop nginx-container
To remove the stopped container, run:
podman rm nginx-container
While Podman is usually easy to install, you may encounter some issues during the process. Here are a few common problems and their solutions:
Error: “podman: command not found” |
Ensure that you have installed Podman using the correct package manager (dnf install -y podman).
“SELinux error” when running containers |
This issue is usually related to SELinux permissions. Try setting z to the container mounts:
podman run -v /host/path:/container/path:z nginx
The |
This is a DEPRECATED command. It is recommended to use Quadlets for running containers and pods under systemd.
In this guide, we’ve walked through the installation and configuration of Podman on CentOS Stream 10. Podman offers a lightweight and secure alternative to Docker, with added benefits such as a daemonless architecture and rootless containers. With this step-by-step guide, you can get Podman running on your CentOS system in no time and start managing your containerized applications securely.
Did you find this article helpful? Your feedback is invaluable to us! Feel free to share this post with those who may benefit, and let us know your thoughts in the comments section below.
Learn how to install the LAMP stack on RHEL 9 | CentOS 9 using Podman with our comprehensive guide. Follow step-by-step instructions to set up
Learn how to install Podman on Ubuntu 24.04 Server with this comprehensive guide. Discover key features, essential commands, and troubleshooting tips to effectively manage your

Learn how to install Podman on AlmaLinux 9.5 with a step-by-step guide. Set up Podman containers, use Podman Compose, and manage multi-container applications securely. Table