Commands
Learn how to install CentOS 9 Stream with a graphical user interface (GUI) step by step, including a complete desktop setup guide. Discover useful commands

Learn how to create and build RPM packages for Linux-based systems. This guide covers setting up your RPM build environment, writing spec files, and building and testing RPM packages step-by-step.
In the world of Linux-based systems, the ability to create and manage software packages is a fundamental skill for developers and system administrators. One of the most commonly used packaging formats in the Linux ecosystem is RPM (Red Hat Package Manager). RPM is widely used by distributions such as Red Hat, CentOS, Fedora, and others. Creating your own RPM packages allows you to bundle software for easy distribution and installation across these systems.
In this post, we’ll take a deep dive into the process of creating and building your own RPM packages. From setting up your environment to writing the necessary build scripts, we’ll cover all the essential steps. By the end of this article, you’ll have the knowledge you need to create, package, and distribute software efficiently using RPM.
An RPM package is a software distribution format used primarily in Linux distributions such as Red Hat, CentOS, Fedora, and SUSE. It allows developers to package software in a standardized format that can easily be installed, upgraded, or removed using package management tools like rpm and yum.
The RPM package consists of:
|
|
|
An RPM package typically has the .rpm file extension and can be installed, upgraded, and managed with the help of the rpm command line tool or other package managers like dnf and yum.
Creating RPM packages offers several advantages:
|
|
|
|
Before you can start building your RPM package, make sure your system is set up with the necessary tools. The following are the prerequisites for creating RPM packages:
|
|
|
Install the required tools:
sudo dnf install rpm-build rpmdevtools
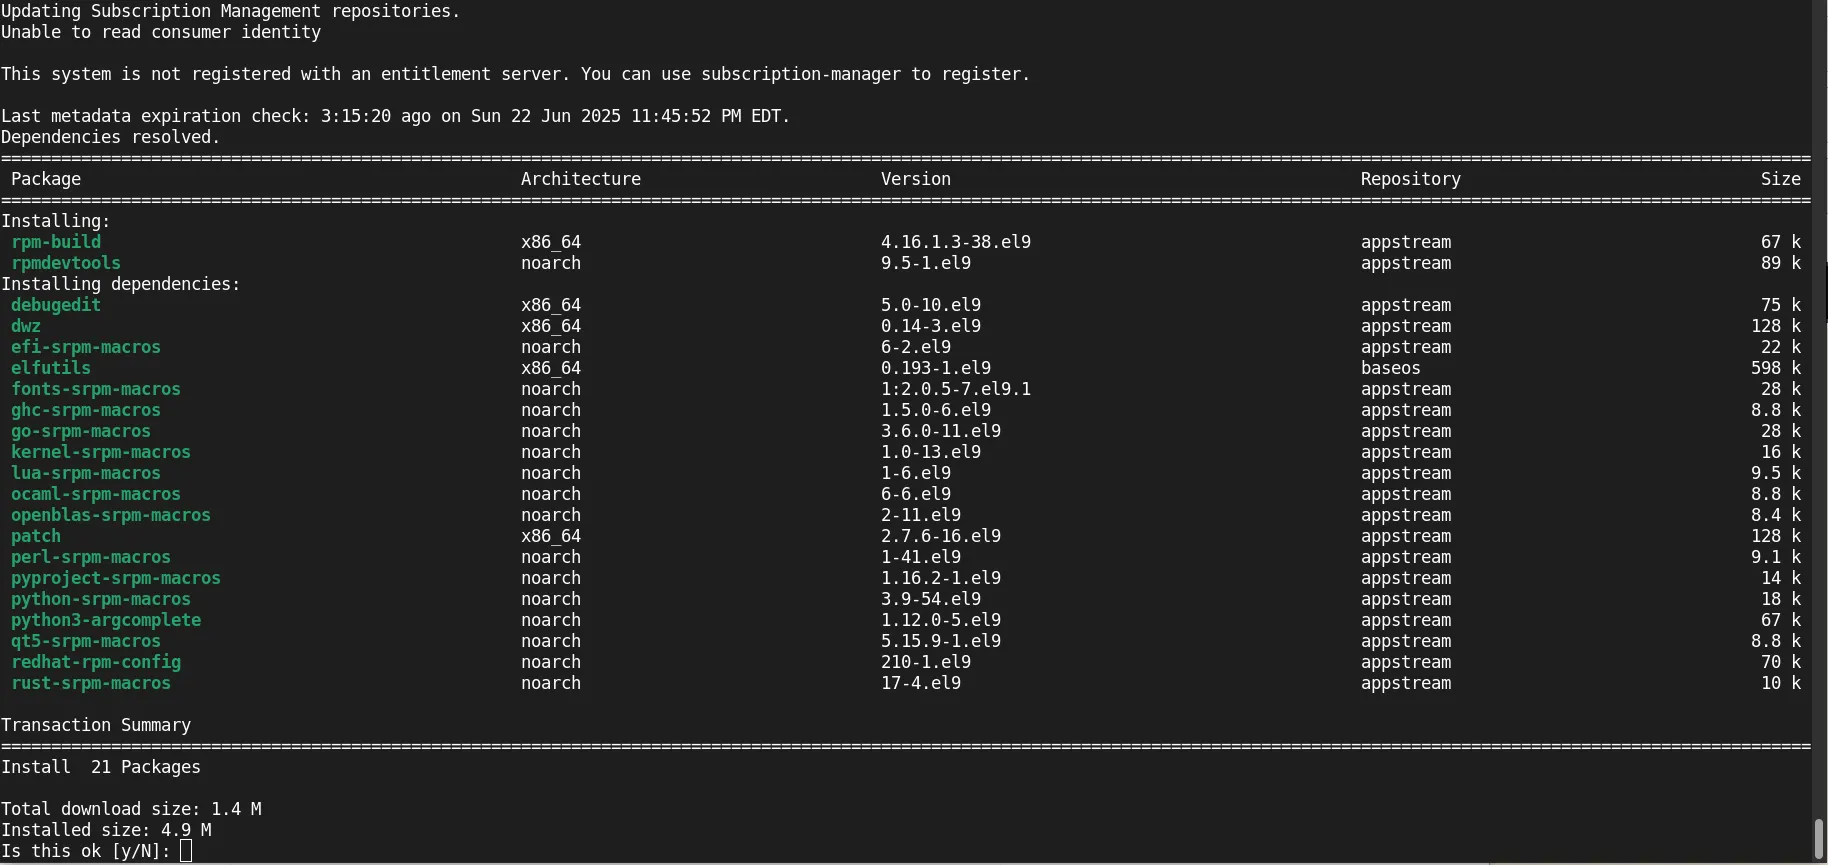
Photo by admingeek from Infotechys
Once the necessary tools are installed, the next step is to set up the RPM build environment. This involves creating a directory structure where all your RPM packages and build files will reside.
Run the following command to set up the RPM build environment:
rpmdev-setuptree
This will create the following directory structure in your home directory (~):
					~/rpmbuild/
├── BUILD
├── RPMS
│   └── x86_64/
├── SOURCES
├── SPECS
└── SRPMS
|
|
|
|
|
The RPM build process revolves around Spec Files, which are files that contain instructions on how to build the RPM package. The spec file includes information like:
|
The spec file is the heart of the RPM package creation process. You can create a spec file using the rpmdev-newspec command. Here’s how you can create a basic spec file:
cd ~/rpmbuild/SPECS
rpmdev-newspec myapp
This will generate a file named myapp.spec. Open this file with a text editor and fill in the necessary details. Here’s an example of a simple spec file:
					Name:           myapp
Version:        1.0
Release:        1%{?dist}
Summary:        My Application

License:        GPL
URL:            https://www.myapp.com
Source0:        myapp-1.0.tar.gz

BuildRequires:  gcc, make
Requires:       libc

%description
MyApp is a simple application that demonstrates how to create an RPM package.

%prep
%setup -q

%build
make

%install
mkdir -p %{buildroot}/usr/local/bin
cp myapp %{buildroot}/usr/local/bin/

%files
/usr/local/bin/myapp

%changelog
* Thu Jun 23 2025 Developer <developer@example.com> 1.0-1
- Initial release
Let’s break this down:
|
|
|
|
|
|
After setting up your spec file and placing the necessary source files in the SOURCES directory, you can start building the RPM package.
To build the RPM, run the following command:
rpmbuild -ba ~/rpmbuild/SPECS/myapp.spec
This command will execute the %prep, %build, and %install sections defined in your spec file and generate the RPM package. The built RPM file will be stored in the RPMS/x86_64 directory.
To verify that the RPM package was created successfully, use the ls command:
ls ~/rpmbuild/RPMS/x86_64/
Once you’ve created the RPM package, it’s important to test it by installing it on a target system. To install the RPM package, use the rpm command:
sudo rpm -i ~/rpmbuild/RPMS/x86_64/myapp-1.0-1.x86_64.rpm
To uninstall the RPM package:
sudo rpm -e myapp
You can also use dnf or yum to manage RPM packages more easily, especially for managing dependencies.
RPM makes it easy to install and remove software. Here are a few common commands for managing RPM packages:
Install a Package: |
sudo rpm -i myapp-1.0-1.x86_64.rpm
Upgrade a package: |
sudo rpm -U myapp-1.1-1.x86_64.rpm
Remove a package: |
sudo rpm -e myapp
Query Installed Packages: |
rpm -q myapp
Creating your own RPM packages can streamline the distribution and installation of software across Linux-based systems. By following the steps outlined in this article, you can create and build custom RPM packages with ease. Remember, the key components of the process are setting up the RPM build environment, writing the spec file, and using the rpmbuild command to compile the package.
With this knowledge, you can manage your software releases more efficiently, automate your build processes, and ensure that your software is packaged in a way that is easily installable and maintainable.
Did you find this article helpful? Your feedback is invaluable to us! Feel free to share this post with those who may benefit, and let us know your thoughts in the comments section below.
Learn how to install CentOS 9 Stream with a graphical user interface (GUI) step by step, including a complete desktop setup guide. Discover useful commands

Learn how to inspect and extract RPM package contents using various tools like rpm, rpm2cpio, and repoquery. Discover detailed examples and best practices for managing
In this tutorial, we’ll guide you through the step-by-step installation of RHEL9 on KVM. The process is uncomplicated, and we’ll present it in a format