Commands
In this guide, we’ll walk you through the step-by-step process of installing LibreOffice on RHEL 9 or CentOS 9. Table of Contents Introduction Are you

Learn how to install gscan2pdf on Ubuntu 24.04 for scanning and converting documents to PDF. Follow this easy guide with detailed commands, troubleshooting tips, and related tools for enhancing your document management.
For Linux users, managing scanned documents efficiently is essential, especially in business environments where document handling is frequent. One tool that significantly simplifies scanning and converting documents to PDFs is gscan2pdf. This open-source application helps users quickly scan, convert, and save scanned documents as PDF files while offering several additional features.
In this guide, we’ll walk you through the process of installing gscan2pdf on Ubuntu 24.04. Additionally, we will provide insights into its features, common troubleshooting steps, and practical tips on maximizing its potential for document management. By the end of this post, you will be able to install, configure, and use gscan2pdf effectively on your Ubuntu 24.04 machine.
What is gscan2pdf? |
gscan2pdf is a tool designed for scanning and converting documents into PDFs. It allows users to scan paper documents, enhance them, and save them in high-quality PDF format. With its simple interface and advanced image manipulation features, gscan2pdf provides an ideal solution for users who need to digitize paper documents without the complexity of more robust, commercial scanning software.
Key Features of gscan2pdf |
|
|
|
|
|
Now that we understand what gscan2pdf offers, let’s dive into how to install it on Ubuntu 24.04.
Before starting the installation process, it’s essential to ensure that your system meets the basic requirements:
|
|
|
You can check your system version by running the following command in your terminal:
lsb_release -a
This will return output similar to:
					No LSB modules are available.
Distributor ID:	Ubuntu
Description:	Ubuntu 24.04.2 LTS
Release:	24.04
Codename:	noble
Ensure that your scanner is recognized by the system by running:
lsusb
This will list connected USB devices, including your scanner.
There are multiple methods to install gscan2pdf on Ubuntu 24.04. We’ll cover the two most common methods: using APT (the default package manager) and Snap.
Method 1: Install |
Update your system’s package list to ensure you have the latest information on available software: |
sudo apt update
Install gscan2pdf using the following command: |
sudo apt install gscan2pdf
Verify the installation by checking the version of gscan2pdf: |
gscan2pdf --version
This should return the version number of gscan2pdf, confirming that it is installed correctly.
gscan2pdf 2.13.2
Launch gscan2pdf by typing the following command in the terminal: |
gscan2pdf
The graphical user interface should open, and you are now ready to start scanning documents.
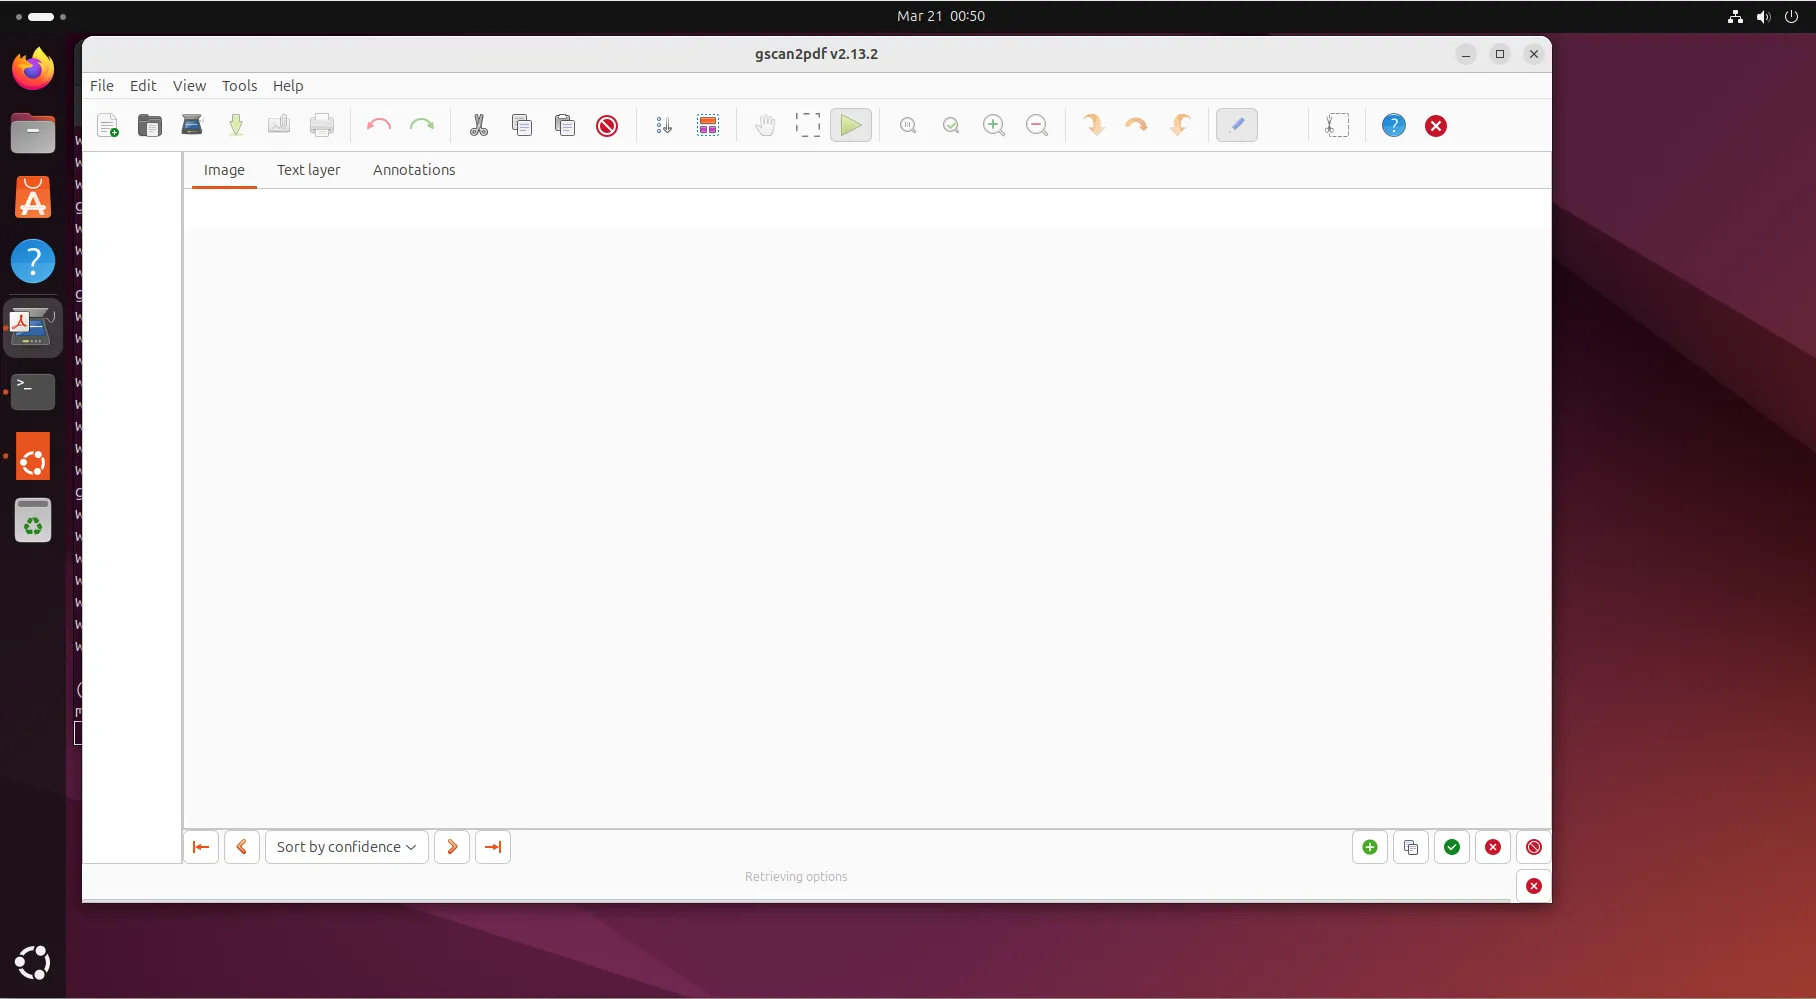
Photo by admingeek from Infotechys
Method 2: Install |
If you prefer using Snap for managing applications, follow these steps:
Ensure Snap is installed on your Ubuntu system. If Snap is not installed by default, you can install it with the following command: |
sudo apt install snapd
Install gscan2pdf via Snap: |
sudo snap install gscan2pdf
Launch gscan2pdf by typing: |
gscan2pdf
This will open the Snap version of gscan2pdf. You can now begin scanning and converting documents.
While installing gscan2pdf is generally straightforward, you may encounter a few issues. Below are some common problems and their solutions:
1. Scanner Not Detected |
If your scanner is not detected by gscan2pdf, try the following steps:
Check if your scanner is connected properly by running: |
lsusb
Ensure that your scanner is listed among the connected USB devices.
Install the necessary scanner drivers using the following command: |
sudo apt install sane-utils
Then, restart the scanning service:
sudo service saned restart
Test the scanner functionality using the command: |
scanimage -L
This should list your scanner if it’s detected correctly.
2. gscan2pdf Not Launching |
If gscan2pdf doesn’t open, try the following:
Run gscan2pdf from the terminal to see if any error messages are displayed. |
gscan2pdf
Check the dependencies. Ensure that all necessary libraries are installed by running: |
sudo apt install libgtk2.0-0 libpoppler-glib8
3. OCR Not Working |
If OCR (Optical Character Recognition) is not functioning properly, ensure that you have the required OCR software installed:
Install Tesseract OCR: |
sudo apt install tesseract-ocr
Check that the OCR engine is selected in gscan2pdf’s preferences.
Once gscan2pdf is installed, you can start scanning documents. Here’s a simple step-by-step guide to get you started:
1. Launch gscan2pdf by running gscan2pdf from your terminal or application menu. |
2. Select Your Scanner: When gscan2pdf opens, it will automatically try to detect your connected scanner. If it doesn’t, select it manually from the scanner list. |
3. Scan Document: Press the “Scan” button to begin scanning your document. You can scan multiple pages one after another. |
4. Adjust Image Settings: Once the document is scanned, you can crop, rotate, and adjust the brightness/contrast using the tools available in the software. |
5. Save as PDF: After scanning and editing, save the file as a PDF by choosing “File” > “Save As”. |
|
|
|
Installing gscan2pdf on Ubuntu 24.04 is an efficient way to manage your scanned documents. Whether you’re working in a business setting or just need a simple solution to convert paper documents into PDFs, gscan2pdf offers a powerful set of features for scanning, editing, and saving documents in different formats.
By following the installation steps in this guide, you should now have gscan2pdf up and running on your system. If you run into any issues, refer to the troubleshooting section for solutions. With gscan2pdf installed and configured, you can streamline your document management tasks and ensure that your digital archives are organized and easily accessible.
In this guide, we’ll walk you through the step-by-step process of installing LibreOffice on RHEL 9 or CentOS 9. Table of Contents Introduction Are you

Learn how to resize and compress PDF documents using Python. This guide covers simple methods with pdf2image, Pillow, and more advanced tools like pikepdf and

In this article, we review different ways to install VSCode on Fedora 39, providing step-by-step instructions to ensure a seamless setup of the Visual Studio