
Commands
Learn how to effortlessly deploy and manage a LAMP stack on RHEL9 using Ansible. Streamline your server setup with automation! Table of Contents Introduction Hey

Learn how to install the LAMP stack on RHEL 9 | CentOS 9 using Podman with our comprehensive guide. Follow step-by-step instructions to set up Apache, MySQL, and PHP in a containerized environment for enhanced performance and security. Perfect for developers and system administrators!
If you’re looking to set up a robust web development environment on RHEL 9 or CentOS 9, installing the LAMP stack using Podman is an efficient and containerized approach. In this comprehensive guide, we’ll walk through the steps to install and configure the LAMP stack—Linux, Apache, MySQL (PostgreSQL in our case), and PHP—using Podman. By following these steps, you’ll be able to create a portable and scalable web application setup.
Podman is a container management tool that allows you to run containers without needing a daemon. It’s particularly popular in environments that prefer lightweight and secure applications. Unlike Docker, Podman doesn’t require root privileges to run containers, making it a great choice for many Linux users.
✅ What You’ll Need |
Before you begin, ensure you have:
|
|
| Feature | Description |
|---|---|
| Daemonless | Runs containers directly as a non-root user. |
| Compatibility | Similar command structure to Docker. |
| Easy Management | Simplifies the management of containers and pods. |
🔄 Step 1: Create a Pod |
First, we need to create a pod to host our LAMP stack containers. If the pod doesn’t already exist, you can create it with the following command:
podman pod create --name my-lamp-pod -p 9601:443 -p 5432:5432
💡NOTE:Mapping the HTTPS port 443 to 9601 (using the notation 9601:443) is just an example for this demonstration. You can map it to 443:443 or any port number within the available range of 1025 to 65535 that suits your needs. |
| Option | Description |
|---|---|
pod create | Command to create a new pod. |
--name my-lamp-pod | Sets the name of the pod. |
-p 9601:443 | Maps port 443 (HTTPS) to host port 9601. |
-p 5432:5432 | Maps PostgreSQL port 5432 for database access. |
🔄 Step 2: Build a LAMP stack image |
1.) First, open a Containerfile:
vim Containerfile
2.) Copy and paste the following into the file:
					# Use a UBI/RHEL 9 base image
FROM registry.access.redhat.com/ubi9/ubi

# Install Nginx and PHP-FPM
RUN dnf install -y \
    nginx \
    php \
    php-fpm \
    php-mysqlnd \
    && dnf clean all

# Create the PHP-FPM socket directory
RUN mkdir -p /run/php-fpm && \
    chown -R nginx:nginx /run/php-fpm

# Copy custom Nginx configuration
COPY nginx.conf /etc/nginx/nginx.conf

# Copy SSL certificates (if needed)
COPY server.crt /etc/ssl/certs/server.crt
COPY server.key /etc/ssl/private/server.key

# Set permissions
RUN chown -R nginx:nginx /usr/share/nginx/html && \
    chmod -R 755 /usr/share/nginx/html

# Expose ports
EXPOSE 80
EXPOSE 443

# Start both Nginx and PHP-FPM
CMD ["sh", "-c", "php-fpm & nginx -g 'daemon off;'"]
| Step | Command | Purpose |
|---|---|---|
| 1 | FROM registry.access.redhat.com/ubi9/ubi | Use a Universal Base Image (UBI) from Red Hat, specifically version 9. |
| 2 | RUN dnf install -y \ nginx \ php \ php-fpm \ php-mysqlnd \ && dnf clean all | Install Nginx, PHP, PHP-FPM, and MySQL native driver, then clean up. |
| 3 | RUN mkdir -p /run/php-fpm && chown -R nginx:nginx /run/php-fpm | Create PHP-FPM socket directory and change ownership to the nginx user. |
| 4 | COPY nginx.conf /etc/nginx/nginx.conf | Copy custom Nginx configuration file into the container. |
| 5 | COPY server.crt /etc/ssl/certs/server.crt | Copy SSL certificate into the container. |
| 5 | COPY server.key /etc/ssl/private/server.key | Copy SSL key into the container. |
| 6 | RUN chown -R nginx:nginx /usr/share/nginx/html && chmod -R 755 /usr/share/nginx/html | Change ownership and set permissions for the Nginx HTML directory. |
| 7 | EXPOSE 80 | Declare that the container listens on port 80 (HTTP). |
| 7 | EXPOSE 443 | Declare that the container listens on port 443 (HTTPS). |
| 8 | CMD ["sh", "-c", "php-fpm & nginx -g 'daemon off;'"] | Start PHP-FPM in the background and Nginx in the foreground. |
3.) Build the LAMP stack image (called lampstack in this example) with the following command:
podman build -t lampstack .
Run podman images command to verify:
podman images
					REPOSITORY                                      TAG                    IMAGE ID      CREATED      SIZE
localhost/lampstack                             latest                 a6005d6b66d2  5 mins ago   345 MB
🔄 Step 3: Run the Application Container |
Next, let’s deploy the Apache and PHP application container. We’ll mount a directory from the host to the container to serve the web application files.
podman run -d --pod my-lamp-pod --name my-web-container -v /path/to/directory:/var/www/html lampstack:latest
| Option | Description |
|---|---|
podman run -d | Runs the container in detached mode. |
--pod my-lamp-pod | Connects the container to the specified pod. |
--name my-web-container | Assigns a name to the container. |
-v /path/to/directory:/var/www/html | Binds the specified directory to the container. |
✅ Configuring Apache and PHP |
Ensure you have an index.php file in the /path/to/directory to test your setup (copy and paste the following line to the index.php file):
<?php phpinfo(); ?>
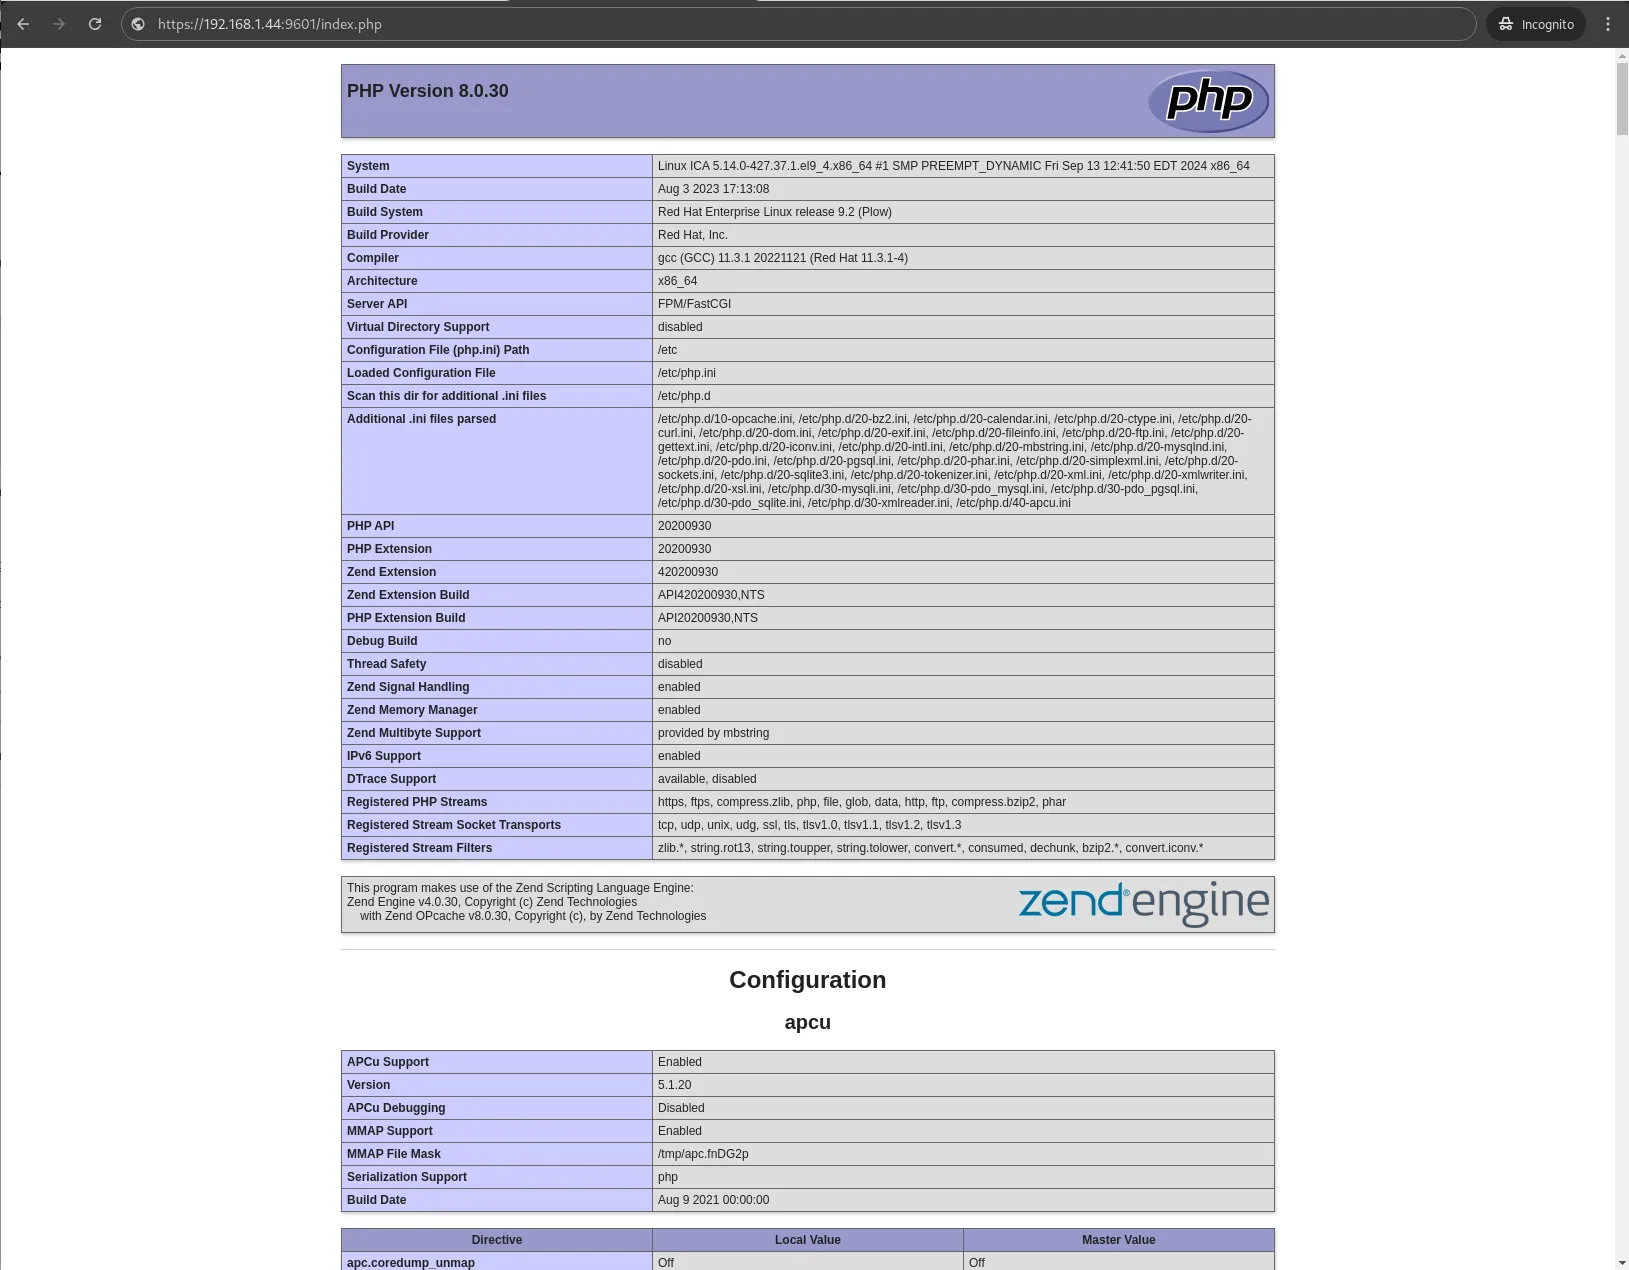
Photo by admingeek from Infotechys
You can place this file in your mounted directory to see if Apache serves it correctly.
🔄 Step 4: Run the PostgreSQL Container |
Now, we need to run the PostgreSQL container. We will configure it with a user, password, and database:
podman run -d --rm --pod my-lamp-pod --name my-db-container -e POSTGRES_USER=testuser -e POSTGRES_PASSWORD=pgpass_test_123 -e POSTGRES_DATABASE=login -v /path/to/directory/pgdata:/var/lib/postgresql/data:Z docker.io/postgres
Replace the POSTGRES variable names with your chosen names, such as DATABASE and USER.
| Option | Description |
|---|---|
--rm | Automatically removes the container when stopped. |
--name my-db-container | Assigns a name to the PostgreSQL container. |
-e POSTGRES_USER=testuser | Sets the PostgreSQL username. |
-e POSTGRES_PASSWORD=pgpass_test_123 | Sets the password for the PostgreSQL user. |
-e POSTGRES_DB=login | Creates a database named ‘login’. |
-v /path/to/directory/pgdata:/var/lib/postgresql/data:Z | Binds a directory for persistent data. (:Z) is a SELinux context modifier.
|
🔄 Step 5: Verify Installation |
✅ Check Running Containers |
To verify that your containers are running, use the following command:
podman ps
					CONTAINER ID  IMAGE                                         COMMAND     CREATED     STATUS      PORTS                                          NAMES
73e6d92ea406  localhost/podman-pause:4.9.4-rhel-1723107101              4 hours ago  Up 4 hours   0.0.0.0:5432->5432/tcp, 0.0.0.0:9601->443/tcp  7a3b1227bf52-infra
69a3a918ebed  localhost/lampstack:latest                    /sbin/init  4 hours ago  Up 4 hours   0.0.0.0:5432->5432/tcp, 0.0.0.0:9601->443/tcp  my-web-container
49d1879e546c  docker.io/library/postgres:latest             postgres    4 hours ago  Up 4 hours   0.0.0.0:5432->5432/tcp, 0.0.0.0:9601->443/tcp  my-db-container
You should see both my-web-container and my-db-container listed.
✅ Accessing the Web Application |
Open a web browser and navigate to https://<your_server_ip>:9601 . You should see the PHP info page if everything is set up correctly.
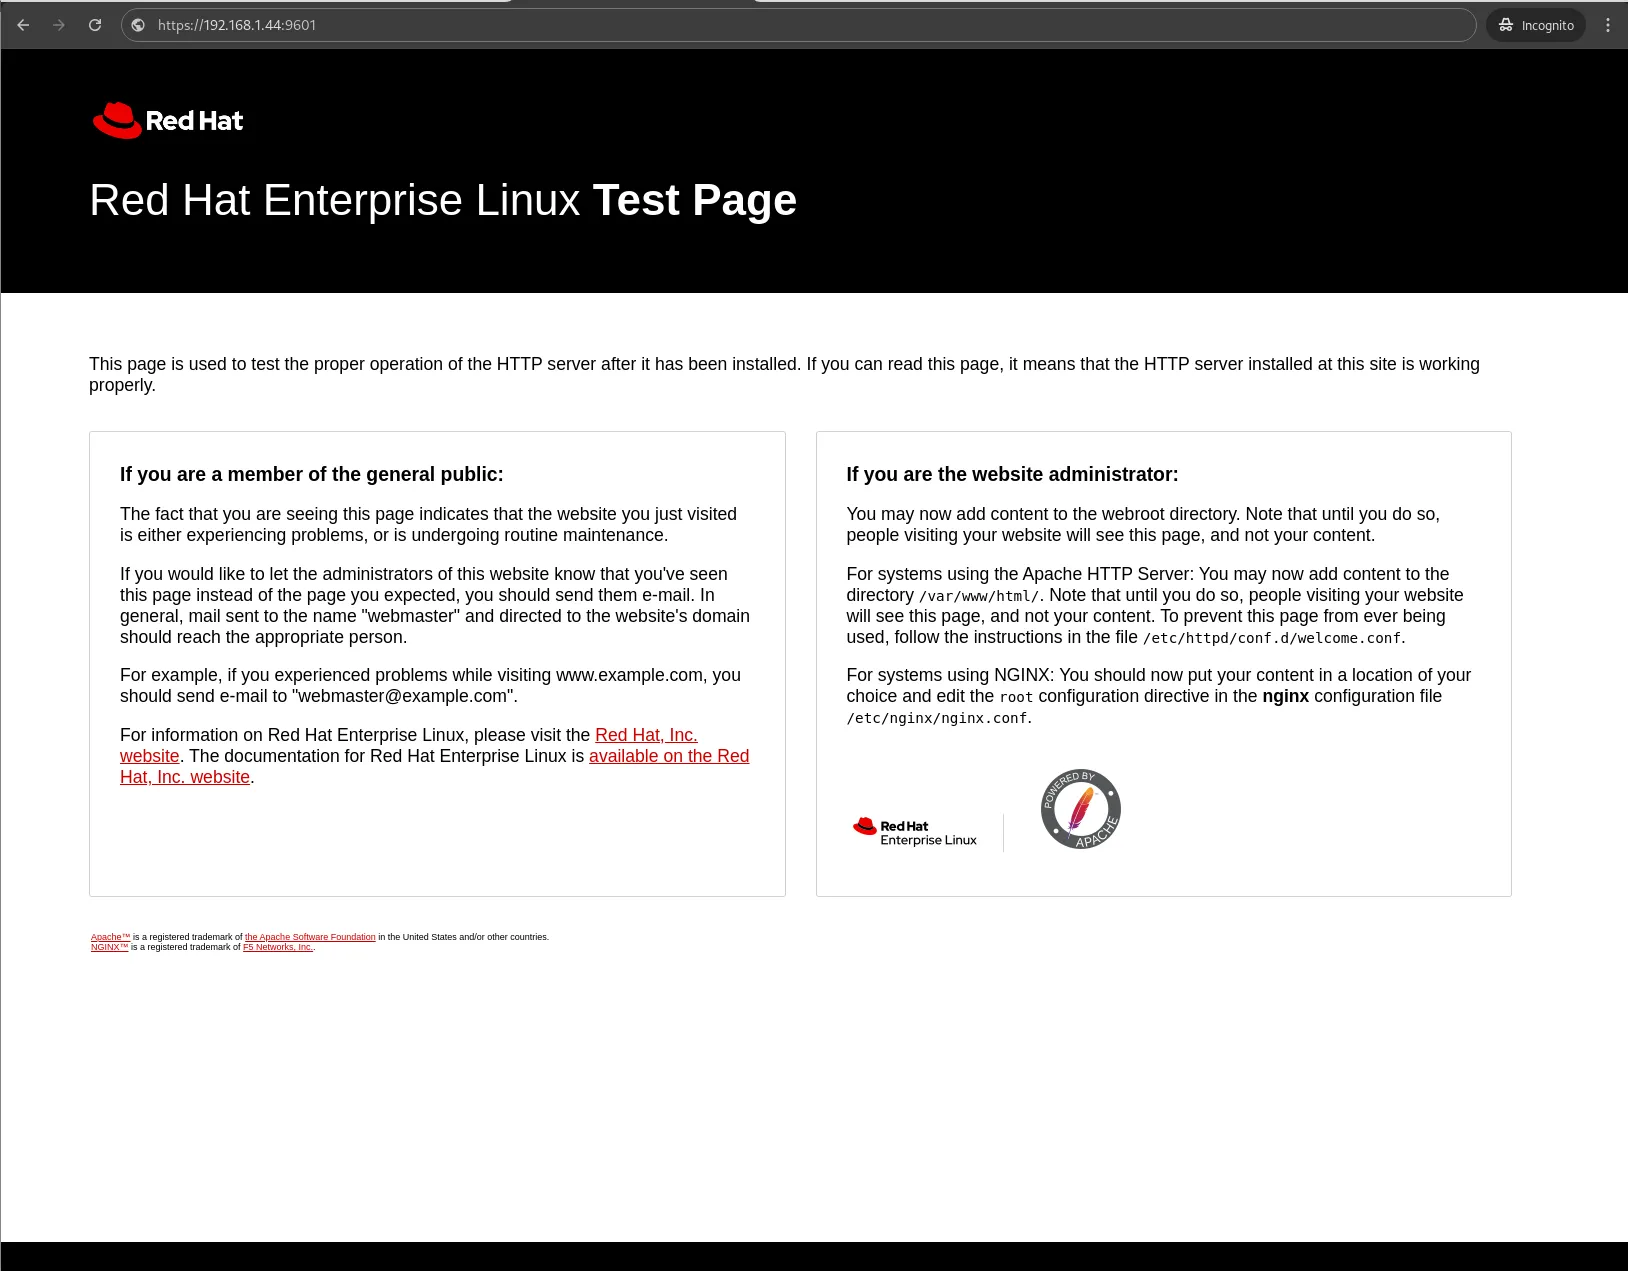
Photo by admingeek from Infotechys
✅ Accessing PostgreSQL |
You can access PostgreSQL using the following command from your terminal:
podman exec -it my-db-container psql -U testuser -d login
					psql (17.0 (Debian 17.0-1.pgdg120+1))
Type "help" for help.

login=#
This command will connect you to the PostgreSQL database using the user and database you specified.
| Feature | Description |
|---|---|
| Lightweight | Podman containers consume fewer resources compared to traditional virtual machines. |
| Isolation | Each container operates in isolation, minimizing conflicts between applications. |
| Portability | Easily migrate your setup across different systems without dependency issues. |
✅ Web Application fails to start |
If you’re unable to launch the web application or if Apache isn’t starting from your web browser, the issue is likely related to the firewall. To resolve this, run the following commands to allow traffic for HTTP, HTTPS, and the mapped port 9601:
sudo firewall-cmd --permanent --add-port=80/tcp --add-port=443/tcp --add-port=9601/tcp
sudo firewall-cmd --reload
✅ Port Conflicts |
Ensure that the ports you’re trying to map are not already in use by other services on your host machine.
✅ Permissions Issues |
If you encounter permission errors with mounted volumes, you may need to adjust the permissions of the host directories or use the :Z option to label the files correctly for SELinux.
By following this guide, you’ve successfully installed a LAMP stack on RHEL 9 or CentOS 9 using Podman. This setup not only allows for a flexible development environment but also leverages the benefits of containerization. Whether you’re developing a new application or hosting an existing one, this method provides a clean and efficient way to manage your web server and database. Feel free to experiment with different configurations and add more services to your pod as needed. Happy coding!
Did you find this article helpful? Your feedback is invaluable to us! Feel free to share this post with those who may benefit, and let us know your thoughts in the comments section below.
Learn how to effortlessly deploy and manage a LAMP stack on RHEL9 using Ansible. Streamline your server setup with automation! Table of Contents Introduction Hey
In this comprehensive guide, we’ll explore step-by-step how to install LAMP stack on Ubuntu 23.10, ensuring you have the foundation to power your web projects
In this comprehensive guide, we’ll walk you through the process of creating and deploying a LAMP stack on Minikube, a tool that enables you to