Commands
In this tutorial, we’ll explore how to leverage Python to convert PNG images to WebP format, empowering you to enhance your website’s performance and boost


Learn how to batch resize images (PNG, JPEG, etc.) using a Python script. Optimize your website or project by automating image resizing with the Pillow library.
Are you working with a large collection of images and need to resize them all at once? If you’re managing an e-commerce store, running a blog, or even organizing photos for personal use, resizing images in bulk can save you significant time and effort. In this guide, we’ll walk you through how to use Python to batch resize images such as PNG, JPEG, and others. By the end, you’ll have an efficient script that can handle multiple images in a fraction of the time it would take to resize them manually. Whether you’re a developer, photographer, or content creator, this Python batch resizing solution is sure to improve your workflow. Let’s dive in!
Before we get into the code, let’s quickly discuss why you might want to batch resize our images in the first place:
Installing Python and Required Libraries |
To follow this guide, you’ll need Python installed on your computer. You also need to install the Pillow library, which is an easy-to-use imaging library in Python. Pillow supports many image formats, including PNG, JPEG, and more.
To install Pillow, run the following command:
pip install pillow
Next, we’ll use this library to handle the image processing.
Script Overview: Batch Resizing with Python |
Our goal is to create a script that:
Using your preferred text-editor, open a file called batch_resize.py:
vim batch_resize.py
Then, copy and paste the following:
					import os
from PIL import Image

def batch_resize_images(input_folder, output_folder, target_width, target_height):
    # Check if output directory exists; if not, create it
    if not os.path.exists(output_folder):
        os.makedirs(output_folder)

    # Loop through all files in the input directory
    for filename in os.listdir(input_folder):
        file_path = os.path.join(input_folder, filename)

        # Only process files with supported image extensions
        if filename.lower().endswith(('.png', '.jpg', '.jpeg', '.gif', '.bmp')):
            try:
                # Open image using Pillow
                with Image.open(file_path) as img:
                    # Resize image to target width and height
                    img_resized = img.resize((target_width, target_height))

                    # Save the resized image to the output directory
                    output_path = os.path.join(output_folder, filename)
                    img_resized.save(output_path)

                    print(f"Successfully resized {filename}")
            except Exception as e:
                print(f"Error resizing {filename}: {e}")
        else:
            print(f"Skipping non-image file: {filename}")

# Example usage
input_folder = "path_to_input_folder"
output_folder = "path_to_output_folder"
target_width = 800
target_height = 600

batch_resize_images(input_folder, output_folder, target_width, target_height)
In the “Example usage” section, replace the input_folder and output_folder variables with the actual paths to your image files and the destination folder where you want to store the resized images. Then, save and exit the file.
Script Explanation |
| Function/Method | Description |
|---|---|
batch_resize_images function | Takes in three parameters: |
input_folder | The directory where your original images are stored. |
output_folder | The directory where you want the resized images to be saved. |
target_width & target_height | The target dimensions for resizing the images. |
os.listdir() | Lists all files in the input_folder directory. |
Image.open() | Opens the image file using Pillow’s Image class. |
img.resize() | Resizes the image to the specified target dimensions. |
img.save() | Saves the resized image to the specified output_folder. |
| Error Handling | If an image can’t be opened or resized (e.g., due to corruption), the script will skip it and print an error message. |
Execute the script with the following command:
python batch_resize.py
					Successfully resized wallpaper_1.jpg
Successfully resized wallpaper_2.jpg
Successfully resized wallpaper_3.jpg
Successfully resized wallpaper_4.jpg
In this demonstration, we resized four JPEG (.jpg) wallpaper images located in the /tmp/wallpapers directory and saved the resized versions in the /tmp/resized directory.
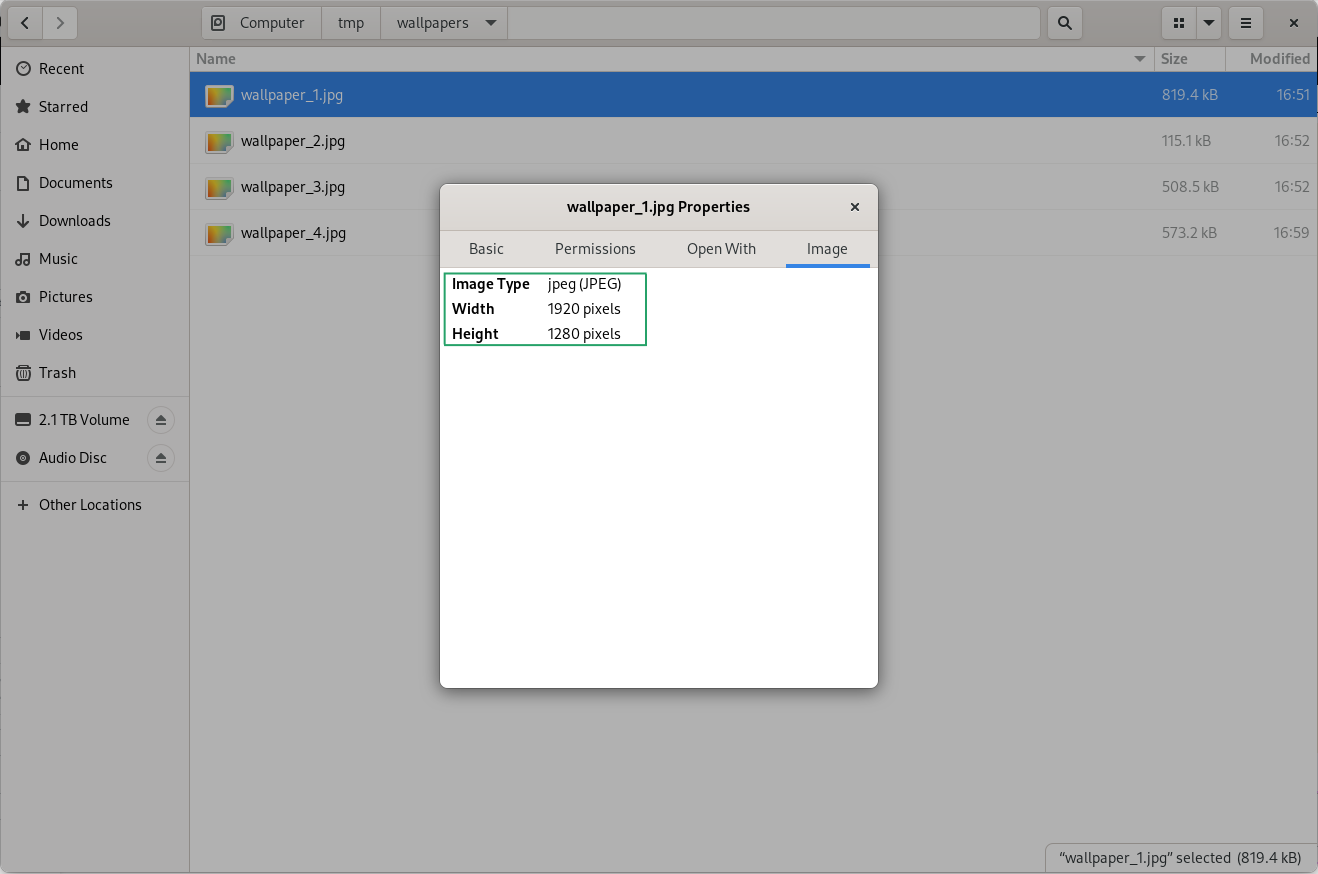
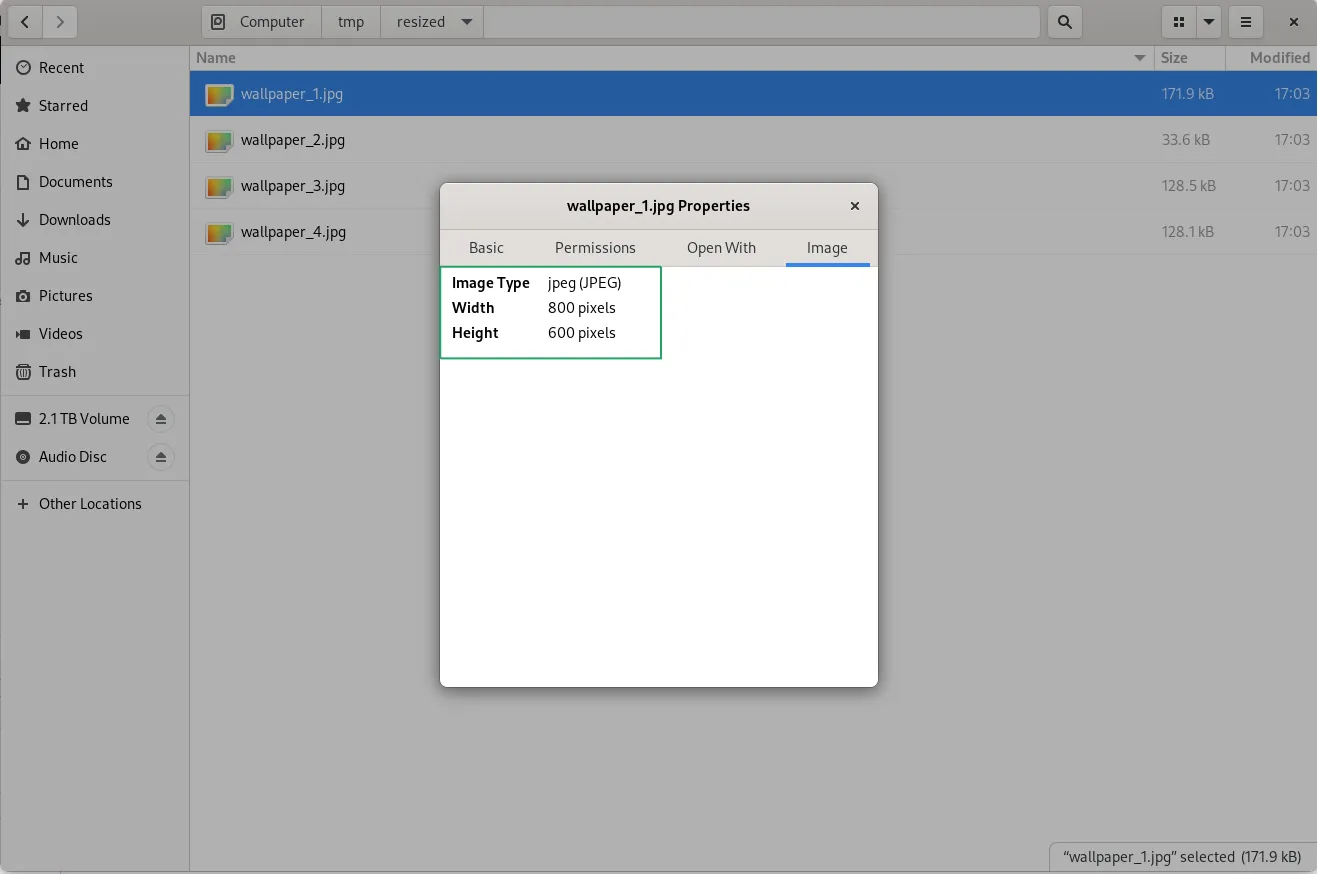
Photo by admingeek from Infotechys
If you prefer to resize images by a scale factor (rather than specifying exact width and height), you can modify the script as follows:
					import os
from PIL import Image

def batch_resize_images_by_scale(input_folder, output_folder, scale_factor):
    # Check if output directory exists; if not, create it
    if not os.path.exists(output_folder):
        os.makedirs(output_folder)

    # Loop through all files in the input directory
    for filename in os.listdir(input_folder):
        file_path = os.path.join(input_folder, filename)

        # Only process files with supported image extensions
        if filename.lower().endswith(('.png', '.jpg', '.jpeg', '.gif', '.bmp')):
            try:
                # Open image using Pillow
                with Image.open(file_path) as img:
                    # Calculate new dimensions based on scale factor
                    new_width = int(img.width * scale_factor)
                    new_height = int(img.height * scale_factor)

                    # Resize image
                    img_resized = img.resize((new_width, new_height))

                    # Save the resized image to the output directory
                    output_path = os.path.join(output_folder, filename)
                    img_resized.save(output_path)

                    print(f"Successfully resized {filename} by {scale_factor}x")
            except Exception as e:
                print(f"Error resizing {filename}: {e}")
        else:
            print(f"Skipping non-image file: {filename}")

# Example usage
input_folder = "path_to_input_folder"
output_folder = "path_to_output_folder"
scale_factor = 0.5  # Example: 50% reduction in size
batch_resize_images_by_scale(input_folder, output_folder, scale_factor)
With this script, you only need to specify a scale factor (e.g., 0.5 for 50% of the original size) instead of exact dimensions.
For those who prefer to run the script from the command line, you can use Python’s argparse module to allow users to pass arguments to the script. Here’s an updated version that works from the CLI:
					import argparse

def parse_args():
    parser = argparse.ArgumentParser(description="Batch resize images")
    parser.add_argument("input_folder", help="Path to the folder with images")
    parser.add_argument("output_folder", help="Path to save resized images")
    parser.add_argument("width", type=int, help="Target width for resizing")
    parser.add_argument("height", type=int, help="Target height for resizing")
    return parser.parse_args()

if __name__ == "__main__":
    args = parse_args()
    batch_resize_images(args.input_folder, args.output_folder, args.width, args.height)
Running the Script |
After saving the script as batch_resize.py , you can run it from the command line like this:
python batch_resize.py /path/to/images /path/to/output 800 600
This command resizes all images in the /path/to/images folder to 800x600 pixels and saves them in the /path/to/output folder.
| Topic | Description |
|---|---|
| Image Formats | Be mindful of the format in which you’re saving your images. JPEGs are better for photographs, while PNGs are ideal for images with transparency or graphics. |
| Quality vs. Speed | Larger images take more processing time to resize. If speed is a concern, consider using a lower resolution for resizing or implementing multi-threading. |
| Image Orientation | Images from mobile devices may be incorrectly oriented. Use img = img.transpose(Image.FLIP_LEFT_RIGHT) to fix the orientation if needed. |
| Logging | For large batches, consider logging the progress to a file rather than printing to the console to maintain performance and track progress. |
Batch resizing images with Python is an excellent solution for automating the process of handling multiple images quickly and efficiently. By using the Pillow library, you can scale images based on fixed dimensions or a dynamic scale factor. This process helps streamline workflows, particularly for web developers, e-commerce platforms, or content creators who deal with large numbers of images regularly.
Remember, optimizing images can help improve website load times, SEO rankings, and overall user experience. Now that you have a powerful batch resizing script in your toolkit, your workflow will be smoother than ever.
Did you find this article useful? Your feedback is invaluable to us! Please feel free to share this post and your thoughts in the comments section below.
In this tutorial, we’ll explore how to leverage Python to convert PNG images to WebP format, empowering you to enhance your website’s performance and boost

Scientific computing using Python refers to the use of the Python programming language and its associated libraries to solve scientific problems. Scientific computing is the

Have you ever wondered how search engines gather all that information from the internet? Learn how to build your own web crawler in Python and