
Linux
In this blog post, we’ll explore the 10 major differences between Ubuntu 20.04 and its latest iteration, Ubuntu 22.04, shedding light on the advancements that await

In this guide, we’ll walk you through the step-by-step process of installing OpenVAS on Kali Linux, the popular distribution used by security professionals and penetration testers.
In today’s cybersecurity landscape, protecting your systems from vulnerabilities is paramount. With the prevalence of cyber threats, having a robust vulnerability assessment tool is crucial for ensuring the security of your network. One such tool that stands out is OpenVAS (Open Vulnerability Assessment System), an open-source vulnerability scanner that helps identify and manage security vulnerabilities in your infrastructure.
Before we delve into the installation process, let’s briefly discuss why OpenVAS is a preferred choice for vulnerability scanning:
Open Source: Being open-source means that OpenVAS is freely available for anyone to download and use, making it accessible to both individuals and organizations regardless of budget constraints.
Comprehensive Vulnerability Detection: OpenVAS boasts a vast database of known vulnerabilities, allowing it to effectively detect a wide range of security issues in your network infrastructure.
Regular Updates: The OpenVAS community actively maintains and updates the tool, ensuring that it stays current with the latest security threats and vulnerabilities.
Before diving into the installation process, it’s essential to ensure that your system meets the necessary prerequisites to install and run OpenVAS effectively. Here are the prerequisites you’ll need:
Kali Linux: Make sure you have Kali Linux installed on your system. If you haven’t already installed Kali Linux, you can download it from the official Kali Linux website and follow the installation instructions.
Internet Connection: A stable internet connection is required to download the necessary packages and updates during the installation process.
Sufficient Resources: OpenVAS can be resource-intensive, so make sure your system has an adequate amount of RAM and CPU power to handle the scanning tasks effectively. It’s recommended to allocate at least 4GB of RAM to OpenVAS for optimal performance.
With the prerequisites out of the way, let’s proceed with the installation process.
Before installing OpenVAS, it’s crucial to ensure that your system is up to date. Open a terminal window on your Kali Linux system and execute the following commands:
$ sudo apt update -y
$ sudo apt upgrade -y
$ sudo apt dist-upgrade -y
These commands will update the package lists and upgrade the installed packages to their latest versions, ensuring that your system is ready for the installation process.
With your system updated, you can now proceed to install OpenVAS. OpenVAS is available in the official Kali Linux repositories, making the installation process straightforward. Simply run the following command in your terminal:
$ sudo apt install openvas
This command will download and install the OpenVAS packages along with any necessary dependencies, allowing you to proceed with the setup process seamlessly.
Once the installation is complete, you’ll need to initialize OpenVAS by running the following command:
$ sudo gvm-setup
This command will configure the OpenVAS services and set up the necessary databases. Depending on your system’s resources, this process may take some time to complete, so be patient and let it finish.
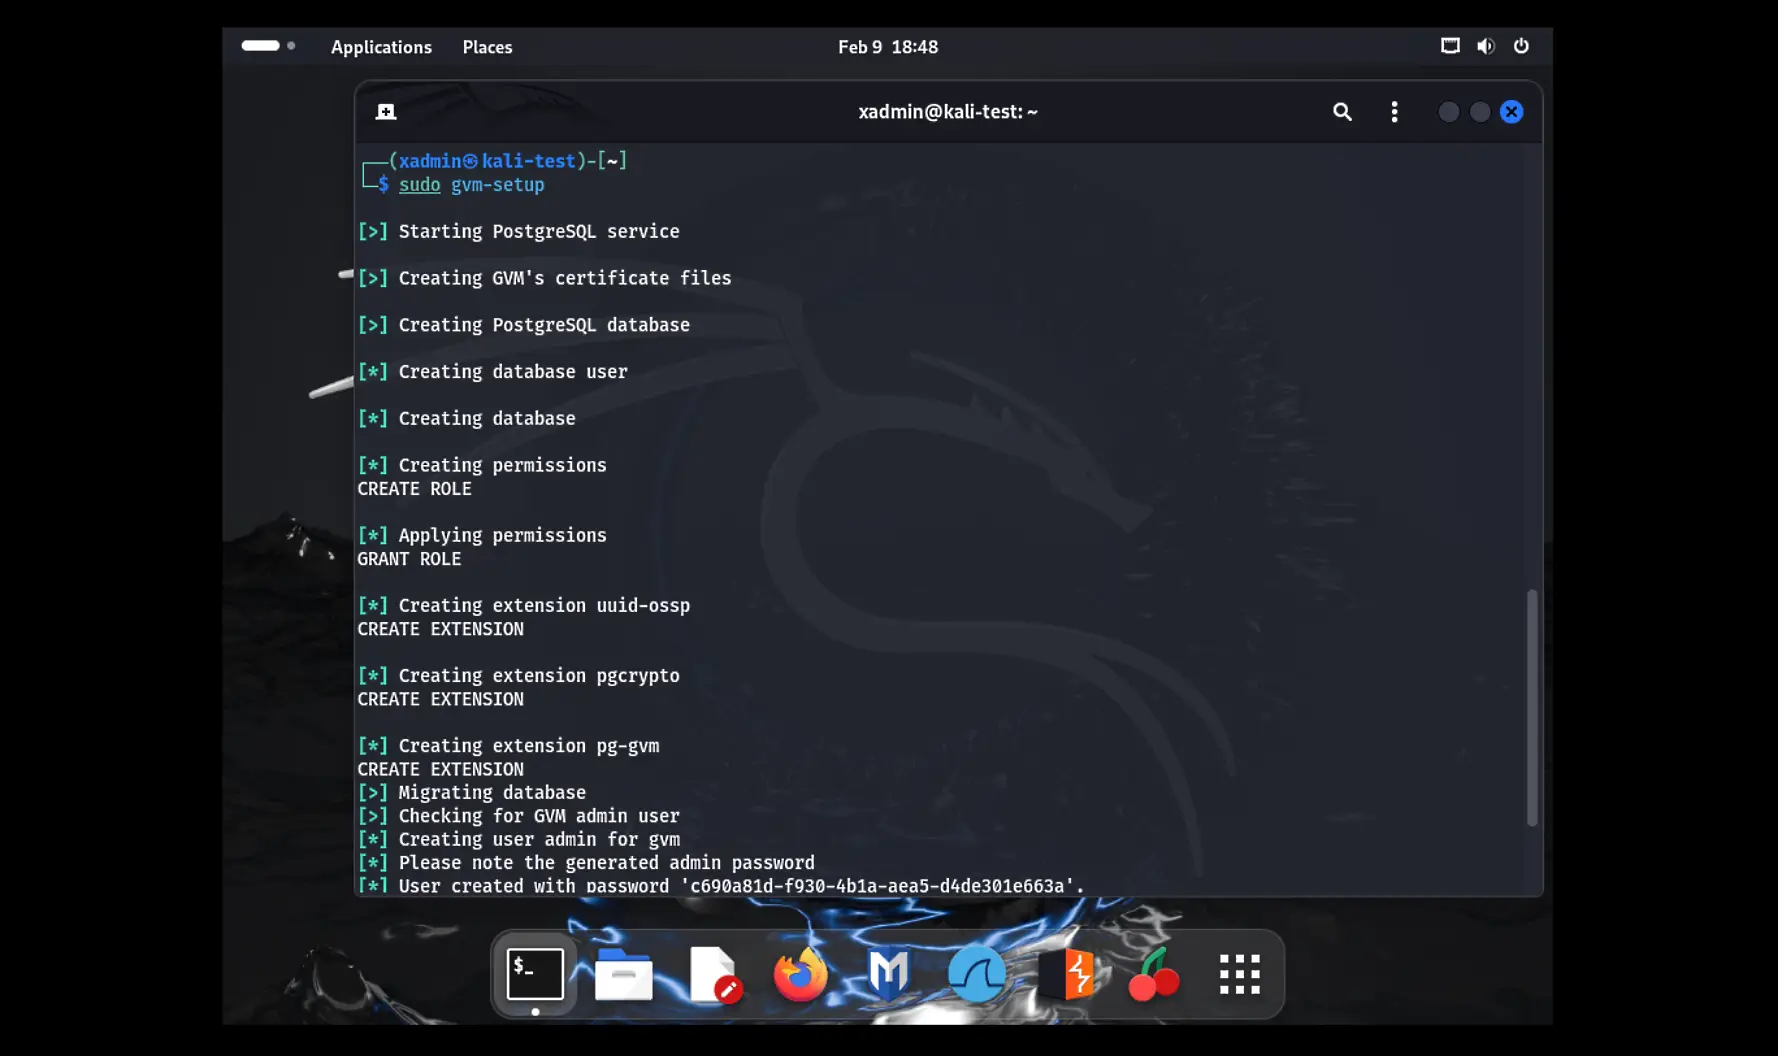
Photo by admingeek from Infotechys
During the Greenbone Vulnerability Management (GVM) setup process, Notus and NASL files will be downloaded. The setup will conclude with the creation of an admin user and password. Please make a note of these credentials as you will need them later.
Once the GVM setup process is complete, confirm its status by running the following command:
$ sudo gvm-check-setup
					gvm-check-setup 23.11.0
  Test completeness and readiness of GVM-23.11.0
Step 1: Checking OpenVAS (Scanner)...
        OK: OpenVAS Scanner is present in version 22.7.9.
        OK: Notus Scanner is present in version 22.6.2.
        OK: Server CA Certificate is present as /var/lib/gvm/CA/servercert.pem.
Checking permissions of /var/lib/openvas/gnupg/*
        OK: _gvm owns all files in /var/lib/openvas/gnupg
        OK: redis-server is present.
        OK: scanner (db_address setting) is configured properly using the redis-server socket: /var/run/redis-openvas/redis-server.sock
        OK: the mqtt_server_uri is defined in /etc/openvas/openvas.conf
        OK: _gvm owns all files in /var/lib/openvas/plugins
        OK: NVT collection in /var/lib/openvas/plugins contains 88210 NVTs.
        OK: The notus directory /var/lib/notus/products contains 456 NVTs.
Checking that the obsolete redis database has been removed
        OK: No old Redis DB
        OK: ospd-openvas service is active.
        OK: ospd-OpenVAS is present in version 22.6.2.
Step 2: Checking GVMD Manager ...
        OK: GVM Manager (gvmd) is present in version 23.1.0.
Step 3: Checking Certificates ...
        OK: GVM client certificate is valid and present as /var/lib/gvm/CA/clientcert.pem.
        OK: Your GVM certificate infrastructure passed validation.
Step 4: Checking data ...
        OK: SCAP data found in /var/lib/gvm/scap-data.
        OK: CERT data found in /var/lib/gvm/cert-data.
Step 5: Checking Postgresql DB and user ...
        OK: Postgresql version and default port are OK.
 gvmd      | _gvm     | UTF8     | libc            | en_US.UTF-8 | en_US.UTF-8 |            |           |
16436|pg-gvm|10|2200|f|22.6||
        OK: At least one user exists.
Step 6: Checking Greenbone Security Assistant (GSA) ...
        OK: Greenbone Security Assistant is present in version 22.08.0~git.
Step 7: Checking if GVM services are up and running ...
        OK: gvmd service is active.
        OK: gsad service is active.
Step 8: Checking few other requirements...
        OK: nmap is present.
        OK: ssh-keygen found, LSC credential generation for GNU/Linux targets is likely to work.
        OK: nsis found, LSC credential package generation for Microsoft Windows targets is likely to work.
        OK: xsltproc found.
        WARNING: Your password policy is empty.
        SUGGEST: Edit the /etc/gvm/pwpolicy.conf file to set a password policy.
Step 9: Checking greenbone-security-assistant...
        OK: greenbone-security-assistant is installed

It seems like your GVM-23.11.0 installation is OK.
After the initialization process is finished, you can access the OpenVAS web interface by opening your web browser and navigating to https://localhost:9392. You’ll be prompted to log in with the default username and password:
adminc690a81d-f930-4b1a-aea5-d4de301e663aIf the URL isn’t functioning properly for you, attempt to resolve the issue by restarting GVM services with the following commands:
$ sudo gvm-stop; sudo gvm-start
					[>] Please wait for the GVM services to start.
[>]
[>] You might need to refresh your browser once it opens.
[>]
[>]  Web UI (Greenbone Security Assistant): https://127.0.0.1:9392
Furthermore, if you happen to forget or misplace your password, you can easily set a new one using the following command:
$ sudo runuser -u _gvm -- gvmd --user=admin --new-password=new_password
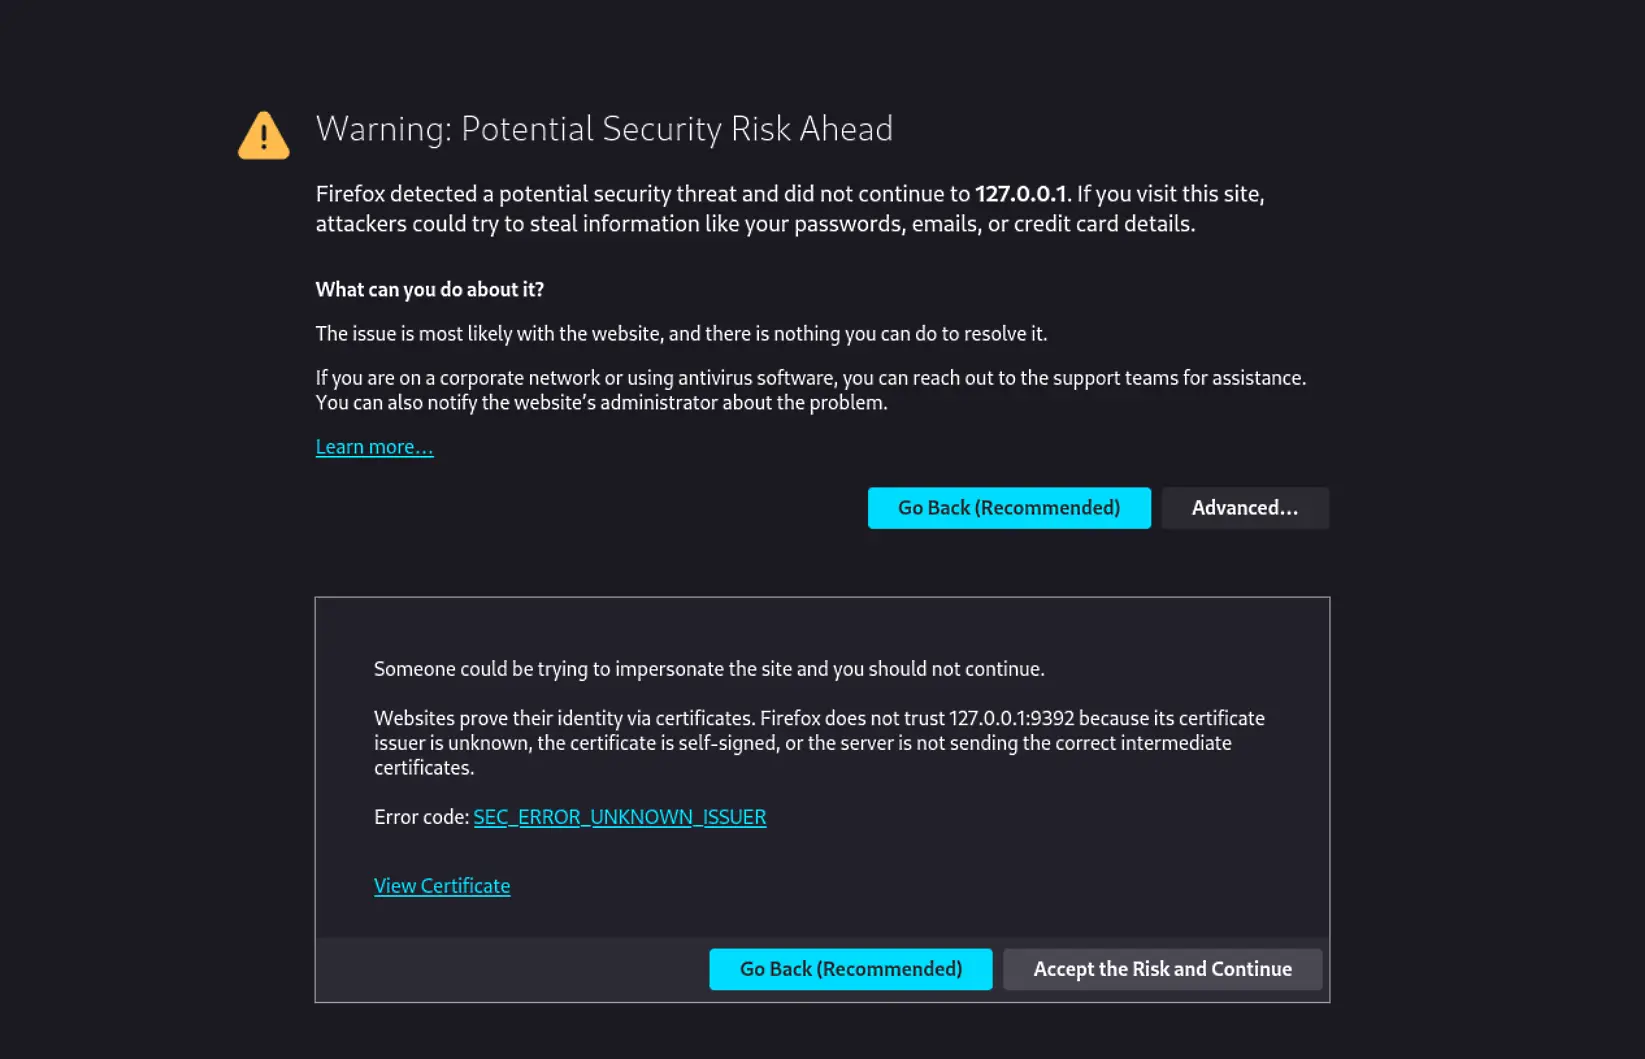
Photo by admingeek from Infotechys

Photo by admingeek from Infotechys
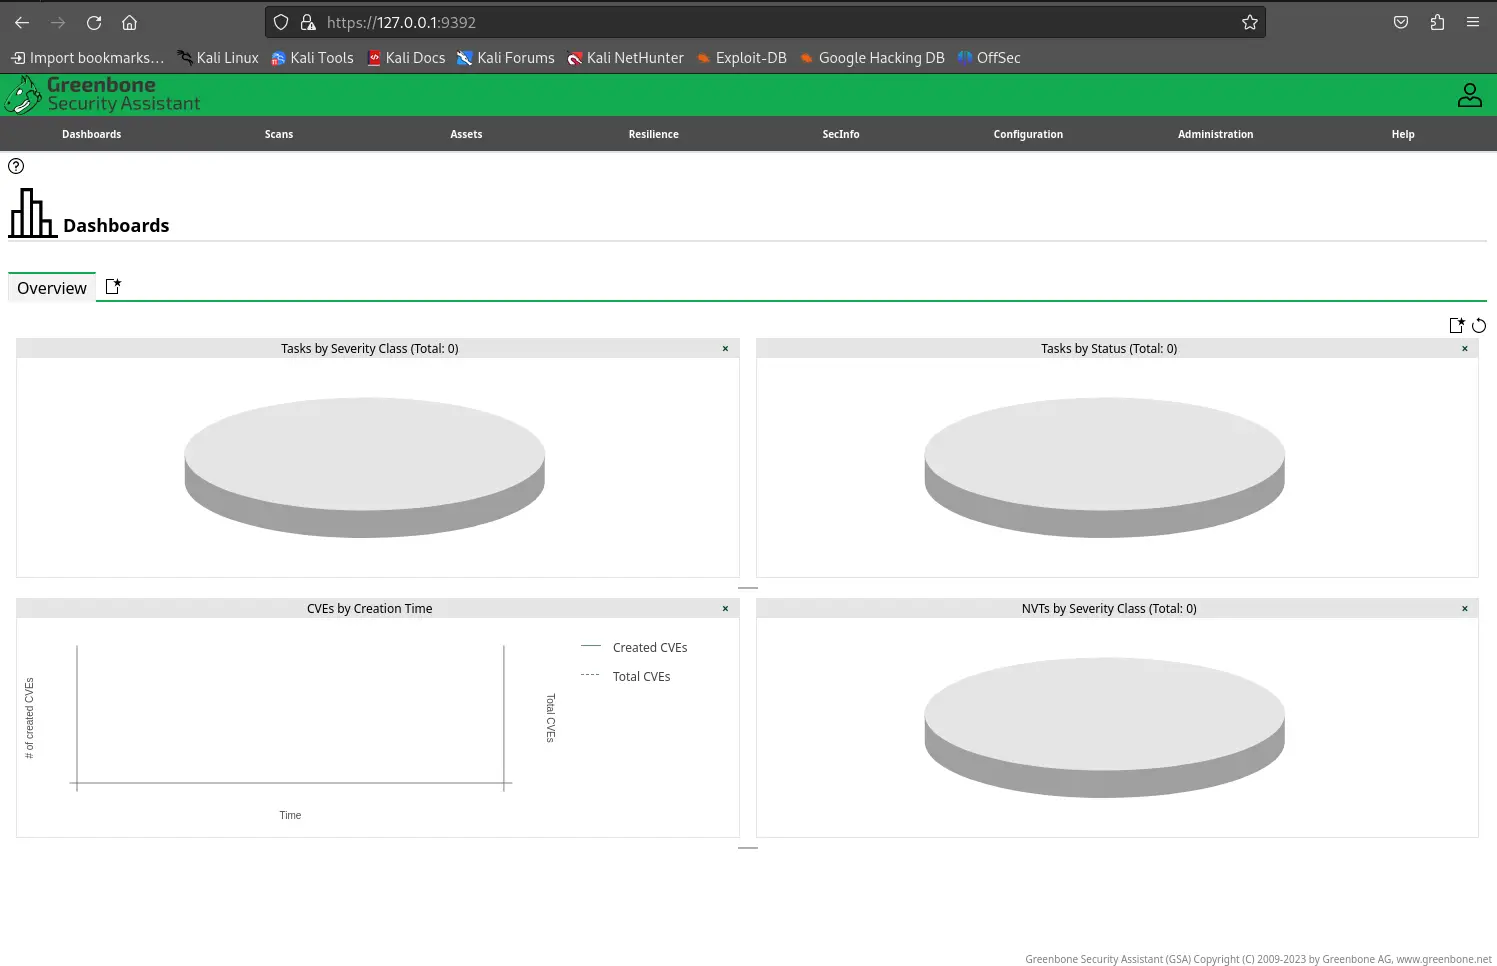
Photo by admingeek from Infotechys
To ensure that OpenVAS is scanning for the latest security threats, it’s essential to keep the vulnerability database up to date. You can update the vulnerability database by running the following command:
$ sudo greenbone-feed-sync
This command will download the latest vulnerability data and update the OpenVAS database accordingly, ensuring that your scans are as accurate and comprehensive as possible.
Run the following command to create a new user and password:
sudo runuser -u _gvm -- gvmd --create-user=newadmin --new-password=enter_new_passsword
In this comprehensive guide, we’ve walked you through the process of installing OpenVAS on Kali Linux, from meeting the prerequisites to accessing the web interface and updating the vulnerability database. By following these steps, you can set up OpenVAS on your system and start scanning for potential security vulnerabilities in your network infrastructure. With OpenVAS at your disposal, you can take proactive measures to secure your systems and protect your sensitive data from potential threats.
Did you find this article useful? Your feedback is invaluable to us! Please feel free to share your thoughts in the comments section below.
Related Posts
In this blog post, we’ll explore the 10 major differences between Ubuntu 20.04 and its latest iteration, Ubuntu 22.04, shedding light on the advancements that await

In this blog post, we’ll explore 10 cool hacks you can perform with Kali Linux, from basic tasks to more advanced techniques. Table of Contents
In this blog post, we’ll delve into the 10 major differences between Red Hat and Kali Linux, shedding light on their unique features, use cases,