
Commands
In this article, we explore the seamless integration of CI/CD with Jenkins on RHEL9, providing a detailed step-by-step guide for setting up an efficient and


In this comprehensive guide, we’ll walk you through the process of installing Dogtag CA on CentOS 9, ensuring your system is equipped with the necessary security infrastructure.
Are you ready to secure your network with a robust Certificate Authority (CA) solution? Look no further than Dogtag CA, an open-source CA system that provides certificate management for various applications, including web servers, email systems, and virtual private networks (VPNs).
Dogtag CA, developed by Red Hat, emerged in the early 2000s as an open-source Certificate Authority (CA) solution. It aimed to provide robust certificate management capabilities for securing networks and applications. Over the years, Dogtag CA evolved with updates and enhancements, offering features such as key management, certificate issuance, and policy enforcement. Its integration with various Red Hat products and support for industry standards solidified its position as a trusted CA solution in the open-source community. Today, Dogtag CA continues to be a preferred choice for organizations seeking reliable and scalable PKI infrastructure.
Before diving into the installation process, let’s highlight why Dogtag CA stands out as a top choice for your certificate management needs:
Open Source: Dogtag CA is open-source software, providing transparency and flexibility in its implementation and customization.
Robust Security: With Dogtag CA, you can enforce strong encryption standards and ensure the integrity and authenticity of your digital certificates.
Scalability: Whether you’re managing a small network or a large enterprise environment, Dogtag CA scales effortlessly to meet your organization’s growing needs.
Comprehensive Features: From certificate issuance and revocation to key management and policy enforcement, Dogtag CA offers a comprehensive suite of features for managing your PKI infrastructure.
Before proceeding with the installation, make sure you have the following prerequisites in place:
CentOS 9 Server: Ensure you have a CentOS 9 server set up with root access or a user account with sudo privileges.
Stable Internet Connection: A stable internet connection is essential for downloading the necessary packages during the installation process.
Basic Linux Command Line Knowledge: Familiarize yourself with basic Linux commands for navigating the terminal and performing administrative tasks.
For illustrative purposes, we’ve configured our system with the following settings:
| Hostname | ca-server.infotechys.com |
| IP address | 192.168.1.233 |
| RAM | 4 |
| Cores | 2 |
Complete the following steps to install Dogtag CA on your CentOS9 or RHEL9 machine.
Start by updating your CentOS 9 system’s package repository and installed packages to ensure you have the latest updates and security patches:
[root@ca-server ~]# dnf update -y
Next, install the Dogtag CA packages using the following command:
[root@ca-server ~]# dnf install -y pki-ca
This command will install the Dogtag CA components along with its necessary dependencies.
Before configuring Dogtag CA, create an instance configuration file (instance.cfg) with the required settings. Use a text editor to create the file and add the following configuration:
					[general]
config_version = 2

[slapd]
root_password = <Enter-password>

[backend-userroot]
sample_entries = yes
suffix = dc=ca-server,dc=infotechys,dc=com
This configuration file specifies general settings, including the version, slapd (LDAP server) root password, and backend user root settings. Adjust the root_password and suffix parameters according to your specific requirements and domain configuration. Save the file and proceed with the configuration process.
Now that we have the instance configuration file (instance.cfg) ready, we’ll initialize the Dogtag CA instance using the dscreate command. Run the following command:
[root@ca-server ~]# dscreate from-file instance.cfg
This command initiates the installation process, which includes several steps:
					Starting installation ...
Validate installation settings ...
Create file system structures ...
Create self-signed certificate database ...
Perform SELinux labeling ...
Create database backend: dc=ca-server,dc=infotechys,dc=com ...
Perform post-installation tasks ...
Completed installation for instance: slapd-localhost
Once the installation is complete, you’ll need to configure Dogtag CA using the pki-server utility. Run the following command to begin the configuration process:
[root@ca-server ~]# pkispawn -s CA
Follow the on-screen prompts to configure the CA instance according to your requirements. You’ll be prompted to provide information such as the CA administrator password, organization details, and CA key sizes.
					Tomcat:
  Instance [pki-tomcat]:
  HTTP port [8080]:
  Secure HTTP port [8443]:
  AJP port [8009]:
  Management port [8005]:

Administrator:
  Username [caadmin]:
  Password:
  Verify password:
  Import certificate (Yes/No) [N]?
  Export certificate to [/root/.dogtag/pki-tomcat/ca_admin.cert]:

Directory Server:
  Hostname [ca-server.infotechys.com]:
  Use a secure LDAPS connection (Yes/No/Quit) [N]?
  LDAP Port [389]:
  Bind DN [cn=Directory Manager]:
  Password:
  Base DN [o=pki-tomcat-CA]:

Security Domain:
  Name [infotechys.com Security Domain]:

Begin installation (Yes/No/Quit)? Yes

Installing CA into /var/lib/pki/pki-tomcat.
During the on-screen prompts, simply press the Enter key to accept the default options, except when prompted for the passwords for caadmin and the Directory Manager. You’ll need to enter those manually.
    ==========================================================================
                                INSTALLATION SUMMARY
    ==========================================================================

      Administrator's username:             caadmin
      Administrator's PKCS #12 file:
            /root/.dogtag/pki-tomcat/ca_admin_cert.p12

      To check the status of the subsystem:
            systemctl status pki-tomcatd@pki-tomcat.service

      To restart the subsystem:
            systemctl restart pki-tomcatd@pki-tomcat.service

      The URL for the subsystem is:
            https://ca-server.infotechys.com:8443/ca

      PKI instances will be enabled upon system boot

    ==========================================================================
Upon a successful completion of the installation, you will be presented with a summary similar to the output shown above.
After the configuration is complete, start the Dogtag CA services with the following commands to make them operational:
					[root@ca-server ~]# systemctl status pki-tomcatd@pki-tomcat.service

[root@ca-server ~]# systemctl restart pki-tomcatd@pki-tomcat.service

[root@ca-server ~]# systemctl enable pki-tomcatd@pki-tomcat.service
To access the Dogtag CA web interface, we need to ensure that port 8443 is open on the CentOS 9 server’s firewall. Run the following commands to open the port:
					[root@ca-server ~]# firewall-cmd --zone=public --add-port=8443/tcp --permanent

[root@ca-server ~]# firewall-cmd --reload

[root@ca-server ~]# firewall-cmd --list-all
public (active)
  target: default
  icmp-block-inversion: no
  interfaces: eth0 eth1
  sources:
  services: cockpit dhcpv6-client ssh
  ports: 8443/tcp
  protocols:
  forward: yes
  masquerade: no
  forward-ports:
  source-ports:
  icmp-blocks:
  rich rules:
You can now access the Dogtag CA web interface using a web browser. Open your browser and navigate to the following URL:
$ https://your-server-ip:8443/ca/
Replace your-server-ip with the IP address or hostname of your CentOS 9 server.
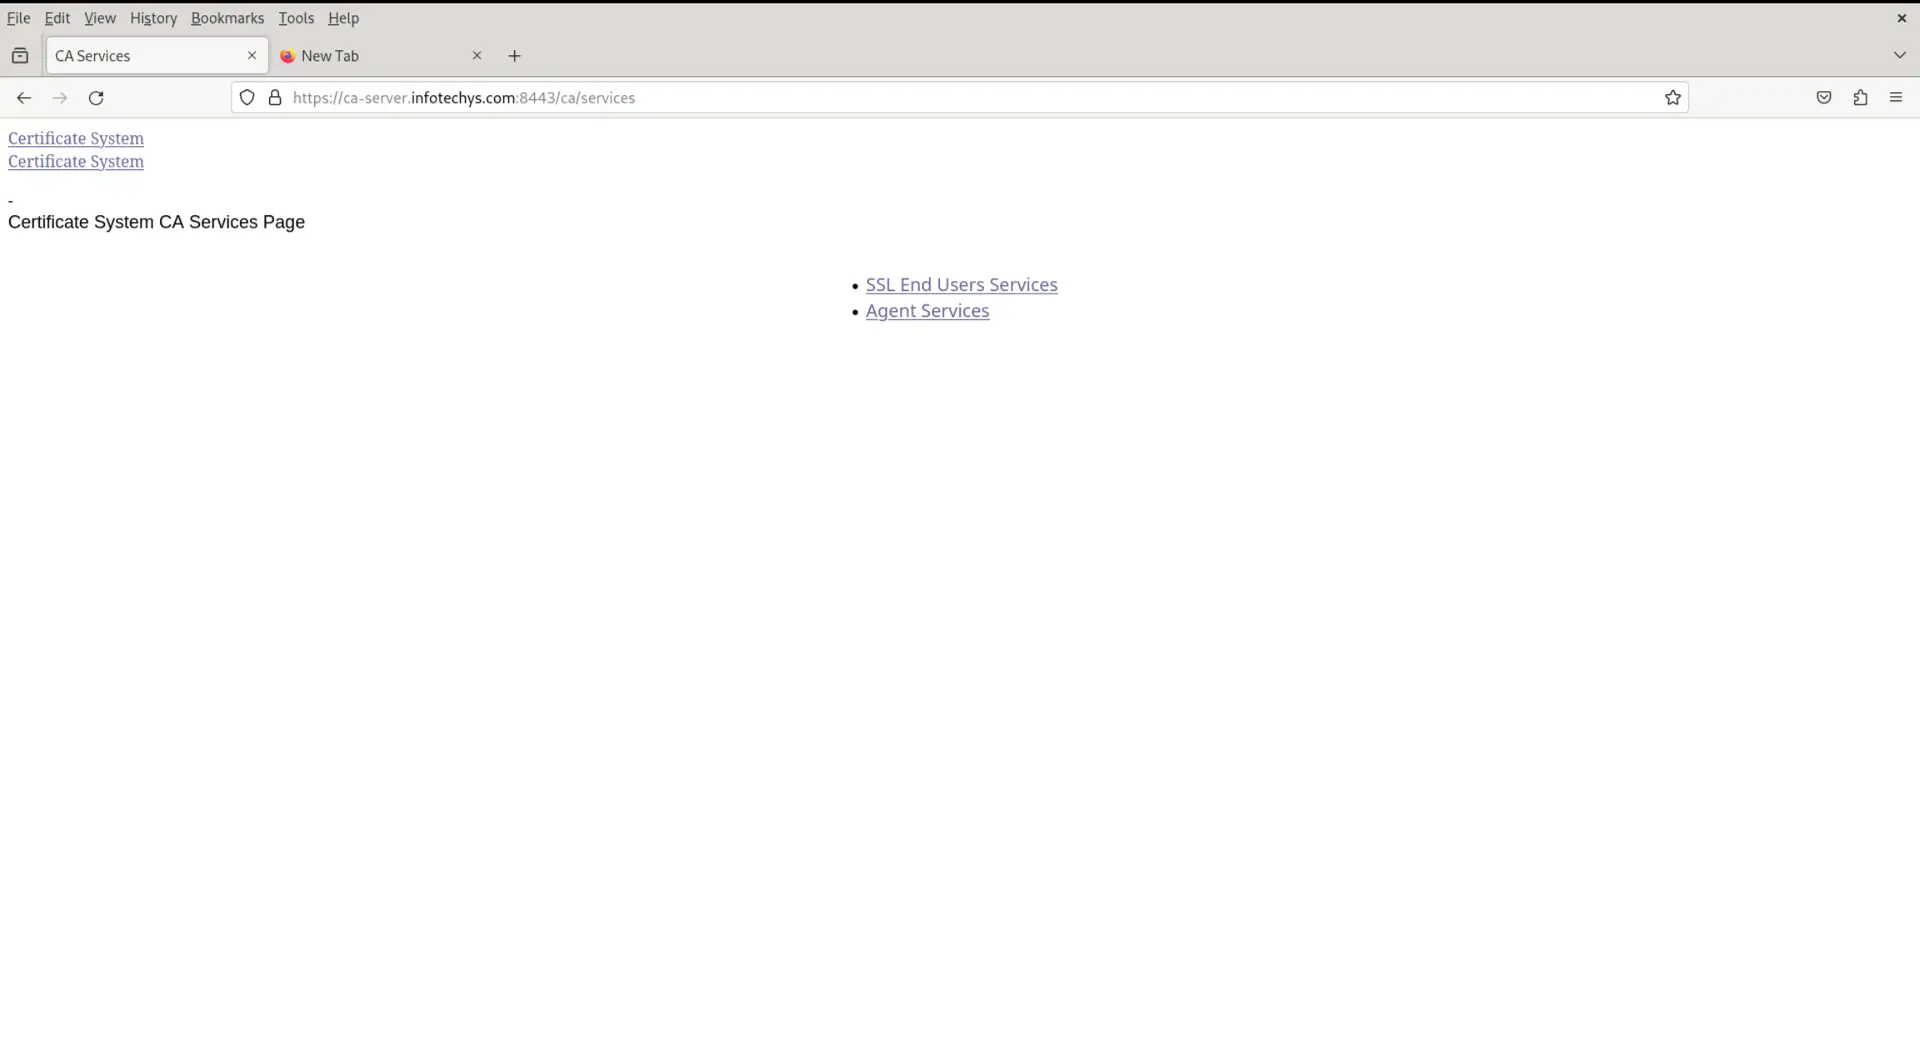
Photo by admingeek from Infotechys
Congratulations! You’ve successfully installed Dogtag CA on CentOS 9, laying the foundation for a secure and reliable PKI infrastructure. By following this step-by-step guide, you can leverage Dogtag CA’s powerful features to manage digital certificates with ease and confidence.
Remember to regularly update and maintain your Dogtag CA instance to ensure optimal performance and security. If you encounter any issues during the installation or configuration process, refer to the official Dogtag CA documentation or seek assistance from the vibrant open-source community.
Stay tuned for more tutorials and guides on optimizing your network security with open-source solutions like Dogtag CA.
Was this article helpful to you? If so, leave us a comment below and share!
Related Posts
In this article, we explore the seamless integration of CI/CD with Jenkins on RHEL9, providing a detailed step-by-step guide for setting up an efficient and

In this guide, we’ll walk you through the step-by-step process of installing Remmina on RHEL9 or CentOS9. Remmina is a feature-rich remote desktop client that allows

In this article, we will review step-by-step, how to change the root password using Ansible. As part of this process, we will examine a sample