In this article, we will review how to install MySQL on Fedora 37, providing step-by-step instructions to ensure a smooth installation process. Table of Contents
Learn how to install MariaDB on RHEL 9 and CentOS 9 with this comprehensive step-by-step guide. Discover essential commands, configurations, and tips for setting up a robust database environment on your system. Perfect for beginners and seasoned users alike!
Installing MariaDB on RHEL 9 or CentOS 9 can be a straightforward process if you follow the right steps. MariaDB is a popular open-source relational database management system (RDBMS) that serves as a drop-in replacement for MySQL, offering improved performance and reliability. In this guide, we will walk you through the entire installation process, covering prerequisites, installation, configuration, and basic commands to get you started.
MariaDB has become a popular choice among developers and system administrators for several reasons:
|
|
|
|
📝 Prerequisites |
Before you start, ensure that you have:
|
|
|
Step 1: Enable the MariaDB Repository |
To install MariaDB, you first need to enable its repository. Execute the following command to create a new repository file.
					sudo tee /etc/yum.repos.d/MariaDB.repo > /dev/null <<EOF
[mariadb]
name = MariaDB
baseurl = https://yum.mariadb.org/11.6/rhel9-amd64
gpgkey=https://yum.mariadb.org/RPM-GPG-KEY-MariaDB
gpgcheck=1
enabled=1
EOF
Explanation: |
This command creates a new repository configuration file for MariaDB. The baseurl specifies the version of MariaDB you wish to install (MariaDB version 11.6 in this example and as of the date of this publication). To install earlier or the latest versions, please visit the MariaDB YUM repository.
Step 2: Install MariaDB Server |
Now that the repository is set up, you can install MariaDB by running the following command:
sudo dnf install MariaDB-server MariaDB-client
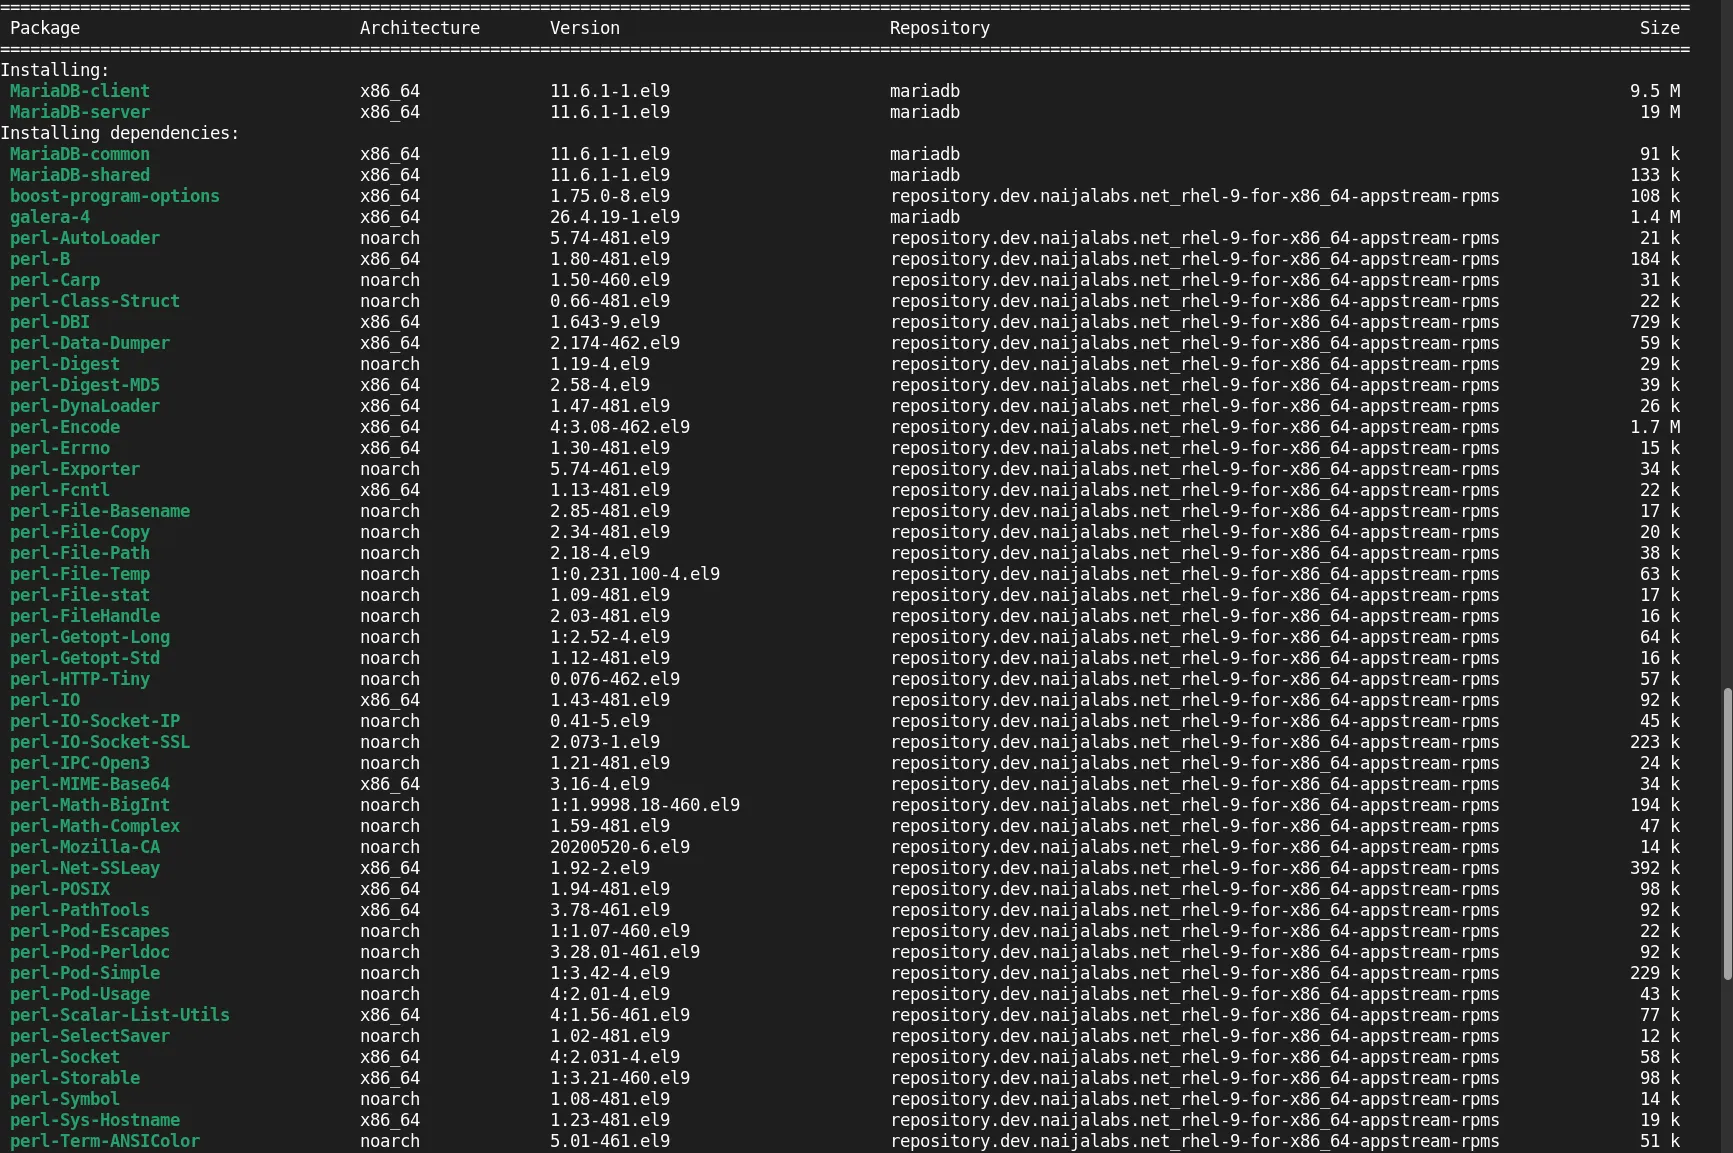
Photo by admingeek from Infotechys
Installation Output: |
During the installation, you will see output indicating the packages that will be installed, similar to this (below):
					...omitted for brevity...
Installing weak dependencies:
 MariaDB-client-compat              noarch             11.6.1-1.el9                      mariadb                                                                    11 k
 MariaDB-server-compat              noarch             11.6.1-1.el9                      mariadb                                                                   9.0 k
 perl-NDBM_File                     x86_64             1.15-481.el9                      repository.dev.naijalabs.net_rhel-9-for-x86_64-appstream-rpms              23 k
 pv                                 x86_64             1.6.20-1.el9                      epel                                                                       65 k

Transaction Summary
=========================================================================================================================================================================
Install  73 Packages

Total download size: 38 M
Installed size: 267 M
Is this ok [y/N]: y
Press [y] and hit [Enter] to proceed with the installation.
Step 3: Start and Enable MariaDB Service |
After the installation is complete, start the MariaDB service and enable it to run on boot:
sudo systemctl enable --now mariadb
You can check the status of the MariaDB service using:
sudo systemctl status mariadb
					● mariadb.service - MariaDB 11.6.1 database server
     Loaded: loaded (/usr/lib/systemd/system/mariadb.service; enabled; preset: disabled)
    Drop-In: /etc/systemd/system/mariadb.service.d
             └─migrated-from-my.cnf-settings.conf
     Active: active (running) since Mon 2024-10-14 20:02:42 EDT; 10min ago
       Docs: man:mariadbd(8)
             https://mariadb.com/kb/en/library/systemd/
    Process: 30798 ExecStartPre=/bin/sh -c [ ! -e /usr/bin/galera_recovery ] && VAR= ||   VAR=`/usr/bin/galera_recovery`; [ $? -eq 0 ]   && echo _WSREP_START_POSITION=$VAR > /var/lib/mysql/wsrep-start>
    Process: 30828 ExecStartPost=/bin/rm -f /var/lib/mysql/wsrep-start-position (code=exited, status=0/SUCCESS)
   Main PID: 30805 (mariadbd)
     Status: "Taking your SQL requests now..."
      Tasks: 7 (limit: 28667)
     Memory: 219.2M
        CPU: 4.363s
     CGroup: /system.slice/mariadb.service
             └─30805 /usr/sbin/mariadbd
Step 4: Secure MariaDB Installation |
By default, MariaDB is not secure. To enhance its security, run the following commands (This step is crucial for any production environment): Log in as Root using the following command:
sudo mariadb -u root -p
					Welcome to the MariaDB monitor.  Commands end with ; or \g.
Your MariaDB connection id is 4
Server version: 11.6.1-MariaDB MariaDB Server

Copyright (c) 2000, 2018, Oracle, MariaDB Corporation Ab and others.

Type 'help;' or '\h' for help. Type '\c' to clear the current input statement.

MariaDB [(none)]>
| Action | Description |
|---|---|
| Set the root password | Optionally set a password for the root user. |
Change the root user’s password (Replace ‘your_new_password’ with your actual password):
ALTER USER 'root'@'localhost' IDENTIFIED BY 'your_new_password';
Query OK, 0 rows affected (0.021 sec)
| Remove anonymous users | Eliminate any anonymous access. |
DELETE FROM mysql.user WHERE User='';
Query OK, 2 rows affected (0.017 sec)
| Disallow root login remotely | Prevent remote login for the root user. |
DELETE FROM mysql.user WHERE User='root' AND Host NOT IN ('localhost', '127.0.0.1', '::1');
Query OK, 0 rows affected (0.002 sec)
| Remove test databases and access | Delete test databases and restrict access to them. |
DROP DATABASE IF EXISTS test;
Query OK, 0 rows affected (0.088 sec)
| Reload privilege tables | Refresh the privilege tables to apply changes. |
FLUSH PRIVILEGES;
Query OK, 0 rows affected (0.001 sec)
Run this command to exit the shell:
EXIT;
Bye
Now that MariaDB is installed and secured, let’s look at some basic commands to manage your database.
Accessing MariaDB |
To access the MariaDB shell, run:
sudo mariadb -p
Enter the password you set during the secure installation.
Creating a User |
To create a new user and grant privileges, run:
CREATE USER 'my_user'@'localhost' IDENTIFIED BY 'my_password'; GRANT ALL PRIVILEGES ON my_database.* TO 'my_user'@'localhost'; FLUSH PRIVILEGES;
Replace my_user, my_password, and my_database with names you prefer.
Viewing Databases |
To view all databases:
SHOW DATABASES;
					+--------------------+
| Database           |
+--------------------+
| information_schema |
| mysql              |
| performance_schema |
| sys                |
+--------------------+
4 rows in set (0.002 sec)

MariaDB [(none)]>
Here are some helpful links to help you along your journey to mastering MariaDB!
| https://mariadb.com/kb | MariaDB Knowledgebase |
| https://mariadb.org/jira | For Reporting Problems |
| https://mariadb.org | Latest information about MariaDB |

In this article, we will review how to install MySQL on Fedora 37, providing step-by-step instructions to ensure a smooth installation process. Table of Contents
Unlock the power of relational databases and streamline your data management processes by discovering how to easily install MySQL on CentOS – a must-know skill
In this step-by-step guide, we will show you how to install mariaDB on CentOS7. MariaDB is a fork of MySQL relational database management systems (RDBMS). Table
