
Configuring autofs in Linux is a straightforward task. This article will guide you through the process of setting up and enabling the autofs service. Table
Installing RHEL7 or CentOS7 on a PC is fairly easy to do. In this tutorial, we will review the installation process step-by-step. Today’s focus will be the Red Hat Enterprise Linux (RHEL) operating system.

Image by Oleg Magni from Pexels
Downloading the CentOS7 ISO is pretty straightforward as well. We can download a copy of the ISO by using the wget command (below) or visiting the centos.org website.
[admin@vm1:~] $ wget http://mirror.umd.edu/centos/7.9.2009/isos/x86_64/CentOS-7-x86_64-Everything-2009.iso
However, as we mentioned earlier in this post, our focus will be the RHEL7 installation.
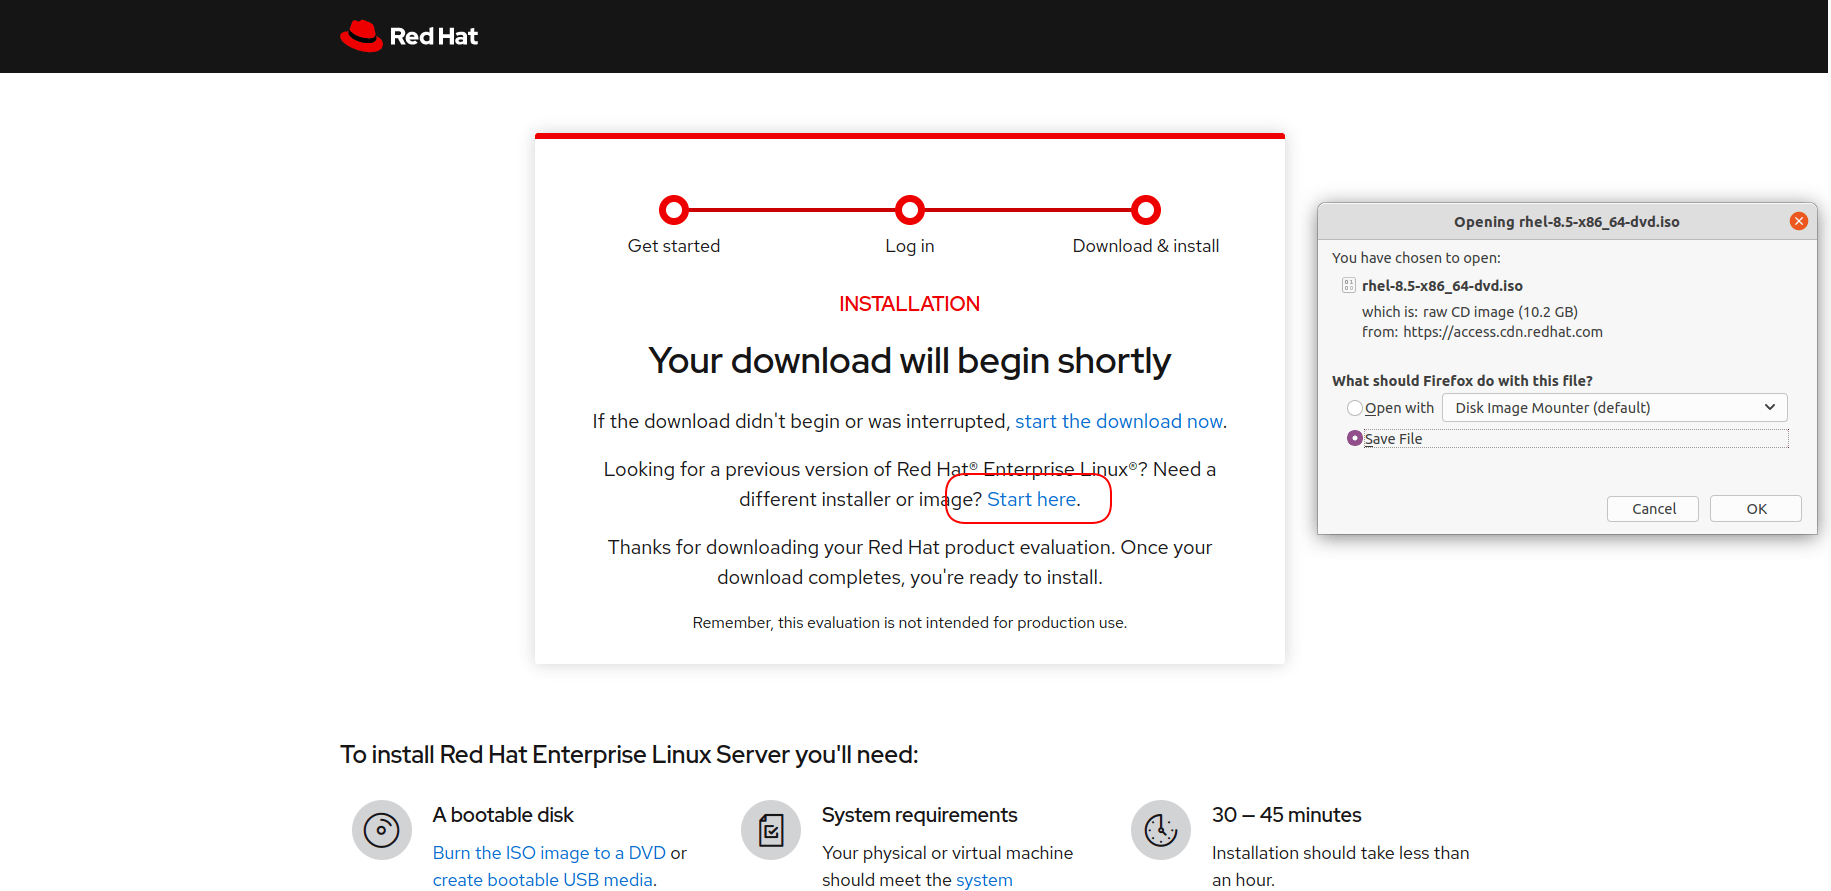
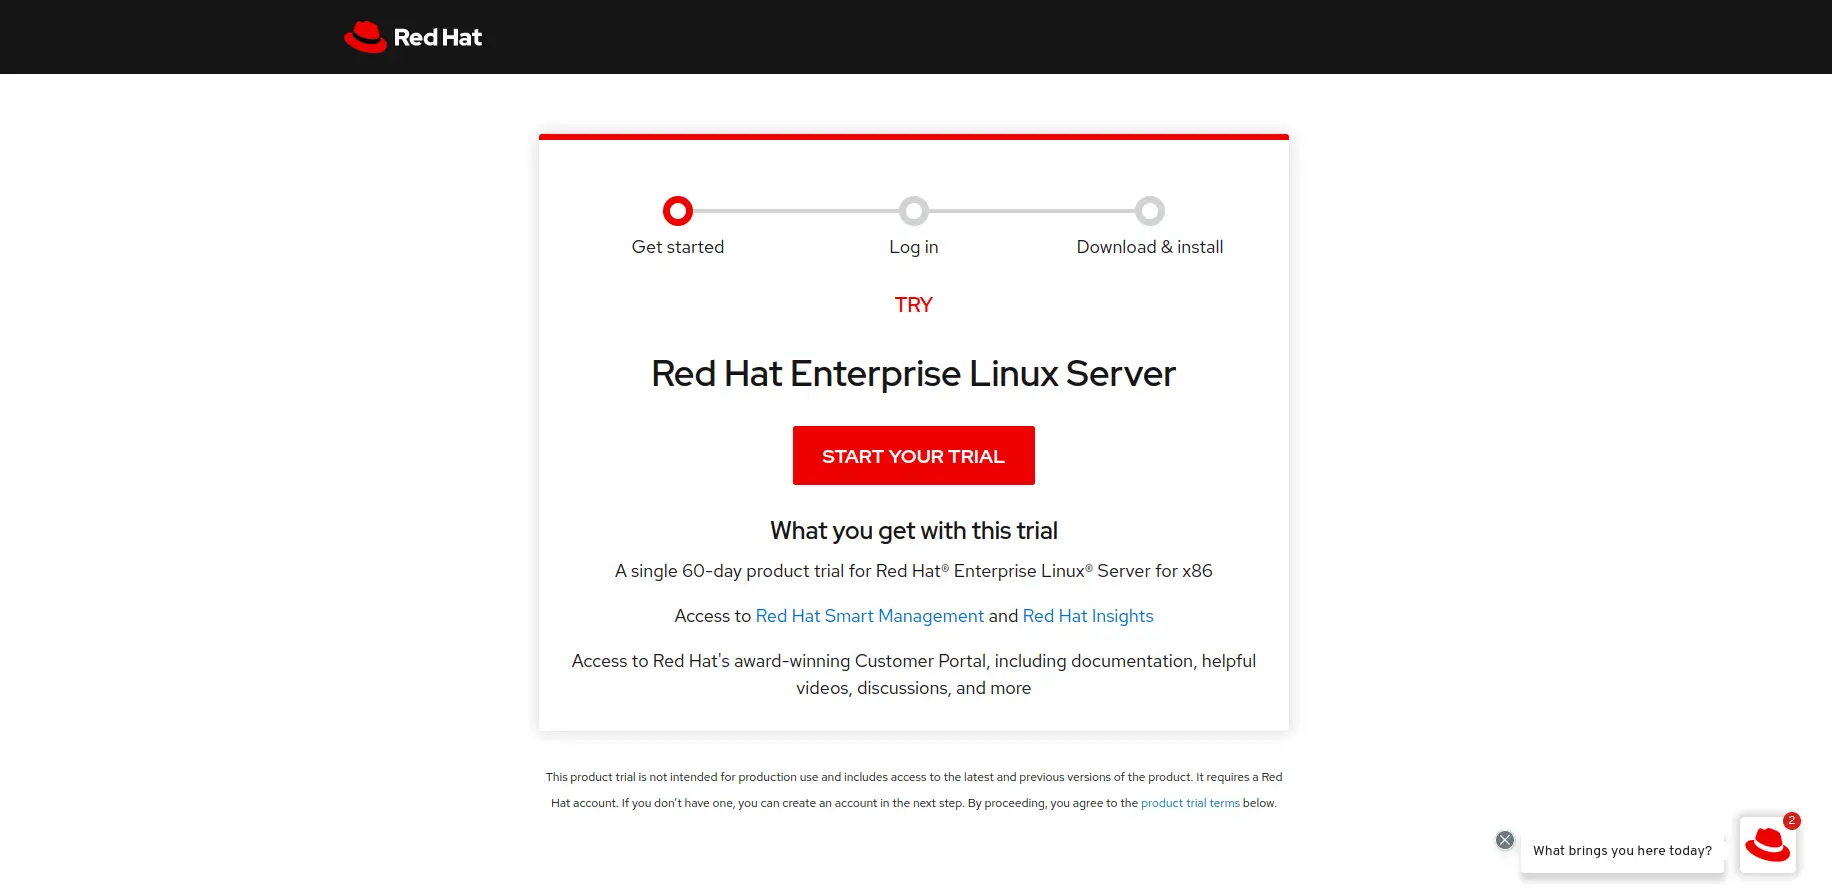
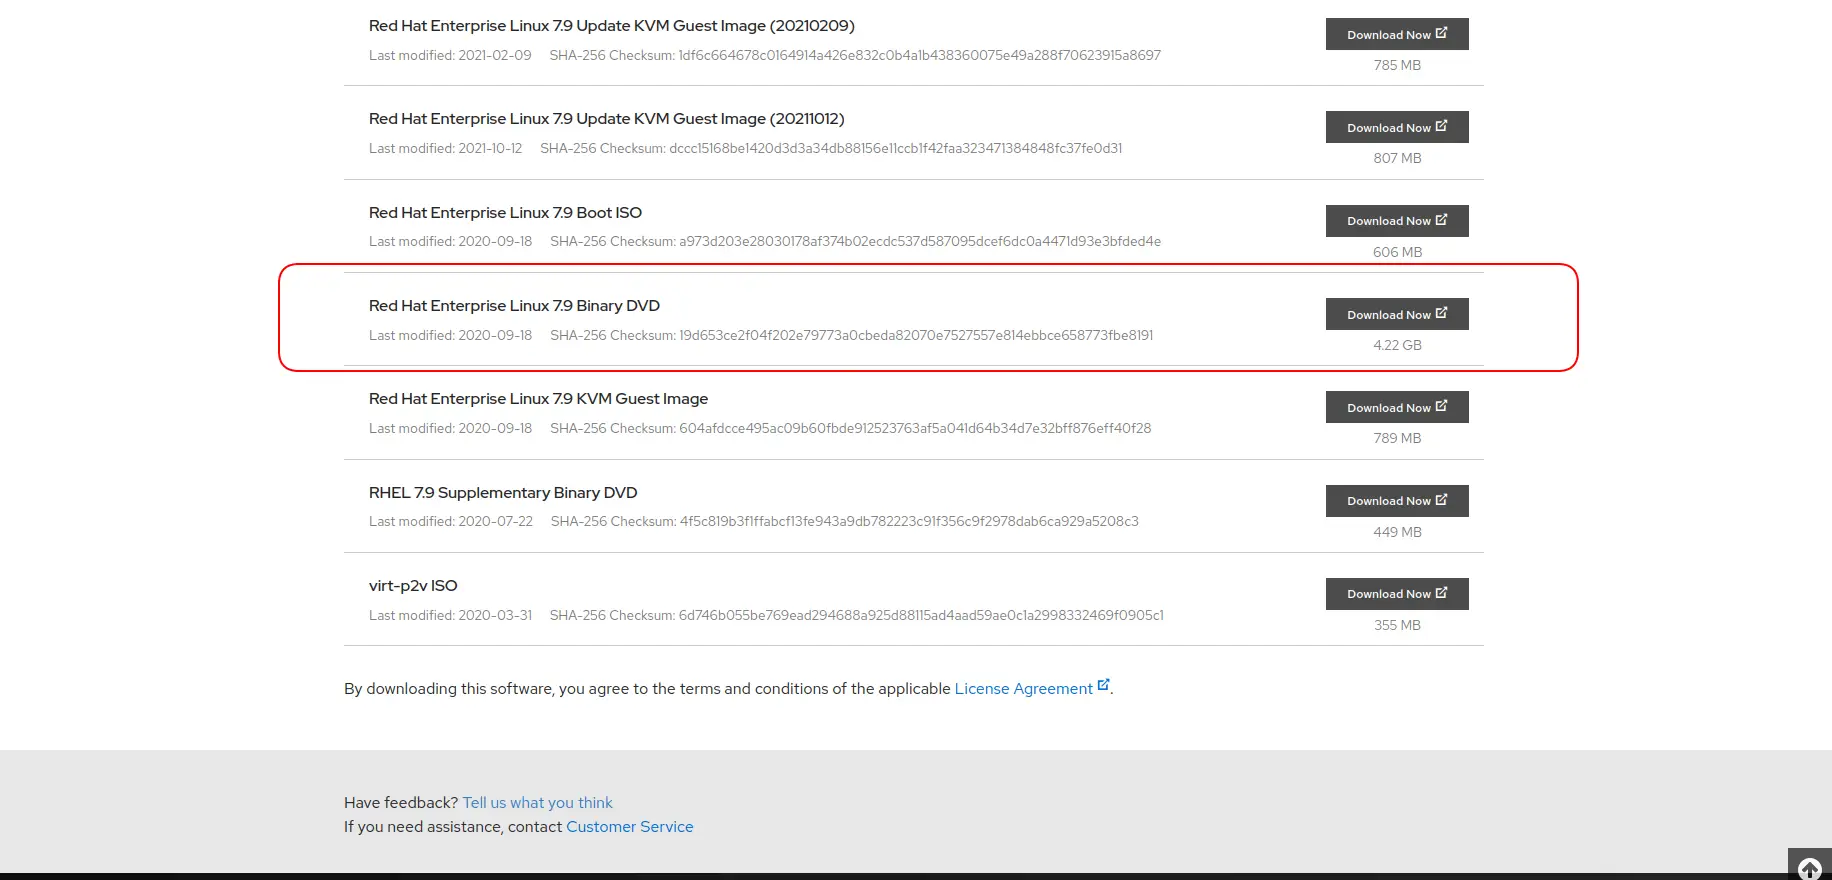
Click the start here link to go to Redhat’s download page. Then, click the Switch to Version 7 and Below link to go to the RHEL7 download page.
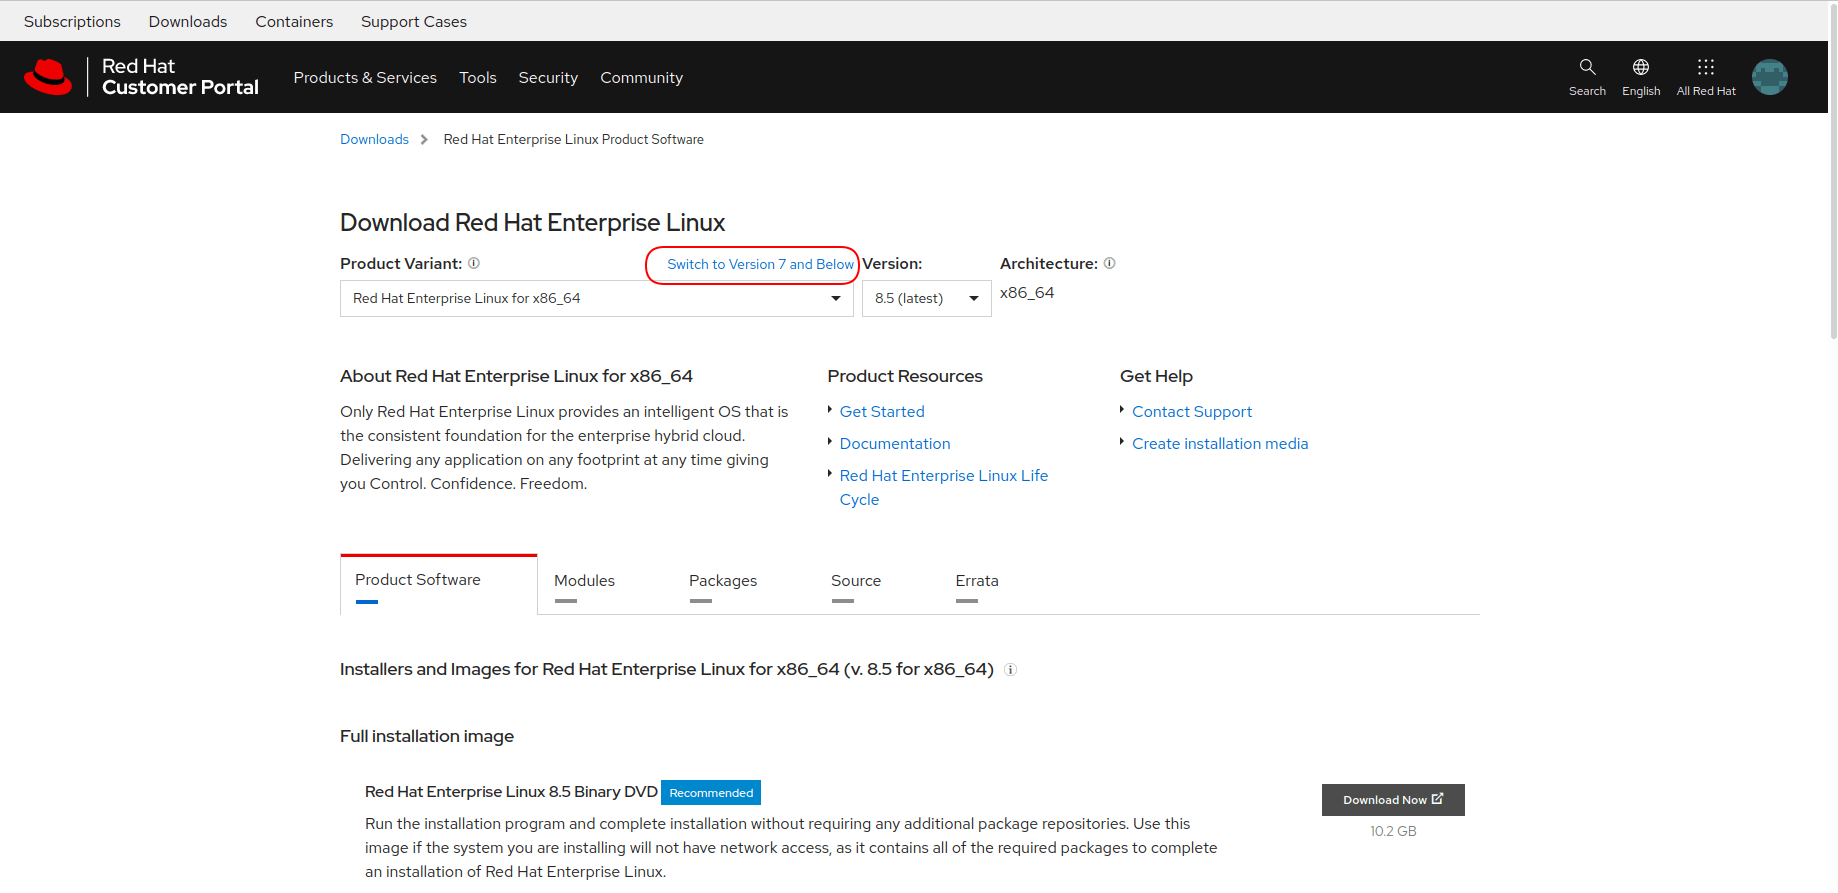
Scroll down and select the binary DVD option circled in red below. This will initiate the download of the rhel-server-7.9-x86_64-dvd.iso.
Now that the ISO is downloaded, we need to copy it to a media device (in this case, a USB flash drive) and make it bootable so we can install RHEL7 on our PC. One way to do this is by executing the data definition or dd command on a Linux machine.
|
|
💡NOTE: If you do not find the USB auto-mounted after running the df command, you can run the fdisk -l command to locate the device. The image below shows our USB Drive mapped to /dev/sdd. Typically, you’d expect to see it mapped to /dev/sdb but, we have other external devices attached to this machine as well; /dev/sdd is the next available drive name. |

Photo by admingeek from Infotechys
After we’ve located our USB flash drive, we can copy the rhel-server-7.9-x86_64-dvd.iso we downloaded to the flash, by executing the dd command to make it bootable (below).
					[admin@vm1:~]$ sudo dd if=~/rhel-server-7.9-x86_64-dvd.iso of=/dev/sdd bs=1M status=progress
1245347234 bytes (1.4 GB, 1.4 GiB) copied, 104 s, 23.4 MB/s
4512022528 bytes (4.5 GB, 4.2 GiB) copied, 272 s, 16.6 MB/s
4317+0 records in
4317+0 records out
4526702592 bytes (4.5 GB, 4.2 GiB) copied, 272.945 s, 16.6 MB/s
Add the status=progress option to the dd command to output the copy in progress to your terminal.
When the copy is complete, remove the USB flash drive and insert it into the new PC to begin the installation. Power on the new PC and press one of the function keys (F keys) to get to the boot menu. Depending on your type of PC, the function keys will vary (see the table below listing popular PC and laptop brands and their respective function keys required to get to the one-time boot menus (below):
Popular PC/Laptop Brands | Function Keys |
Hewitt Packard (HP) | F9 |
DELL | ESC + F12 or F12 |
ACER | ESC + F9, F12 |
Hewitt Packard (HP) Compaq | F10 |
Lenovo | F12 |
ASUS | ESC or F8 |
Toshiba | F12 or F2 |
IBM | F12 |
NEC | F2 |
Hewitt Packard (HP) Proliant | F11 |
Select the option to boot from the USB flash drive to get to the Redhat Installer Screen (below). Your machine will begin to load the Redhat Installer Screen.
Press the UP arrow to highlight the Install Red Hat Enterprise Linux 7.9 option and press the ENTER key.
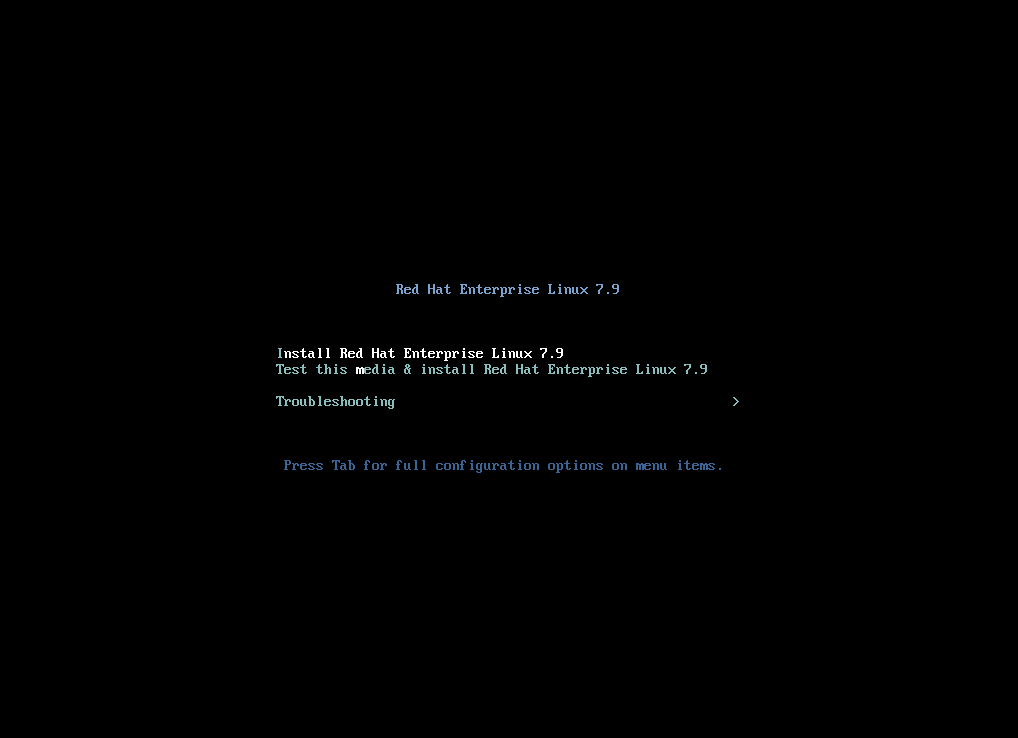
Photo by admingeek from Infotechys
The installer will load to the Welcome to Red Hat Enterprise Linux 7.9 page with the English (United States) language option selected by default. Select the language you’d like to proceed with or press the continue button to go with the default option.
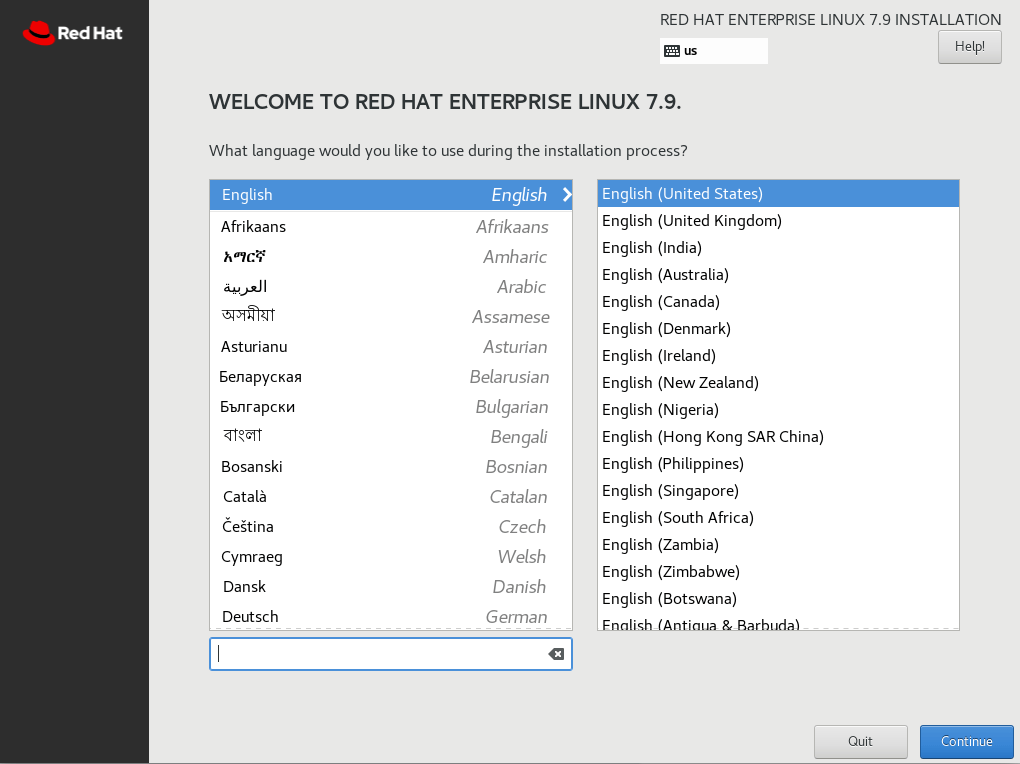
Photo by admingeek from Infotechys
Next, we are presented with the INSTALLATION SUMMARY screen.
Here we can select what software package we want to install by choosing the SOFTWARE SELECTION. Also, notice that “Automatic partitioning is selected” by default for the INSTALLATION DESTINATION option, and the NETWORK & HOST NAME option is currently set to “Not connected”.
We will address all three of these options below.
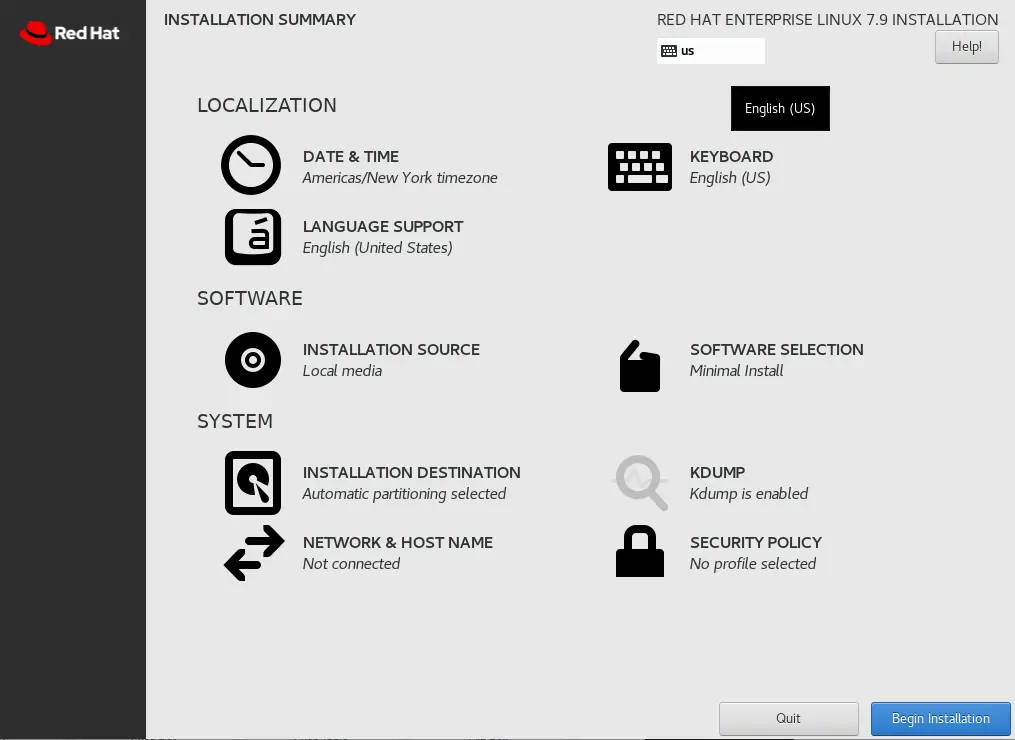
Photo by admingeek from Infotechys
By default, the SOFTWARE SELECTION is set to a Minimal Install. However, we can choose to go with any number of software packages as displayed in the image below.
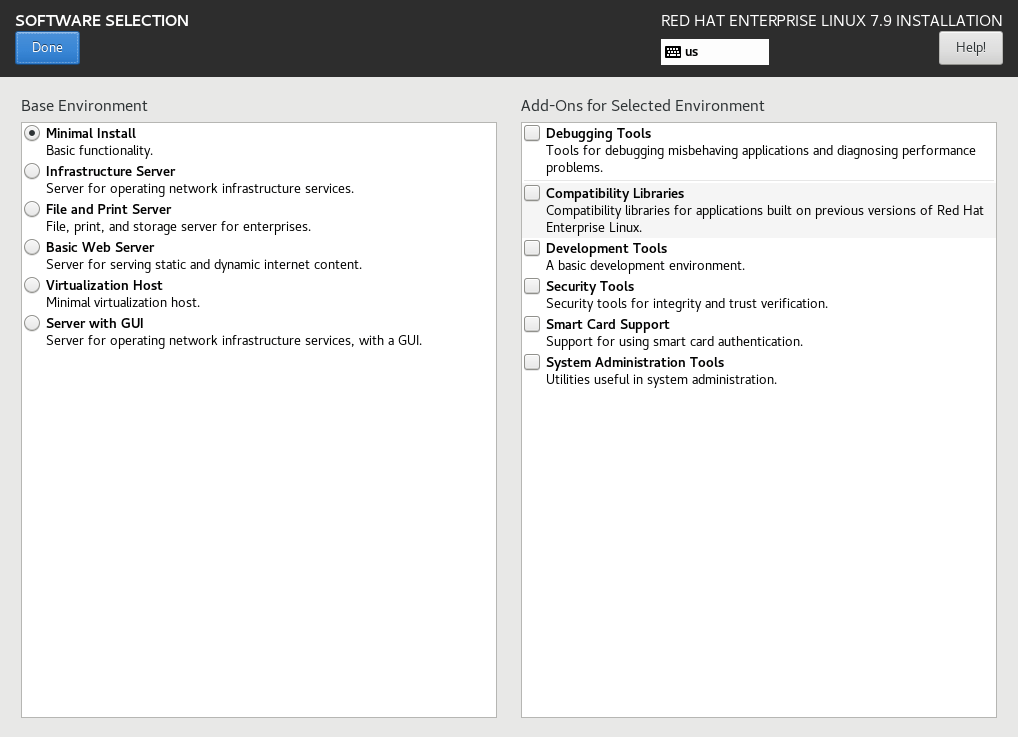
Photo by admingeek from Infotechys
For demonstration purposes, we will go with the default option for the SOFTWARE SELECTION or the Minimal Install option and proceed to the INSTALLATION DESTINATION section.
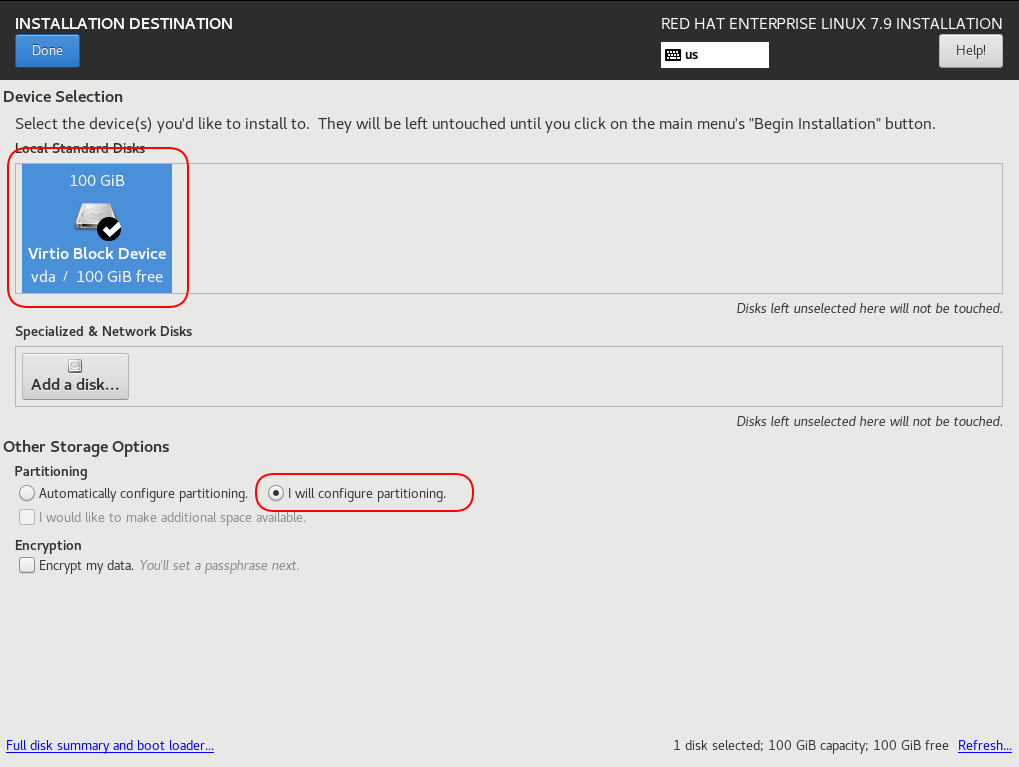
Photo by admingeek from Infotechys
In the Installation Destination section, we are going to make some changes to the way our 100GB disk is partitioned. In other words, we will not be going with the automatically selected partitions. Therefore, ensure the disk with the checkmark and the “I will configure partitioning” options are both selected (circled in red above).
💡NOTE: The selected /dev/vda device indicates we’re performing our installation on a virtual disk. You should see a different device name because you’re installing RHEL7 on a PC. |
Before we proceed with disk partitioning, lets examine the image below.
|
|
|
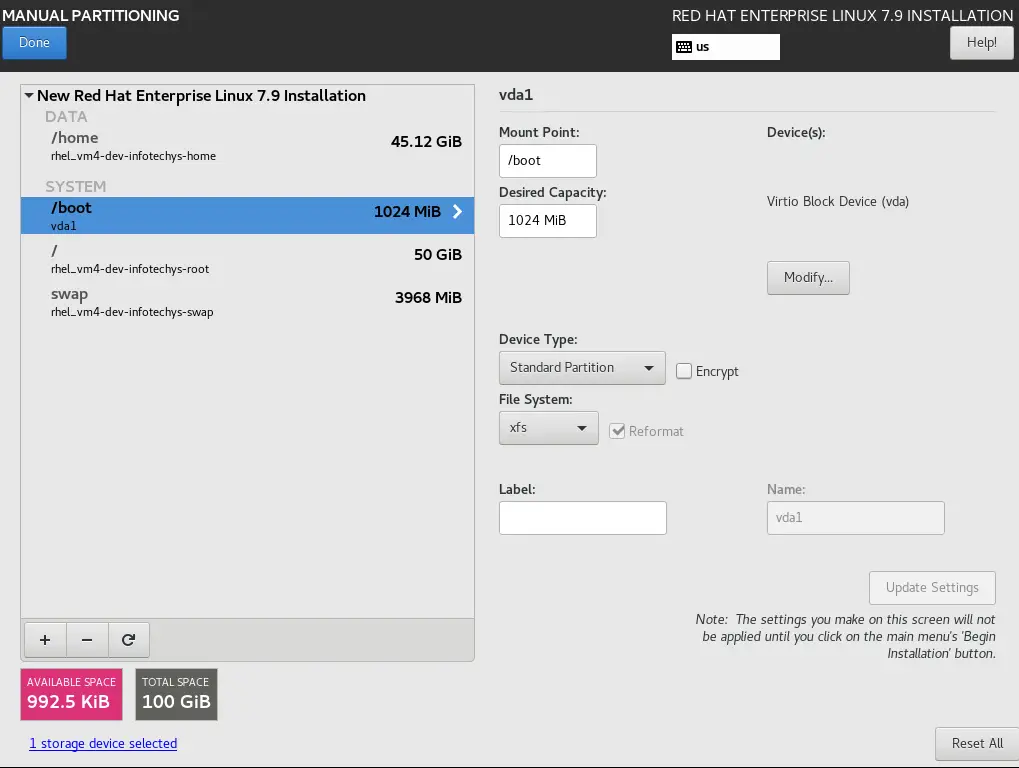
Photo by admingeek from Infotechys
The manual disk partitioning procedure will include the following changes:
|
|
|
|
|
|
Changing the volume group name is a fairly easy procedure but, first, we need to ensure that all existing partitions are wiped from the disk as (seen in the image below). Click the minus (“-“) sign at the bottom of screen until all existing partitions are deleted. At completion, all of your disk space should now be available to be partitioned.
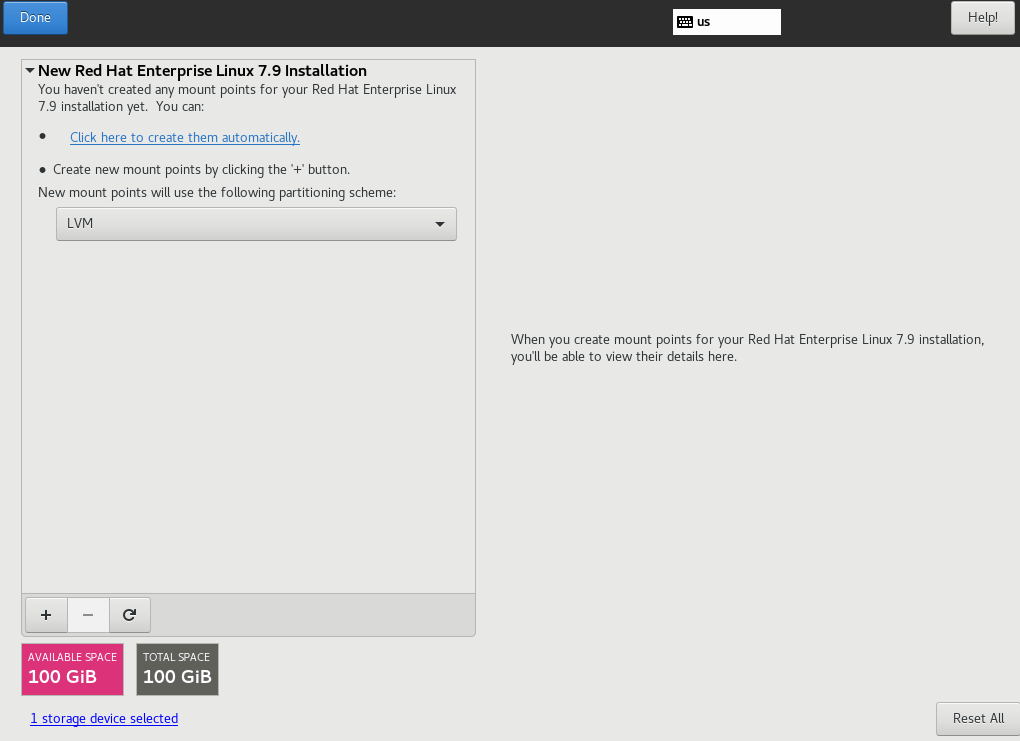
Photo by admingeek from Infotechys
As you can see (above), LVM is the default partitioning scheme selected. Click the plus (“+”) sign to proceed with creating a partition. We will change the volume group name as part of this process.
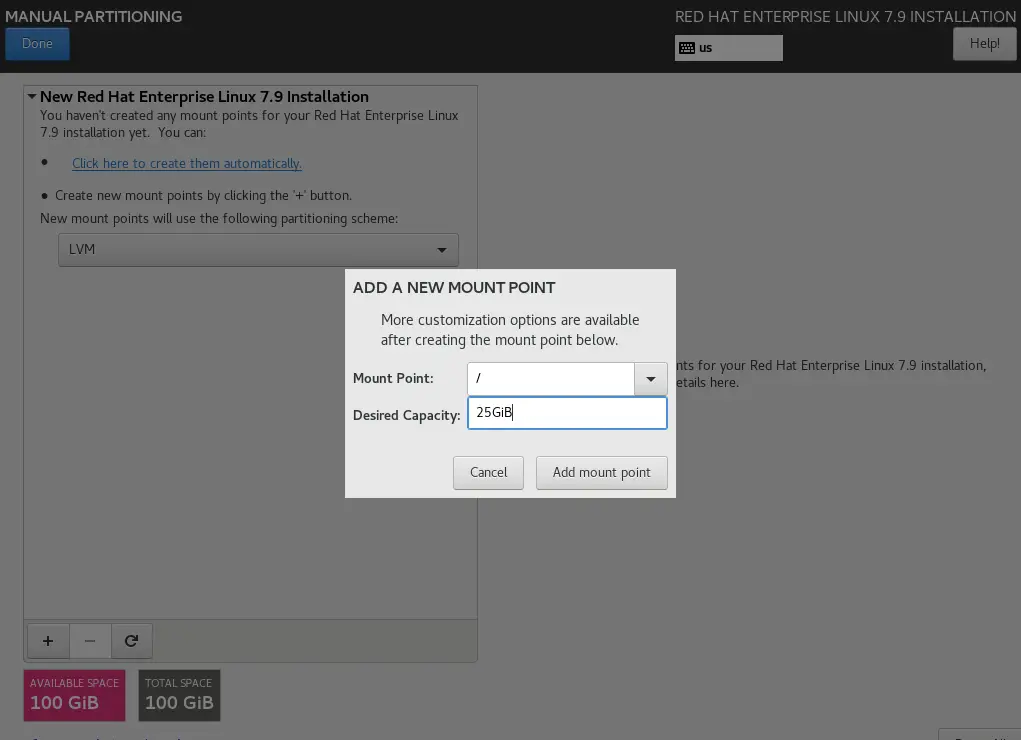
Photo by admingeek from Infotechys
Click the down arrow next to the text box labeled “Mount point:” and select the “/” for the root partition (as shown above). Then, enter the size you want allocated to root in the “Desired Capacity:” text box. In our case, we’ll go with 25GiB and click the Add mount point button to continue.
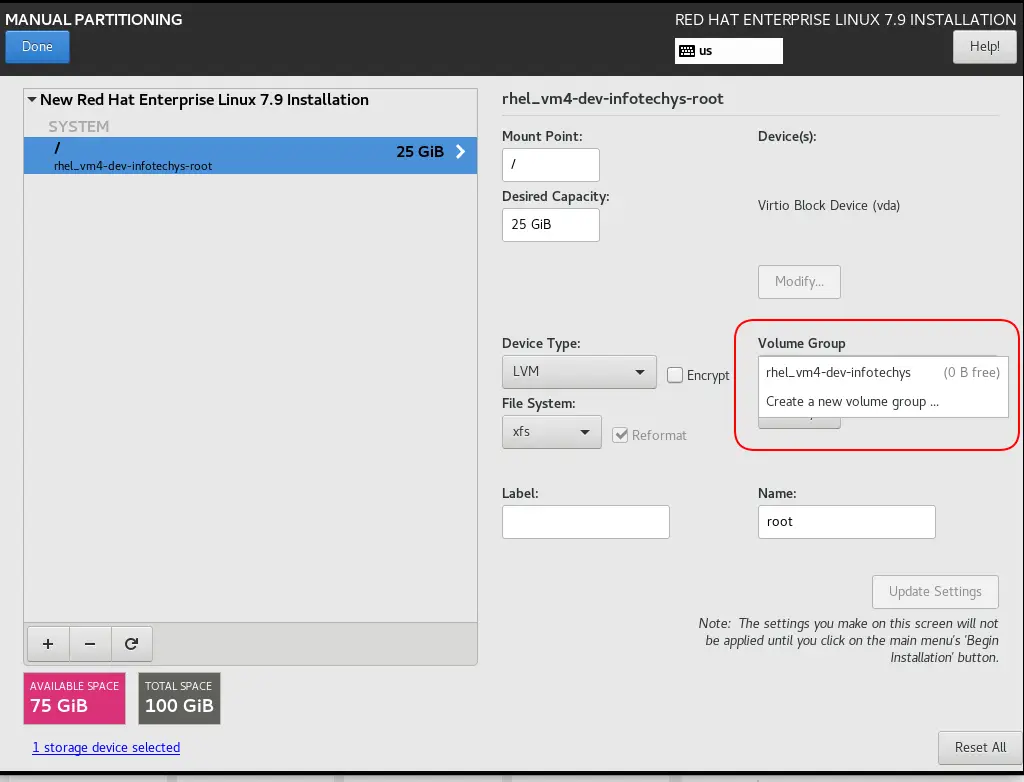
Photo by admingeek from Infotechys
To Change the volume group name, click the down arrow next to the Volume Group and click the “Create a new volume group” option. Then, enter the new name in the text box labeled Name: and click the “Save” button to continue.
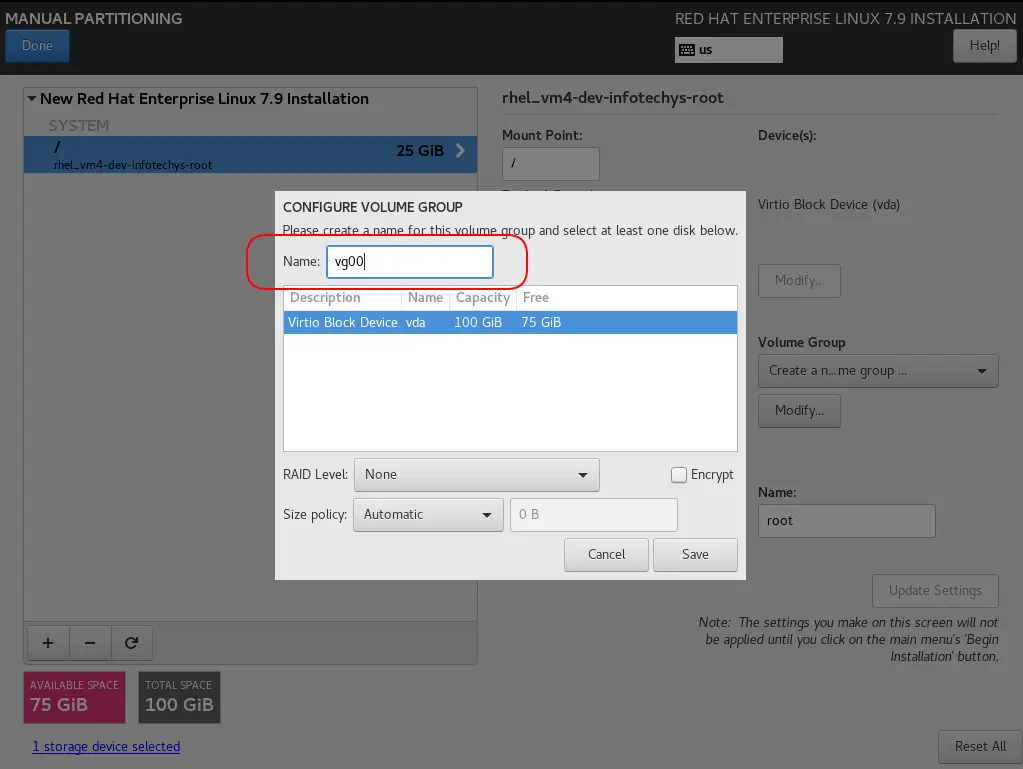
Photo by admingeek from Infotechys
You’ll notice the volume group name has changed to vg00. Now, we can proceed to creating the /home partition. Click the “+” sign to create a new partition and select the /home partition–allocate 12GiB of storage to it.
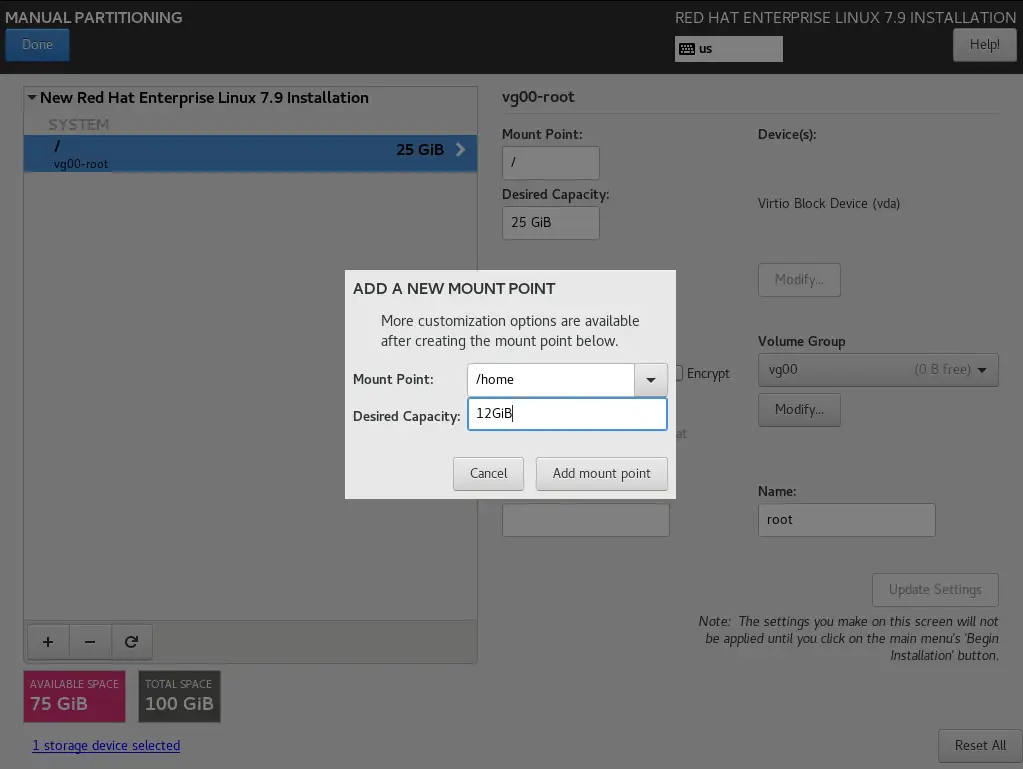
Photo by admingeek from Infotechys
Next, repeat the same steps for creating the remaining partitions: Allocate 2GB to /boot, 4GB to swap, and the remaining storage to /extras. When provisioning the /extras partition, enter /extras into the text box labeled “Mount point:” as it is not listed in the drop down menu.
Click the “Done” button and the “Accept Changes” button to continue.
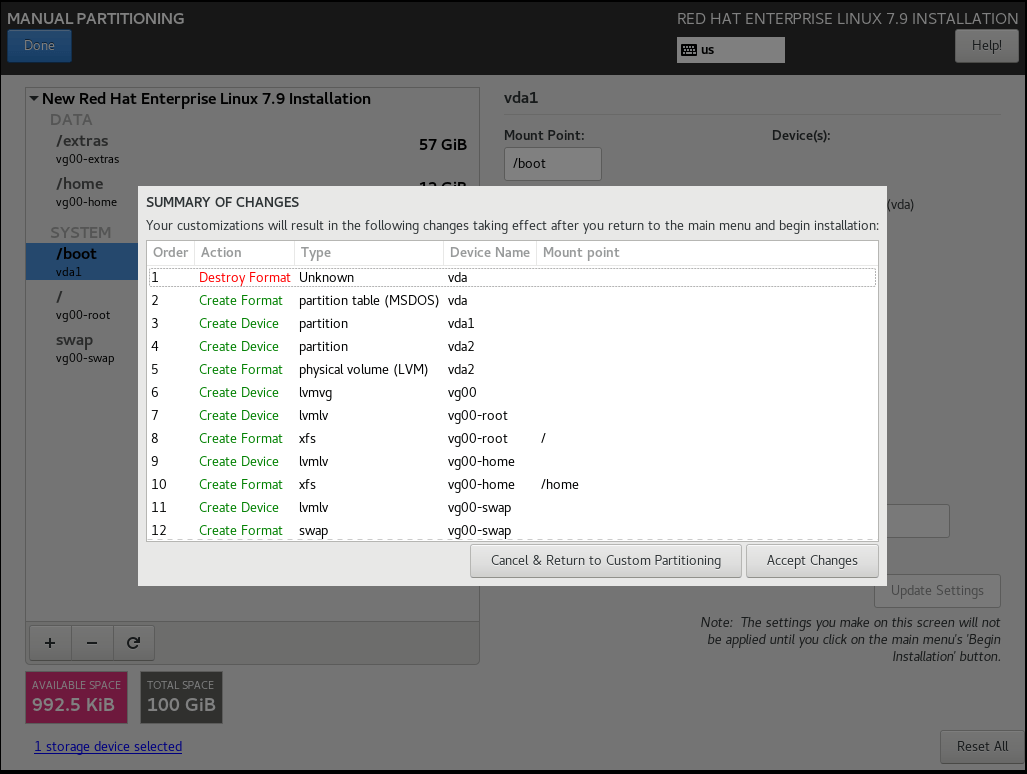
Photo by admingeek from Infotechys
Now that we have set the disk partitions and opted to go with the minimal install, we can proceed with configuring the hostname and network settings. For the purposes of this demonstration, we’ll keep things simple and go with DHCP for the network setting. Also, in the hostname text box at the bottom of the page, enter the hostname you’d like to use.
Click the “Apply” button to set the hostname.
💡NOTE: The hostname was populated for us by default, because we entered DNS records for this machine prior to creating this post. Click the switch at the top-right-hand corner of the screen (circled in red) to “ON”. Turning on the DHCP option, sets the IP address, subnet mask, default route, and DNS address for your machine automatically. Click the “Done” button to continue. |
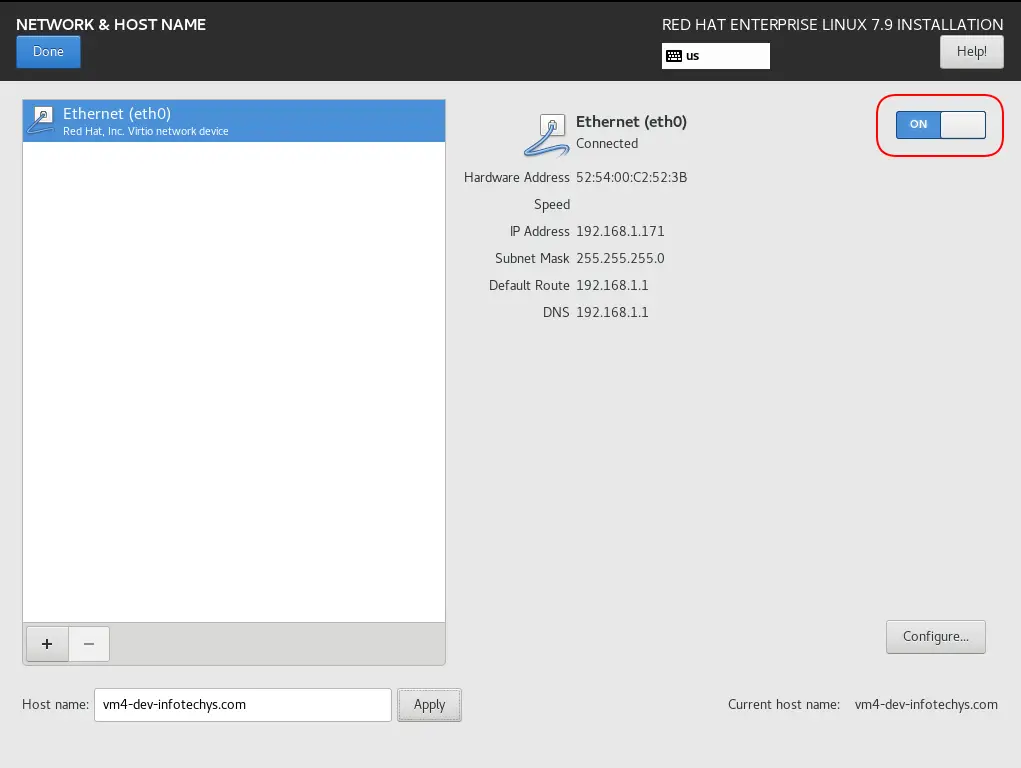
Photo by admingeek from Infotechys
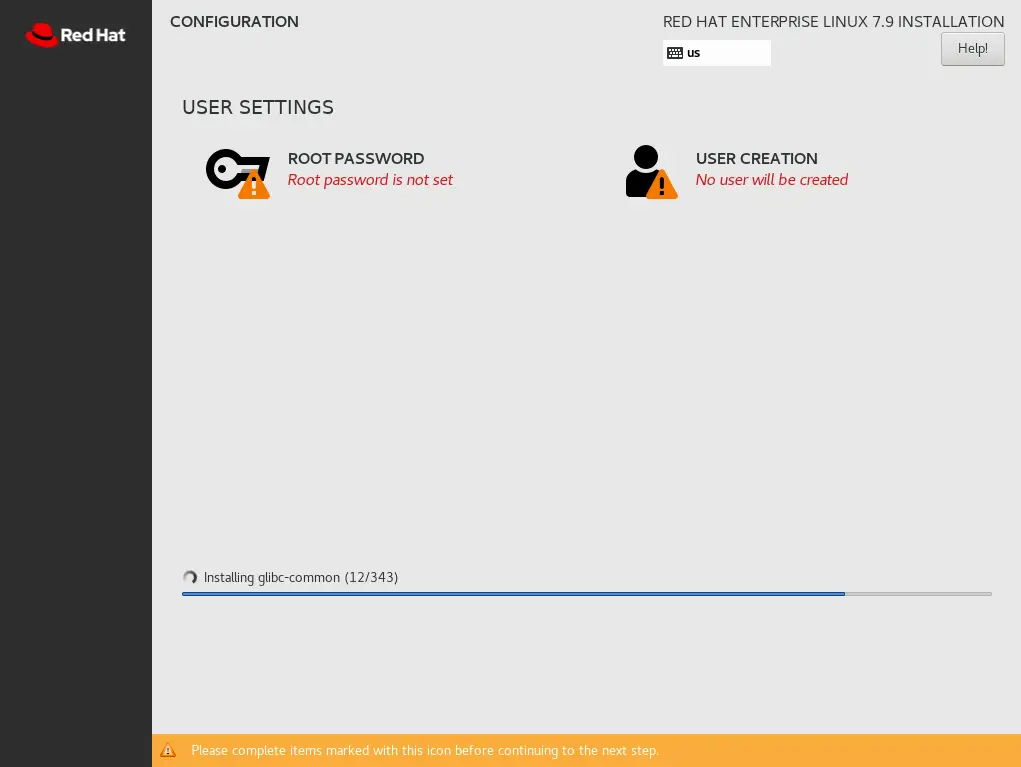
Photo by admingeek from Infotechys
As part of the reboot process, we’ve set the root user password and an administrative user account called admin. After the installation is complete, click the reboot button to continue.
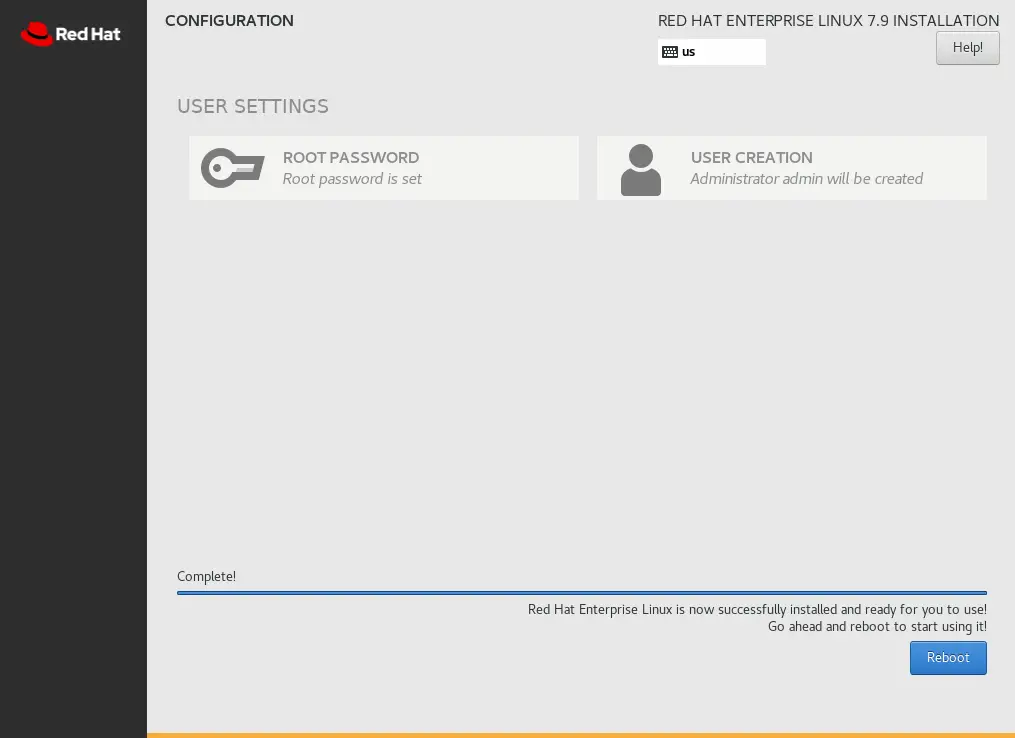
Photo by admingeek from Infotechys
Your machine should boot past the grub menu and get you to the login console.
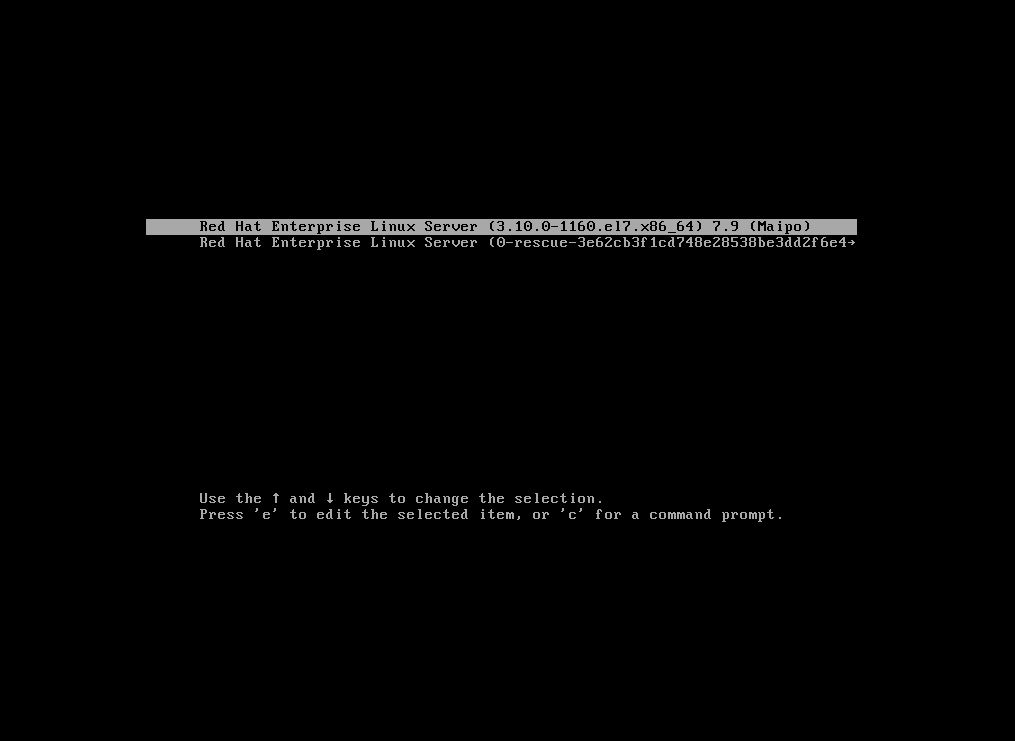
Photo by admingeek from Infotechys
Log onto your RHEL7 machine with your user name and password.
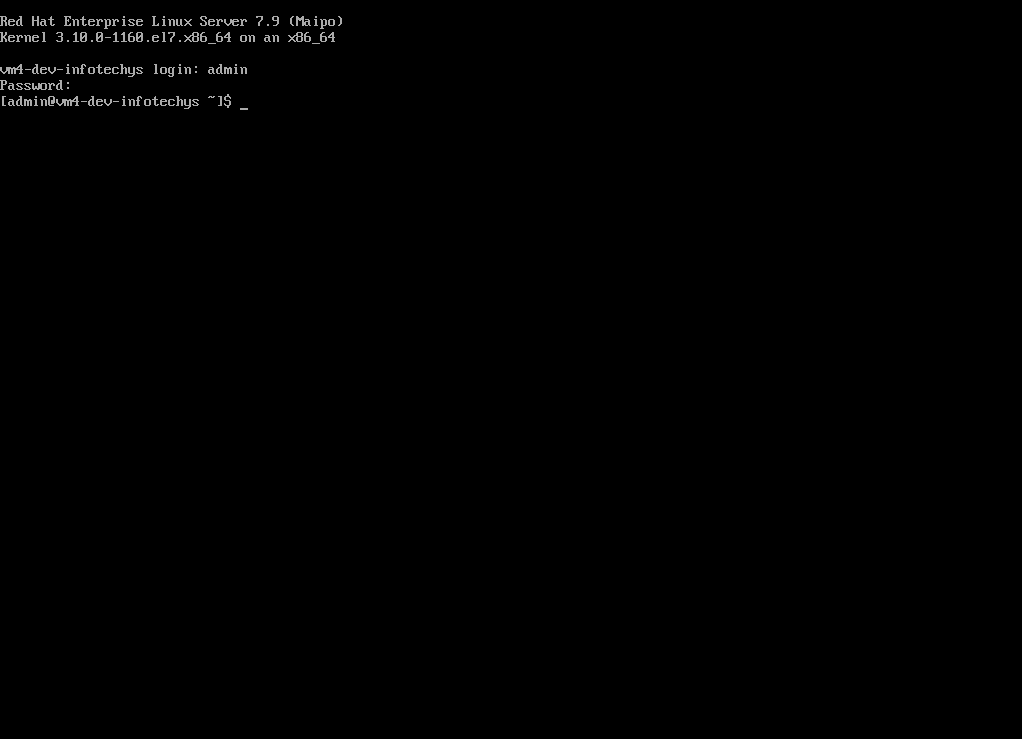
Photo by admingeek from Infotechys
Congratulations!! You’ve now completed the installation of RHEL7 on your PC. The same steps (with a few changes) apply to the CentOS7 installation. In fact, we may post a CentOS7-specific installation tutorial based on the feedback we receive from you. Was this article helpful to you? Are there any Linux-related topics you’d like us to write about? If so, leave us a comment below. We’d love to hear from you!

Configuring autofs in Linux is a straightforward task. This article will guide you through the process of setting up and enabling the autofs service. Table

Looking to establish a reliable and secure web presence? Learn how to Install Apache web server on CentOS and unlock the potential of your website
Table of Contents 🔈Introduction Redhat recently introduced the System Storage Manager (SSM), a unified user interface that allows uses to manage complicated systems in a
