
When it comes to popular text editors for Linux, text editors are like wallets. Everybody’s got one and more importantly, everyone’s choice of a text
Learn how to install Eclipse IDE on RHEL 9 and CentOS 9 with this comprehensive step-by-step guide. From setting up Java to launching Eclipse, get all the tips and troubleshooting advice you need for a seamless installation. Perfect for developers looking to enhance their coding environment!
Eclipse IDE is one of the most popular integrated development environments (IDEs) used for Java development and many other programming languages. Its rich feature set, extensibility, and active community make it a preferred choice for developers. If you’re using Red Hat Enterprise Linux 9 (RHEL 9) Workstation/Desktop or CentOS 9, this guide will walk you through the installation process step-by-step.
Prerequisites |
Before installing Eclipse IDE, ensure that your system meets the following prerequisites:
| Requirement | Description |
|---|---|
| OS | RHEL 9 or CentOS 9 |
| RAM | Minimum 4 GB recommended |
| Disk Space | At least 1 GB of free space |
| Internet Connection | Required for downloading packages |
Before starting the installation process, it’s a good idea to update your system packages to their latest versions. You can do this using the following command:
sudo dnf update -y
Step 1: Install Java Development Kit (JDK) |
Eclipse requires a Java Development Kit (JDK) to run. You can install OpenJDK using the following command:
sudo dnf install java-17-openjdk-devel -y
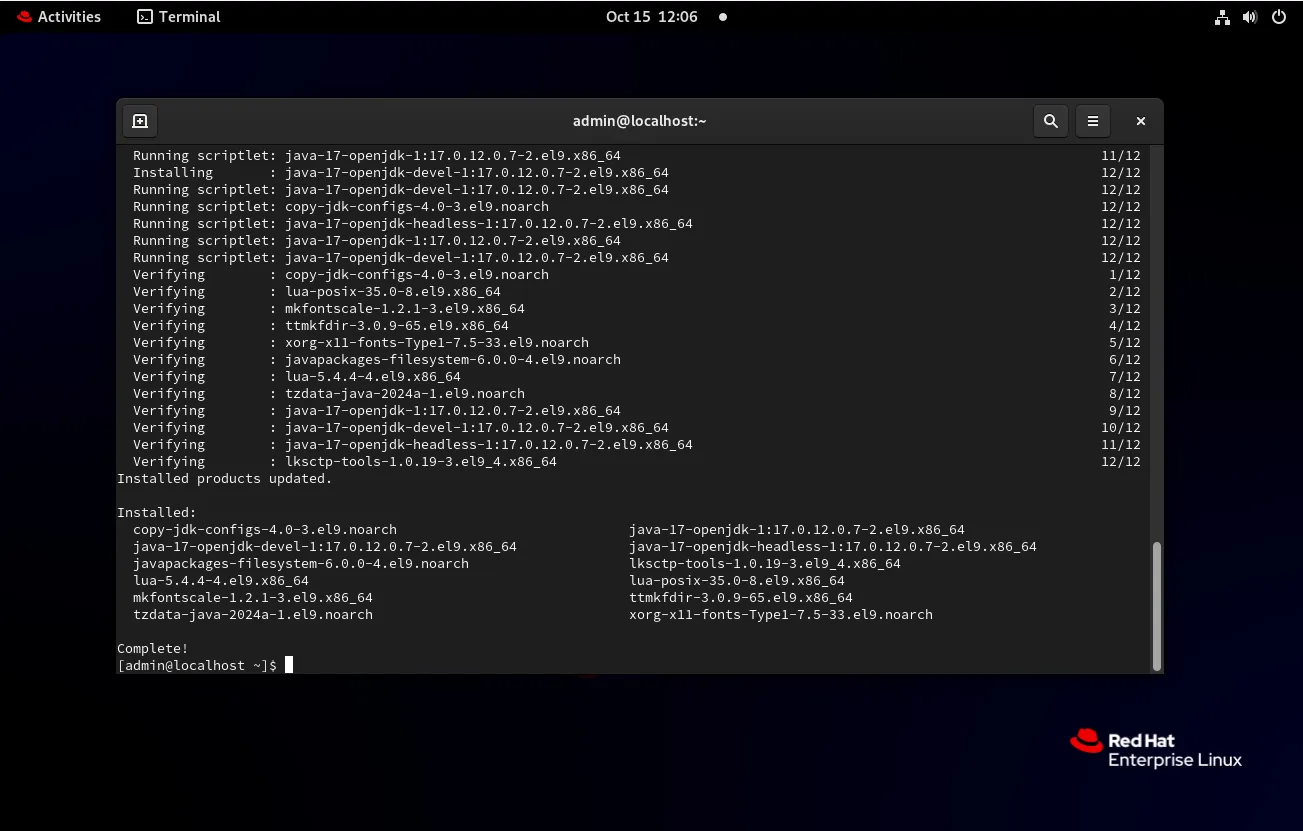
Photo by admingeek from Infotechys
To verify that Java is installed correctly, run:
java -version
You should see output similar to the following:
					openjdk version "17.0.12" 2024-07-16 LTS
OpenJDK Runtime Environment (Red_Hat-17.0.12.0.7-1) (build 17.0.12+7-LTS)
OpenJDK 64-Bit Server VM (Red_Hat-17.0.12.0.7-1) (build 17.0.12+7-LTS, mixed mode, sharing)
Step 2: Download Eclipse IDE |
Eclipse IDE can be downloaded from the official Eclipse website. Use the following command to download the latest Eclipse IDE package:
wget https://download.eclipse.org/technology/epp/downloads/release/2024-09/R/eclipse-java-2024-09-R-linux-gtk-x86_64.tar.gz
You can also visit the Eclipse Downloads Page to download the latest version. Be sure to choose the appropriate package for your needs (e.g., Eclipse IDE for Java Developers).
Step 3: Extract the Eclipse Package |
Once the download is complete, extract the Eclipse package using the following command:
tar -xzf eclipse-java-2024-09-R-linux-gtk-x86_64.tar.gz
					tar: Ignoring unknown extended header keyword 'LIBARCHIVE.creationtime'
tar: Ignoring unknown extended header keyword 'LIBARCHIVE.creationtime'
tar: Ignoring unknown extended header keyword 'LIBARCHIVE.creationtime'
tar: Ignoring unknown extended header keyword 'LIBARCHIVE.creationtime'
tar: Ignoring unknown extended header keyword 'LIBARCHIVE.creationtime'
The warnings you’re seeing, such as “Ignoring unknown extended header keyword ‘LIBARCHIVE.creationtime‘”, are related to the way the tar command processes extended attributes. These warnings typically don’t indicate a problem with the extraction process; the files should still extract correctly.
However, if you want to avoid these warnings, you can use the --no-same-owner option when extracting, like this:
tar --no-same-owner -xzf eclipse-java-2024-09-R-linux-gtk-x86_64.tar.gz
If you notice that the files are not being extracted as expected, you might want to check the integrity of the tar file or ensure that it was downloaded completely. You can verify the download with checksums if provided on the download page.
Step 4: Set Up Eclipse IDE |
Change to the newly created directory:
cd eclipse
You can start Eclipse with the following command:
./eclipse
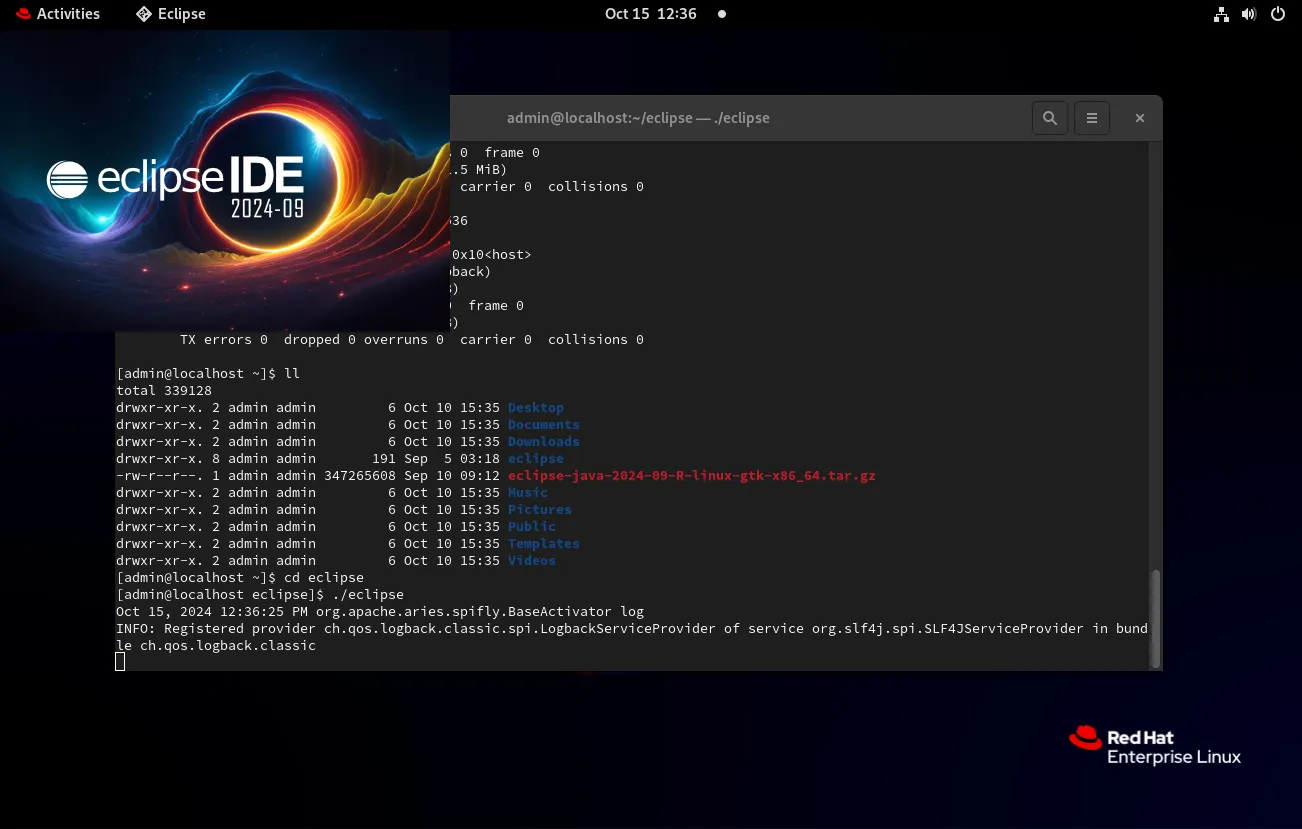
Photo by admingeek from Infotechys
The Eclipse graphical user interface (GUI) will open and prompt you to select a workspace directory. This is where Eclipse IDE will store its preferences and development files.
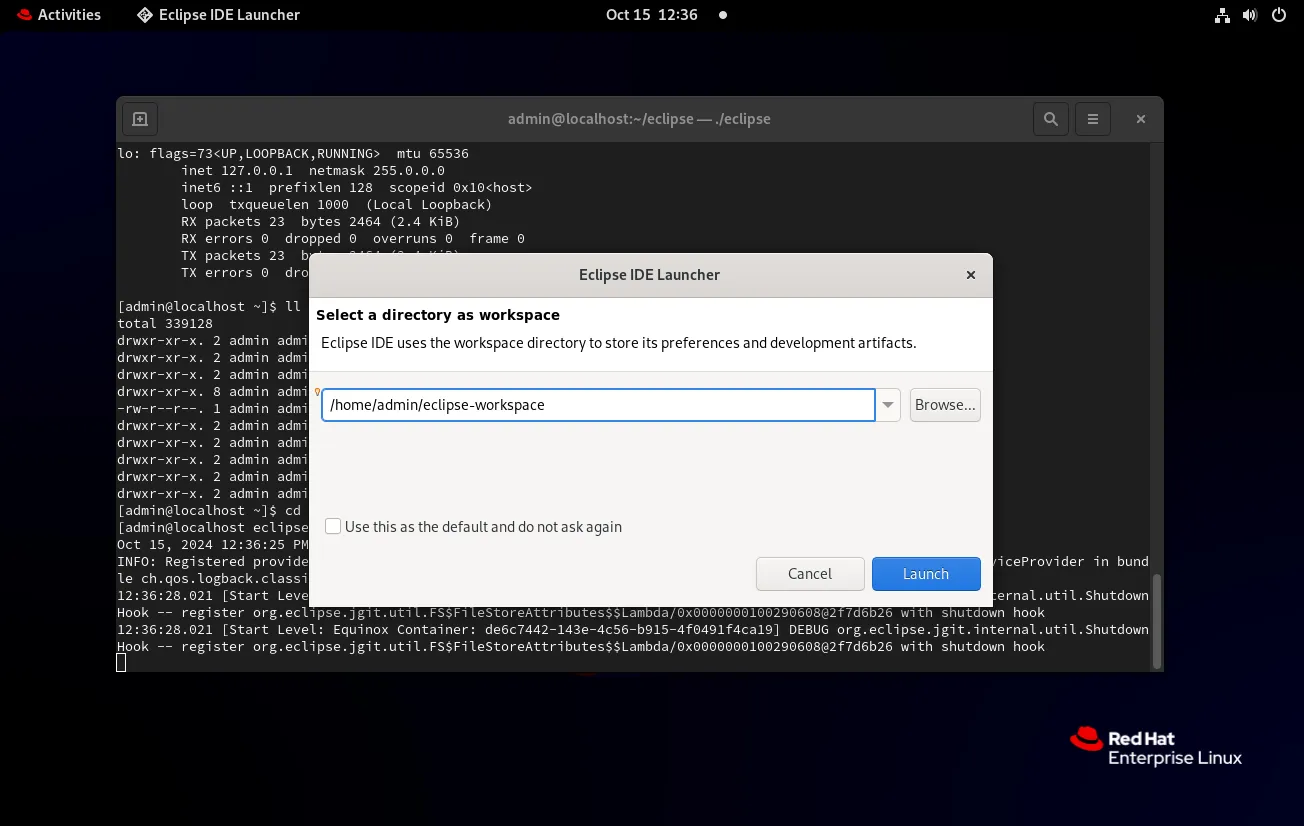
Photo by admingeek from Infotechys
You can either accept the default path by clicking the [Launch] button or specify a different location if you prefer.
Step 5: Launch Eclipse IDE |
After clicking the Launch button, the Eclipse IDE will start up and display a welcome screen.
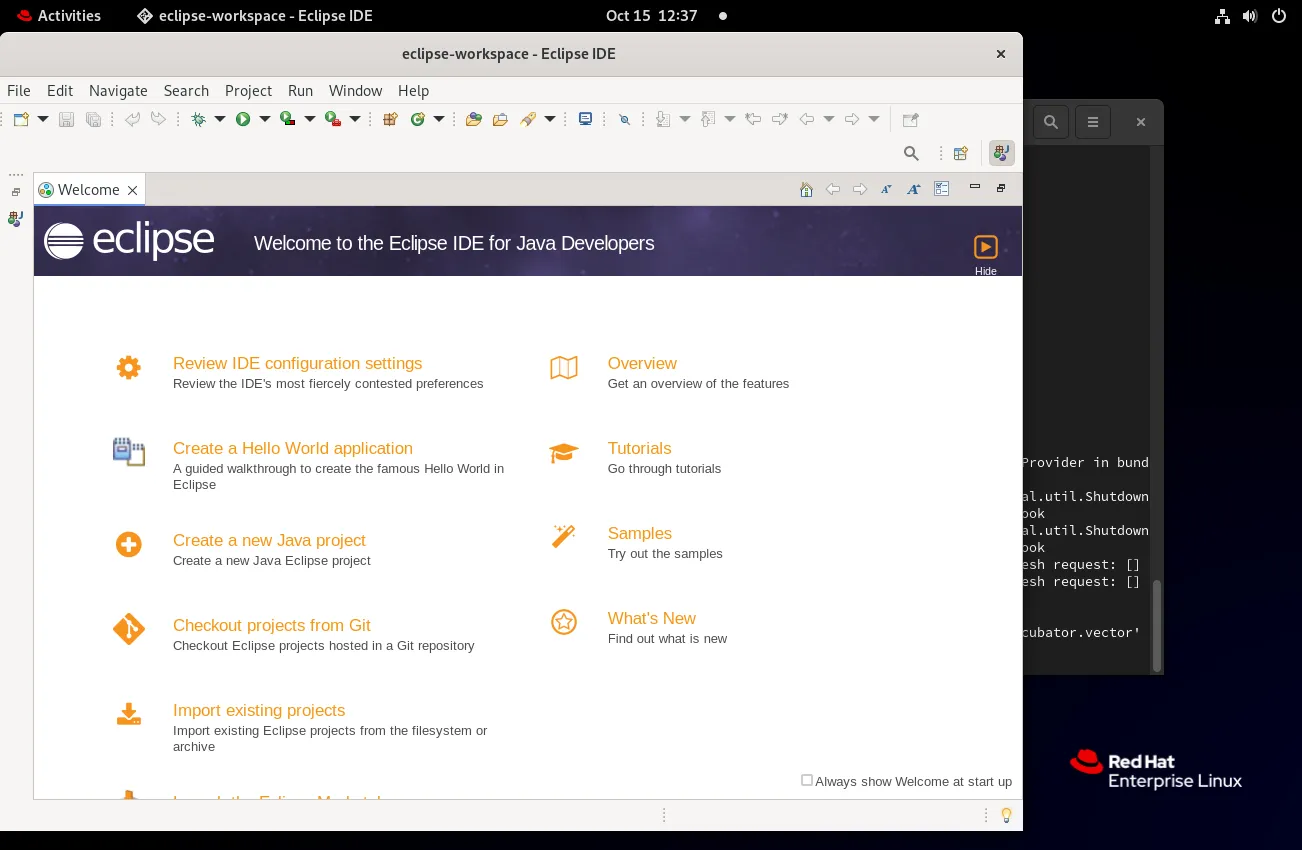
Photo by admingeek from Infotechys
If you didn’t create a launcher during installation, you might want to create a desktop entry for easier access. Create a file named eclipse.desktop in ~/.local/share/applications/:
vim ~/.local/share/applications/eclipse.desktop
Add the following content:
					[Desktop Entry]
Type=Application
Name=Eclipse IDE
Exec=${HOME}/eclipse/eclipse
Icon=${HOME}/eclipse/icon.xpm
Categories=Development;IDE;
Terminal=false
Save and exit. You should now see Eclipse IDE in your application menu.
Common Issues |
Eclipse Won’t Start: Ensure that Java is correctly installed and that the JAVA_HOME environment variable is set. You can set it in your .bashrc or .bash_profile:
					export JAVA_HOME=/usr/lib/jvm/java-17-openjdk
export PATH=$JAVA_HOME/bin:$PATH
Missing Libraries: If you encounter missing libraries, you may need to install additional dependencies. Common libraries include glibc, libx11, and libXtst. Install them with:
sudo dnf install glibc libX11 libXtst -y
Eclipse Runs Slowly or Freezes: If you experience slow performance or freezing when using Eclipse, it may be due to insufficient memory allocation. To address this, you can increase the heap size allocated to Eclipse by modifying the eclipse.ini file.
eclipse.ini fileLocate the eclipse.ini file in your Eclipse installation directory (e.g., ${HOME}/eclipse/eclipse.ini).
vim ${HOME}/eclipse/eclipse.ini
Look for the lines that specify -Xms and -Xmx. These control the initial and maximum heap size, respectively. You can adjust them as follows:
					-Xms512m
-Xmx2048m
This sets the initial heap size to 512 MB and the maximum heap size to 2048 MB.
By increasing the memory allocation, you can improve the performance of Eclipse, especially when working on larger projects.
Installing Eclipse IDE on RHEL 9 or CentOS 9 is a straightforward process that enables you to set up a powerful development environment. With this guide, you should have Eclipse IDE installed and ready to use for your development projects.
If you encounter any issues, check the troubleshooting section or consult the official Eclipse Documentation.
Did you find this article useful? Your feedback is invaluable to us! Please feel free to share your thoughts in the comments section below.

When it comes to popular text editors for Linux, text editors are like wallets. Everybody’s got one and more importantly, everyone’s choice of a text

In this article, we will review in detail how to install sublime text4 on CentOS8 or RHEL8 and also provide examples. Table of Contents Brief
In this article, we will review the installation process for Eclipse IDE on CentOS8. The same procedure can apply to RHEL8 as they are similar operating
