Commands
In today’s article, we will review the step-by-step process involved with a Kubernetes cluster install on Ubuntu server version 20.04. However, this procedure will work

Learn how to install a Kubernetes cluster on RHEL 9 | CentOS 9. Explore step-by-step instructions, best practices, and considerations for smooth deployment and operation. Dive into the world of container orchestration with confidence!
Hey there, fellow tech enthusiasts! Are you ready to dive into the world of Kubernetes on Red Hat Enterprise Linux (RHEL 9) or CentOS 9? Strap in, because we’re about to embark on an exciting journey of setting up your very own Kubernetes cluster. In this comprehensive guide, we’ll walk through the steps needed to get your cluster up and running smoothly, from installation to configuration. So, grab your favorite beverage and let’s get started!
Why Kubernetes? |
Before we delve into the installation process, let’s quickly touch upon why Kubernetes has become the de facto standard for container orchestration. Kubernetes simplifies the management and deployment of containerized applications, providing features like automated scaling, load balancing, and self-healing capabilities. Whether you’re running a small-scale project or managing a large-scale enterprise application, Kubernetes offers the flexibility and scalability you need.
Prerequisites |
Before we begin the installation process, ensure you have the following prerequisites:
/etc/hosts file:
					# Kubernetes Cluster
192.168.1.26 	master.naijalabs.net    # Replace with your actual hostname and IP address
192.168.1.27 	worker1.naijalabs.net   # Replace with your actual hostname and IP address
192.168.1.28 	worker2.naijalabs.net   # Replace with your actual hostname and IP address
For demonstration purposes, we’ve configured our Linux nodes as follows:
| Hostname | RAM | Cores | OS |
| master.naijalabs.net | 4 | 2 | Red Hat Enterprise Linux release 9.3 (Plow) |
| worker1.naijalabs.net | 4 | 2 | Red Hat Enterprise Linux release 9.3 (Plow) |
| worker2.naijalabs.net | 4 | 2 | Red Hat Enterprise Linux release 9.3 (Plow) |
Install a Kubernetes Cluster on RHEL 9 | CentOS 9: A Step-by-Step Guide |
First, ensure that you have the appropriate kernel headers installed on your system (on each node). You can install them using the following command:
sudo dnf install kernel-devel-$(uname -r)
To load the necessary kernel modules required by Kubernetes, you can use the modprobe command followed by the module names (on each node). Here’s how you can do it:
					sudo modprobe br_netfilter
sudo modprobe ip_vs
sudo modprobe ip_vs_rr
sudo modprobe ip_vs_wrr
sudo modprobe ip_vs_sh
sudo modprobe overlay
These commands load the required kernel modules (br_netfilter, ip_vs, ip_vs_rr, ip_vs_wrr, ip_vs_sh, overlay) that are essential for Kubernetes to function properly and facilitate communication within the Kubernetes cluster.
By loading these modules, you ensure that your servers are prepared for Kubernetes installation and can effectively manage networking and load balancing tasks within the cluster.
Next, create a configuration file (as the root user on each node) to ensure these modules load at system boot:
					cat > /etc/modules-load.d/kubernetes.conf << EOF
br_netfilter
ip_vs
ip_vs_rr
ip_vs_wrr
ip_vs_sh
overlay
EOF
To set specific sysctl settings (on each node) that Kubernetes relies on, you can update the system’s kernel parameters. These settings ensure optimal performance and compatibility for Kubernetes. Here’s how you can configure the necessary sysctl settings:
					cat > /etc/sysctl.d/kubernetes.conf << EOF
net.ipv4.ip_forward = 1
net.bridge.bridge-nf-call-ip6tables = 1
net.bridge.bridge-nf-call-iptables = 1
EOF
These commands adjust the following kernel parameters:
| Kernel Parameter | Description |
|---|---|
| net.bridge.bridge-nf-call-iptables | Enables iptables to process bridged IPv4 traffic. |
| net.bridge.bridge-nf-call-ip6tables | Enables iptables to process bridged IPv6 traffic. |
| net.ipv4.ip_forward | Enables IPv4 packet forwarding. |
By setting these sysctl parameters, you ensure that your system is properly configured to support Kubernetes networking requirements and forwarding of network traffic within the cluster. These settings are essential for the smooth operation of Kubernetes networking components. Run the following command to apply the changes:
sysctl --system
					* Applying /usr/lib/sysctl.d/10-default-yama-scope.conf ...
* Applying /usr/lib/sysctl.d/50-coredump.conf ...
* Applying /usr/lib/sysctl.d/50-default.conf ...
* Applying /usr/lib/sysctl.d/50-libkcapi-optmem_max.conf ...
* Applying /usr/lib/sysctl.d/50-pid-max.conf ...
* Applying /usr/lib/sysctl.d/50-redhat.conf ...
* Applying /etc/sysctl.d/99-sysctl.conf ...
* Applying /etc/sysctl.d/kubernetes.conf ...
* Applying /etc/sysctl.conf ...
...omitted parts of the output for brevity...
kernel.kptr_restrict = 1
net.ipv4.conf.default.rp_filter = 1
net.ipv4.conf.enp1s0.rp_filter = 1
net.ipv4.conf.lo.rp_filter = 1
net.ipv4.ip_forward = 1
net.bridge.bridge-nf-call-ip6tables = 1
net.bridge.bridge-nf-call-iptables = 1
To disable swap on each server in your Kubernetes cluster, you can follow these steps:
sudo swapoff -a
This command turns off all swap devices.
sed -e '/swap/s/^/#/g' -i /etc/fstab
Using the sed command (above), you can locate the line that contains the swap entry comment it out by adding a # at the beginning of the line.
#/dev/mapper/vg00-swap none swap defaults 0 0
In this step, we’ll install Containerd on each node. Containerd serves as a crucial container runtime responsible for managing and executing containers, which serve as the fundamental units of Kubernetes applications. Containerd provides the necessary infrastructure for container orchestration, ensuring efficient deployment and management of containerized workloads within the Kubernetes ecosystem.
Add the Docker CE Repository |
Before proceeding with the installation of Containerd, we first need to add the Docker Community Edition (CE) repository to our system. Docker CE is the free version of Docker, offering essential components for container management. Adding this repository ensures we have access to the latest Docker CE packages for installation.
sudo dnf config-manager --add-repo https://download.docker.com/linux/centos/docker-ce.repo
Update Package Cache |
After adding the repository, it’s essential to update the package cache to ensure the latest package information is available:
sudo dnf makecache
					Updating Subscription Management repositories.
Docker CE Stable - x86_64                                                                                                                                                                           66 kB/s |  41 kB     00:00
Extra Packages for Enterprise Linux 9 - x86_64                                                                                                                                                      41 kB/s |  26 kB     00:00
Extra Packages for Enterprise Linux 9 openh264 (From Cisco) - x86_64                                                                                                                               8.9 kB/s | 993  B     00:00
Red Hat Enterprise Linux 9 for x86_64 - BaseOS (RPMs)                                                                                                                                              8.5 kB/s | 4.1 kB     00:00
Red Hat Enterprise Linux 9 for x86_64 - AppStream (RPMs)                                                                                                                                            22 kB/s | 4.5 kB     00:00
Red Hat Enterprise Linux 9 for x86_64 - AppStream (RPMs)                                                                                                                                            16 MB/s |  30 MB     00:01
Metadata cache created.
Now, install the containerd.io package:
sudo dnf -y install containerd.io
Configure Containerd |
After installing Containerd, the next step is to configure it to ensure optimal performance and compatibility with your environment. The configuration file for Containerd is located at /etc/containerd/config.toml. While the default configuration provides a solid starting point for most environments, we’ll make a small adjustment to enable Systemd Cgroup support, which is essential for proper container management. Let’s proceed with configuring Containerd:
cat /etc/containerd/config.toml
					#   Copyright 2018-2022 Docker Inc.

#   Licensed under the Apache License, Version 2.0 (the "License");
#   you may not use this file except in compliance with the License.
#   You may obtain a copy of the License at

#       http://www.apache.org/licenses/LICENSE-2.0

#   Unless required by applicable law or agreed to in writing, software
#   distributed under the License is distributed on an "AS IS" BASIS,
#   WITHOUT WARRANTIES OR CONDITIONS OF ANY KIND, either express or implied.
#   See the License for the specific language governing permissions and
#   limitations under the License.

disabled_plugins = ["cri"]

#root = "/var/lib/containerd"
#state = "/run/containerd"
#subreaper = true
#oom_score = 0

#[grpc]
#  address = "/run/containerd/containerd.sock"
#  uid = 0
#  gid = 0

#[debug]
#  address = "/run/containerd/debug.sock"
#  uid = 0
#  gid = 0
#  level = "info"
Run the following command to build out the containerd configuration file:
sudo sh -c "containerd config default > /etc/containerd/config.toml" ; cat /etc/containerd/config.toml
					...omitted parts of the output for brevity...
          [plugins."io.containerd.grpc.v1.cri".containerd.runtimes.runc.options]
            BinaryName = ""
            CriuImagePath = ""
            CriuPath = ""
            CriuWorkPath = ""
            IoGid = 0
            IoUid = 0
            NoNewKeyring = false
            NoPivotRoot = false
            Root = ""
            ShimCgroup = ""
            SystemdCgroup = false
Using your preferred text editor, open the /etc/containerd/config.toml file and set the SystemdCgroup variable to true (SystemdCgroup = true):
sudo vim /etc/containerd/config.toml
SystemdCgroup = true
This configuration change enables SystemdCgroup support in Containerd, ensuring compatibility with Systemd-managed containers. Once you’ve made these adjustments, Containerd will be configured with SystemdCgroup support, providing enhanced compatibility for managing containers within a Systemd environment.
💡Save and exit the file. Then, run the following command to start and enable |
sudo systemctl enable --now containerd.service
Reboot your machine.
sudo systemctl reboot
Then, run this command to verify the status of the containerd.service. It should be up and running:
sudo systemctl status containerd.service
					● containerd.service - containerd container runtime
     Loaded: loaded (/usr/lib/systemd/system/containerd.service; enabled; preset: disabled)
     Active: active (running) since Tue 2024-03-26 12:19:06 EDT; 8s ago
       Docs: https://containerd.io
    Process: 4326 ExecStartPre=/sbin/modprobe overlay (code=exited, status=0/SUCCESS)
   Main PID: 4327 (containerd)
      Tasks: 9
     Memory: 16.6M
        CPU: 135ms
     CGroup: /system.slice/containerd.service
             └─4327 /usr/bin/containerd

Mar 26 12:19:06 master.naijalabs.net containerd[4327]: time="2024-03-26T12:19:06.566779843-04:00" level=info msg="Start subscribing containerd event"
Mar 26 12:19:06 master.naijalabs.net containerd[4327]: time="2024-03-26T12:19:06.567089512-04:00" level=info msg="Start recovering state"
Mar 26 12:19:06 master.naijalabs.net containerd[4327]: time="2024-03-26T12:19:06.567487572-04:00" level=info msg="Start event monitor"
To allow specific ports used by Kubernetes components through the firewall, you can execute the following commands (on each node):
					sudo firewall-cmd --zone=public --permanent --add-port=6443/tcp
sudo firewall-cmd --zone=public --permanent --add-port=2379-2380/tcp
sudo firewall-cmd --zone=public --permanent --add-port=10250/tcp
sudo firewall-cmd --zone=public --permanent --add-port=10251/tcp
sudo firewall-cmd --zone=public --permanent --add-port=10252/tcp
sudo firewall-cmd --zone=public --permanent --add-port=10255/tcp
sudo firewall-cmd --zone=public --permanent --add-port=5473/tcp
These commands add firewall rules to allow traffic on the specific ports required by Kubernetes components:
| Port(s) | Description |
|---|---|
| 6443 | Kubernetes API server |
| 2379-2380 | etcd server client API |
| 10250 | Kubelet API |
| 10251 | kube-scheduler |
| 10252 | kube-controller-manager |
| 10255 | Read-only Kubelet API |
| 5473 | ClusterControlPlaneConfig API |
After executing these commands, the firewall will permit traffic on the specified ports, ensuring proper communication between Kubernetes components. Remember to reload the firewall to apply the changes:
sudo firewall-cmd --reload
To install Kubernetes components (kubelet, kubeadm, and kubectl) and add the Kubernetes repository to your package manager, you can follow these steps:
Add Kubernetes Repository |
First, add the Kubernetes repository (as the root user) to your package manager. For example, on RHEL/CentOS version 8+, you can use the following command:
					cat <<EOF | sudo tee /etc/yum.repos.d/kubernetes.repo
[kubernetes]
name=Kubernetes
baseurl=https://pkgs.k8s.io/core:/stable:/v1.29/rpm/
enabled=1
gpgcheck=1
gpgkey=https://pkgs.k8s.io/core:/stable:/v1.29/rpm/repodata/repomd.xml.key
exclude=kubelet kubeadm kubectl cri-tools kubernetes-cni
EOF
Install Kubernetes Packages |
Once the repository is added, you can proceed to install the Kubernetes components (kubelet, kubeadm, and kubectl) using the package manager. Run the following command:
dnf makecache; dnf install -y kubelet kubeadm kubectl --disableexcludes=kubernetes
The --disableexcludes=kubernetes flag ensures that packages from the Kubernetes repository are not excluded during installation.
Start and Enable kubelet Service |
After installing kubelet, start and enable the kubelet service to ensure it starts automatically upon system boot:
systemctl enable --now kubelet.service
💡Don’t worry about any kubelet errors at this point. Once the worker nodes are successfully joined to the Kubernetes cluster using the provided join command, the |
Install a Kubernetes Cluster on RHEL 9 | CentOS 9: Master Node Configuration |
👀NOTE: Up until this point of the installation process, we’ve installed and configured Kubernetes components on all nodes. From this point onward, we will focus on the master node. |
Great! Let’s proceed with initializing the Kubernetes control plane on the master node. Here’s how we can do it:
sudo kubeadm config images pull
					[config/images] Pulled registry.k8s.io/kube-apiserver:v1.29.3
[config/images] Pulled registry.k8s.io/kube-controller-manager:v1.29.3
[config/images] Pulled registry.k8s.io/kube-scheduler:v1.29.3
[config/images] Pulled registry.k8s.io/kube-proxy:v1.29.3
[config/images] Pulled registry.k8s.io/coredns/coredns:v1.11.1
[config/images] Pulled registry.k8s.io/pause:3.9
[config/images] Pulled registry.k8s.io/etcd:3.5.12-0
After executing this command, Kubernetes will pull the necessary container images from the default container registry (usually Docker Hub) and store them locally on the machine. This step is typically performed before initializing the Kubernetes cluster to ensure that all required images are available locally and can be used without relying on an external registry during cluster setup.
sudo kubeadm init --pod-network-cidr=10.244.0.0/16
					Your Kubernetes control-plane has initialized successfully!

To start using your cluster, you need to run the following as a regular user:

  mkdir -p $HOME/.kube
  sudo cp -i /etc/kubernetes/admin.conf $HOME/.kube/config
  sudo chown $(id -u):$(id -g) $HOME/.kube/config

Alternatively, if you are the root user, you can run:

  export KUBECONFIG=/etc/kubernetes/admin.conf

You should now deploy a pod network to the cluster.
Run "kubectl apply -f [podnetwork].yaml" with one of the options listed at:
  https://kubernetes.io/docs/concepts/cluster-administration/addons/

Then you can join any number of worker nodes by running the following on each as root:

kubeadm join 192.168.1.26:6443 --token y8cow4.jib2syhyrb0bh1dt \
	--discovery-token-ca-cert-hash sha256:cb67fddec41469cf1f495db34008ae1a41d3f24ce418b46d5aefb262a1721f43
This command initializes the Kubernetes control plane on the master node. The --pod-network-cidr flag specifies the range of IP addresses for the pod network. Adjust the CIDR according to your network configuration if needed.
Set Up kubeconfig File |
Set up the kubeconfig file to enable communication with the Kubernetes cluster. Run the following commands:
					mkdir -p $HOME/.kube
sudo cp -i /etc/kubernetes/admin.conf $HOME/.kube/config
sudo chown $(id -u):$(id -g) $HOME/.kube/config
Deploy Pod Network |
To enable networking between pods across the cluster, deploy a pod network. For example, deploy the Tigera Operator for Calico:
kubectl create -f https://raw.githubusercontent.com/projectcalico/calico/v3.26.1/manifests/tigera-operator.yaml
					namespace/tigera-operator created
customresourcedefinition.apiextensions.k8s.io/bgpconfigurations.crd.projectcalico.org created
customresourcedefinition.apiextensions.k8s.io/bgpfilters.crd.projectcalico.org created
customresourcedefinition.apiextensions.k8s.io/bgppeers.crd.projectcalico.org created
customresourcedefinition.apiextensions.k8s.io/blockaffinities.crd.projectcalico.org created
customresourcedefinition.apiextensions.k8s.io/caliconodestatuses.crd.projectcalico.org created
customresourcedefinition.apiextensions.k8s.io/clusterinformations.crd.projectcalico.org created
customresourcedefinition.apiextensions.k8s.io/felixconfigurations.crd.projectcalico.org created
customresourcedefinition.apiextensions.k8s.io/globalnetworkpolicies.crd.projectcalico.org created
customresourcedefinition.apiextensions.k8s.io/globalnetworksets.crd.projectcalico.org created
customresourcedefinition.apiextensions.k8s.io/hostendpoints.crd.projectcalico.org created
customresourcedefinition.apiextensions.k8s.io/ipamblocks.crd.projectcalico.org created
customresourcedefinition.apiextensions.k8s.io/ipamconfigs.crd.projectcalico.org created
customresourcedefinition.apiextensions.k8s.io/ipamhandles.crd.projectcalico.org created
customresourcedefinition.apiextensions.k8s.io/ippools.crd.projectcalico.org created
customresourcedefinition.apiextensions.k8s.io/ipreservations.crd.projectcalico.org created
customresourcedefinition.apiextensions.k8s.io/kubecontrollersconfigurations.crd.projectcalico.org created
customresourcedefinition.apiextensions.k8s.io/networkpolicies.crd.projectcalico.org created
customresourcedefinition.apiextensions.k8s.io/networksets.crd.projectcalico.org created
customresourcedefinition.apiextensions.k8s.io/apiservers.operator.tigera.io created
customresourcedefinition.apiextensions.k8s.io/imagesets.operator.tigera.io created
customresourcedefinition.apiextensions.k8s.io/installations.operator.tigera.io created
customresourcedefinition.apiextensions.k8s.io/tigerastatuses.operator.tigera.io created
serviceaccount/tigera-operator created
clusterrole.rbac.authorization.k8s.io/tigera-operator created
clusterrolebinding.rbac.authorization.k8s.io/tigera-operator created
deployment.apps/tigera-operator created
To download the custom Calico resources manifest, you can use the curl or wget command to fetch the YAML file from the Calico project’s GitHub repository. Here’s how you can do it using curl:
curl -O https://raw.githubusercontent.com/projectcalico/calico/v3.26.1/manifests/custom-resources.yaml
Using wget:
wget https://raw.githubusercontent.com/projectcalico/calico/v3.26.1/manifests/custom-resources.yaml
Adjust the CIDR setting in the custom resources file:
sed -i 's/cidr: 192\.168\.0\.0\/16/cidr: 10.244.0.0\/16/g' custom-resources.yaml
Finally, create the Calico custom resources:
kubectl create -f custom-resources.yaml
					installation.operator.tigera.io/default created
apiserver.operator.tigera.io/default created
After successfully initializing the Kubernetes control plane on the master node, you’ll need to join the worker nodes to the cluster. Kubernetes provides a join command that includes a token and the master node’s IP address to allow worker nodes to connect to the cluster. Here’s how you can do it:
Get Join Command on Master Node |
On the master node, run the following command to generate the join command along with a token:
sudo kubeadm token create --print-join-command
kubeadm join 192.168.1.26:6443 --token kyy7v6.h26obyvthe08ohsn --discovery-token-ca-cert-hash sha256:cb67fddec41469cf1f495db34008ae1a41d3f24ce418b46d5aefb262a1721f43
This command generates a join command with a token that allows worker nodes to join the cluster. It also includes the master node’s IP address.
Run Join Command on Worker Nodes |
Copy the join command generated in the previous step and run it on each worker node. The join command typically looks like this:
sudo kubeadm join <MASTER_IP>:<MASTER_PORT> --token <TOKEN> --discovery-token-ca-cert-hash <DISCOVERY_TOKEN_CA_CERT_HASH>
Replace <MASTER_IP>, <MASTER_PORT>, <TOKEN>, and <DISCOVERY_TOKEN_CA_CERT_HASH> with the appropriate values from the join command generated on the master node.
Verify Worker Node Join |
After running the join command on each worker node, switch back to the master node and run the following command to verify that the worker nodes have successfully joined the cluster:
kubectl get nodes
This command should list all the nodes in the cluster, including the master node and the newly joined worker nodes. The status of the worker nodes should be “Ready,” indicating that they have successfully joined the cluster and are ready to accept workloads.
					NAME                    STATUS   ROLES           AGE     VERSION
master.naijalabs.net    Ready    control-plane   60m     v1.29.3
worker1.naijalabs.net   Ready    <none>          5m16s   v1.29.3
worker2.naijalabs.net   Ready    <none>          2m40s   v1.29.3
To test your Kubernetes cluster, you can deploy a simple application such as a NGINX web server. Here’s a sample YAML manifest to deploy NGINX as a test deployment:
					apiVersion: apps/v1
kind: Deployment
metadata:
  name: nginx-deployment
  labels:
    app: nginx
spec:
  replicas: 3
  selector:
    matchLabels:
      app: nginx
  template:
    metadata:
      labels:
        app: nginx
    spec:
      containers:
      - name: nginx
        image: nginx:latest
        ports:
        - containerPort: 80
Deploy NGINX |
nginx-deployment.yaml, then apply it using the kubectl apply command:
kubectl apply -f nginx-deployment.yaml
deployment.apps/nginx-deployment created
This deployment will create three replicas of NGINX pods in your cluster. Each pod will run an NGINX container exposing port 80. To check the status of your deployment, use the following command:
kubectl get deployments
					NAME               READY   UP-TO-DATE   AVAILABLE   AGE
nginx-deployment   3/3     3            3           2m40s
To verify that the NGINX pods are running, use:
kubectl get pods
					NAME                                READY   STATUS    RESTARTS   AGE
nginx-deployment-7c79c4bf97-gnbfn   1/1     Running   0          6m6s
nginx-deployment-7c79c4bf97-tmbpg   1/1     Running   0          6m6s
nginx-deployment-7c79c4bf97-vgh42   1/1     Running   0          6m6s
Expose NGINX to the external network |
Once the pods are up and running, you can expose the NGINX service to the external network using a Kubernetes Service:
					apiVersion: v1
kind: Service
metadata:
  name: nginx-service
spec:
  selector:
    app: nginx
  ports:
    - protocol: TCP
      port: 80
      targetPort: 80
  type: LoadBalancer
nginx-service.yaml, then apply it using the kubectl apply command:
kubectl apply -f nginx-service.yaml
service/nginx-service created
This will create a Service of type LoadBalancer, which exposes the NGINX deployment to the external network. To get the external IP address of the NGINX service, you can use:
kubectl get service nginx-service
Once you have the external IP address, navigate to it in a web browser. You should see the default NGINX welcome page, indicating that your Kubernetes cluster is successfully serving web traffic.
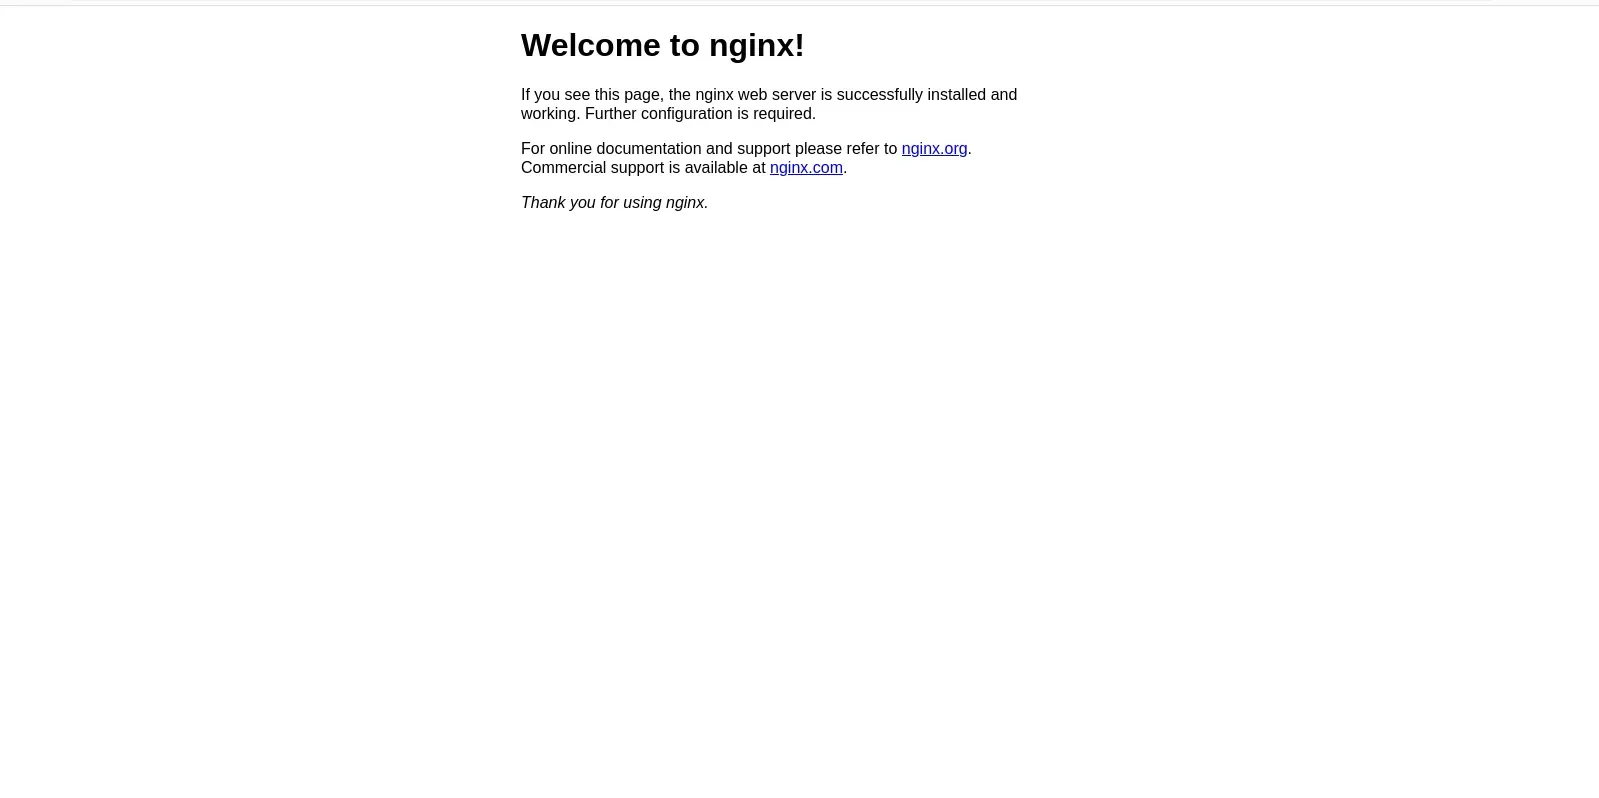
Photo by admingeek from Infotechys
Alternate Methods: Expose Service Externally |
If you cannot use a LoadBalancer service type to expose your application externally and you want to use an IP address within the 192.168.1 subnet for example, there are alternative approaches you can consider. Here are a few options:
| Approach | Description |
|---|---|
| NodePort Service | Exposes your service on a port across all nodes in the cluster. You can set up port forwarding or NAT on your router to forward traffic from a specific port on your router’s external IP address to the NodePort of your service. |
| ExternalIPs Field | Specifies a list of external IP addresses in the service manifest. You can configure your router to forward traffic to the desired internal IP address of your cluster node, which has an IP address within the 192.168.1 subnet. |
| Ingress Controller with NodePort | Deploys an Ingress controller and configures it to use a NodePort service. You can then set up port forwarding or NAT on your router to forward traffic from a specific port on your router’s external IP address to the NodePort of the Ingress controller service. |
| HostNetwork | Deploys application pods with the hostNetwork: true setting, allowing them to use the host’s network namespace. This binds the application directly to the node’s network interfaces, allowing it to use the node’s IP address. |
Consider your network setup, router capabilities, and security requirements when choosing the appropriate approach. Each option has its pros and cons, so choose the one that best fits your needs and constraints.
Congratulations! You’ve successfully set up a Kubernetes cluster on Red Hat Enterprise Linux 9 or CentOS 9. With your cluster up and running, you can now begin deploying and managing containerized applications with ease. Remember, Kubernetes is a powerful tool that can streamline your development and deployment workflows, so don’t hesitate to explore its full potential.
In this guide, we covered the essential steps required to install Kubernetes on RHEL 9 | CentOS 9, but there’s still plenty more to learn. Keep experimenting, stay curious, and never stop exploring the fascinating world of Kubernetes. Happy clustering!
Did you find this article useful? Your feedback is invaluable to us! Please feel free to share your thoughts in the comments section below.
Related Posts
In today’s article, we will review the step-by-step process involved with a Kubernetes cluster install on Ubuntu server version 20.04. However, this procedure will work
Are you looking to set up a Kubernetes development environment with Vagrant quickly and efficiently? Look no further! In this guide, we’ll walk through how
In this guide, we’ll walk you through the process of deploying WordPress on Kubernetes, leveraging its benefits to ensure your website runs smoothly and efficiently.