
Commands
Learn how to install Apache Guacamole on RHEL 9 or CentOS 9 using Ansible roles for automated, secure, and efficient remote desktop access. Step-by-step guide

Learn how to install Ansible Navigator on CentOS 9 Stream in this comprehensive guide. Step-by-step instructions, troubleshooting tips, and configuration examples provided.
As infrastructure automation becomes increasingly essential for organizations, tools like Ansible continue to gain popularity. Ansible is widely recognized for its simplicity and power in managing servers, applications, and networks. Ansible Navigator is an extension to Ansible that enhances its capabilities, offering a streamlined interface for executing and visualizing automation tasks. In this guide, we’ll walk through the installation process of Ansible Navigator on CentOS 9 Stream and cover key considerations for both beginners and experienced users.
Whether you’re setting up Ansible Navigator for the first time or upgrading your current setup, following these steps will allow you to take full advantage of its features for effective IT automation. We will also provide CLI commands, configuration tips, and a table comparing the installation methods for easy understanding.
By the end of this post, you’ll be able to install and configure Ansible Navigator on CentOS 9 Stream without any hassle.
What is Ansible Navigator? |
Ansible Navigator is a command-line tool designed to enhance the usability and experience of running Ansible automation tasks. Unlike the traditional CLI experience, Ansible Navigator offers a more interactive interface, including detailed outputs, step-by-step explanations, and enhanced visualizations. This makes it especially useful for those new to Ansible or those who want a more intuitive approach to automation tasks.
Why Use Ansible Navigator? |
Ansible Navigator simplifies complex automation processes with features such as:
It is particularly valuable when managing large infrastructures with many components, offering deeper insights into automation jobs. It also integrates seamlessly with the Ansible Automation Platform.
Before we begin, ensure your system meets the following prerequisites:
Verify Python and Pip with the following commands:
python3 --version && pip3 --version
You should see output similar to:
					Python 3.9.21
pip 21.3.1 from /usr/lib/python3.9/site-packages/pip (python 3.9)
If Python or pip is not installed, you can install it using:
sudo dnf install python3 -y && sudo dnf install python3-pip -y
Now, let’s dive into the installation process for Ansible Navigator on CentOS 9 Stream.
Step 1: Installing Required Dependencies |
Before installing Ansible Navigator, you need to install some essential dependencies. This includes Ansible, Python 3, and other Python-related packages.
Run the following command to install dependencies:
sudo dnf install epel-release -y && sudo dnf install ansible python3 python3-pip -y
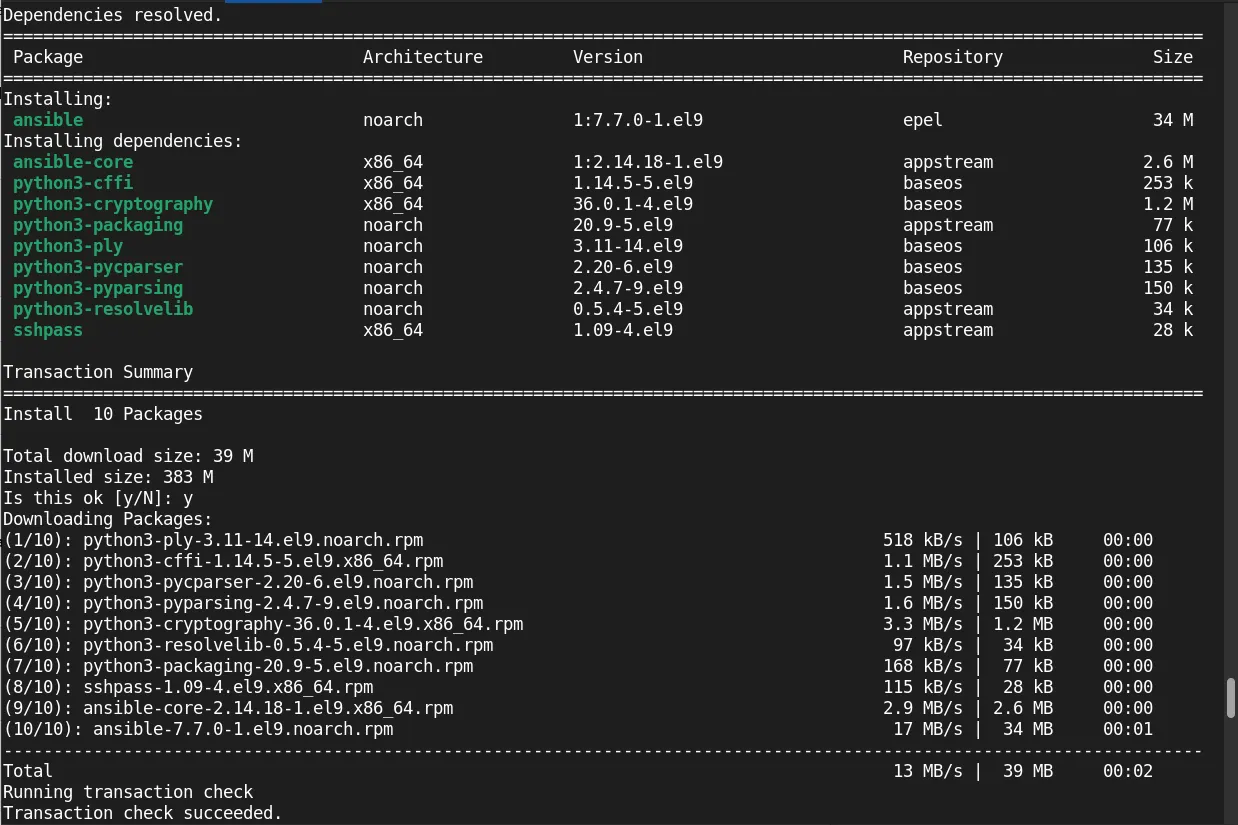
Photo by admingeek from Infotechys
Verify Ansible installation:
ansible --version
If installed correctly, it should return version information for Ansible.
					ansible [core 2.14.18]
  config file = /etc/ansible/ansible.cfg
  configured module search path = ['/home/admin/.ansible/plugins/modules', '/usr/share/ansible/plugins/modules']
  ansible python module location = /usr/lib/python3.9/site-packages/ansible
  ansible collection location = /home/admin/.ansible/collections:/usr/share/ansible/collections
  executable location = /usr/bin/ansible
  python version = 3.9.21 (main, Dec  4 2024, 00:00:00) [GCC 11.5.0 20240719 (Red Hat 11.5.0-2)] (/usr/bin/python3)
  jinja version = 3.1.2
  libyaml = True
Step 2: Installing Ansible Navigator |
With all dependencies in place, the next step is to install Ansible Navigator. The easiest way to install it is via pip (Python’s package installer). Run the following command:
pip3 install ansible-navigator
					...omitted for brevity...
Requirement already satisfied: ply==3.11 in /usr/lib/python3.9/site-packages (from pycparser->cffi>=1->onigurumacffi<2,>=1.1.0->ansible-navigator) (3.11)
Installing collected packages: typing-extensions, rpds-py, attrs, referencing, packaging, mdurl, jsonschema-specifications, zipp, tomli, subprocess-tee, ruamel.yaml.clib, pygments, platformdirs, pbr, pathspec, Parsley, mypy-extensions, markdown-it-py, lockfile, jsonschema, distro, click, bracex, yamllint, wcmatch, ruamel.yaml, rich, python-daemon, MarkupSafe, importlib-metadata, filelock, black, bindep, ansible-compat, tzdata, onigurumacffi, jinja2, ansible-runner, ansible-lint, ansible-builder, ansible-navigator
Successfully installed MarkupSafe-3.0.2 Parsley-1.3 ansible-builder-3.1.0 ansible-compat-24.10.0 ansible-lint-6.22.2 ansible-navigator-24.2.0 ansible-runner-2.4.0 attrs-25.1.0 bindep-2.12.0 black-25.1.0 bracex-2.5.post1 click-8.1.8 distro-1.9.0 filelock-3.17.0 importlib-metadata-6.2.1 jinja2-3.1.5 jsonschema-4.23.0 jsonschema-specifications-2024.10.1 lockfile-0.12.2 markdown-it-py-3.0.0 mdurl-0.1.2 mypy-extensions-1.0.0 onigurumacffi-1.4.1 packaging-24.2 pathspec-0.12.1 pbr-6.1.1 platformdirs-4.3.6 pygments-2.19.1 python-daemon-3.1.2 referencing-0.36.2 rich-13.9.4 rpds-py-0.22.3 ruamel.yaml-0.18.10 ruamel.yaml.clib-0.2.12 subprocess-tee-0.4.2 tomli-2.2.1 typing-extensions-4.12.2 tzdata-2025.1 wcmatch-10.0 yamllint-1.35.1 zipp-3.21.0
This command will download and install the latest stable version of Ansible Navigator. The installation process will also install any required dependencies automatically.
Step 3: Verifying the Installation |
After installation, verify the successful installation by checking the Ansible-Navigator version:
ansible-navigator --version
You should see output like:
ansible-navigator 24.2.0
If you encounter any issues at this stage, refer to the troubleshooting section of this post.
Once Ansible Navigator is installed, it’s time to configure it for use.
Configuring the Ansible Navigator CLI |
By default, Ansible Navigator will look for the configuration files in the user’s home directory. You can modify these files to customize how Ansible Navigator behaves.
Run the following command to generate a default configuration file:
ansible-navigator config init
					---------------------------------------------------------------------
Execution environment image and pull policy overview
---------------------------------------------------------------------
Execution environment image name:     ghcr.io/ansible/creator-ee:v0.22.0
Execution environment image tag:      v0.22.0
Execution environment pull arguments: None
Execution environment pull policy:    tag
Execution environment pull needed:    True
---------------------------------------------------------------------
Updating the execution environment
---------------------------------------------------------------------
Running the command: podman pull ghcr.io/ansible/creator-ee:v0.22.0
Trying to pull ghcr.io/ansible/creator-ee:v0.22.0...
Getting image source signatures
Copying blob ca6ff2c3ecc4 done   |
Copying blob 32db66e6bbce done   |
Copying blob 2941e6f1d2bc done   |
Copying blob 92e1f4a92098 done   |
Copying blob 2764fac24a7d done   |
Copying blob 600b306c9749 done   |
Copying blob d419ad167630 done   |
Copying blob 7b03b9e3c798 done   |
Copying blob 05a232cb5cea done   |
Copying blob be915b595e0a done   |
Copying blob 25380a2f785a done   |
Copying blob 1a57afb20498 done   |
Copying blob 09f2372dbd92 done   |
Copying config 4405e824c5 done   |
Writing manifest to image destination
4405e824c556ff708afbd0de144373cac250135d892e178941fe7c690e78814c
As part of the initialization process, it pulls the execution environment image (ghcr.io/ansible/creator-ee:v0.22.0) using podman. As you can see (example above), the image was pulled without any issues, and all the required blobs were copied over to your local system.
Setting Up Ansible Collections and Playbooks |
Ansible Navigator relies on Ansible Collections to execute automation tasks. If you haven’t set up a collection, you can do so with the following command:
ansible-galaxy collection install <namespace>.<collection_name>
For example:
ansible-galaxy collection install community.zabbix
					Starting galaxy collection install process
Process install dependency map
Starting collection install process
Downloading https://galaxy.ansible.com/api/v3/plugin/ansible/content/published/collections/artifacts/community-zabbix-3.2.0.tar.gz to /home/admin/.ansible/tmp/ansible-local-2489a8cka01v/tmpfvq9l13a/community-zabbix-3.2.0-9nppdwit
Installing 'community.zabbix:3.2.0' to '/home/admin/.ansible/collections/ansible_collections/community/zabbix'
community.zabbix:3.2.0 was installed successfully
Downloading https://galaxy.ansible.com/api/v3/plugin/ansible/content/published/collections/artifacts/ansible-posix-2.0.0.tar.gz to /home/admin/.ansible/tmp/ansible-local-2489a8cka01v/tmpfvq9l13a/ansible-posix-2.0.0-dwfgogog
Installing 'ansible.posix:2.0.0' to '/home/admin/.ansible/collections/ansible_collections/ansible/posix'
Downloading https://galaxy.ansible.com/api/v3/plugin/ansible/content/published/collections/artifacts/ansible-netcommon-7.1.0.tar.gz to /home/admin/.ansible/tmp/ansible-local-2489a8cka01v/tmpfvq9l13a/ansible-netcommon-7.1.0-o902o7oz
ansible.posix:2.0.0 was installed successfully
...omitted for brevity...
More Command-Line (CLI) examples |
In this next example, we’ve created a simple playbook (my-playbook.yml) to test Ansible Navigator:
					---
- name: Test Playbook
  hosts: localhost
  tasks:
    - name: Ping localhost
      ansible.builtin.ping:
You can run this playbook using Ansible Navigator:
ansible-navigator run my_playbook.yml
You should see output similar to the image below:
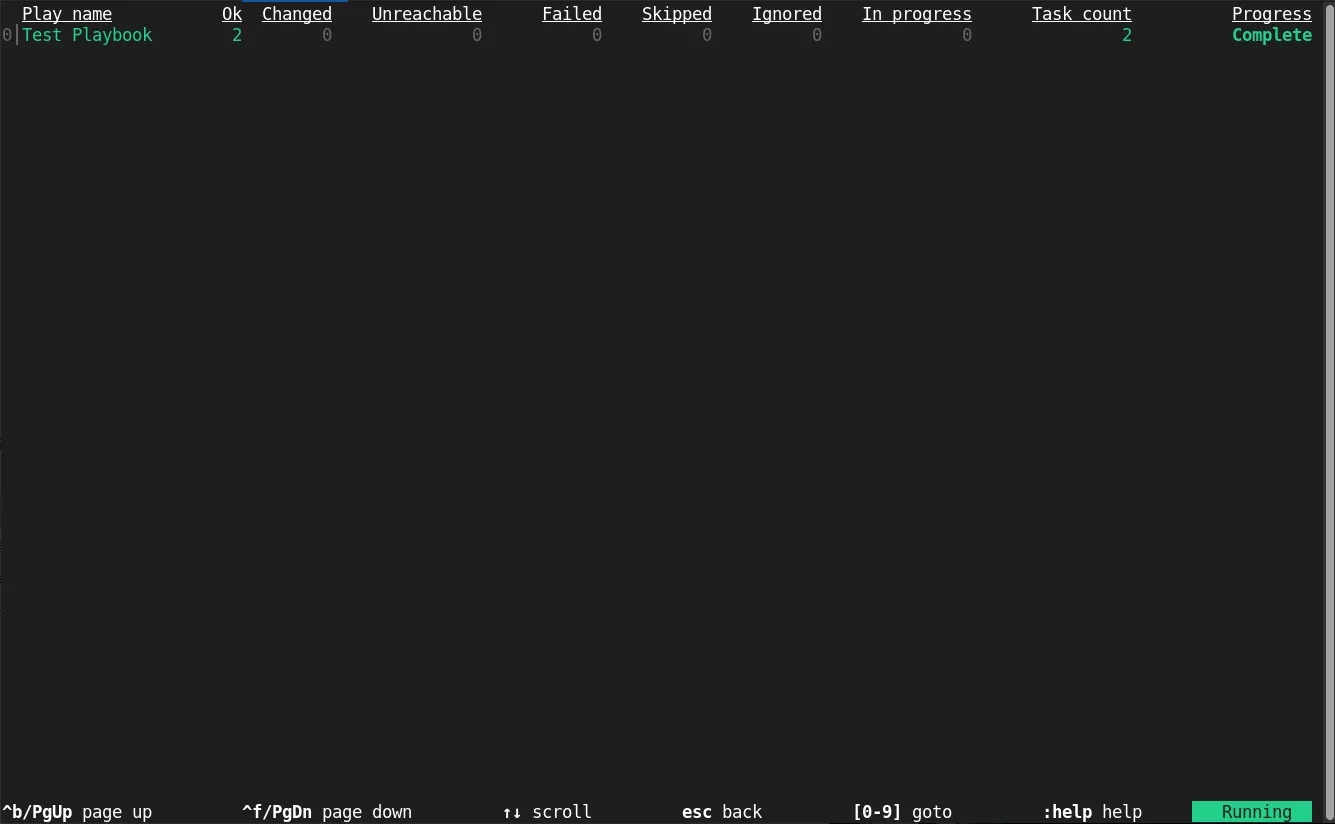
Photo by admingeek from Infotechys
Checking available configurations |
To view the current configuration settings, use:
ansible-navigator config view
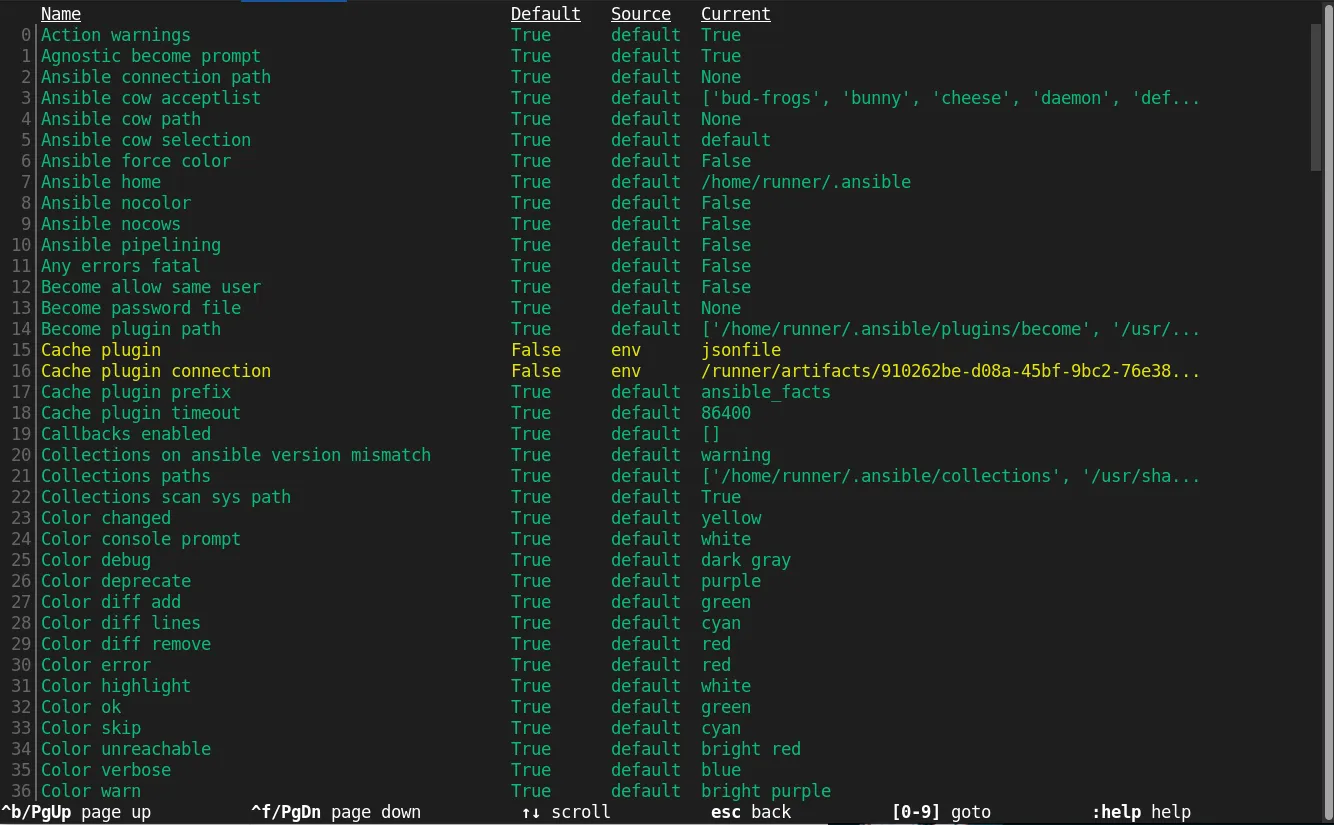
Photo by admingeek from Infotechys
List available collections |
To view a list of available collections, use:
ansible-navigator config view
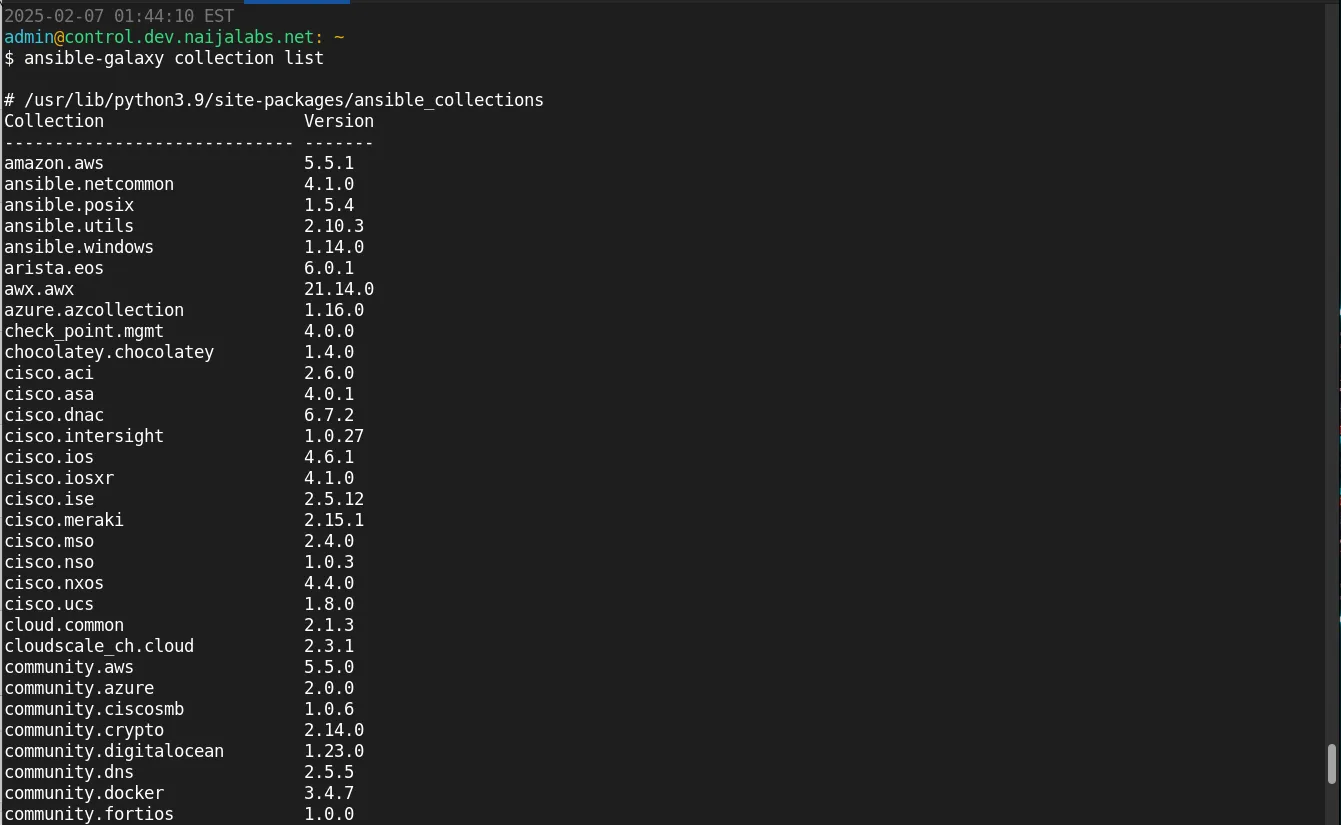
Photo by admingeek from Infotechys
While installing Ansible Navigator on CentOS 9 Stream is generally straightforward, here are a few common problems and solutions:
| Issue | Solution |
|---|---|
| “Command not found” error | Ensure Ansible and Ansible-Navigator are installed correctly using pip3. |
| Permission denied | Run commands as root or with sudo if you encounter permission issues. |
| Missing dependencies | Use pip3 install to install missing Python libraries. |
| Configuration not loading | Run ansible-navigator config init to regenerate configuration files. |
Installing Ansible Navigator on CentOS 9 Stream is a straightforward process that will enhance your Ansible experience. By following this guide, you should now be able to run your playbooks with ease and enjoy a better, more interactive user interface. With its powerful features and ease of use, Ansible Navigator is an essential tool for anyone working with Ansible automation.
Did you find this article useful? Your feedback is invaluable to us! Please feel free to share this post!
Learn how to install Apache Guacamole on RHEL 9 or CentOS 9 using Ansible roles for automated, secure, and efficient remote desktop access. Step-by-step guide

In this article, we will examine 10 ways to speed up your Ansible Playbooks, providing actionable strategies and examples to optimize performance and streamline automation

Learn how to effortlessly deploy and manage a LAMP stack on RHEL9 using Ansible. Streamline your server setup with automation! Table of Contents Introduction Hey