
Commands
In this guide, we’ll walk you through the step-by-step process of installing Remmina on RHEL9 or CentOS9. Remmina is a feature-rich remote desktop client that allows


Learn how to install NICE DCV on RHEL 9 with our step-by-step guide. This tutorial covers prerequisites, installation, SSL setup, and optimization tips for secure and high-performance remote desktop access. Perfect for cloud and on-premises environments!
NICE DCV (Desktop Cloud Visualization) is a powerful remote visualization technology developed by AWS, allowing users to securely access high-performance graphical applications over a network. With NICE DCV, users can access Linux or Windows remote desktops, making it ideal for cloud computing environments where visual-intensive applications are required, such as CAD, gaming, and 3D design.
This guide will walk you through the process of installing NICE DCV on Red Hat Enterprise Linux 9 (RHEL 9) Workstation, from configuring necessary prerequisites to securing and optimizing your remote desktop environment. By following this step-by-step tutorial, you’ll have NICE DCV up and running in no time!
Before starting the NICE DCV installation, ensure that your system meets the following requirements:
| Requirement | Description |
|---|---|
| Operating System | RHEL 9 |
| Hardware Requirements | Minimum 4 GB of RAM, 2 CPU cores, and a GPU (optional for graphical acceleration) |
| Network | Ensure open ports for NICE DCV traffic (default port 8443 for HTTPS) |
| Internet Access | Required for downloading installation files and package dependencies |
Note: As of version 2024.0, released on October 1, 2024, NICE DCV has been rebranded to Amazon DCV. This new name highlights its integration with AWS managed services like Amazon WorkSpaces and Amazon AppStream 2.0, which leverage the DCV protocol to deliver improved remote desktop experiences.
For this demonstration, we’ve configured our RHEL 9 workstation instance as follows:
| Hostname | RAM | Cores | IP Address/OS |
| nice.dev.naijalabs.net | 8 | 4 | 192.168.1.238 /Red Hat Enterprise Linux release 9.4 (Plow) |
Step 1: Update Your System |
The first step is to update the RHEL 9 package repositories to ensure the latest packages are installed. Use the following commands to update and reboot your system:
sudo dnf update -y ; sudo systemctl reboot
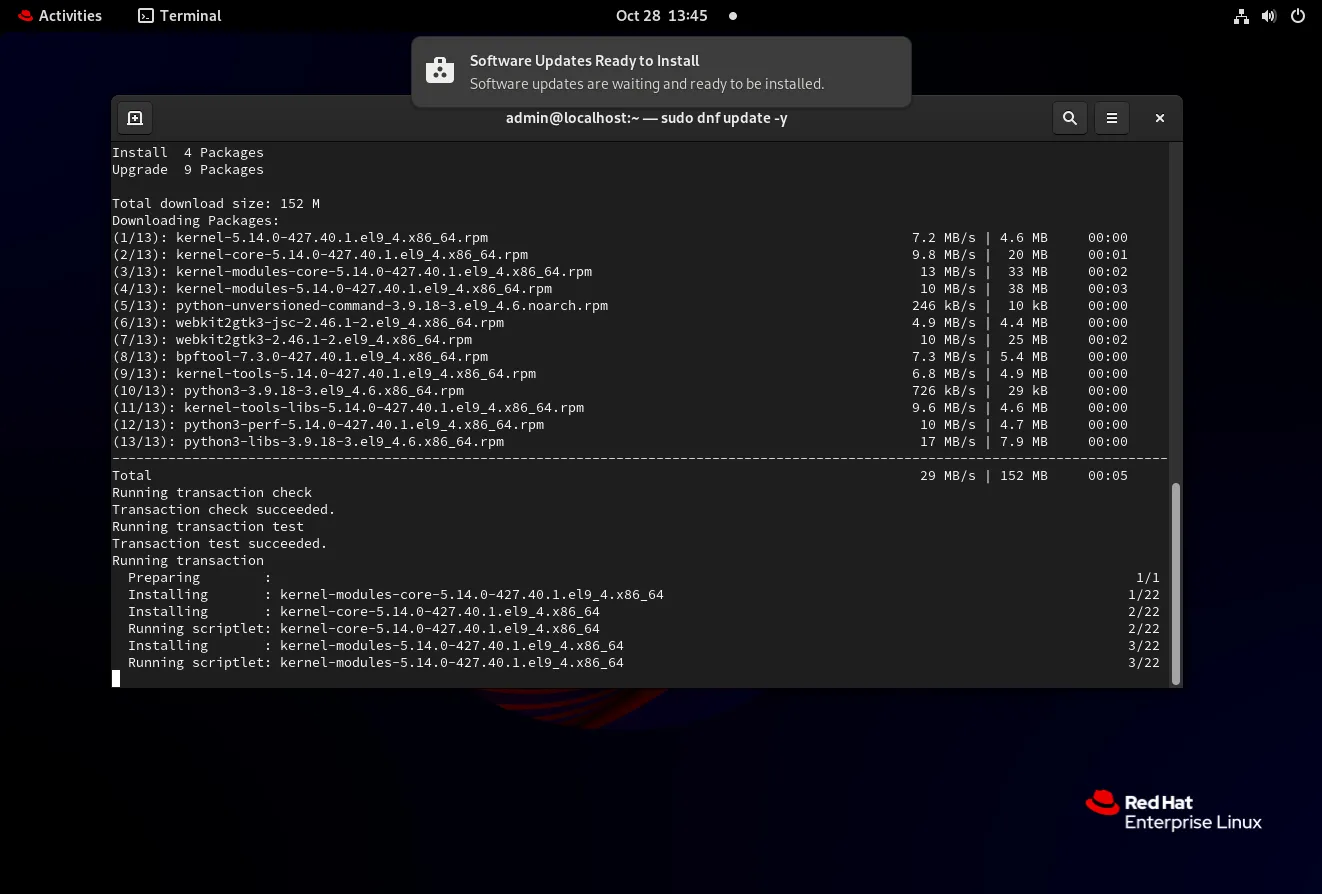
Photo by admingeek from Infotechys
Updating ensures all packages are current, helping to prevent potential issues during the NICE DCV installation.
Step 2: Install Prerequisite Packages |
NICE DCV requires a few dependencies, including the Extra Packages for Enterprise Linux (EPEL) repository. Run the following commands to install EPEL and other necessary packages:
sudo dnf install https://dl.fedoraproject.org/pub/epel/epel-release-latest-9.noarch.rpm
sudo dnf install -y epel-release wget tar
These packages will help in downloading and extracting the NICE DCV installation files.
Step 3: Download NICE DCV Server |
Go to the AWS NICE DCV Downloads page to download the latest version of the NICE DCV server for Linux. However, before downloading the NICE DCV packages, run the following command to install all the required libraries:
sudo dnf install -y libuuid libX11 libXext libXtst libXrender libXcomposite libXrandr libXcursor libXdamage libXcursor libXt libXScrnSaver
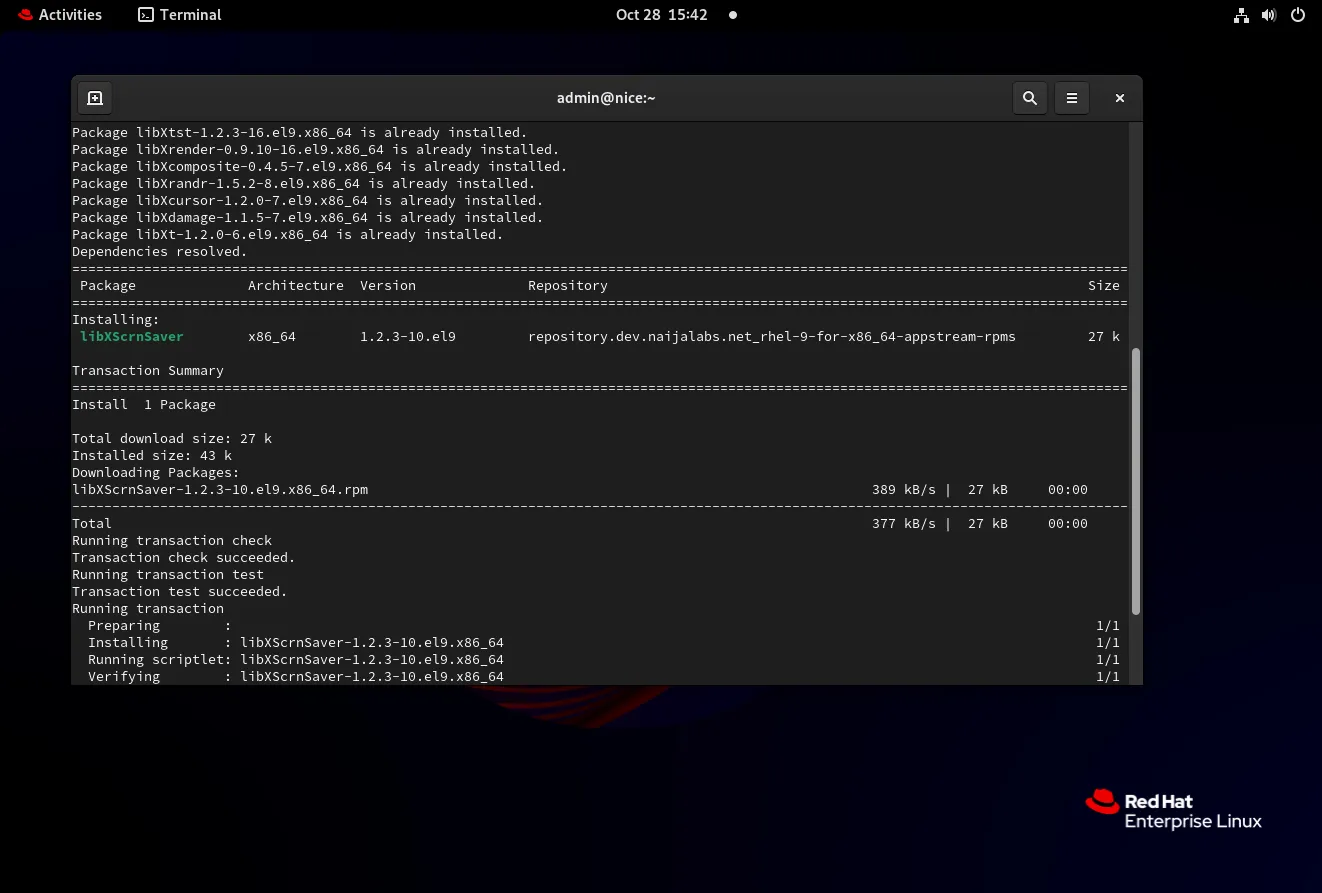
Photo by admingeek from Infotechys
Copy the download link for RHEL 9 and use wget to download it on your system:
wget https://d1uj6qtbmh3dt5.cloudfront.net/2024.0/Servers/nice-dcv-2024.0-17979-el9-x86_64.tgz
					--2024-10-28 15:48:17--  https://d1uj6qtbmh3dt5.cloudfront.net/2024.0/Servers/nice-dcv-2024.0-17979-el9-x86_64.tgz
Resolving d1uj6qtbmh3dt5.cloudfront.net (d1uj6qtbmh3dt5.cloudfront.net)... 3.167.64.89, 3.167.64.191, 3.167.64.56, ...
Connecting to d1uj6qtbmh3dt5.cloudfront.net (d1uj6qtbmh3dt5.cloudfront.net)|3.167.64.89|:443... connected.
HTTP request sent, awaiting response... 200 OK
Length: 17840687 (17M) [binary/octet-stream]
Saving to: ‘nice-dcv-2024.0-17979-el9-x86_64.tgz’

nice-dcv-2024.0-17979-el9-x86_64.tg 100%[==================================================================>]  17.01M  57.3MB/s    in 0.3s

2024-10-28 15:48:18 (57.3 MB/s) - ‘nice-dcv-2024.0-17979-el9-x86_64.tgz’ saved [17840687/17840687]
This will save the NICE DCV server tarball to your current directory. Then, extract the contents of the tarball and navigate to the extracted directory.
tar -xzvf nice-dcv-2024.0-17979-el9-x86_64.tgz && cd nice-dcv-2024.0-17979-el9-x86_64 && ls -lh
					total 17536
-rw-r--r--. 1 admin admin   281734 Oct  9 09:04 nice-dcv-gl-2024.0.1073-1.el9.x86_64.rpm
-rw-r--r--. 1 admin admin   551291 Oct  9 09:04 nice-dcv-gltest-2024.0.340-1.el9.x86_64.rpm
-rw-r--r--. 1 admin admin 14994988 Oct  9 09:04 nice-dcv-server-2024.0.17979-1.el9.x86_64.rpm
-rw-r--r--. 1 admin admin    12164 Oct  9 09:04 nice-dcv-simple-external-authenticator-2024.0.256-1.el9.x86_64.rpm
-rw-r--r--. 1 admin admin  1049496 Oct  9 09:04 nice-dcv-web-viewer-2024.0.17979-1.el9.x86_64.rpm
-rw-r--r--. 1 admin admin  1053708 Oct  9 09:04 nice-xdcv-2024.0.627-1.el9.x86_64.rpm
-rw-r--r--. 1 admin admin      706 Oct  9 09:04 README.md
Step 4: Install NICE DCV Server |
Next, run the following command to install the RPM packages:
sudo dnf install *.rpm -y
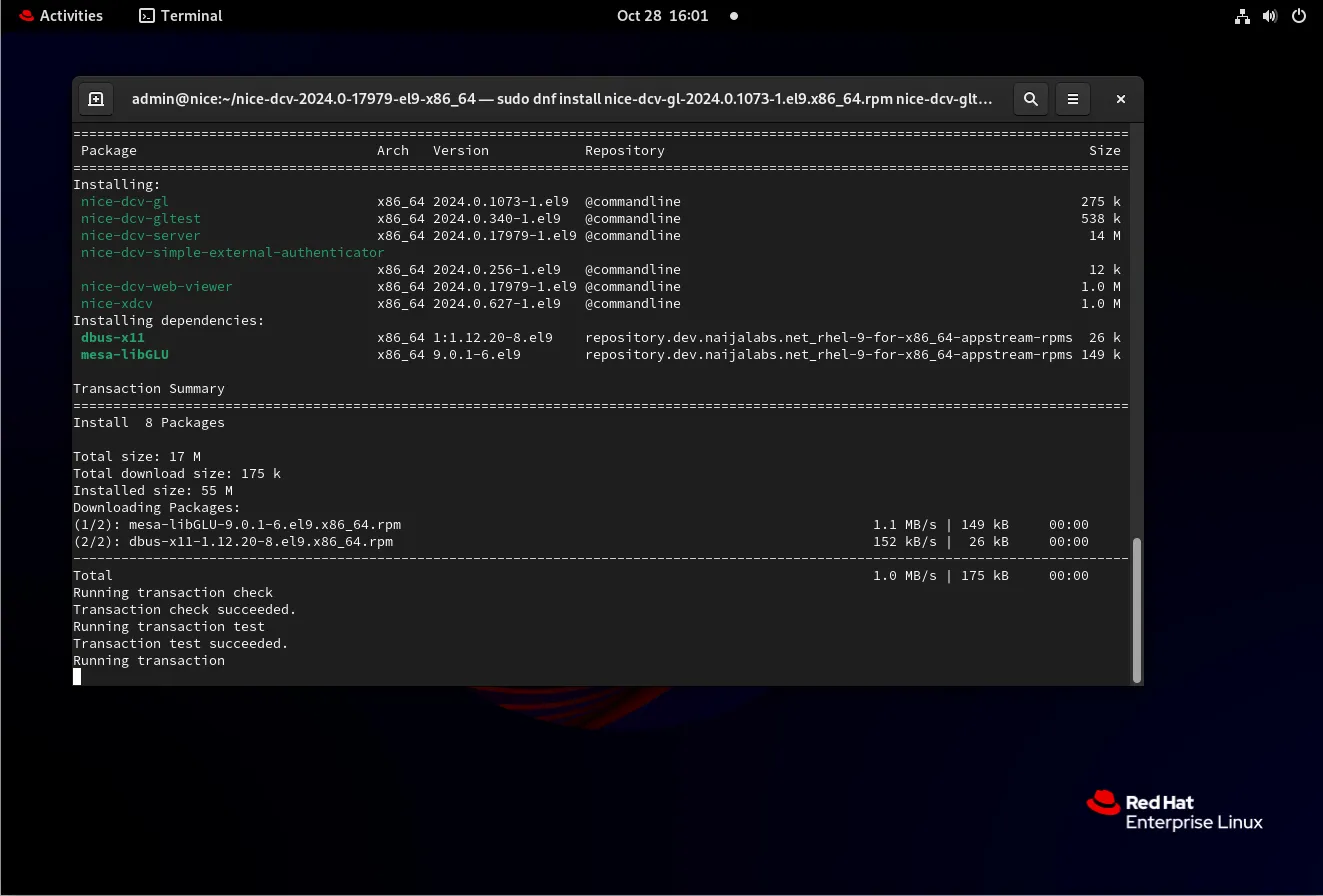
Photo by admingeek from Infotechys
After the installation completes, verify that the NICE DCV server was installed successfully:
dcvserver --version
DCV server version 2024.0 (r17979) - 3063bab82578a6efb65a336434e70a39e0d6653b
You should see the installed version output, confirming a successful installation.
Step 5: Configure NICE DCV License |
NICE DCV installs with a demo license that is valid for 30 days. After the demo period expires, you’ll need to obtain a valid license to continue using NICE DCV, unless you’re running it on an Amazon EC2 instance, the license key can be added by editing the dcv.conf file:
sudo vim /etc/dcv/dcv.conf
Locate the [license] section and add the path to your license file:
					###############################################################################
## Section "license" contains properties to configure the license management
###############################################################################

[license]

# Property "license-file" specifies the path to a demo license file or the name
# of the license server used by the rlm daemon, in the format port@host
# (for example 5053@licserver).
# The port number must be the same as that specified in the HOST line of the
# license file.
# If empty or not specified, a default path to a demo license file will be
# used (e.g: /usr/share/dcv/license/license.lic). If the default file does not
# exists a demo license will be used.
#license-file = ""
Save the file and exit. If you’re using NICE DCV on Amazon EC2, skip this step as licensing is automatically managed provided your IAM permissions are properly set.
Step 6: Configure Display and Session |
NICE DCV supports virtual sessions (without GPU) and GPU-based sessions. To configure NICE DCV to run a virtual session, modify the following settings in the dcv.conf file:
sudo vim /etc/dcv/dcv.conf
Locate the [session-management] section and enable virtual sessions:
					###############################################################################
## Section "session-management" contains the properties of DCV session creation
###############################################################################

[session-management]

# Property "create-session" requests to automatically create a console session
# (with ID "console") at DCV startup.
# Can be set to true or false.
# If not specified, no console session will be automatically created.
#create-session = true
enable = true

# Property "enable-gl-in-virtual-sessions" specifies whether to employ the
# 'dcv-gl' feature (a specific license will be required).
# Allowed values: 'always-on', 'always-off', 'default-on', 'default-off'.
# If not specified, the default value is 'default-on'.
enable-gl-in-virtual-sessions = "default-on"
Save and exit the file. This configuration is ideal for users without dedicated GPUs or if your system relies solely on CPU resources.
Step 7: Start and Enable NICE DCV Service |
Once configuration is complete, start the NICE DCV server and enable it to start automatically upon boot:
sudo systemctl enable --now dcvserver
Created symlink /etc/systemd/system/multi-user.target.wants/dcvserver.service → /usr/lib/systemd/system/dcvserver.service.
Check the service status to ensure it’s running:
sudo systemctl status dcvserver
					● dcvserver.service - Amazon DCV server daemon
     Loaded: loaded (/usr/lib/systemd/system/dcvserver.service; enabled; preset: disabled)
     Active: active (running) since Mon 2024-10-28 17:07:33 EDT; 1min 12s ago
    Process: 10108 ExecStartPre=/sbin/modprobe -a eveusb v4l2loopback (code=exited, status=1/FAILURE)
   Main PID: 10109 (dcvserver)
      Tasks: 7 (limit: 48800)
     Memory: 14.9M
        CPU: 285ms
     CGroup: /system.slice/dcvserver.service
             ├─10109 /usr/bin/bash /usr/bin/dcvserver -d --service
             └─10110 /usr/libexec/dcv/dcvserver --service

Oct 28 17:07:33 nice.dev.naijalabs.net systemd[1]: Starting Amazon DCV server daemon...
You should see an active status, confirming that the NICE DCV service is running successfully.
Step 8: Configure Network and Firewall |
NICE DCV uses port 8443 by default for HTTPS connections. To allow traffic through this port, use the following firewall-cmd commands:
sudo firewall-cmd --permanent --add-port=8443/tcp && sudo firewall-cmd --reload
These commands open the port necessary for remote access to NICE DCV sessions. You may also need to adjust settings on your network firewall or router to allow external access. Finally, reboot your machine.
sudo systemctl reboot
Step 9: Connect to NICE DCV Session |
Upon a successful reboot, you’re ready to connect to your NICE DCV session. Open a web browser and enter the following URL:
|

Photo by admingeek from Infotechys
Since valid SSL certificates are not yet configured, your browser will display a “Your connection is not private” warning message. You can choose to ignore the warning or install a trusted certificate for added security. SSL setup will be addressed in a later step.
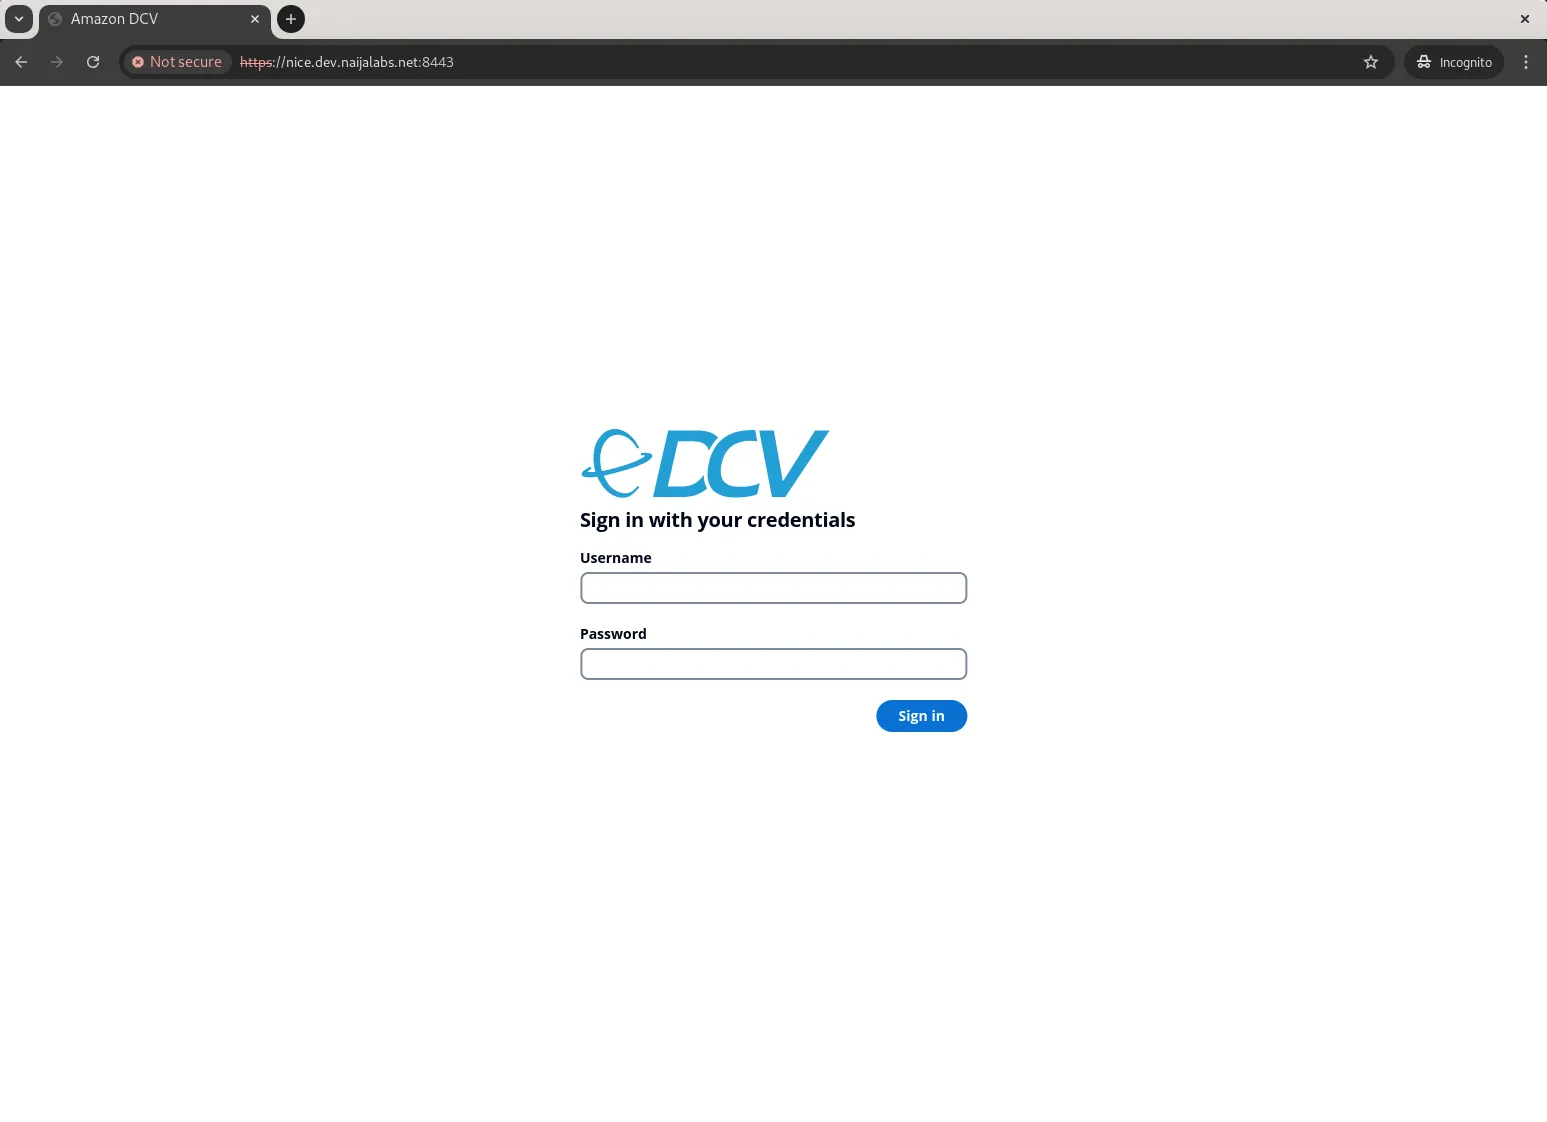
Photo by admingeek from Infotechys
Step 10: Configuring Nice DCV Access |
You can access NICE DCV with your local account credentials. However, from the command line, verify you have an active session:
dcv list-sessions
If no sessions are available, create a failsafe session by generating an init script (init.sh) for the user:
vim init.sh
Copy and paste the following in the file:
					#!/bin/sh
metacity &
xterm
Save and exit the file. Then, make it executable.
chmod +x init.sh
Finally, execute the following commands to create a new session:
sudo dcvgladmin enable # Enables GPU rendering
dcv create-session --storage-root %home --init init.sh 1
dcv create-session --storage-root %home 1
You can now log in with your user credentials and confirm that your session is active.
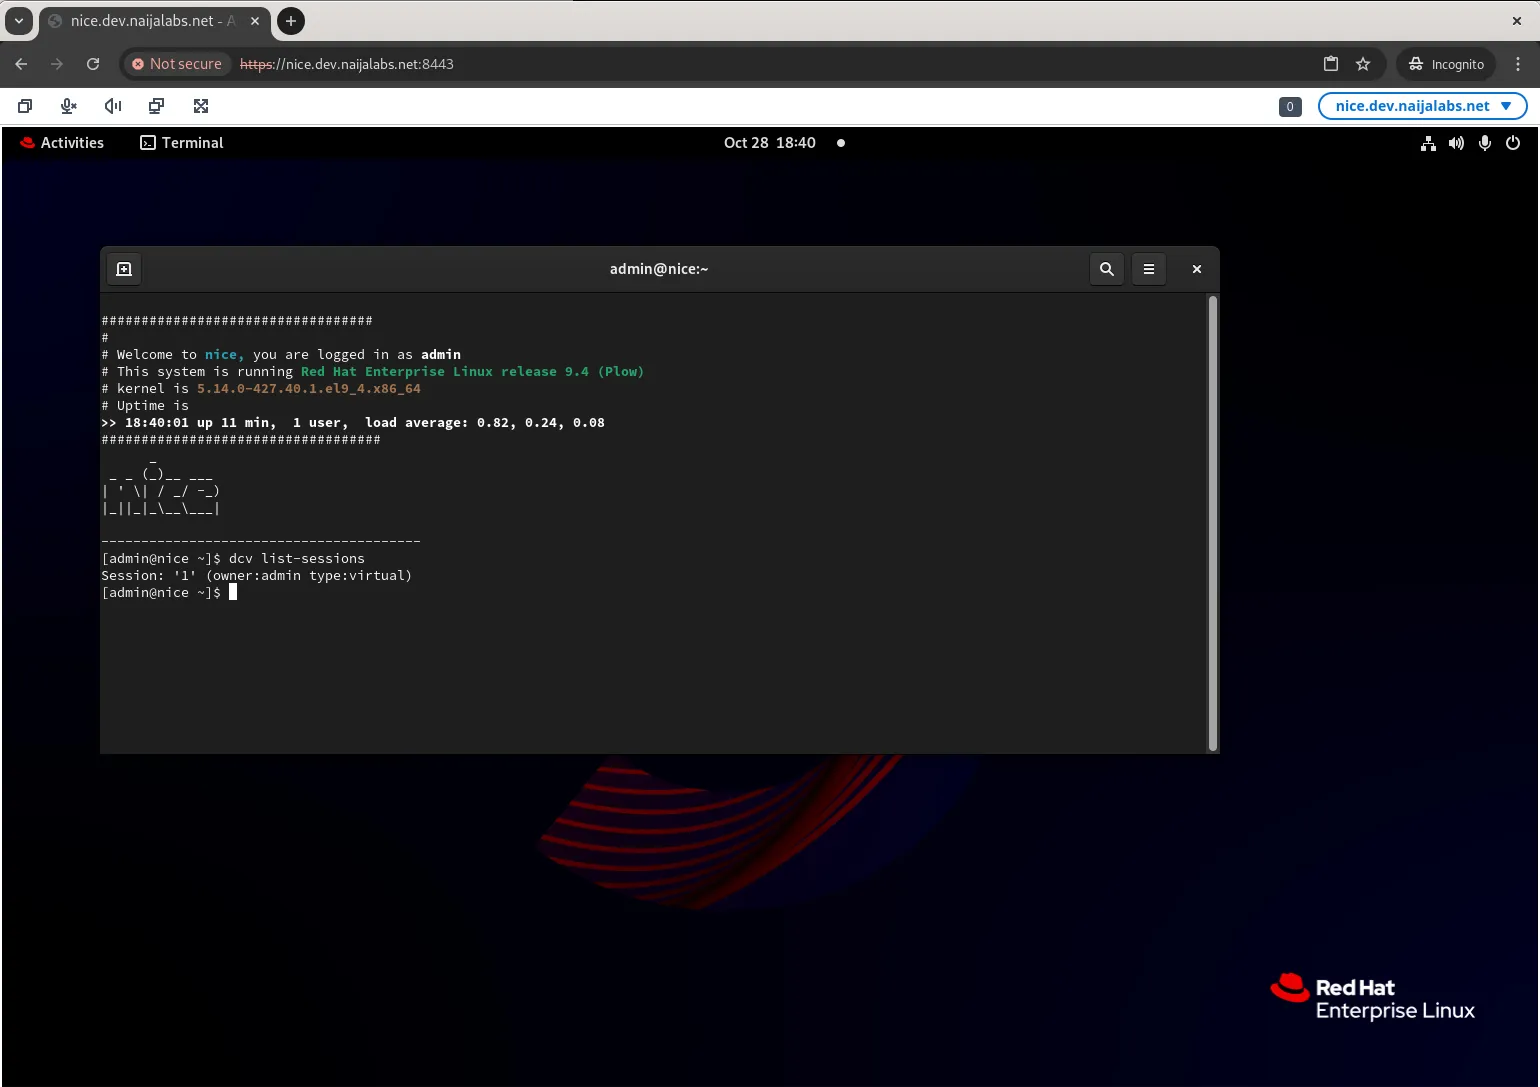
Photo by admingeek from Infotechys
Step 11: Configure SSL for NICE DCV |
Securing your NICE DCV connection with SSL is essential for protecting data transmitted between the client and server. By default, NICE DCV uses a self-signed certificate, which may trigger security warnings in web browsers. You can replace it with a trusted SSL certificate from a Certificate Authority (CA) or generate your own.
Option 1: Using a Self-Signed Certificate |
If you don’t have an SSL certificate, you can generate a self-signed certificate with OpenSSL:
					sudo mkdir -p /etc/dcv/ssl
sudo openssl req -x509 -nodes -days 365 -newkey rsa:2048 \
    -keyout /etc/dcv/ssl/dcv.key \
    -out /etc/dcv/ssl/dcv.crt \
    -subj "/C=US/ST=YourState/L=YourCity/O=YourOrganization/OU=YourUnit/CN=yourdomain.com"
This command generates a certificate valid for one year, saved in /etc/dcv/ssl/dcv.crt and a private key in /etc/dcv/ssl/dcv.key.
Open the NICE DCV configuration file and specify the certificate and key paths:
sudo vim /etc/dcv/dcv.conf
Locate the [security] section, and add the following lines:
					###############################################################################
## Section "security" contains the properties related to authentication and security
###############################################################################

[security]

# Property "authentication" specifies the client authentication method used by
# the DCV server. Use 'system' to delegate client authentication to the
# underlying operating system. Use 'none' to disable client authentication and
# grant access to all clients.
#authentication="none"

# Property "pam-service-name" specifies the name of the PAM configuration file
# used by DCV. The default PAM service name is 'dcv' and corresponds with
# the /etc/pam.d/dcv configuration file. This parameter is only used if
# the 'system' authentication method is used.
#pam-service-name="dcv-custom"

# Property "auth-token-verifier" specifies an endpoint (URL) for an external
# the authentication token verifier. If empty or not specified, the internal
# authentication token verifier is used
#auth-token-verifier="https://127.0.0.1:8444"

certificate-file = "/etc/dcv/ssl/dcv.crt"
certificate-key-file = "/etc/dcv/ssl/dcv.key"
sudo systemctl restart dcvserver
Option 2: Using a Trusted SSL Certificate |
If you have a CA-signed certificate, you can use it instead of a self-signed one (recommended for production environments):
Copy your CA certificate files to the Nice DCV directory
sudo cp /path/to/your/ca-cert.pem /etc/dcv/ssl/dcv.crt
sudo cp /path/to/your/private-key.pem /etc/dcv/ssl/dcv.key
Make sure to specify the correct paths for your CA certificate and key files in the [security] section of your dcv.conf file.
sudo systemctl restart dcvserver
After this setup, you should be able to connect to NICE DCV over a secure HTTPS connection without any browser warnings (if using a trusted CA certificate). This configuration ensures that all data transmitted between the client and server is encrypted, providing a secure environment for remote desktop access.
Option 3: Configure SSL using Nginx |
Additionally, you can secure your Nice DCV server by enabling SSL with Nginx as a Proxy. Before proceeding, copy the necessary SSL certificate and key files to your server. In our configuration, we’re utilizing Letsencrypt, and these files are typically located at /etc/letsencrypt/live/.
sudo dnf install -y nginx
sudo vim /etc/nginx/conf.d/nginx-dcv.conf
Copy and paste the following lines:
					# Redirect HTTP to HTTPS
server {
    listen 80;
    listen [::]:80;
    server_name nice.dev.naijalabs.net;

    # Redirect all HTTP requests to HTTPS
    return 301 https://$host$request_uri;
}

# Main server block for HTTPS
server {
    listen 443 ssl http2;
    listen [::]:443 ssl http2;
    server_name nice.dev.naijalabs.net;

    # SSL certificate paths (use your Let's Encrypt certs)
    ssl_certificate "/etc/letsencrypt/live/naijalabs.net/fullchain.pem";
    ssl_certificate_key "/etc/letsencrypt/live/naijalabs.net/privkey.pem";

    # Additional SSL settings for security
    ssl_session_cache shared:SSL:1m;
    ssl_session_timeout  10m;
    ssl_protocols TLSv1.2 TLSv1.3;
    ssl_ciphers HIGH:!aNULL:!MD5;

    # Proxy settings
    location / {
        proxy_pass https://192.168.1.238:8443;  # Forward to the NICE DCV server on port 8443
        proxy_http_version 1.1;
        proxy_set_header Upgrade $http_upgrade;
        proxy_set_header Connection "upgrade";
        proxy_set_header Host $host;
        proxy_set_header X-Real-IP $remote_addr;
        proxy_set_header X-Forwarded-For $proxy_add_x_forwarded_for;
        proxy_set_header X-Forwarded-Proto $scheme;
    }
}
Replace the server_name and ip_address with your own settings and run the following commands to start Nginx and enable it to autostart on boot:
sudo systemctl daemon-reload && sudo systemctl enable --now nginx
To allow traffic through the HTTPS port (443), use the following firewall-cmd commands:
sudo firewall-cmd --permanent --add-port=443/tcp && sudo firewall-cmd --reload
Once configured, accessing https://nice.dev.naijalabs.net should display a secure connection, with NGINX serving as a secure proxy to the NICE DCV server on port 8443
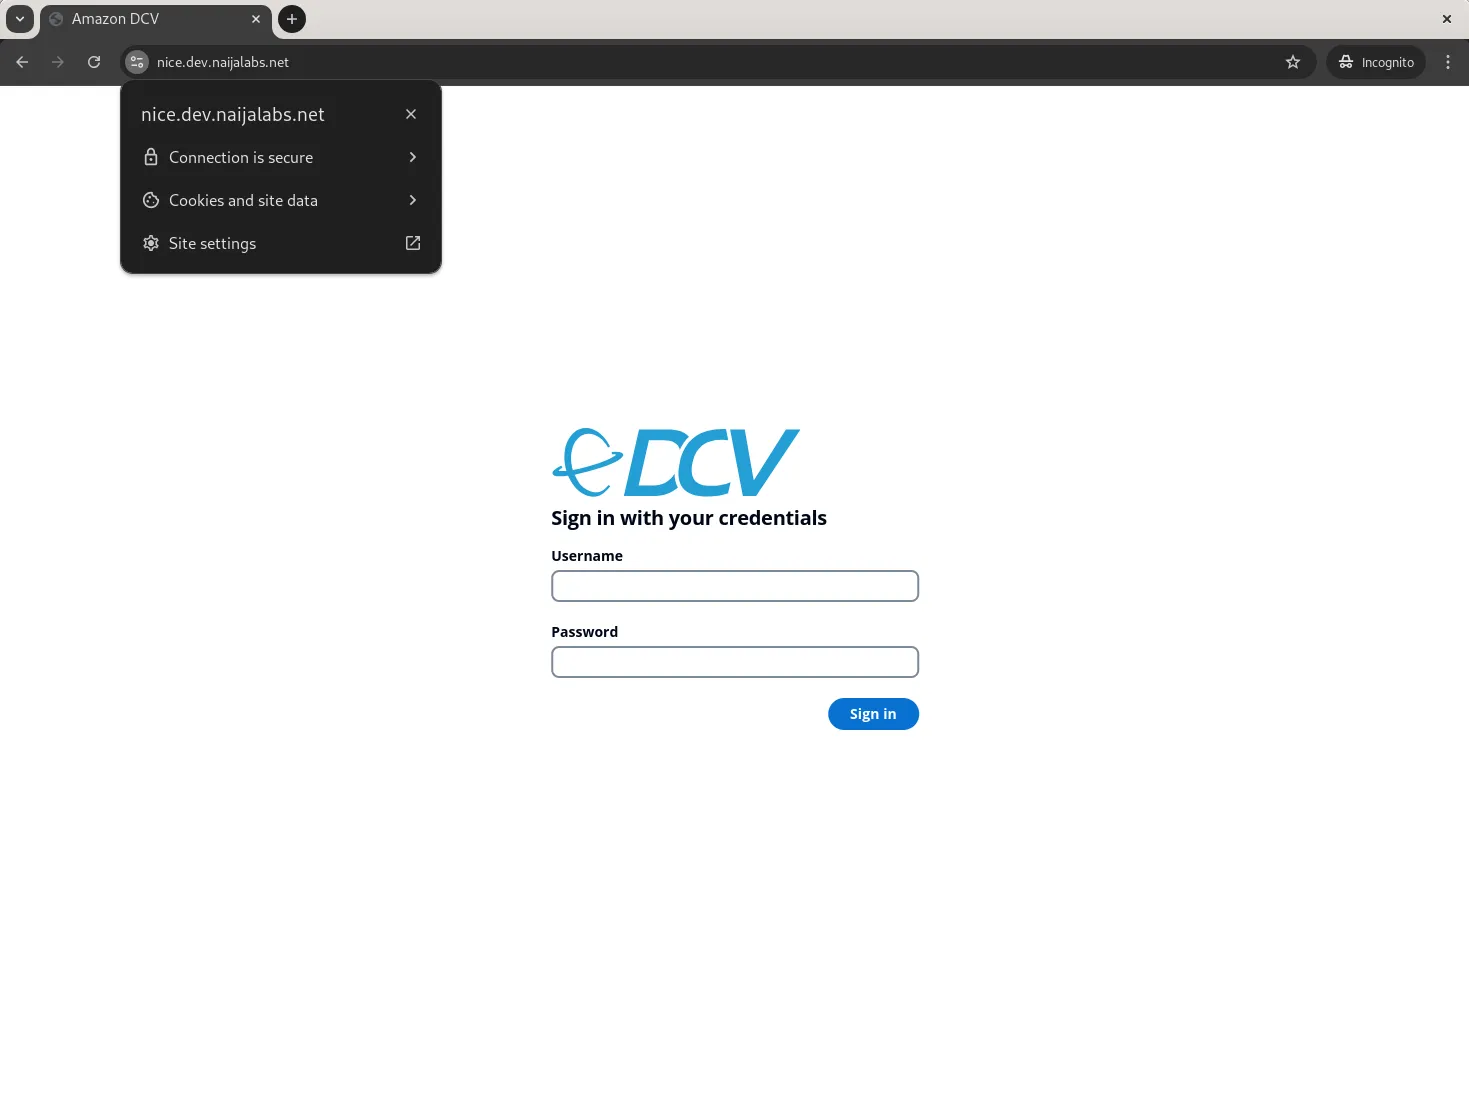
Photo by admingeek from Infotechys
Step 12: Optimize NICE DCV Settings |
After confirming your setup, consider fine-tuning NICE DCV settings for performance and security. Some recommended optimizations include:
Session Timeout: Set session timeouts to manage idle connections and improve security.
Compression Settings: Adjust compression for a better balance between quality and bandwidth usage. For low-bandwidth environments, increase compression for smoother performance.
Network Bandwidth: Adjust video and audio quality settings based on network speed for optimal performance.
These settings can be configured in the dcv.conf file, allowing you to tailor the experience based on your hardware and network environment.
Common NICE DCV Configuration Settings |
| Setting | Section | Recommended Value | Description |
|---|---|---|---|
license-file | [license] | PATH_TO_LICENSE_FILE | Adds NICE DCV license key for on-premises setups. |
enable | [session-management] | true | Enables session management for NICE DCV. |
enable-gl-in-virtual-sessions | [session-management] | default-on | DCV-GL (Direct Connect Virtual Graphics Library) feature is a component of NICE DCV that enhances the graphical performance and rendering capabilities of remote desktop sessions, especially for applications that require high-performance graphics |
port | [network] | 8443 | Default port for NICE DCV HTTPS connections. |
Here are some common issues you may encounter during NICE DCV installation and configuration on RHEL 9:
License Key Not Recognized: Verify that the license key is correctly entered in /etc/dcv/dcv.conf and restart the dcvserver service.
sudo systemctl daemon-reload && sudo systemctl enable --now nginx
Port 8443 and/or 443 Inaccessible: Ensure that both the server and network firewalls are allowing traffic on port 8443 and 443. If you have SELinux enabled and enforcing on your server, run the following command to set allow Apache to connect to other (external) network services (e.g. APIs, Databases).
sudo setsebool -P httpd_can_network_connect 1
Session Management Errors: Confirm that [session-management] is enabled and virtual sessions are configured correctly if a GPU isn’t available.
Log files: Logs are an essential part of troubleshooting issues that occur in general. The Nice DCV Logs are located in the /var/log/dcv directory:
ls -lh /var/log/dcv
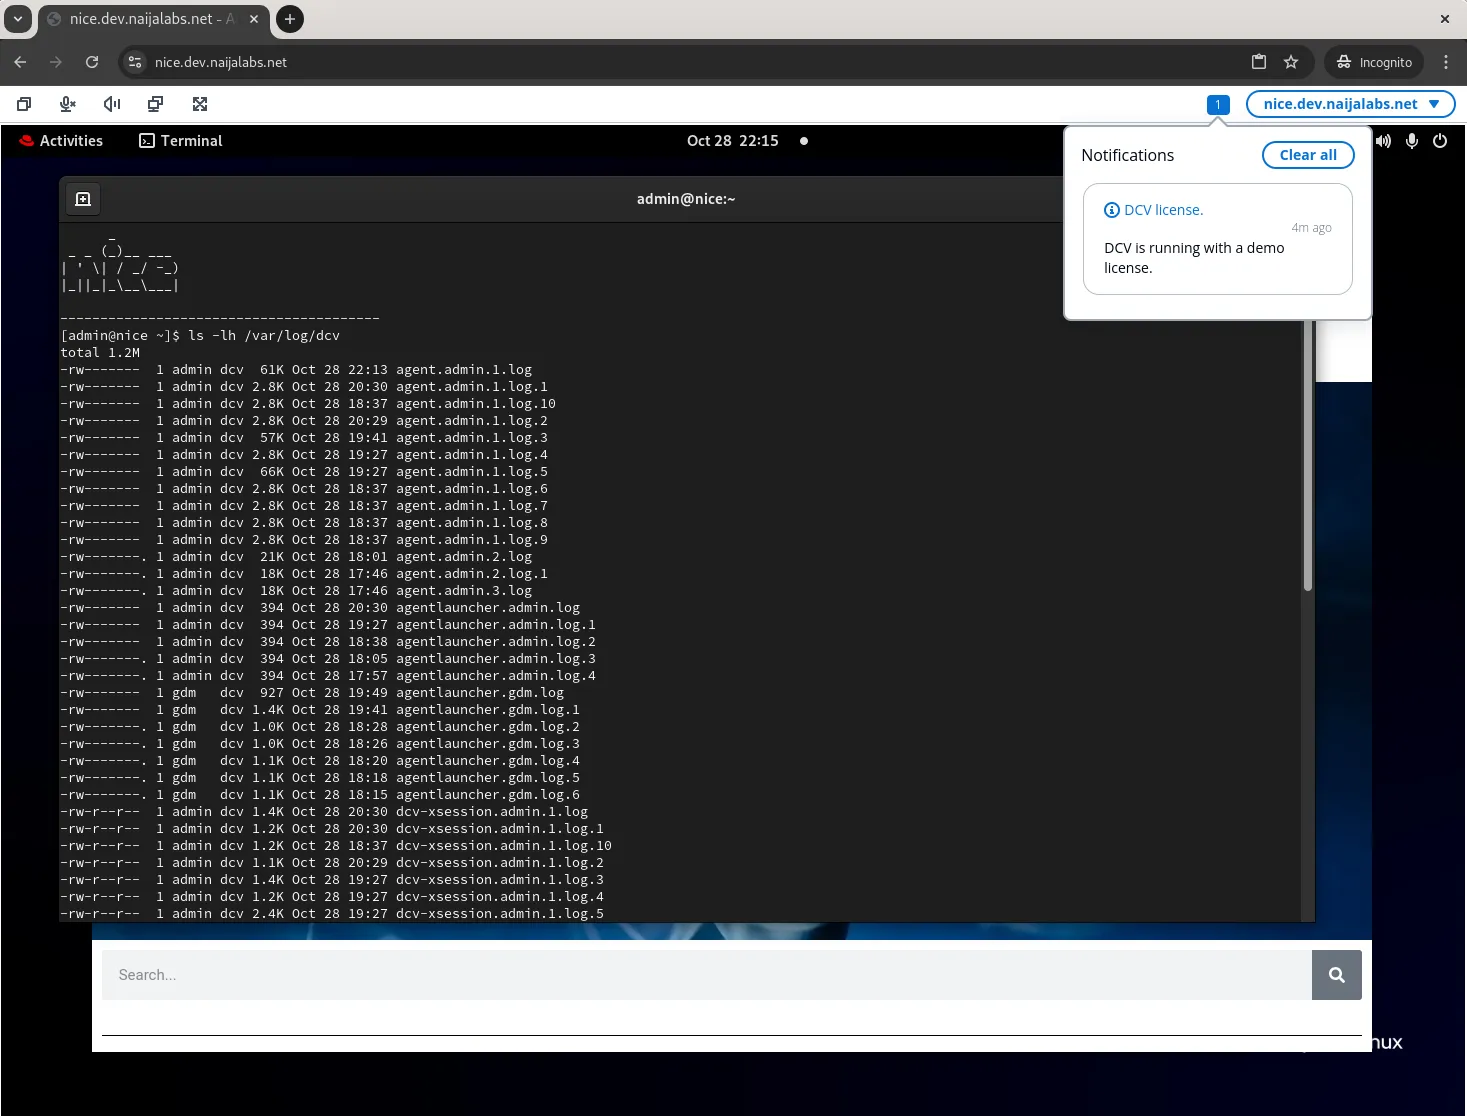
Photo by admingeek from Infotechys
Setting up NICE DCV on RHEL 9 is a straightforward process that can provide high-performance remote access to your Linux desktop. By following this guide, you’ve configured and optimized NICE DCV, opening up the potential for secure, flexible access to graphical applications, ideal for remote teams and cloud environments. With the NICE DCV server now ready for use, you can easily connect, configure sessions, and control graphical environments with excellent performance and flexibility.
For further customizations, refer to the Official NICE DCV documentation.
Did you find this article useful? Your feedback is invaluable to us! Please feel free to share your thoughts in the comments section below.
In this guide, we’ll walk you through the step-by-step process of installing Remmina on RHEL9 or CentOS9. Remmina is a feature-rich remote desktop client that allows
This article examines how to install NICE DCV on CentOS9 and it’s written to accommodate a virtual instance without an NVIDIA graphics card installed. Table

In this guide, we’ll walk you through how to install AnyDesk on Ubuntu 22.04, ensuring a smooth and hassle-free setup process for seamless remote desktop