
Commands
Installing RHEL7 or CentOS7 on a PC is fairly easy to do. In this tutorial, we will review the installation process step-by-step. Today’s focus will


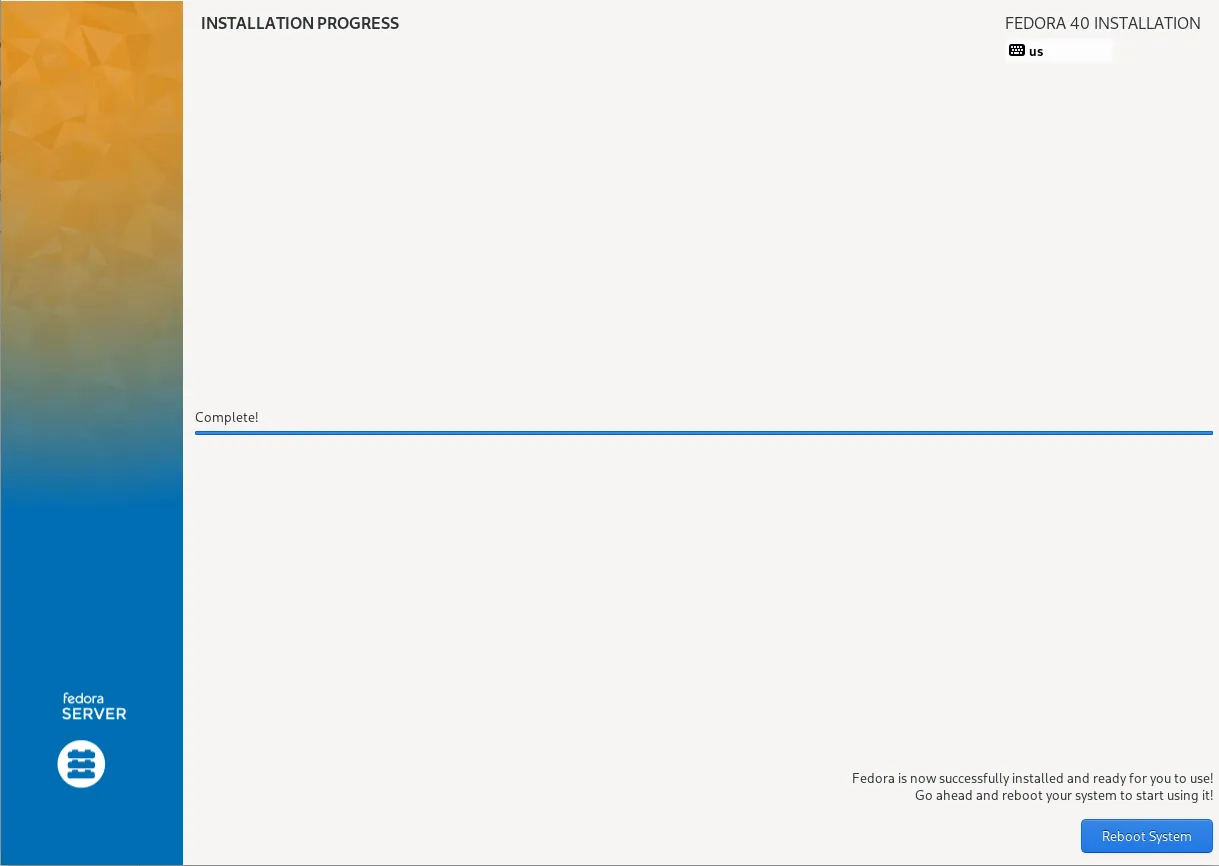
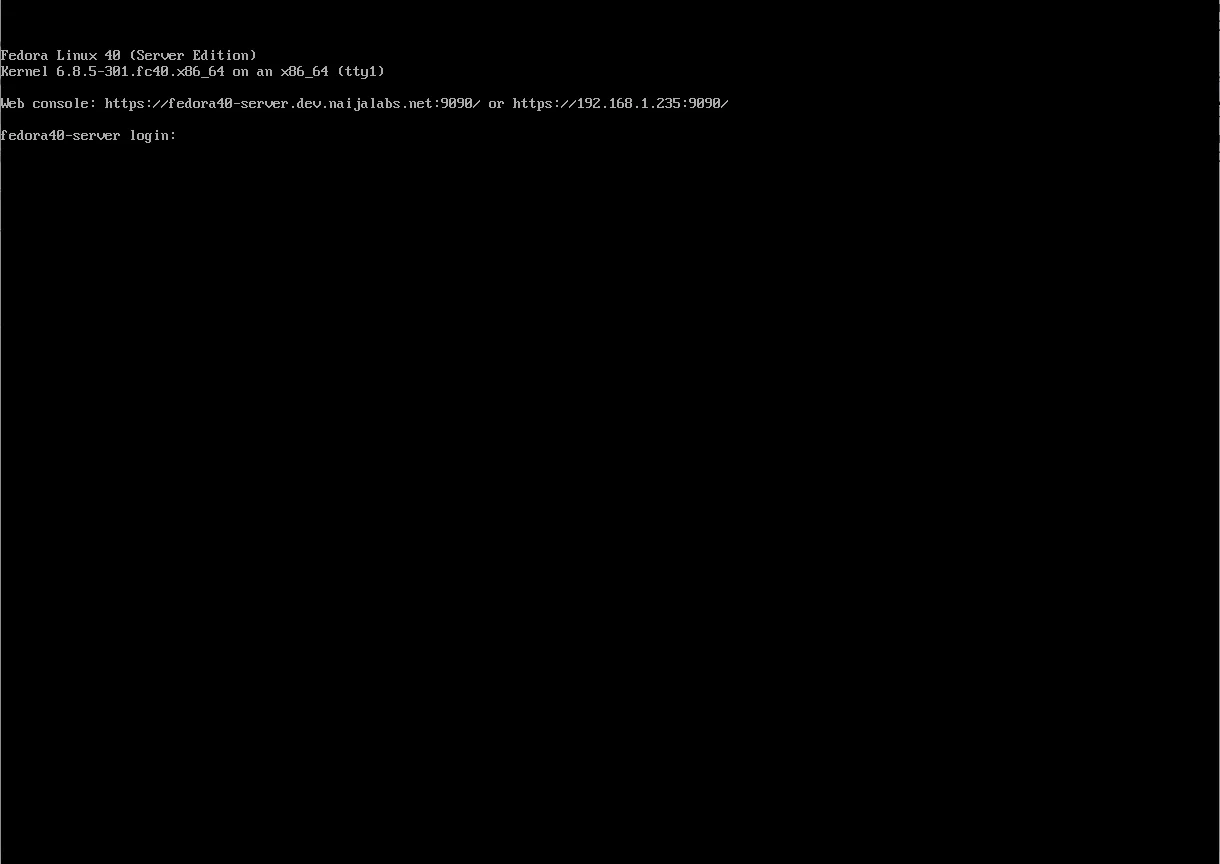
Installing RHEL7 or CentOS7 on a PC is fairly easy to do. In this tutorial, we will review the installation process step-by-step. Today’s focus will
In this tutorial, we will review the Arch Linux Installation process on KVM. The installation procedure for Arch Linux is different from your standard Linux
In this tutorial, we’ll guide you through the step-by-step installation of RHEL9 on KVM. The process is uncomplicated, and we’ll present it in a format