
Commands
In this guide, we’ll walk you through the process of setting up a Caddy server using Podman, empowering you to host your websites with confidence.


In this article, we’ll explore the simple steps to enable HTTPS on your website. We’ll guide you through the process of installing SSL on RHEL9, ensuring your website’s security and trustworthiness.
With cyber threats on the rise, implementing HTTPS (HyperText Transfer Protocol Secure) via SSL (Secure Sockets Layer) has become a necessity. Not only does it protect sensitive data exchanged between your website and its visitors, but it also improves your site’s credibility and SEO ranking.
Before diving into the installation process, let’s clarify some key concepts. SSL is a cryptographic protocol that ensures secure communication over the internet. It encrypts data transmitted between a web server and a user’s browser, preventing unauthorized access or tampering.
HTTPS, on the other hand, is the secure version of HTTP. It uses SSL/TLS (Transport Layer Security) to establish a secure connection between the server and the client, guaranteeing the confidentiality and integrity of data.
Data Security: SSL encryption protects sensitive information such as login credentials, credit card details, and personal data from interception by malicious actors.
Trust and Credibility: Websites with HTTPS are perceived as more trustworthy by visitors and search engines alike. Displaying a padlock icon in the browser’s address bar instills confidence and reassures users of the site’s legitimacy.
SEO Benefits: Google considers HTTPS as a ranking signal, giving preference to secure websites in search results. By migrating to HTTPS, you can potentially improve your site’s visibility and organic traffic.
Now, let’s delve into the step-by-step process of installing SSL on your RHEL9 or CentOS9 server. We’ve configured our Linux server with the following settings:
| Hostname | test-srv1.naijalabs.net |
| IP address | 192.168.1.7 |
| RAM | 4 GB |
| Cores | 2 |
| Operating System (OS) | CentOS Stream release 9 |
Before proceeding with the HTTPS installation, it’s essential to follow best practices by ensuring your server is up-to-date. Execute the following commands to update your server and install SSL:
$ sudo dnf update -y; sudo systemctl reboot
$ sudo dnf -y install httpd mod_ssl
After the installation is complete, use the following commands to start the HTTPD service and configure it to initiate automatically upon reboot:
$ sudo systemctl enable --now httpd
Great! We’ve successfully installed HTTP on your machine. However, to view the test page, we must open the firewall and permit port 80 traffic to our machine.
$ sudo firewall-cmd --permanent --add-port=80/tcp; sudo firewall-cmd --reload
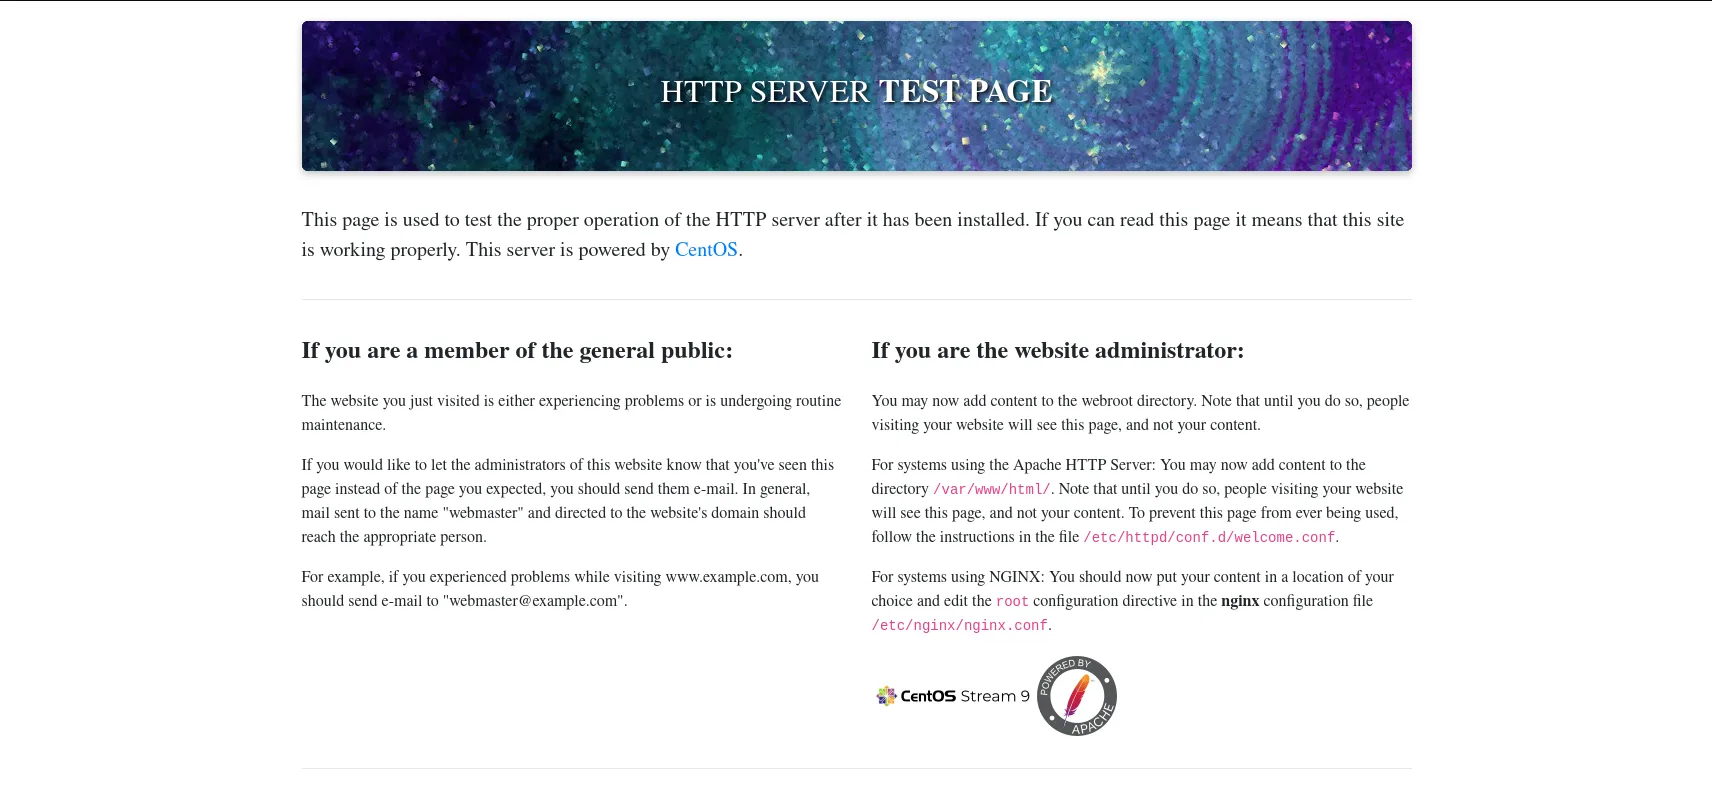
Photo by admingeek from Infotechys
Now, let’s configure our website to use SSL, thereby enabling HTTPS. Create the following two directories:
$ sudo mkdir -p /etc/httpd/{sites-available,sites-enabled}
Next, create a virtual host to use SSL. We are using test-srv1 for this example.
$ sudo mkdir -p /var/www/html/test-srv1; sudo mkdir -p /var/log/httpd/test-srv1
Then, using your preferred text editor, create a file called test-srv1.conf (or your preferred name) under the /etc/httpd/sites-available directory.
$ sudo vim /etc/httpd/sites-available/test-srv1.conf
Copy and paste the following into the test-srv1.conf. Then, save and close the file.
					<VirtualHost *:443>
    ServerName test-srv1.naijalabs.net
    ServerAlias www.test-srv1.naijalabs.net
    DocumentRoot /var/www/html/test-srv1

    ErrorLog /var/log/httpd/test-srv1/test-srv1_error.log
    CustomLog /var/log/httpd/test-srv1/test-srv1_access.log combined

    SSLEngine on
    SSLCertificateFile /etc/pki/tls/certs/localhost.crt
    SSLCertificateKeyFile /etc/pki/tls/private/localhost.key

    # Additional SSL Protocols added to enchance security
    SSLProtocol all -SSLv2 -SSLv3 -TLSv1 -TLSv1.1
    SSLCipherSuite EECDH+AESGCM:EDH+AESGCM:AES256+EECDH:AES256+EDH
    SSLHonorCipherOrder on

    <Directory /var/www/html/test-srv1>
        Options FollowSymLinks
        AllowOverride All
        Require all granted
    </Directory>
</VirtualHost>
Next, we need to edit the httpd.conf file to make it aware of the sites-enabled directory. To accomplish this, open /etc/httpd/conf/httpd.conf and add the following line to the bottom of the file (then, save and close the file):
IncludeOptional sites-enabled/*.conf
Then, create a symbolic link between the sites-available and sites-enabled directories to ensure that Apache (httpd service) is aware of the new config file.
$ sudo ln -s /etc/httpd/sites-available/test-srv1.conf /etc/httpd/sites-enabled/test-srv1.conf
Let’s enable port 443 to allow HTTPS traffic.
$ sudo firewall-cmd --permanent --add-port=443/tcp; sudo firewall-cmd --reload
Additionally, disable port 80 to block HTTP traffic.
$ sudo firewall-cmd --permanent --remove-port=80/tcp; sudo firewall-cmd --reload
Now, for the moment of truth! Restart the httpd service.
$ sudo systemctl restart httpd
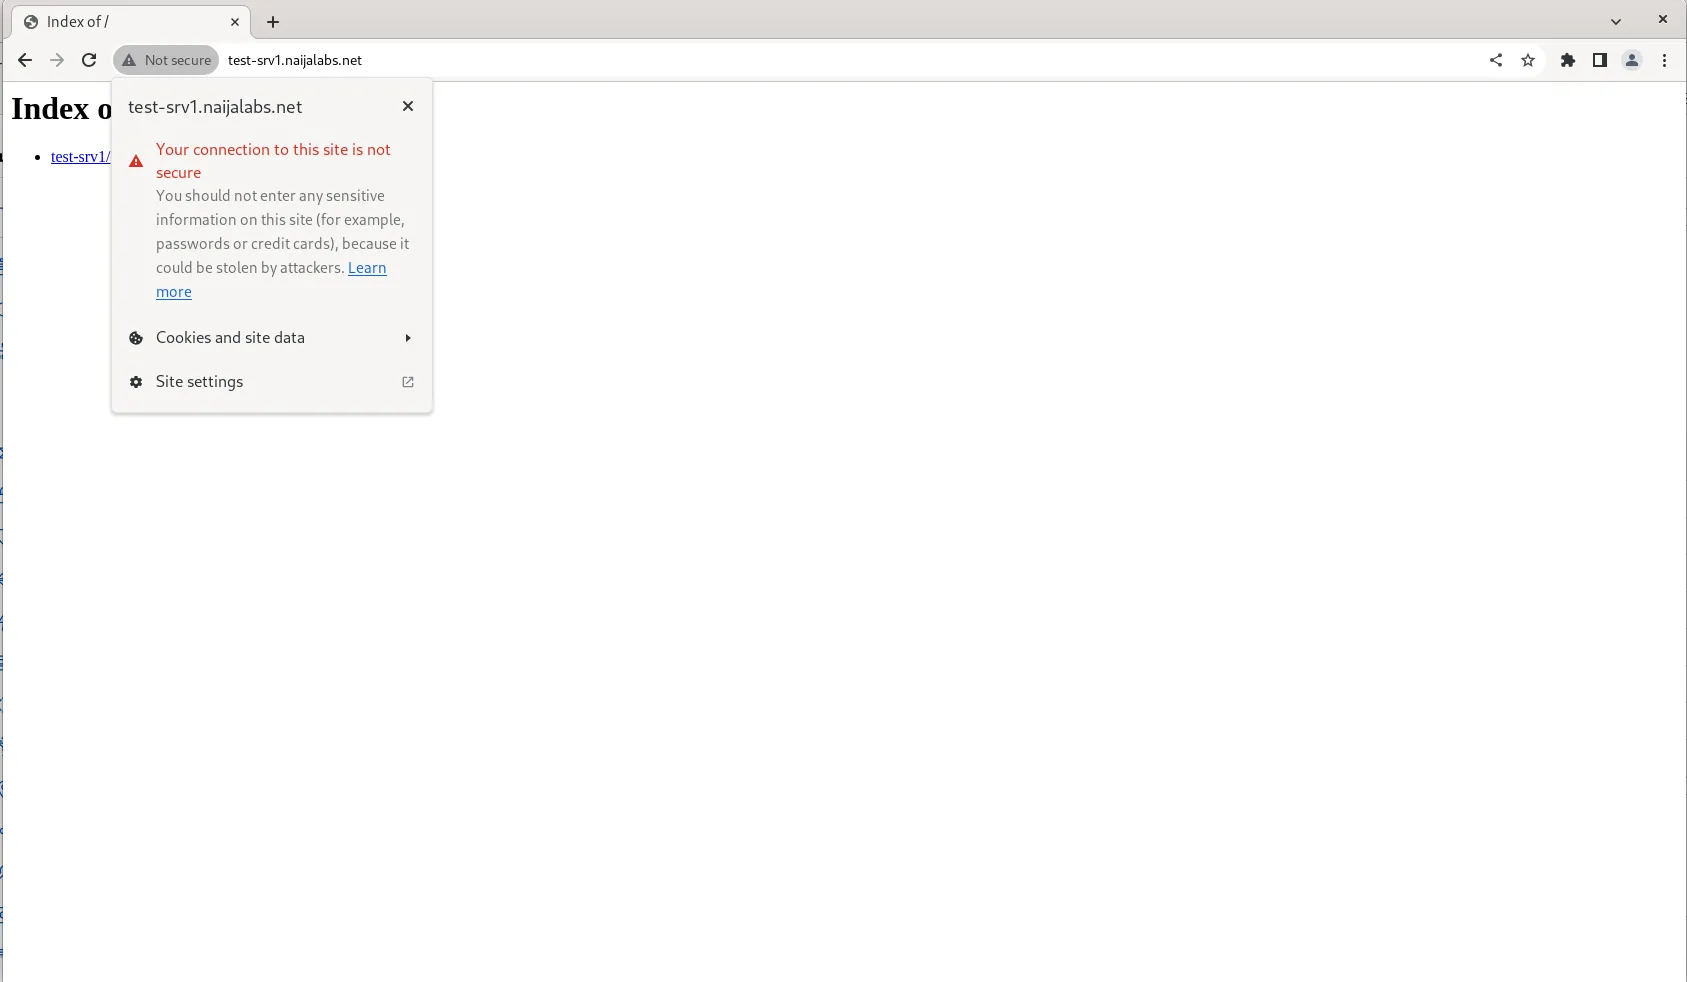
Photo by admingeek from Infotechys
Congrats! We’ve successfully configured our web server for HTTPS. However, this connection isn’t secure as we’re utilizing default certificates located at /etc/pki/tls/certs/localhost.crt and /etc/pki/tls/private/localhost.key for our certificate and private key, respectively.
Before proceeding, it’s crucial to acknowledge that if you plan to make your website publicly accessible, using a self-signed certificate is not advisable. Instead, consider consulting one of the numerous certificate authorities available or utilizing Let’s Encrypt for a more secure solution.
Begin by creating a directory (as the root user) to work from and navigate to it:
# mkdir -p newcerts; cd newcerts
Next, generate a private key. This will serve as the root certificate authority (CA).
# openssl genrsa -out root-ca.key 4096
Let’s simplify this process by creating a configuration file that includes all the necessary details for generating our Root CA certificate. Open your preferred text editor and create a new file named root-ca.cnf.
# vim root-ca.cnf
Then, copy and paste the following content into that file:
					[req]
default_bits = 4096
prompt = no
default_md = sha256
distinguished_name = dn

[dn]
countryName = YOUR_COUNTRY_CODE (2 LETTER CODE)
stateOrProvinceName = YOUR_STATE
localityName = YOUR_LOCALITY
organizationName = YOUR_ORGANIZATION_NAME
organizationalUnitName = YOUR_UNIT_NAME
commonName = Root CA
emailAddress = YOUR_EMAIL_ADDRESS

[v3_root_ca]
basicConstraints = critical, CA:TRUE
keyUsage = critical, keyCertSign, cRLSign
subjectKeyIdentifier = hash
authorityKeyIdentifier = keyid:always
Modify the config file to suit your environment. Here’s an example of our root CA configuration file:
					[req]
default_bits = 4096
prompt = no
default_md = sha256
distinguished_name = dn

[dn]
countryName = US
stateOrProvinceName = Maryland
localityName = Laurel
organizationName = Internal Certificate Authority
commonName = Root CA Internal

[v3_root_ca]
basicConstraints = critical, CA:TRUE
keyUsage = critical, keyCertSign, cRLSign
subjectKeyIdentifier = hash
authorityKeyIdentifier = keyid:always
Use the root CA private key and the configuration file to generate the root CA certificate:
# openssl req -x509 -new -nodes -sha256 -days 3650 -config root-ca.cnf -keyout root-ca.key -out root-ca.crt -extensions v3_root_ca
Now, generate an intermediate key.
# openssl genrsa -out intermediate-ca.key 2048
Let’s create a configuration file to simplify the process of generating the intermediate certificate. Copy and paste the following content (below) to your intermediate.cnf file.
					[ ca ]
# man ca
# Used by the ca command
default_ca		= CA_default

[CA_default]
dir             = /root/newcerts
database        = $dir/index.txt
new_certs_dir   = $dir/signed_certs
certificate      = $dir/intermediate-ca.crt
private_key     = $dir/intermediate-ca.key
serial          = $dir/serial
default_md      = sha256
default_days    = 365
policy	    	= policy_strict

[policy_strict]
countryName		    	= supplied
stateOrProvinceName		= supplied
organizationName		= supplied
organizationalUnitName	= supplied
commonName		    	= supplied
emailAddress			= optional

[req]
default_bits = 2048
prompt = no
default_md = sha256
distinguished_name = dn

[dn]
countryName = US
stateOrProvinceName = Maryland
localityName = Laurel
organizationName = Internal Certificate Authority
commonName = Intermediate CA Internal

[v3_intermediate_ca]
basicConstraints = CA:TRUE
subjectKeyIdentifier = hash
authorityKeyIdentifier = keyid:always,issuer

[key_usage]
keyUsage = cRLSign, keyCertSign

[extended_key_usage]
extendedKeyUsage = serverAuth, clientAuth
We added a few more lines of entry to the intermediate configuration because we will later use it to sign our server certificate.
Generate an intermediate certificate signing request (CSR) using its corresponding key and configuration file.
# openssl req -new -sha256 -key intermediate-ca.key -out intermediate-ca.csr -config intermediate.cnf
To sign the intermediate CA certificate with the root CA, run the following:
# openssl x509 -req -days 1825 -in intermediate-ca.csr -CA root-ca.crt -CAkey root-ca.key -set_serial 01 -out intermediate-ca.crt -extfile intermediate.cnf -extensions v3_intermediate_ca
					Certificate request self-signature ok
subject=C = US, ST = Maryland, L = Laurel, O = Internal Certificate Authority, CN = Intermediate CA Internal
Breaking down the command |
|
|
|
|
|
|
|
|
|
|
Execute the following command to check the certificate and confirm that everything functions as anticipated:
# openssl x509 -in intermediate-ca.crt -text
					Certificate:
    Data:
        Version: 3 (0x2)
        Serial Number: 1 (0x1)
        Signature Algorithm: sha256WithRSAEncryption
        Issuer: C = US, ST = Maryland, L = Laurel, O = Internal Certificate Authority, CN = Root CA Internal
        Validity
            Not Before: Mar  5 03:15:25 2024 GMT
            Not After : Mar  4 03:15:25 2029 GMT
        Subject: C = US, ST = Maryland, L = Laurel, O = Internal Certificate Authority, CN = Intermediate CA Internal
        Subject Public Key Info:
            Public Key Algorithm: rsaEncryption
                Public-Key: (2048 bit)
                Modulus:
                    00:b1:13:72:e2:82:22:e6:00:fb:0f:0b:ab:2d:e2:
                    9c:6b:26:ef:ec:c6:74:53:0e:ec:fb:f8:da:f3:e7:
                    84:d8:c1:40:33:12:2c:15:c1:4b:fe:9d:8b:63:d4:
                    24:d0:62:cc:37:dd:5c:5e:a6:cb:33:3d:a1:0d:c5:
                    1f:a2:fe:4d:b7:09:11:0d:a4:48:29:fc:e7:6b:f2:
                    bd:37:17:f0:c0:9b:93:bb:a2:7f:07:b4:4f:b7:df:
                    60:26:7a:1c:5b:c7:d8:4d:1e:bb:dd:3b:02:d7:9a:
                    bc:26:5b:95:d4:97:9f:6f:bb:3e:26:d4:64:be:9e:
                    e7:1f:a6:74:3d:2d:72:f9:eb:2e:8a:b0:7c:21:76:
                    f3:8e:81:ec:d3:d0:20:22:72:1c:39:82:90:61:60:
                    3f:75:e8:25:fd:bf:ee:36:85:d4:91:5f:75:c2:9c:
                    47:ec:a1:34:2f:b5:15:da:d1:21:c3:2f:c0:ec:86:
                    a9:b1:b8:51:be:62:23:43:db:db:36:8b:8d:3e:4c:
                    89:df:2e:8f:80:2d:75:2d:cf:4f:62:a7:d1:25:c1:
                    90:73:35:58:38:0e:4b:4b:51:14:e7:ca:49:94:8d:
                    ec:8f:7c:4b:10:49:29:7e:65:80:c3:88:fc:d2:84:
                    a8:a5:8d:80:5f:d5:66:2d:65:bc:c5:99:c3:5d:fa:
                    dd:39
                Exponent: 65537 (0x10001)
        X509v3 extensions:
            X509v3 Basic Constraints:
                CA:TRUE
... output omitted for brevity ...
Similarly, you can verify a CSR by executing the following command. If any errors occur, repeat the process. It’s crucial to ensure accuracy for secure HTTPS sessions.
# openssl req -text -noout -verify -in intermediate-ca.csr
					Certificate request self-signature verify OK
Certificate Request:
    Data:
        Version: 1 (0x0)
        Subject: C = US, ST = Maryland, L = Laurel, O = Internal Certificate Authority, CN = Intermediate CA Internal
        Subject Public Key Info:
            Public Key Algorithm: rsaEncryption
                Public-Key: (2048 bit)
                Modulus:
                    00:b1:13:72:e2:82:22:e6:00:fb:0f:0b:ab:2d:e2:
                    9c:6b:26:ef:ec:c6:74:53:0e:ec:fb:f8:da:f3:e7:
                    84:d8:c1:40:33:12:2c:15:c1:4b:fe:9d:8b:63:d4:
                    24:d0:62:cc:37:dd:5c:5e:a6:cb:33:3d:a1:0d:c5:
                    1f:a2:fe:4d:b7:09:11:0d:a4:48:29:fc:e7:6b:f2:
                    bd:37:17:f0:c0:9b:93:bb:a2:7f:07:b4:4f:b7:df:
                    60:26:7a:1c:5b:c7:d8:4d:1e:bb:dd:3b:02:d7:9a:
                    bc:26:5b:95:d4:97:9f:6f:bb:3e:26:d4:64:be:9e:
                    e7:1f:a6:74:3d:2d:72:f9:eb:2e:8a:b0:7c:21:76:
                    f3:8e:81:ec:d3:d0:20:22:72:1c:39:82:90:61:60:
                    3f:75:e8:25:fd:bf:ee:36:85:d4:91:5f:75:c2:9c:
                    47:ec:a1:34:2f:b5:15:da:d1:21:c3:2f:c0:ec:86:
                    a9:b1:b8:51:be:62:23:43:db:db:36:8b:8d:3e:4c:
                    89:df:2e:8f:80:2d:75:2d:cf:4f:62:a7:d1:25:c1:
                    90:73:35:58:38:0e:4b:4b:51:14:e7:ca:49:94:8d:
                    ec:8f:7c:4b:10:49:29:7e:65:80:c3:88:fc:d2:84:
                    a8:a5:8d:80:5f:d5:66:2d:65:bc:c5:99:c3:5d:fa:
                    dd:39
                Exponent: 65537 (0x10001)
        Attributes:
            (none)
            Requested Extensions:
    Signature Algorithm: sha256WithRSAEncryption
... output omitted for brevity ...
Now that we have obtained our Root CA and Intermediate (or Sub CA) certificates, we can proceed with generating the self-signed certificate for our web server. However, before we proceed, let’s create the following files and directories under our /root/newcerts directory:
# mkdir -p signed_certs
# touch index.txt serial
Then, run the following command to append the serial file with a random hexadecimal number.
# openssl rand -hex 16 > serial
					# cat serial
94f6019685db8196059bc7a334d7a07a
When a new certificate is issued, OpenSSL reads the serial number from this file, increments it, and then uses the incremented value as the serial number for the new certificate. This ensures that each certificate issued by the CA has a unique serial number.
Run the following command to generate a private key for the web server:
# openssl genrsa -out test-srv1.naijalabs.net.key 2048
Copy and paste the following content below to a file called test-srv1.cnf:
					[req]
default_bits = 2048
prompt = no
default_md = sha256
distinguished_name = dn

[dn]
countryName = YOUR_COUNTRY_CODE
stateOrProvinceName = YOUR_STATE
localityName = YOUR_LOCALITY
organizationName = YOUR_ORGANIZATION_NAME
organizationalUnitName = YOUR_UNIT_NAME
commonName = test-srv1.naijalabs.net
emailAddress = YOUR_EMAIL_ADDRESS

[req_extensions]
subjectAltName = @alt_names

[alt_names]
DNS.1 = test-srv1.naijalabs.net
Make sure to replace the placeholders (YOUR_COUNTRY_CODE, YOUR_STATE, YOUR_LOCALITY, YOUR_ORGANIZATION_NAME, YOUR_UNIT_NAME, YOUR_EMAIL_ADDRESS) with the appropriate values for your organization and the domain name of your web server. Then, save and close the file (our example of the test-srv1.cnf file is displayed below).
					[req]
default_bits = 2048
prompt = no
default_md = sha256
distinguished_name = dn

[dn]
countryName = US
stateOrProvinceName = Maryland
localityName = Laurel
organizationName = Test Web Server Instance
organizationalUnitName = Testing
commonName = test-srv1.naijalabs.net
emailAddress = info@test-srv1.naijalabs.net

[req_extensions]
subjectAltName = @alt_names

[alt_names]
DNS.1 = test-srv1.naijalabs.net
test-srv1.cnf file.
# openssl req -new -sha256 -key test-srv1.naijalabs.net.key -out test-srv1.naijalabs.net.csr -config test-srv1.cnf
Now, let’s generate a self-signed certificate by executing the following command:
# openssl ca -config intermediate.cnf -notext -in test-srv1.naijalabs.net.csr -out test-srv1.naijalabs.net.crt -extensions req_extensions -extfile test-srv1.cnf
					Using configuration from intermediate.cnf
Check that the request matches the signature
Signature ok
The Subject's Distinguished Name is as follows
countryName           :PRINTABLE:'US'
stateOrProvinceName   :ASN.1 12:'Maryland'
localityName          :ASN.1 12:'Laurel'
organizationName      :ASN.1 12:'Test Web Server Instance'
organizationalUnitName:ASN.1 12:'Testing'
commonName            :ASN.1 12:'test-srv1.naijalabs.net'
emailAddress          :IA5STRING:'info@test-srv1.naijalabs.net'
Certificate is to be certified until Mar  5 06:22:26 2025 GMT (365 days)
Sign the certificate? [y/n]:y
In this scenario, we’re utilizing the intermediate CA to sign the certificate for test-srv1.naijalabs.net. The certificate is valid for 365 days, approximately a year. Once implemented correctly, it will ensure the security of our web server’s HTTPS sessions. Press the ‘y’ key for yes and the Enter key to continue.
1 out of 1 certificate requests certified, commit? [y/n]y
Again, repeat the same response and hit the Enter key to continue.
					Write out database with 1 new entries
Data Base Updated
💡Notice that a new file has been generated under the /root/newcerts/signed_certs directory. |
Copy the newly generated files to their appropriate locations replacing or overwriting the existing localhost.crt and localhost.key with your .pem and test-srv1.naijalabs.net.key files respectively. The serial number associated with the .pem is randomly-generated–so replace it with your actual .pem file.
# cp /root/newcerts/test-srv1.naijalabs.net.key /etc/pki/tls/private/localhost.key
# cp /root/newcerts/signed_certs/94F6019685DB8196059BC7A334D7A07A.pem /etc/pki/tls/certs/localhost.crt
Once more, restart the httpd.service to apply the changes:
# systemctl restart httpd
Essentially, the CA bundle consists of the root-ca.crt and intermediate-ca.crt files merged together into one file. We’ll call this file fullchain.pem:
					# cat /root/newcerts/root-ca.crt > fullchain.pem
# cat /root/newcerts/intermediate-ca.crt >> fullchain.pem
Make sure to save fullchain.pem or copy it to a location where you can easily access it for uploading.
Even with our newly signed certificate, our web server remains insecure. This occurs because our browser (e.g., Google Chrome or Chromium in this example) lacks awareness of the local CA we’ve created for signing certificates. To address this issue, input the following into your browser’s URL bar: chrome://settings/certificates
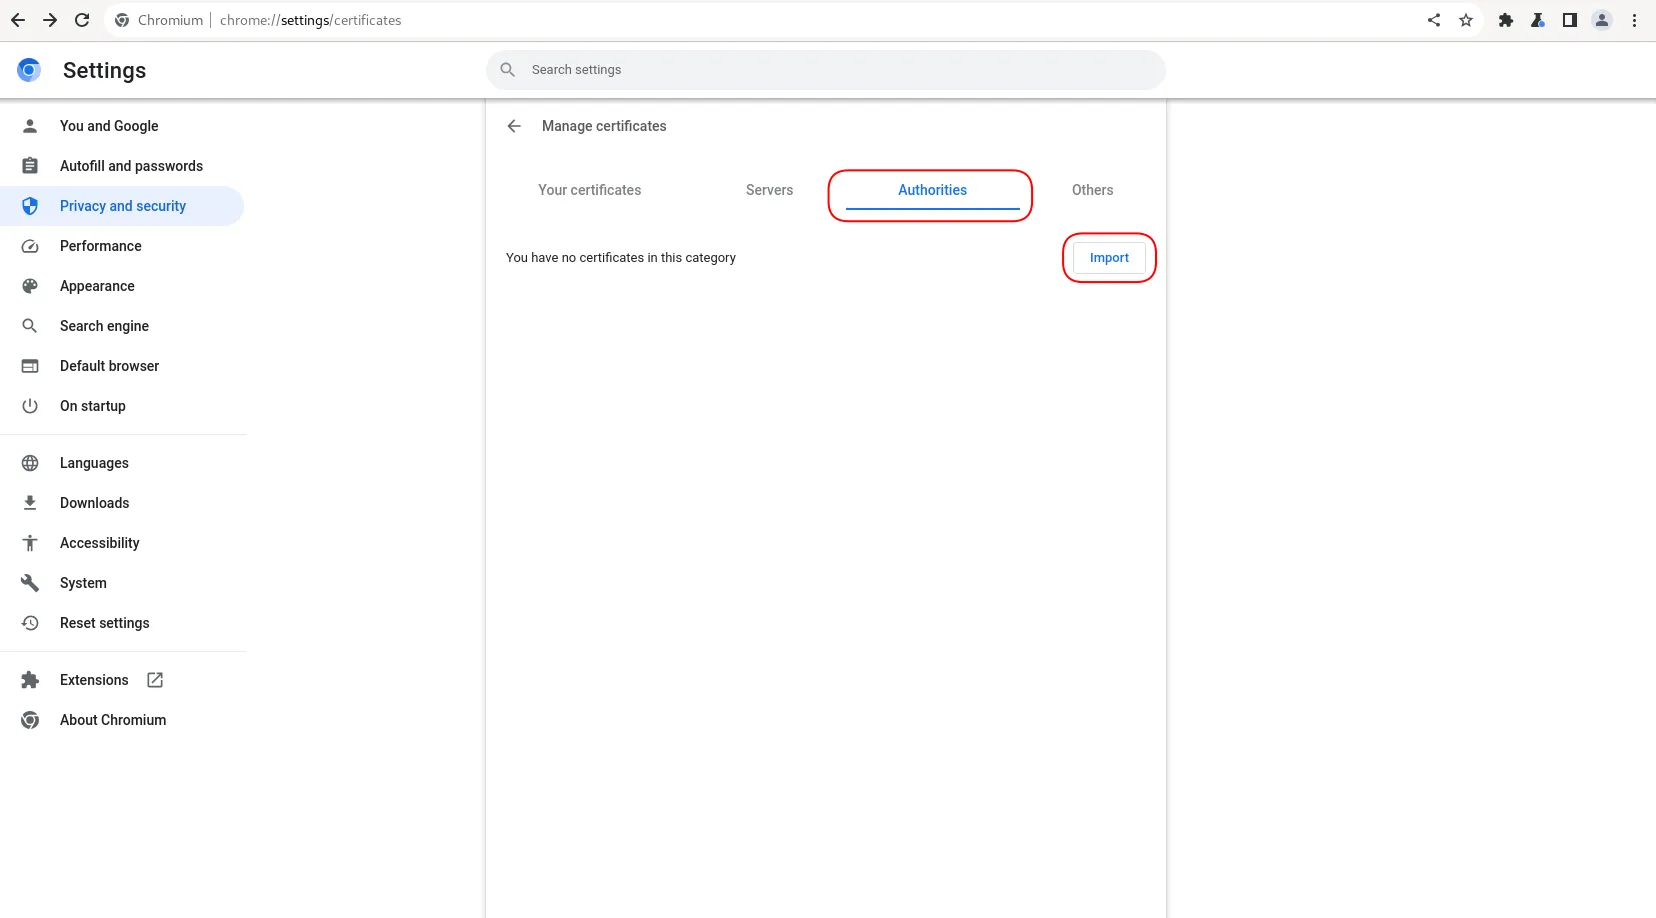
Photo by admingeek from Infotechys
This will load the Manage Certificates page. Navigate to the Authorities tab and click the Import button (circled in red).

Photo by admingeek from Infotechys
Navigate to the location of your fullchain.pem file and click the select button.
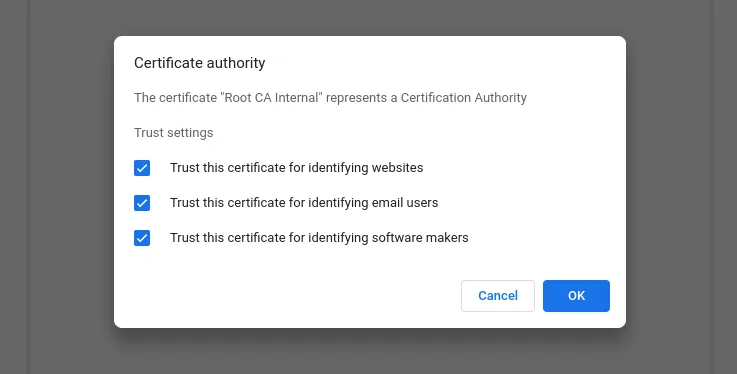
Photo by admingeek from Infotechys
Check all the boxes and click the OK button to continue.
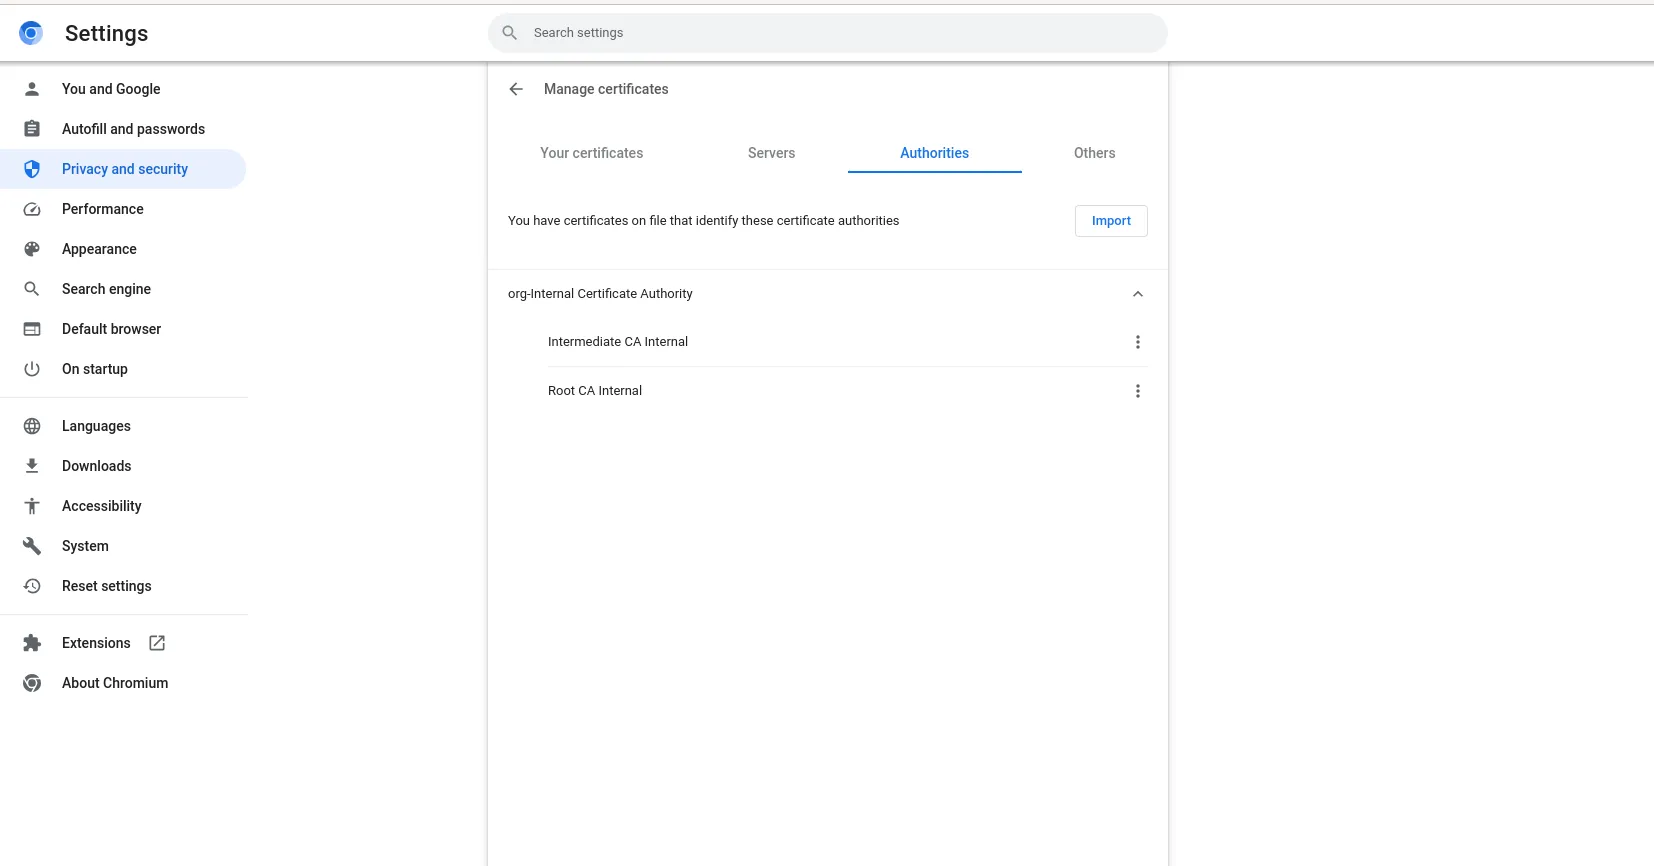
Photo by admingeek from Infotechys
You should now see the local Root CA represented on the Manage Certificates page. Finally, refresh your browser with the URL https://test-srv1.naijalabs.net.
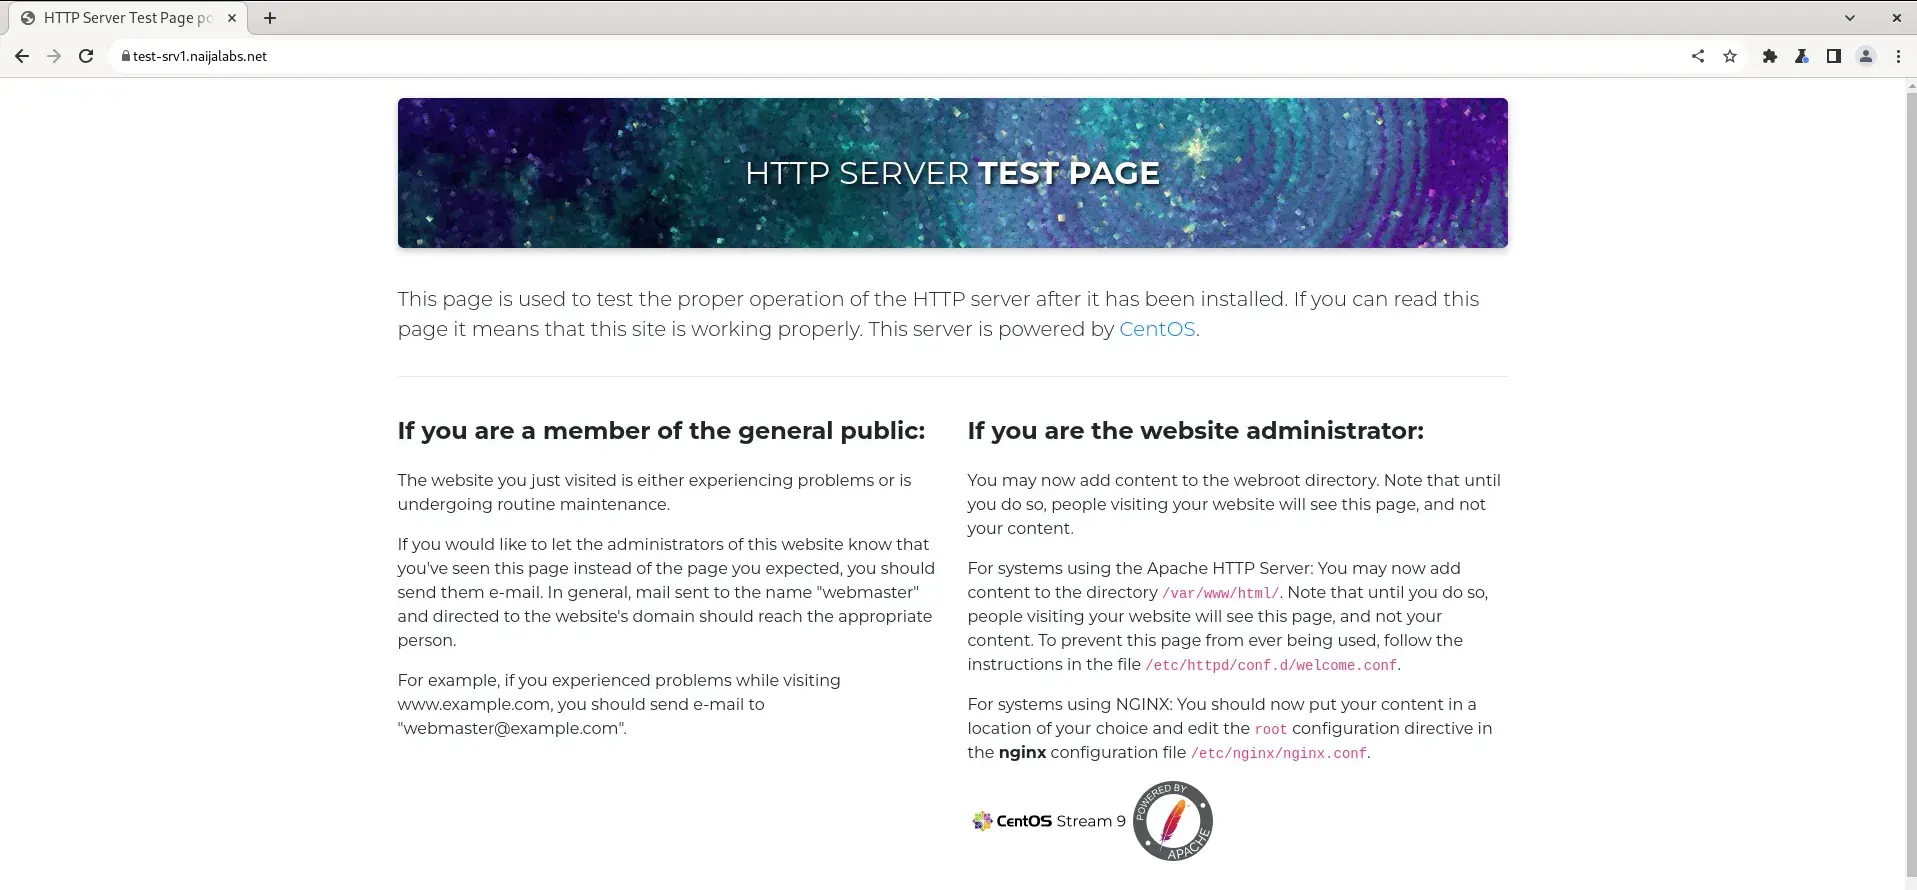
Photo by admingeek from Infotechys
Well done! You’ve successfully completed this tutorial and now have a functioning and secure HTTPS website!
Implementing SSL/TLS encryption on web servers running on RHEL 9 or CentOS 9 is essential for enhancing security and ensuring the integrity of data transmitted over the internet. By encrypting communication between the server and clients, SSL/TLS mitigates the risk of data interception and tampering, safeguarding sensitive information such as login credentials, personal details, and financial transactions.
Throughout this article, we’ve explored the step-by-step process of configuring SSL/TLS certificates, starting from the creation of a Root CA to signing certificates for web servers using Intermediate CAs. We’ve discussed the importance of generating Certificate Signing Requests (CSRs), obtaining certificates from trusted authorities or self-signing them, and configuring web servers to utilize SSL/TLS protocols.
Did you find this article helpful? Your feedback is invaluable to us! Feel free to share this post with those who may benefit, and let us know your thoughts in the comments section below.
Related Posts
In this guide, we’ll walk you through the process of setting up a Caddy server using Podman, empowering you to host your websites with confidence.

Looking to establish a reliable and secure web presence? Learn how to Install Apache web server on CentOS and unlock the potential of your website
This guide examines how to setup an HTTPS server using Podman, a containerization tool, thereby fortifying a secure and streamlined hosting environment for your web