In this tutorial, we will install Nano and review basic commands for navigating the text editor. Table of Contents Introduction For the newbie Linux user,
In this article, we will review how to install VMware Workstation Player on a RHEL7 or CentOS7 Linux machine, guiding you through the installation process step by step to ensure a successful setup of the virtualization software on your Red Hat Enterprise Linux 7 or CentOS 7 system.
Whether you’re a developer, system administrator, or enthusiast looking to create and manage virtual machines, this comprehensive guide will help you leverage the capabilities of VMware Workstation Player for your Linux environment. VMware Workstation Player, formerly known as VMware Player is a free virtualization software offered by VMware, Inc. It is ideal for running a single virtual instance on a Microsoft Windows or Linux operating system.
Before we begin, this tutorial assumes you already have a CentOS7 machine running with root or sudo privileges. Also, ensure that the wget and yum-utils packages are installed.
[admin@vm1 ~]$ sudo yum -y install wget yum-utils
Using the wget command, download the latest VMware bundle version 16.2.1 for Linux–as of the date of this publication.
[admin@vm1 ~]$ sudo wget https://download3.vmware.com/software/player/file/VMware-Player-Full-16.2.1-18811642.x86_64.bundle
Next, using the chmod command, make the VMware bundle executable.
[admin@vm1 ~]$ sudo chmod u+x VMware-Player-Full-16.2.1-18811642.x86_64.bundle
Launch the VMware Player Installer. It will automatically extract, copy, and configure the necessary VMware components, networking, and application tools.
					[admin@vm1 ~]$ sudo ./VMware-Player-Full-16.2.1-18811642.x86_64.bundle
[sudo] password for admin:
Extracting VMware Installer...done.
Installing VMware Installer 3.0.0
Copying files...
Configuring...
Installing VMware Player Setup 16.2.1
Copying files...
Configuring...
Installing VMware USB Arbitrator 20.5.0
Copying files...
Configuring...
Installing VMware Network Editor 16.2.1
Copying files...
Configuring...
Installing VMware VMX 16.2.1
Copying files...
Configuring...
Installing VMware Virtual Printer 1.0
Copying files...
Configuring...
Installing VMware Tools for legacy Linux 11.3.5
Copying files...
Configuring...
Installing VMware Tools for Linux 11.3.5
Copying files...
Configuring...
Installing VMware Tools for NetWare 11.3.5
Copying files...
Configuring...
Installing VMware Tools for Solaris 11.3.5
Copying files...
Configuring...
Installing VMware Tools for Windows 95, 98, Me and NT 11.3.5
Copying files...
Configuring...
Installing VMware Tools for Windows 2000, XP and Server 2003 11.3.5
Copying files...
Configuring...
Installing VMware Tools for Windows Vista or later 11.3.5
Copying files...
Configuring...
Installing VMware Player Application 16.2.1
Copying files...
Configuring...
Installing VMware OVF Tool component for Linux 4.4.3
Copying files...
Configuring...
Installing VMware Player 16.2.1
Copying files...
Configuring...
Installation was successful.
Once the installation is complete, you can launch VMware Player by running the following command (below):
[admin@vm1 ~]$ vmplayer
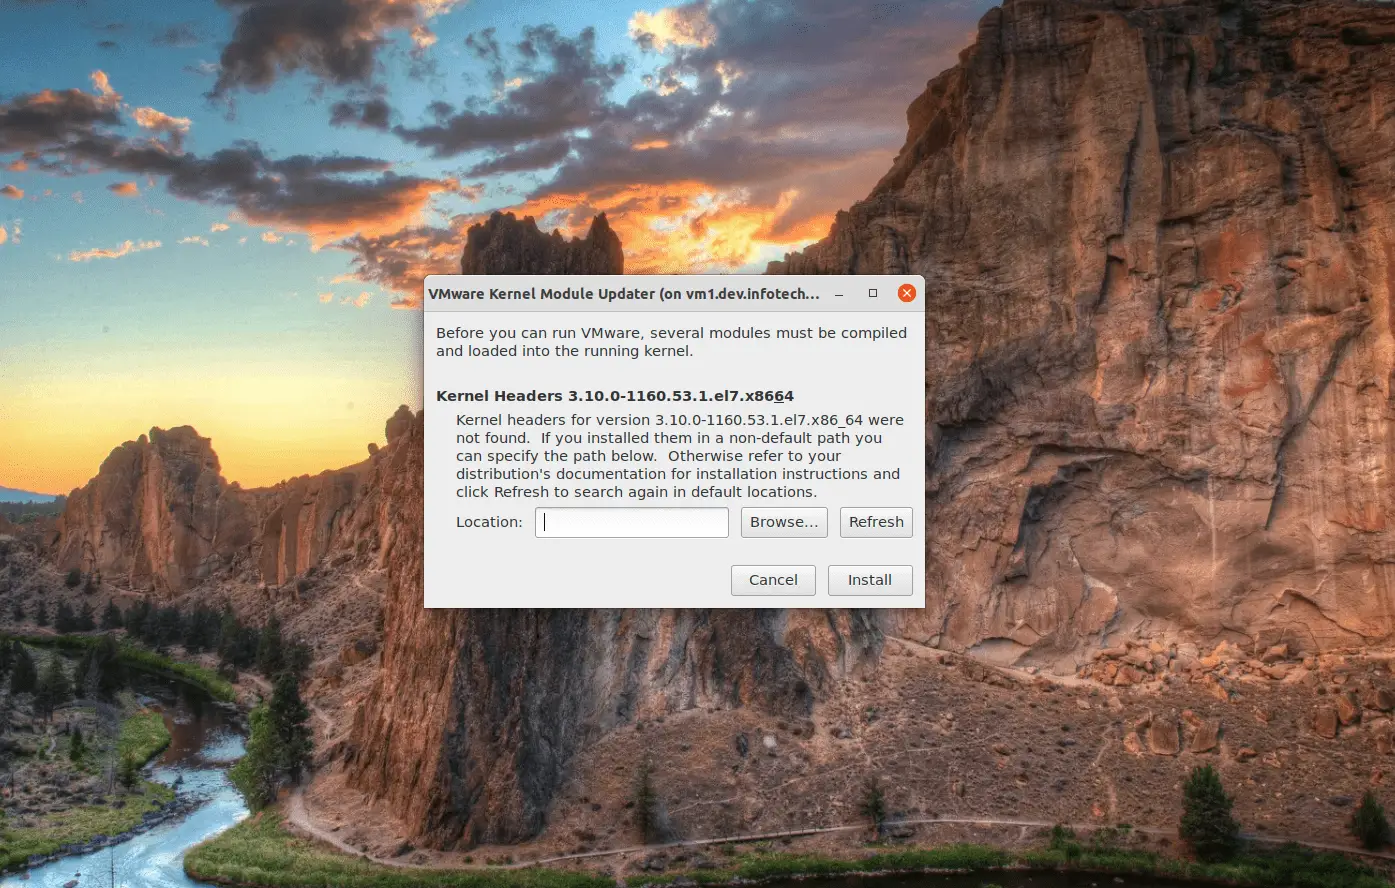
Photo by admingeek from Infotechys
You will receive a notice like this (above) indicating the latest kernel-headers were not found or installed on your machine. Install the kernel-headers and kernel-devel packages to resolve this problem. Also, install the pcsc-lite-libs package to enable smart card reader support.
[admin@vm1:~] $ sudo yum -y install kernel-headers kernel-devel pcsc-lite-libs
Reboot your machine after the installation is complete.
[admin@vm1:~] $ sudo /sbin/shutdown -r now
After rebooting your machine, launch the vmplayer again. You should see a different dialogue window (below): Click the Install button to continue.
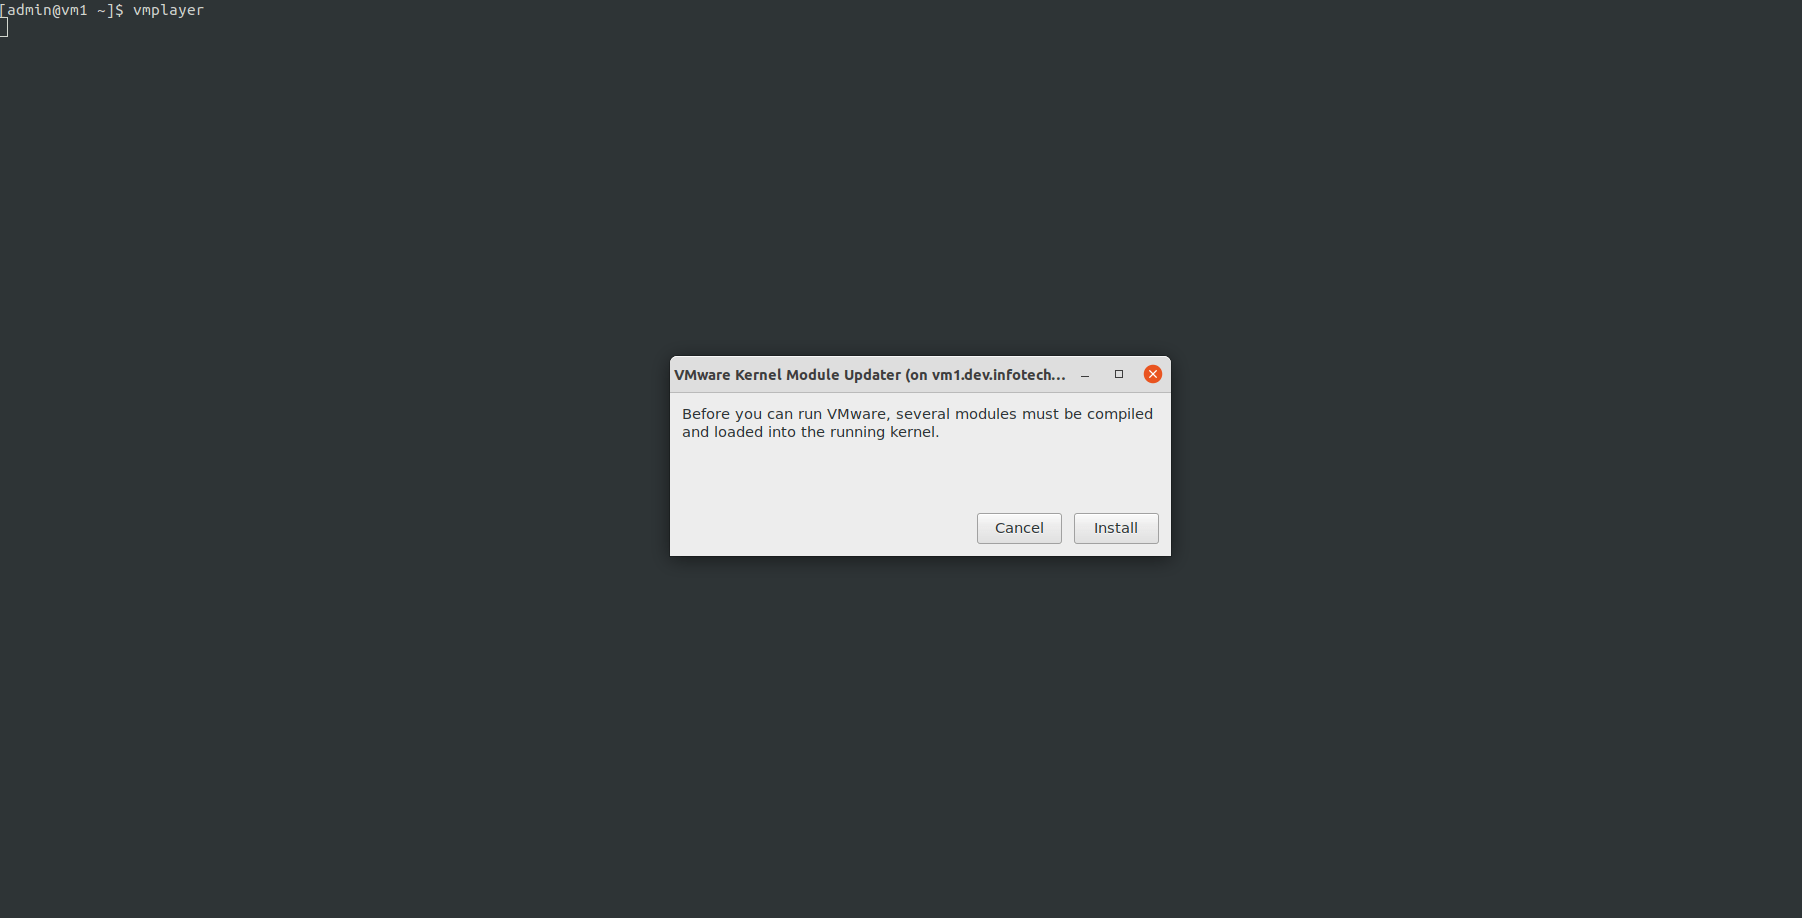
Photo by admingeek from Infotechys
Next, you will be prompted to select a user for root user authentication. Select a user from your list with root sudo privileges. In this case, we will proceed with the admin user and enter the admin password to continue.
					==== AUTHENTICATING FOR org.freedesktop.policykit.exec ===
Authentication is needed to run `/usr/bin/vmware-modconfig' as the super user
Multiple identities can be used for authentication:
1. admin
Choose identity to authenticate as (1): 1
Password:
==== AUTHENTICATION COMPLETE ===
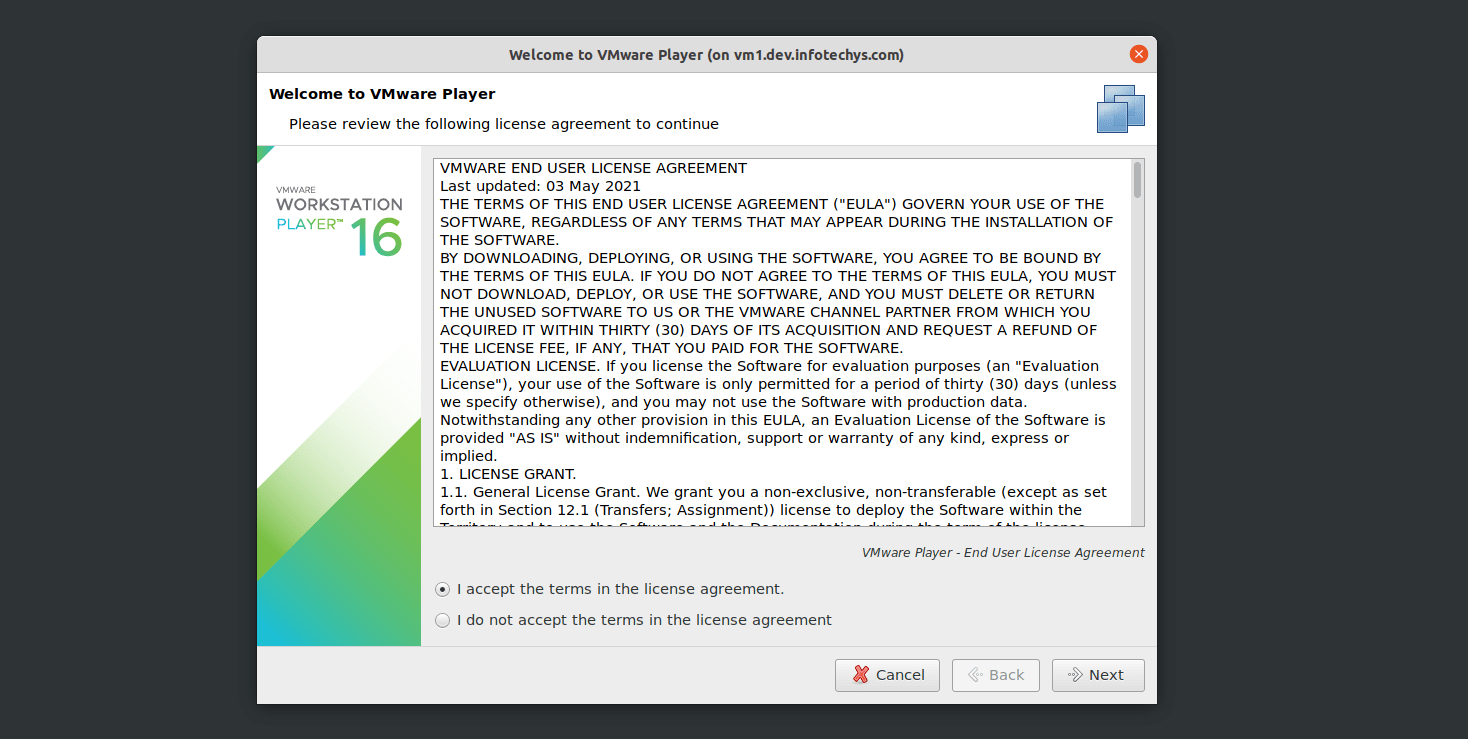
Photo by admingeek from Infotechys
After a successful authentication, you will be presented with a VMware Player End User License Agreement window (above). Accept the terms and click the Next button to continue.
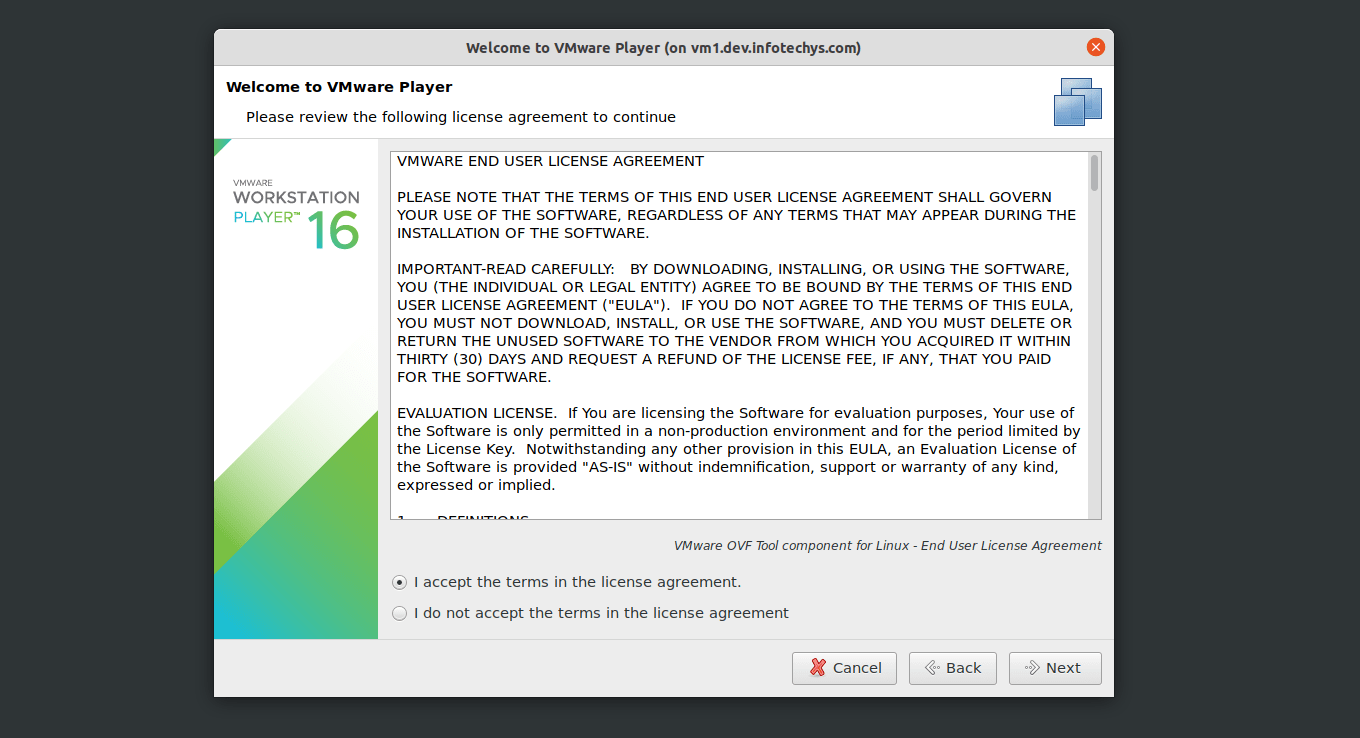
Photo by admingeek from Infotechys
Repeat the same procedure for the VMware OVF Tool component for Linux – End User License Agreement. Accept the terms and click the Next button to continue.

Photo by admingeek from Infotechys
Next, you will be presented with the option (selected by default) to check for product updates on startup. Click the Next button to continue.
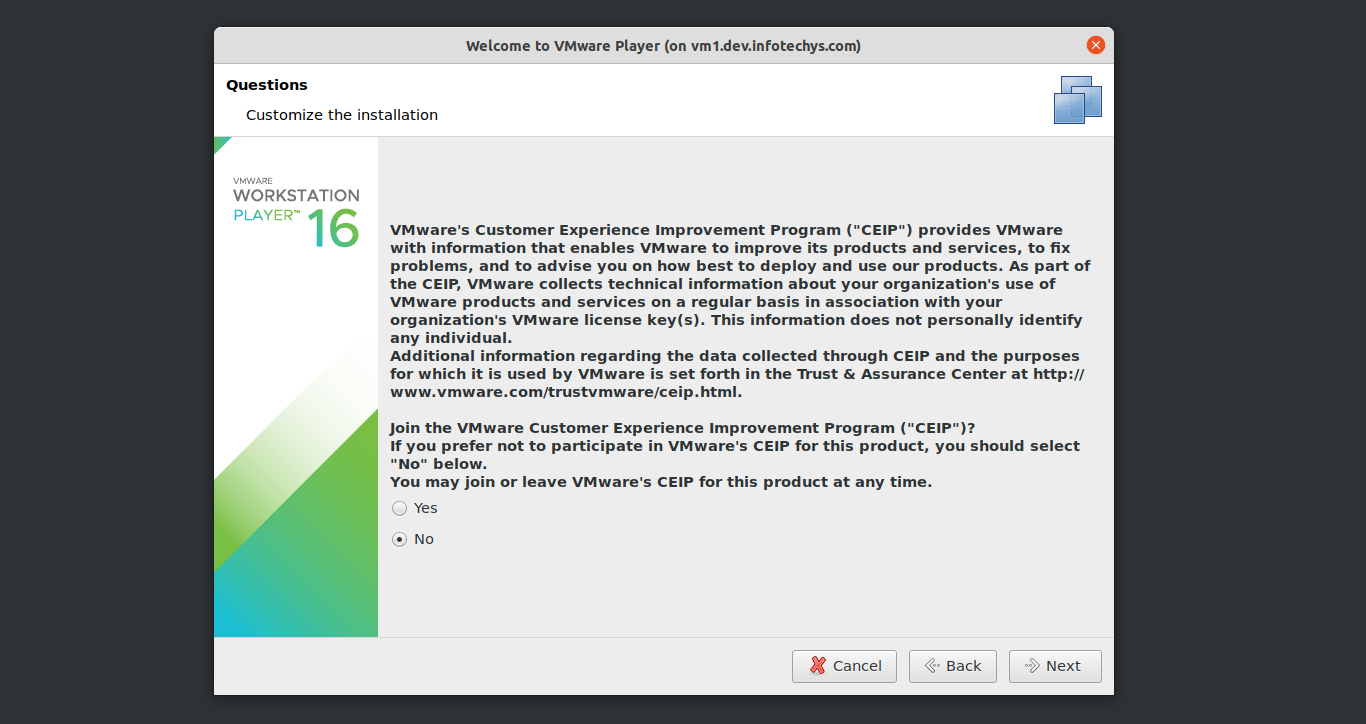
Photo by admingeek from Infotechys
Next, you will be prompted to Join the VMware Customer Experience Improvement Program (CEIP). However, this installation is for demonstration purposes only so, we will select No and click the Next button to continue.

Photo by admingeek from Infotechys
Next, you will be prompted to either Enter a License key to allow commercial use or proceed with the default option: Use VMware Player 16 for free for non-commercial use. Click the Finish button to continue with the default option.
You will be prompted to authenticate once more as the user with root privileges.
					==== AUTHENTICATING FOR org.freedesktop.policykit.exec ===
Authentication is needed to run `/usr/bin/vmware-modconfig' as the super user
Multiple identities can be used for authentication:
1. admin
Choose identity to authenticate as (1): 1
Password:
==== AUTHENTICATION COMPLETE ===
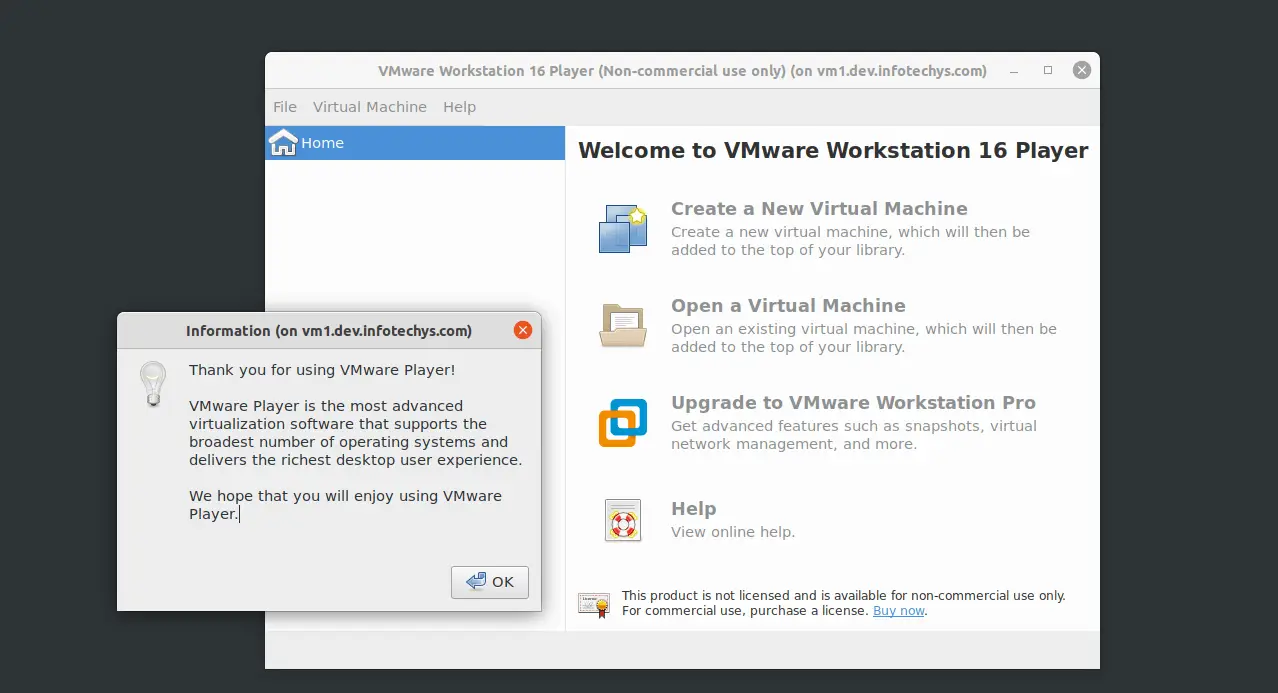
Photo by admingeek from Infotechys
Congratulations! You have successfully installed VMware Workstation Player 16. You can proceed with creating a virtual machine. Was this article helpful to you? If so, leave us a comment. We’d love to hear from you!
Related Posts

In this tutorial, we will install Nano and review basic commands for navigating the text editor. Table of Contents Introduction For the newbie Linux user,
In this article, we will review installing and using Git on Linux machines. Besides minor differences in syntax, the install commands and procedures are similar

In this article, we will review in detail how to install sublime text4 on CentOS8 or RHEL8 and also provide examples. Table of Contents Brief
