Learn how to install CentOS Stream 10 Server with GUI in just 12 easy steps. This guide provides clear instructions, CLI examples, and tips for
Learn how to install RHEL 10 Workstation in 12 easy, step‑by‑step instructions—from downloading the ISO to post‑install configuration, complete with CLI examples and practical tips.
Red Hat Enterprise Linux (RHEL) 10 Workstation is a powerful, enterprise-grade operating system tailored for developers, sysadmins, and professionals. This guide walks you through installing RHEL 10 Workstation in 12 clear, beginner-friendly steps—from downloading the ISO to installing packages and configuring your first user. Whether you’re new to Linux or migrating from RHEL 9, this tutorial ensures you’re up and running smoothly.
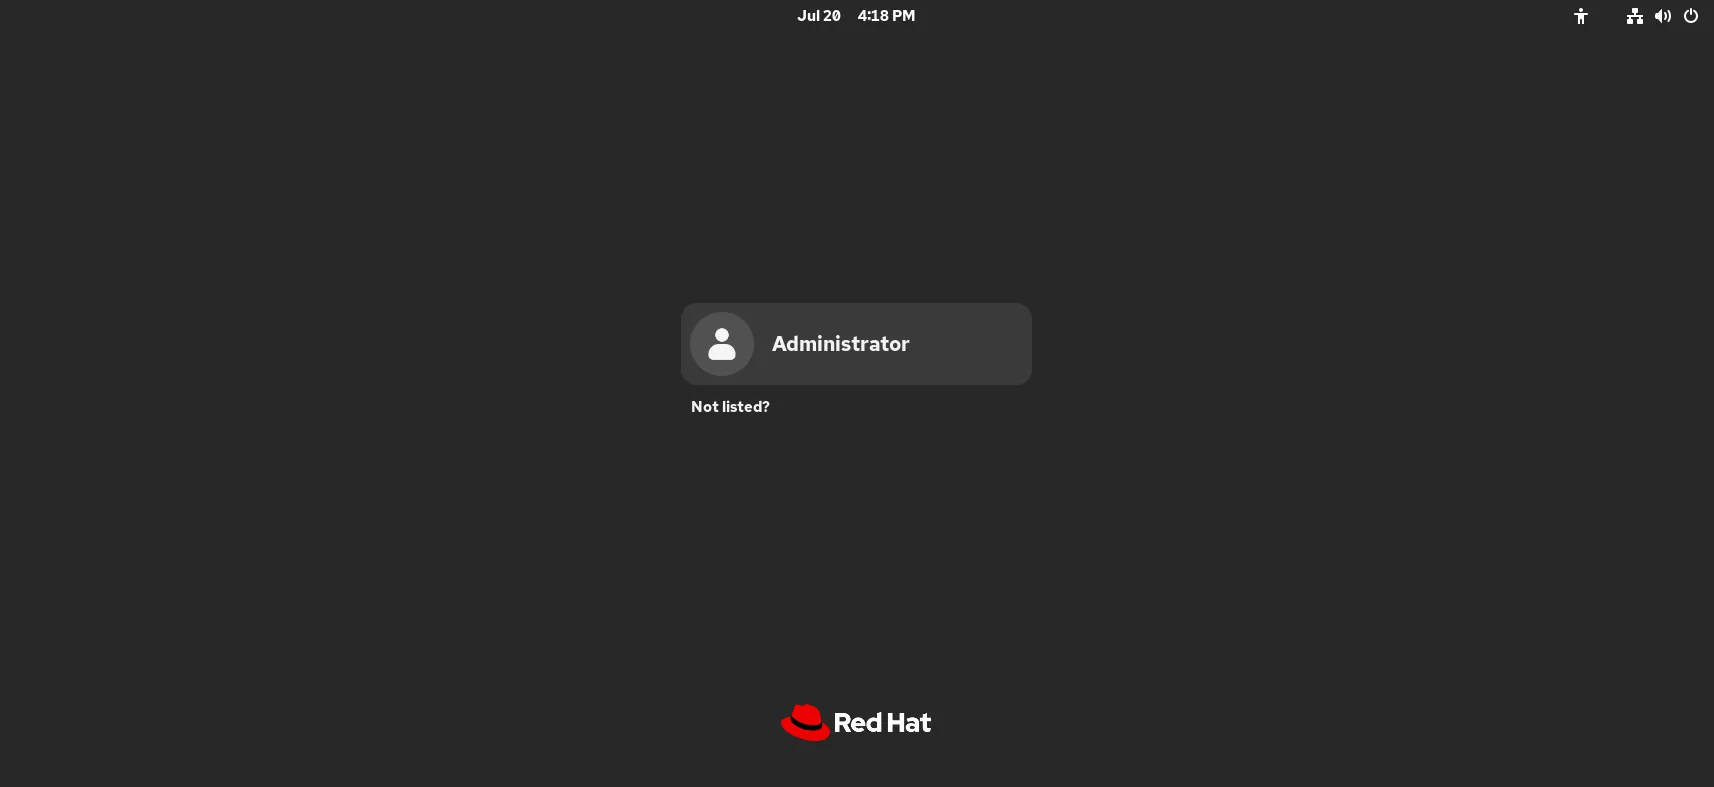
Photo by admingeek from Infotechys
🔹1. Download the RHEL 10 DVD ISO |
Go to the official Red Hat Customer Portal and download the RHEL 10 Workstation DVD ISO. If you don’t have an account, you can register for free. You should see a file named something like rhel-10.0-x86_64-dvd.iso.
💡Tip: Always verify the checksum to ensure the ISO integrity. |
					sha256sum rhel-10.0-x86_64-dvd.iso
# compare with the published SHA‑256 checksum
🔹2. Create a Bootable USB or Mount the ISO |
sudo dd if=rhel‑10…iso of=/dev/sdX bs=4M status=progress oflag=sync
Replace /dev/sdX with your USB device. Or, you can burn a DVD or use virtualization (e.g., virt-manager, VirtualBox) and mount the ISO directly.
🔹3. Boot from Installation Media |
Insert your USB stick (or connect your DVD) and restart your machine. Enter BIOS/UEFI and choose the USB/DVD as the boot device. The RHEL installer welcome screen should appear.
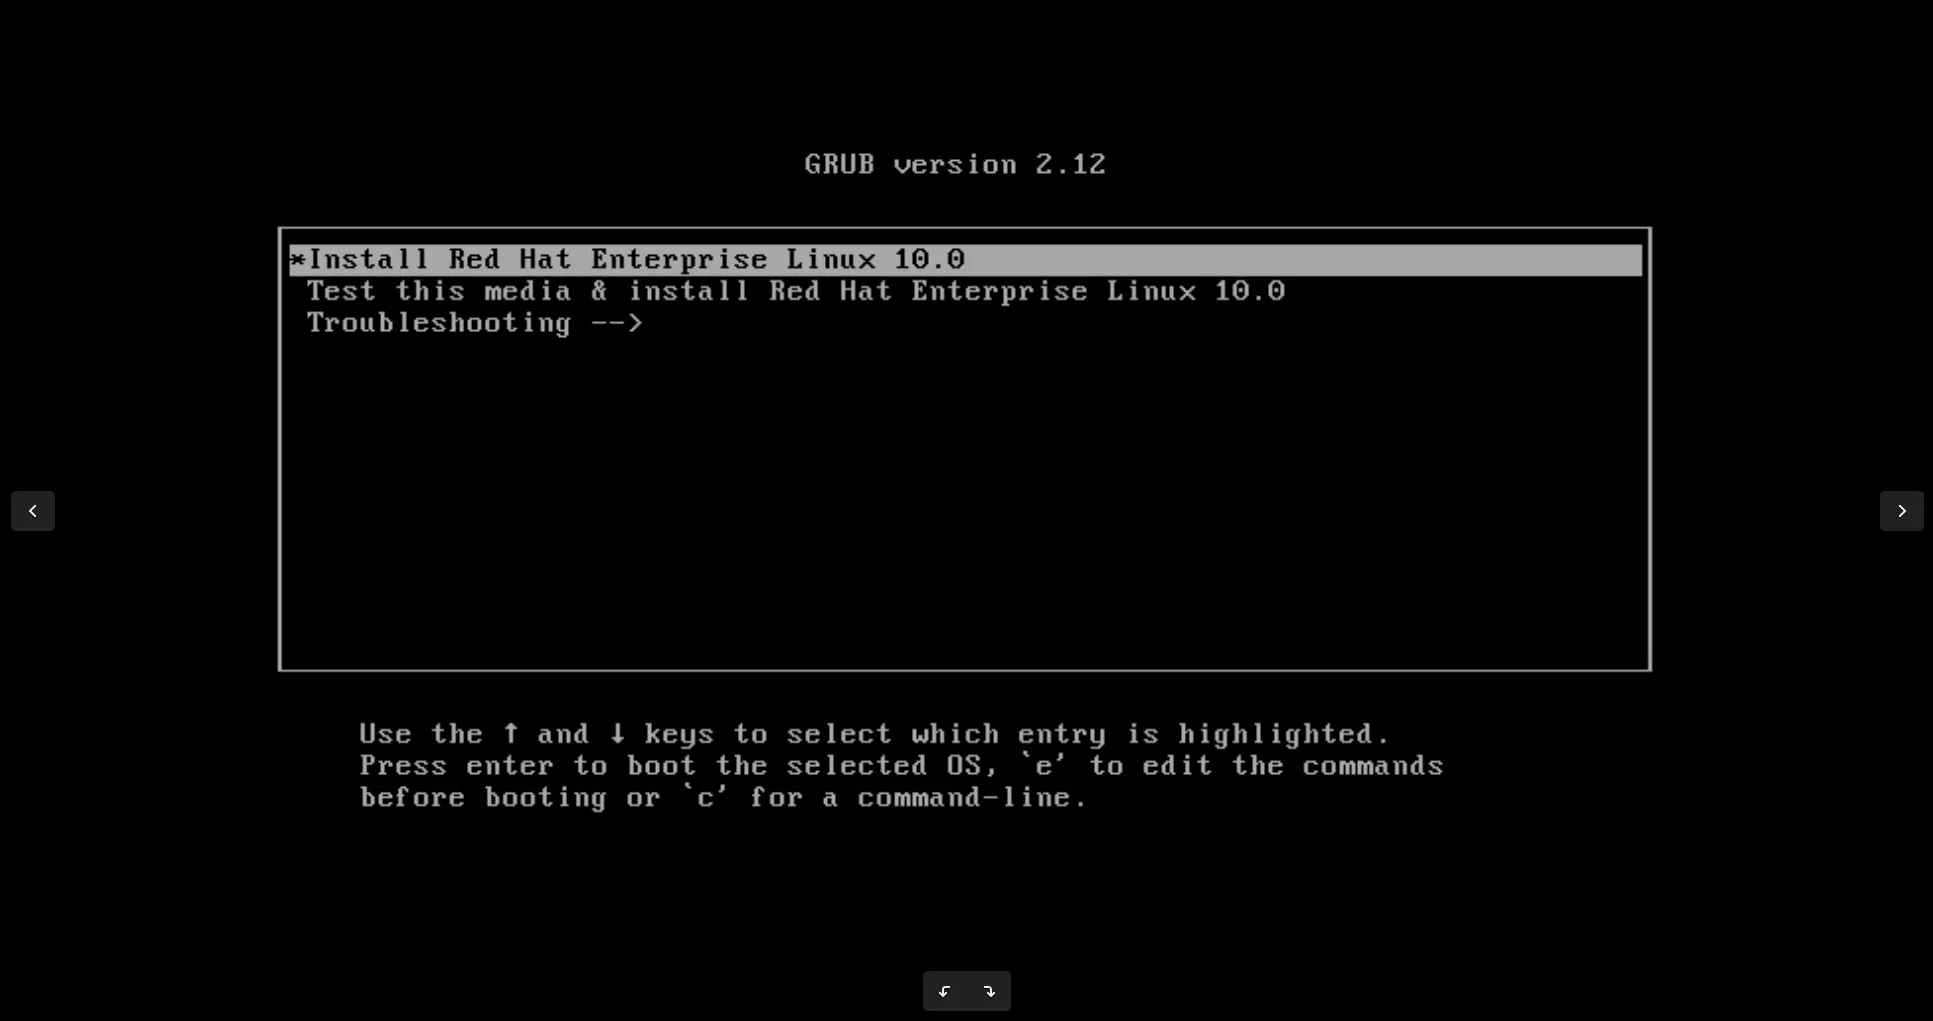
Photo by admingeek from Infotechys
🔹4. Select Language & Keyboard Layout |
Choose your preferred language and keyboard layout for installation. This step ensures a comfortable user experience post-install. Click Continue to proceed.
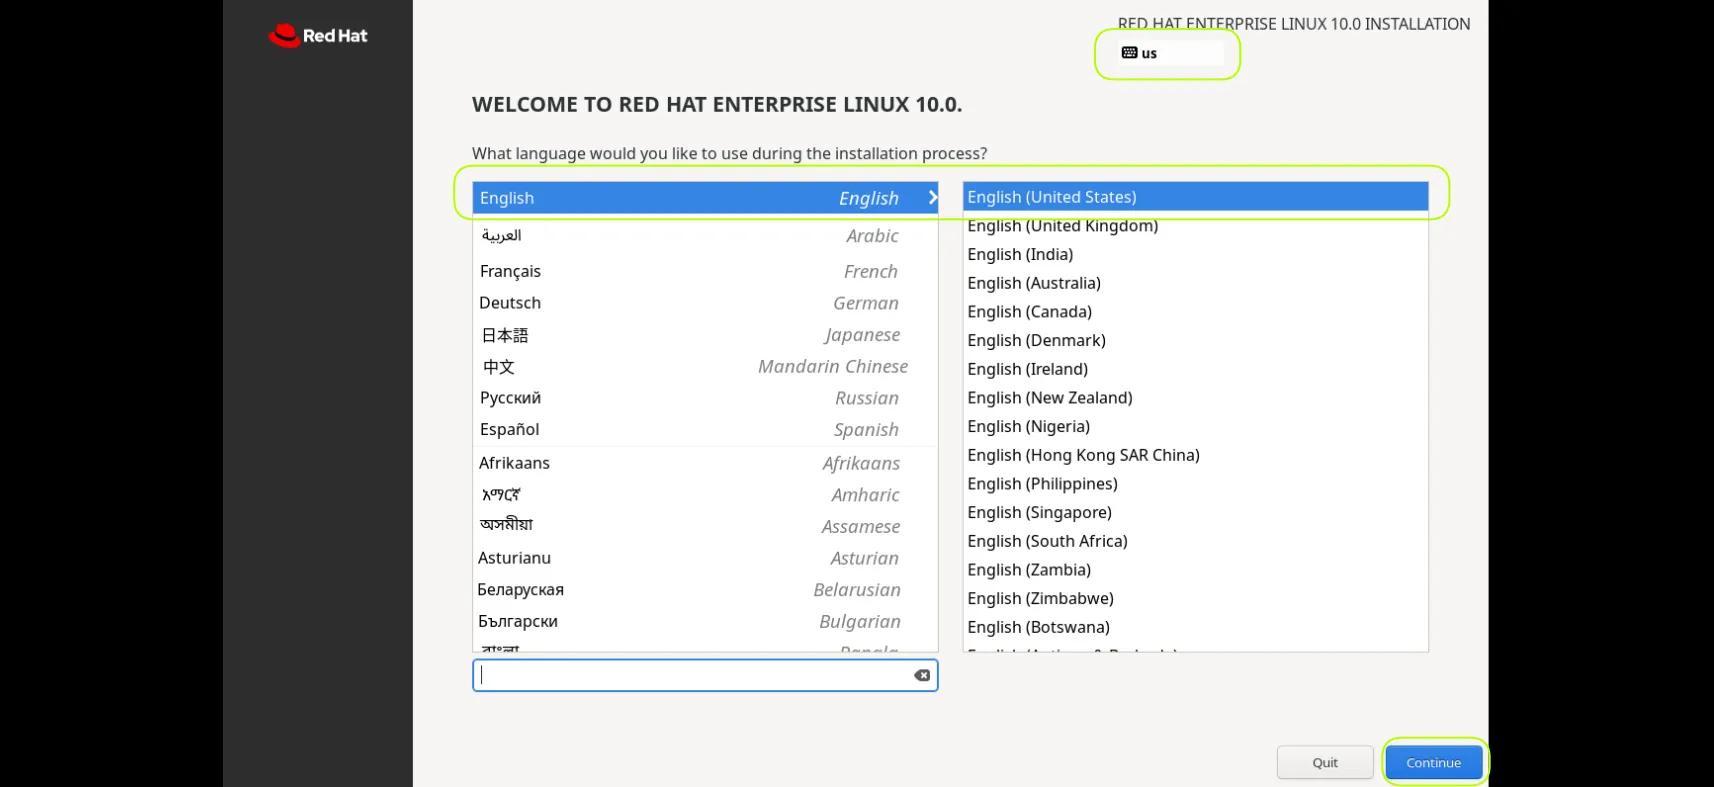
Photo by admingeek from Infotechys
🔹5. Configure Installation Destination |
Select the target disk. You can choose:
| Option | Description |
|---|---|
| Automatic partitioning | RHEL chooses partitions automatically (Root, Swap, Home) |
| Custom partitioning | You design partitions as needed (e.g., LVM, Btrfs, separate /home) |
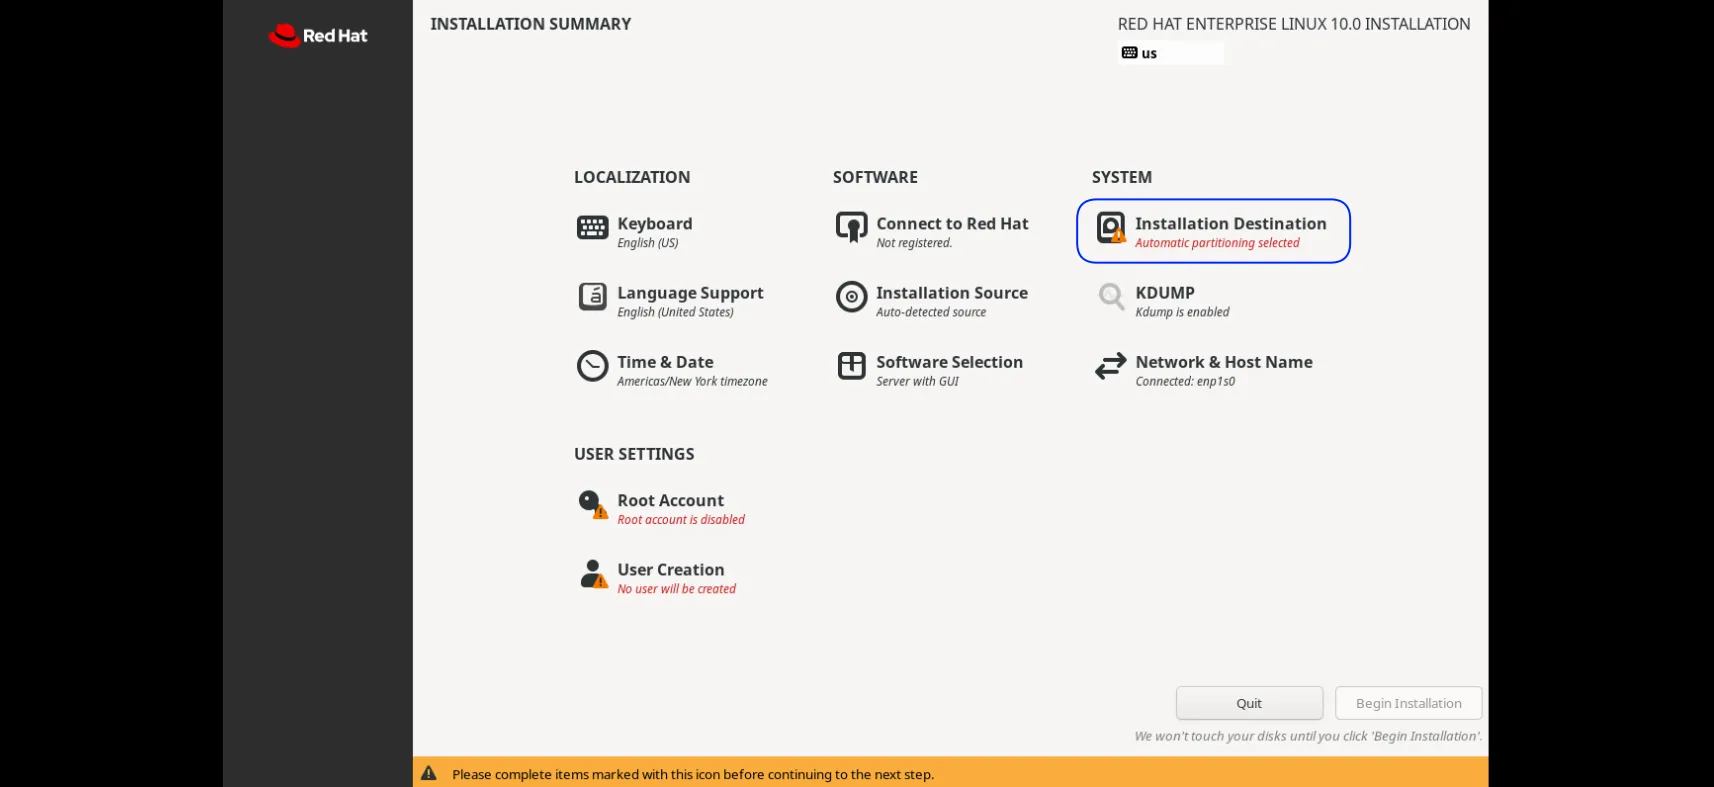
Photo by admingeek from Infotechys
For beginners, “Automatic partitioning selected” is easiest and the default setting; advanced users may prefer custom layouts.
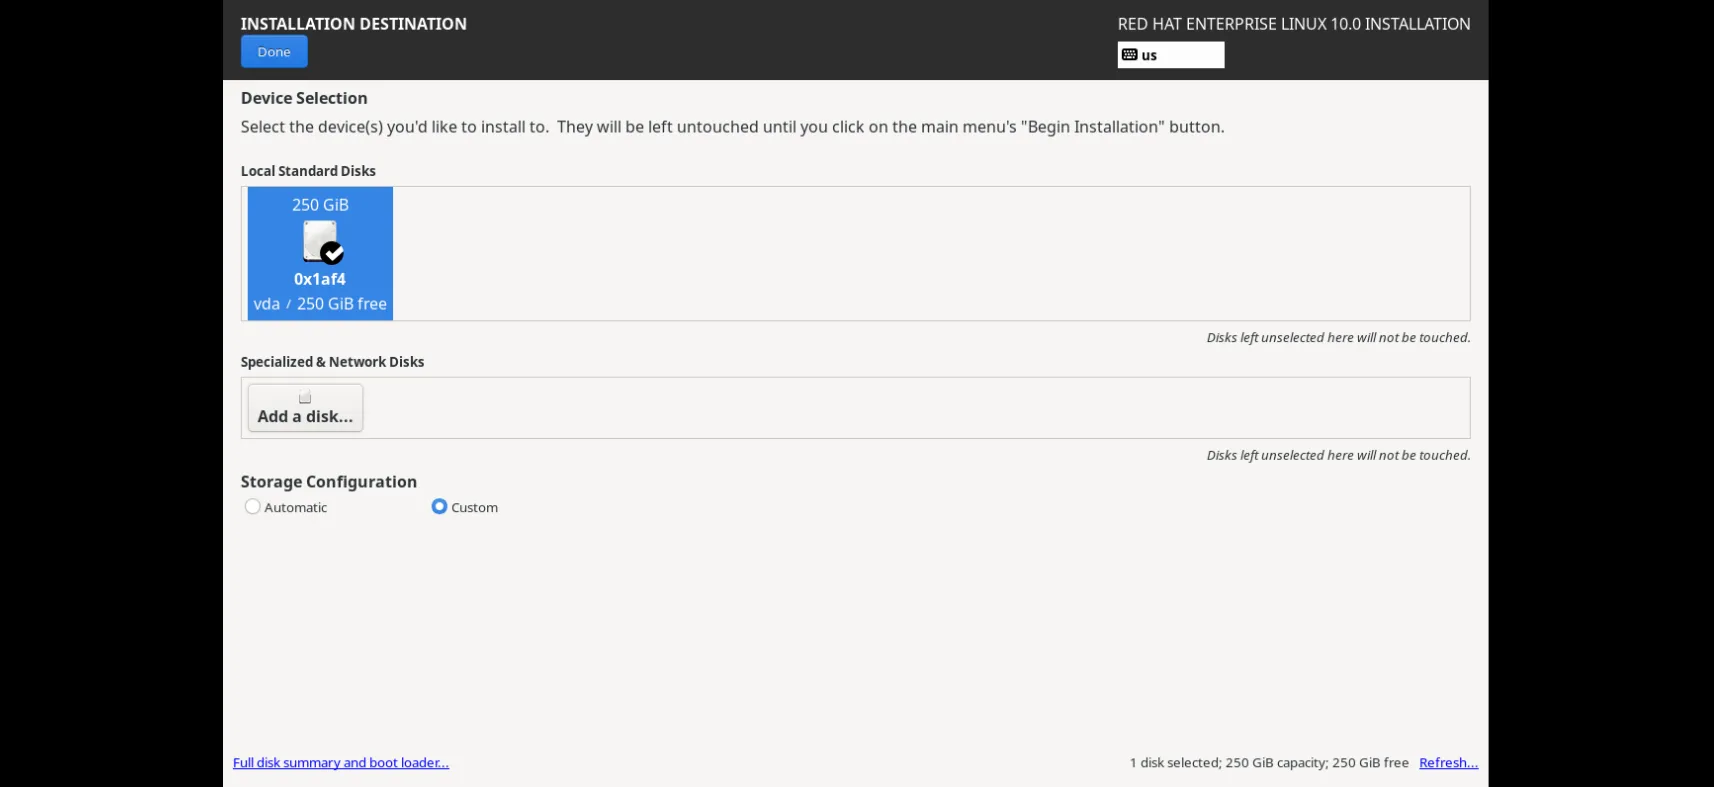
Photo by admingeek from Infotechys
If you’re an advanced user, you can click “Installation Destination” and manually select you’re preferred partitioning scheme (sample layout below). Then, click Done when finished.
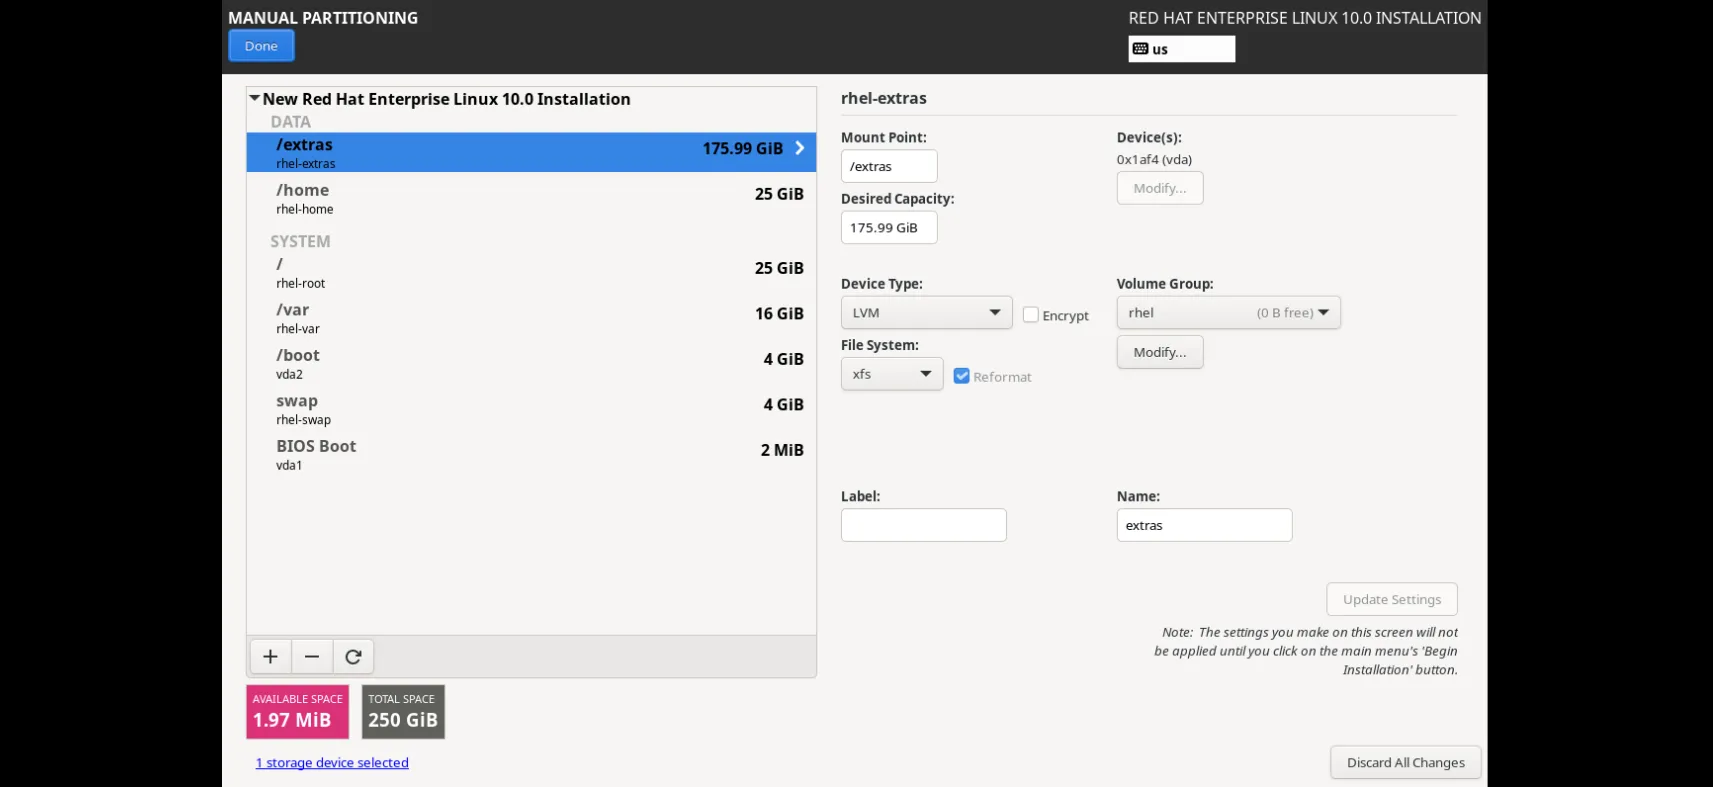
Photo by admingeek from Infotechys
🔹6. Set Network & Hostname |
If your system is connected to a network with internet access or DHCP enabled, it will typically connect automatically by default. To configure or modify the hostname and IP address settings, simply click on “Network & Host Name.”
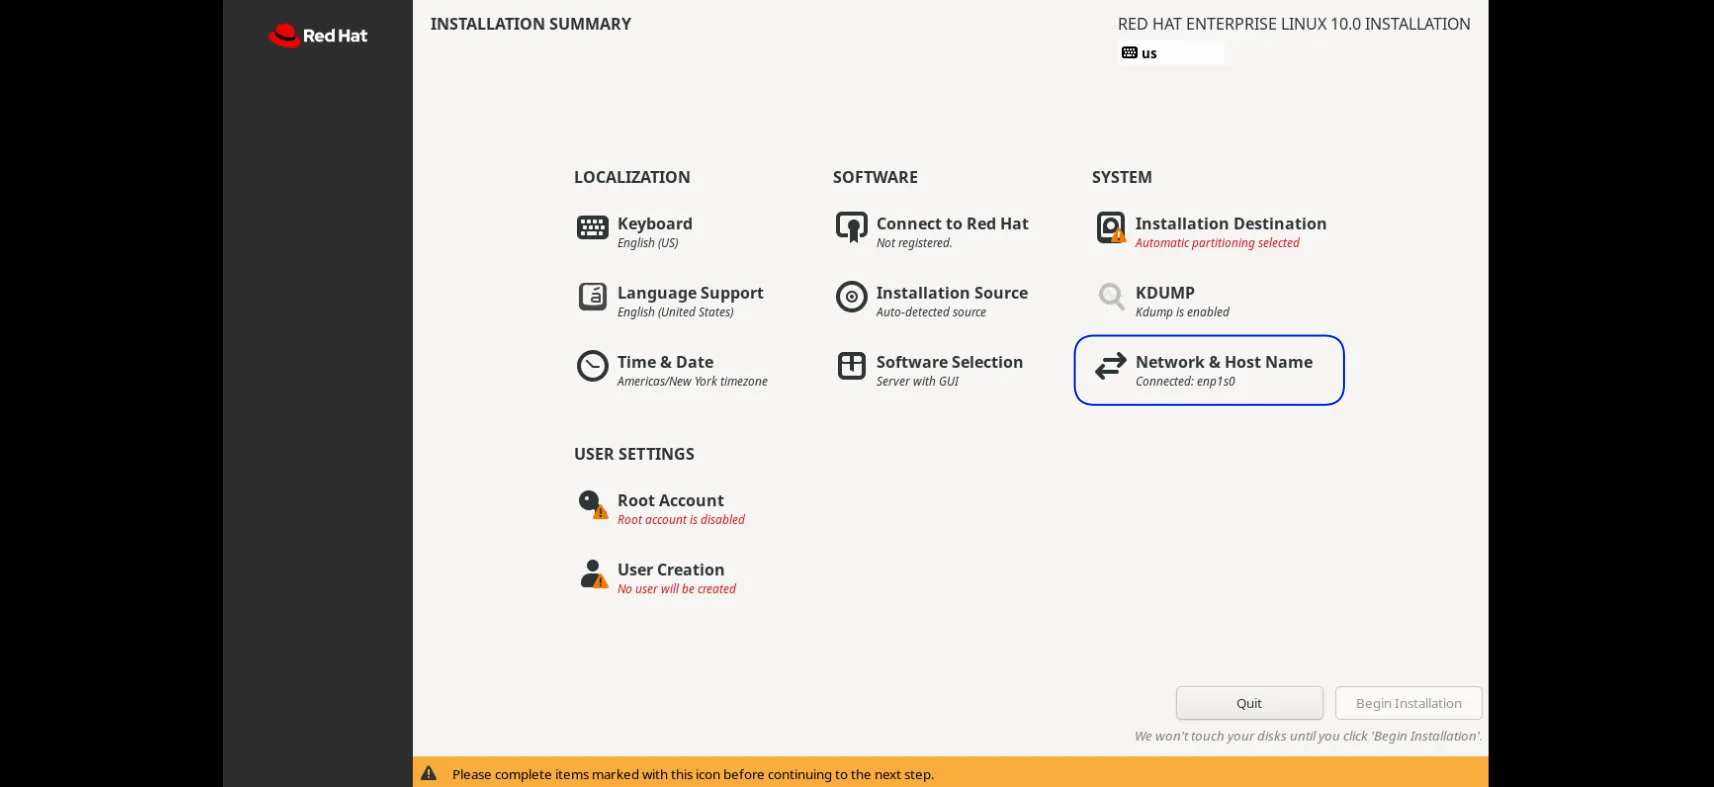
Photo by admingeek from Infotechys
🔹7. Choose Software Selection |
By default “Server with GUI” is selected but the installer offers predefined environments. For most Workstation users, select:
|
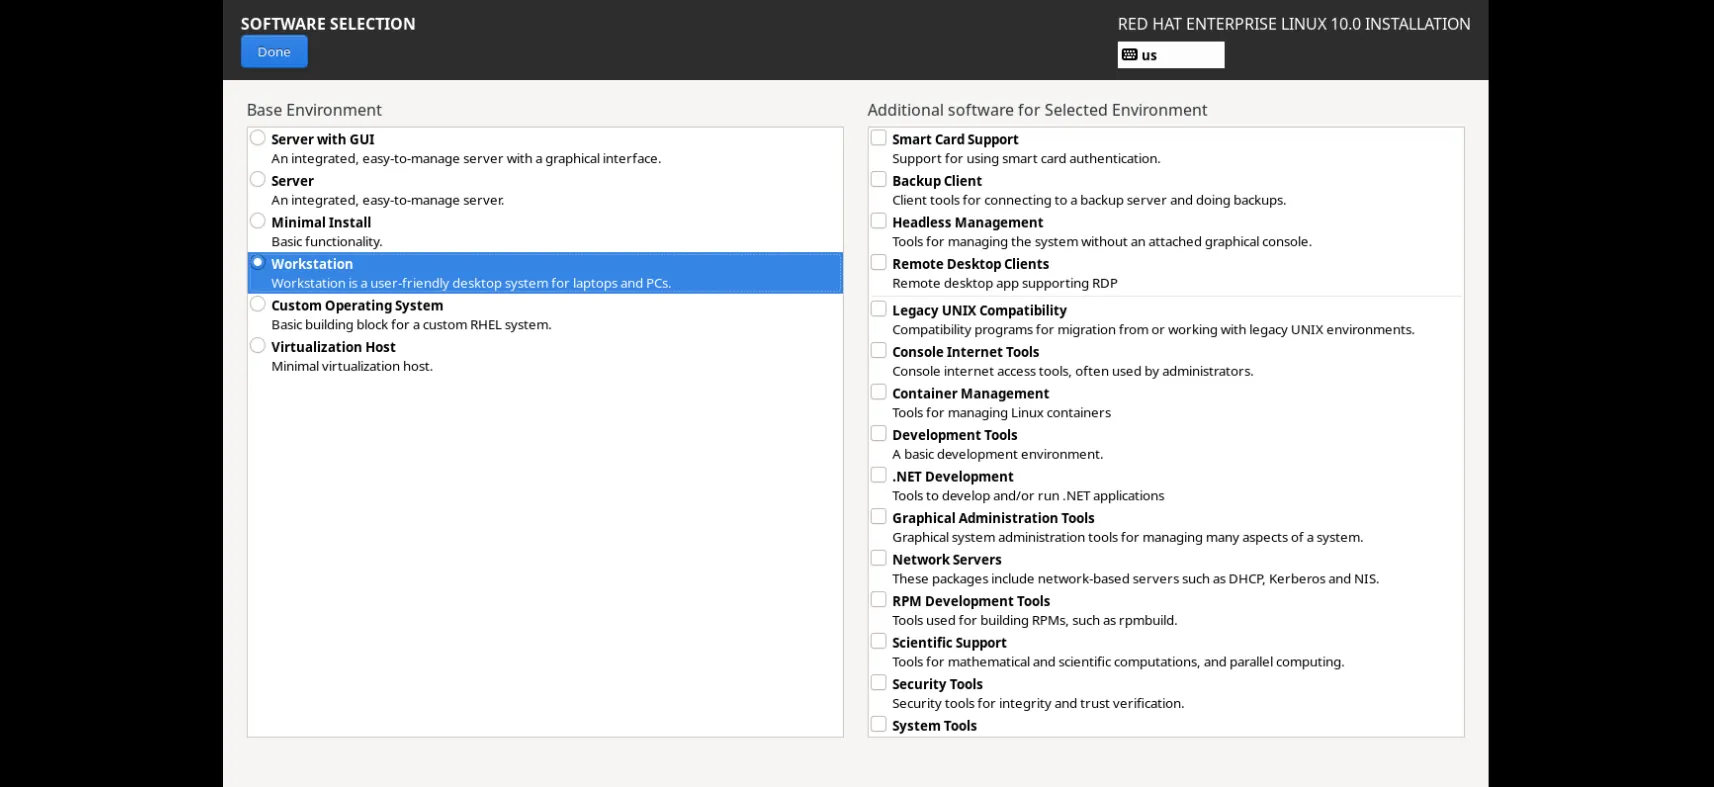
Photo by admingeek from Infotechys
🔹8. Set Root Password & Create First User |
Root Password: Choose a strong password. This is also where you can choose to enable or disable the root account entirely, and decide whether it should be accessible via SSH.
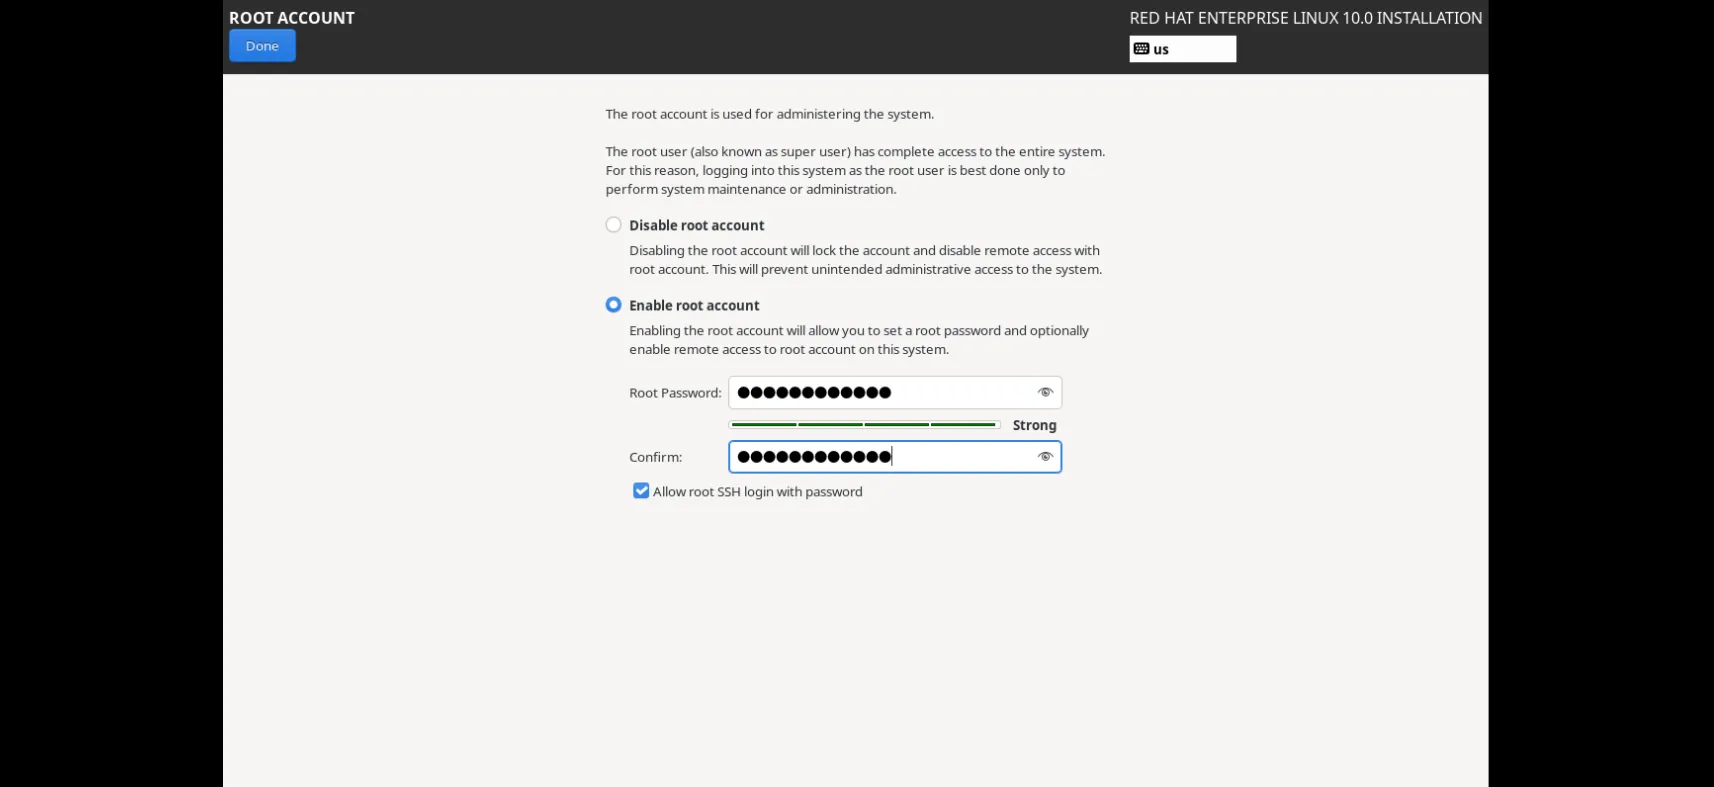
Photo by admingeek from Infotechys
Create User:
|
|
|
This allows the user to manage the system using sudo.
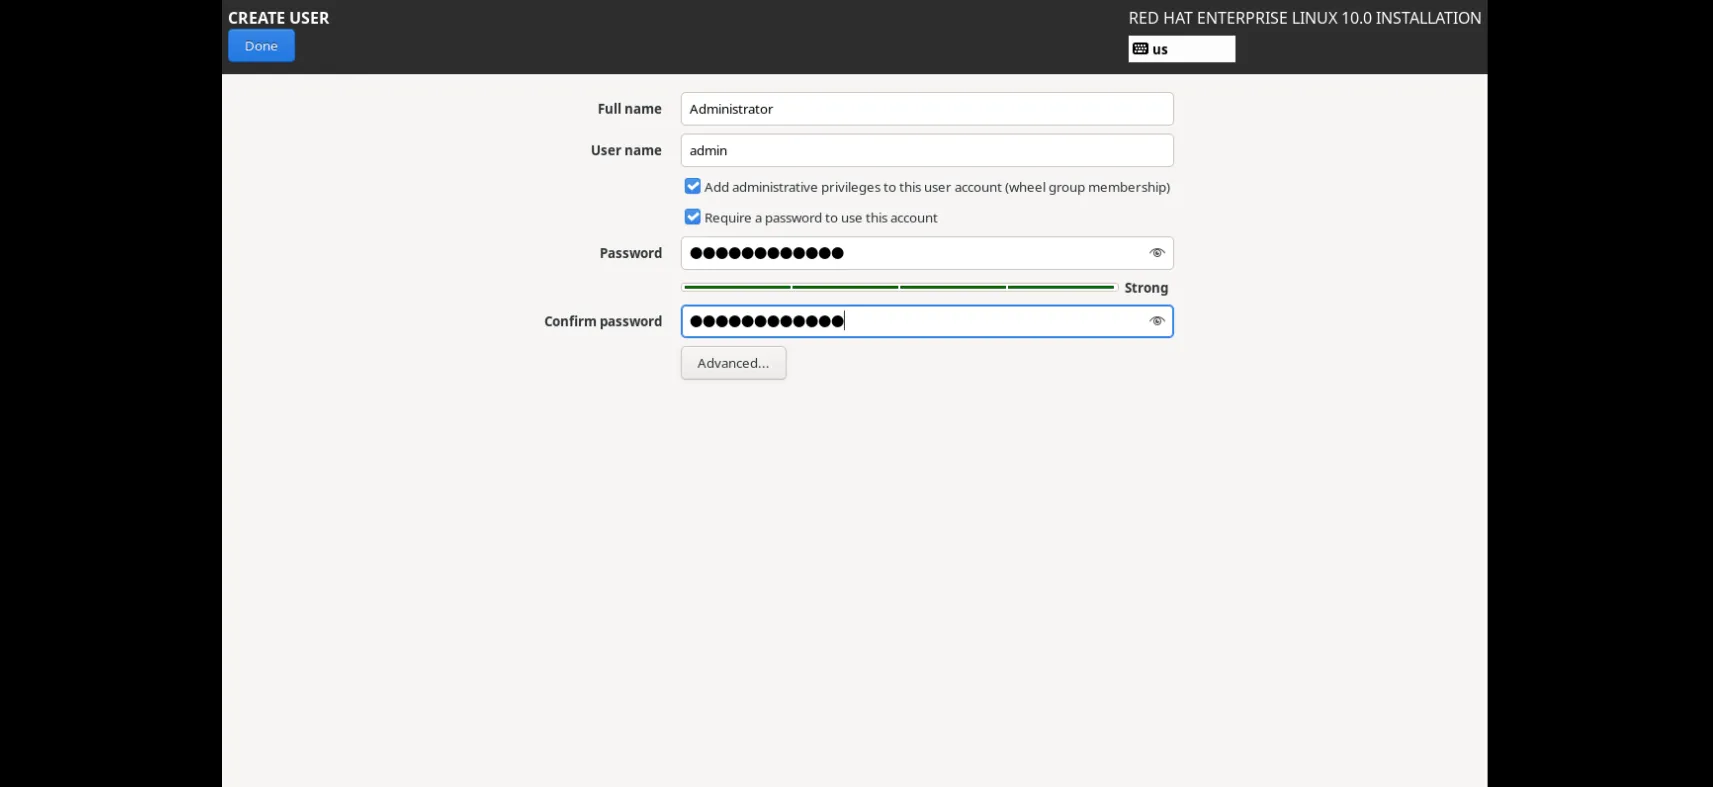
Photo by admingeek from Infotechys
🔹9. Configure Security Profiles (Firewall & SELinux) |
RHEL comes secure by default. Still, you can double-check:
|
|
					sudo sestatus             # SELinux status
sudo firewall-cmd --state # should return “running”
Optionally, open ports (e.g., SSH):
					sudo firewall-cmd --add-service=ssh --permanent
sudo firewall-cmd --reload
🔹10. Begin Installation |
Click Begin Installation.
A progress screen will show:
| Installation Item | Status |
|---|---|
| Software packages | Installing |
| Time & Date | Setting time zone, clock |
| Installation source | Loading from DVD/ISO |
| Network/Host configuration | Cached from earlier setup |
This may take several minutes depending on hardware and media speed.
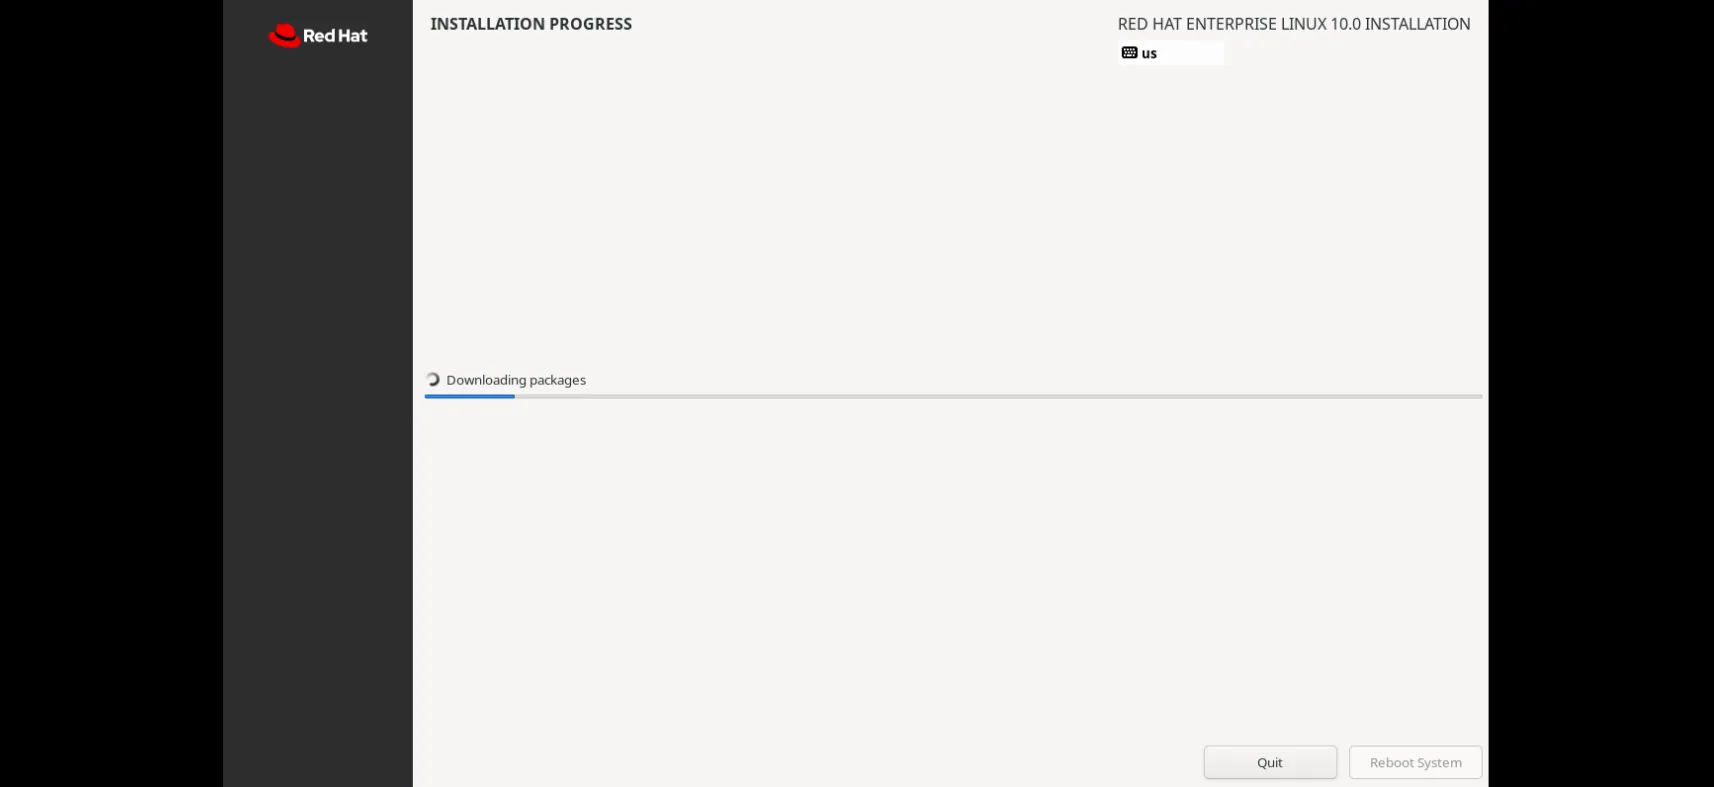
Photo by admingeek from Infotechys
🔹11. Reboot & Initial Setup |
Once installation completes, click Reboot. Remove your installation media when prompted.
Upon first boot, you’ll land on a login screen. Log in with your user account. A few optional first‑boot steps may include:
|
|
|
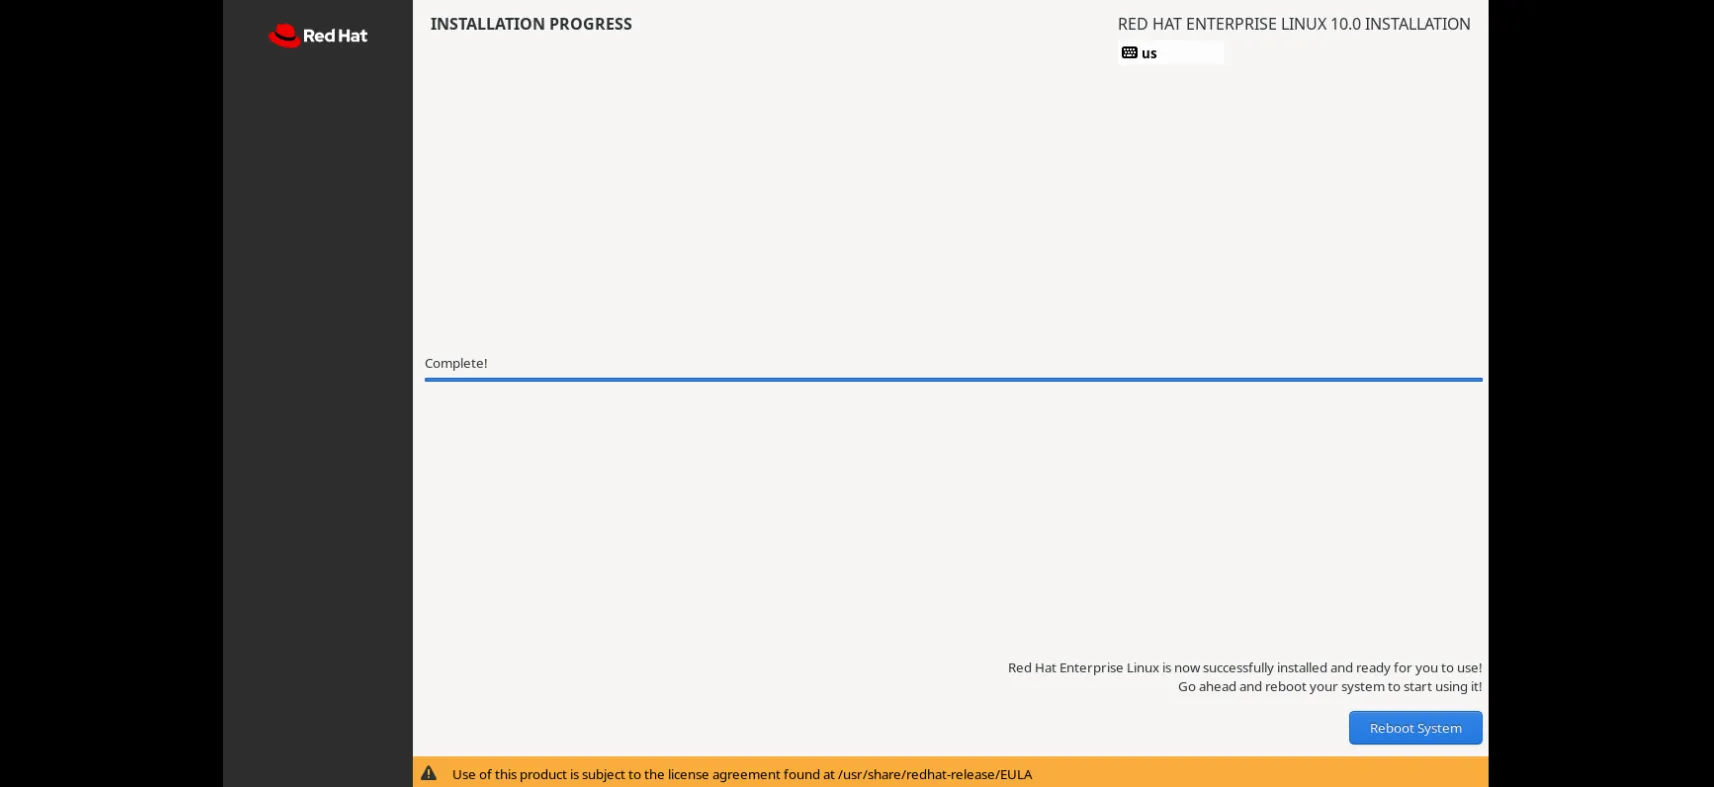
Photo by admingeek from Infotechys
🔹12. Post‑Install Configuration & System Updates |
Now it’s time to update your system and install common developer tools:
					sudo dnf update -y
sudo dnf install @development-tools vim git -y
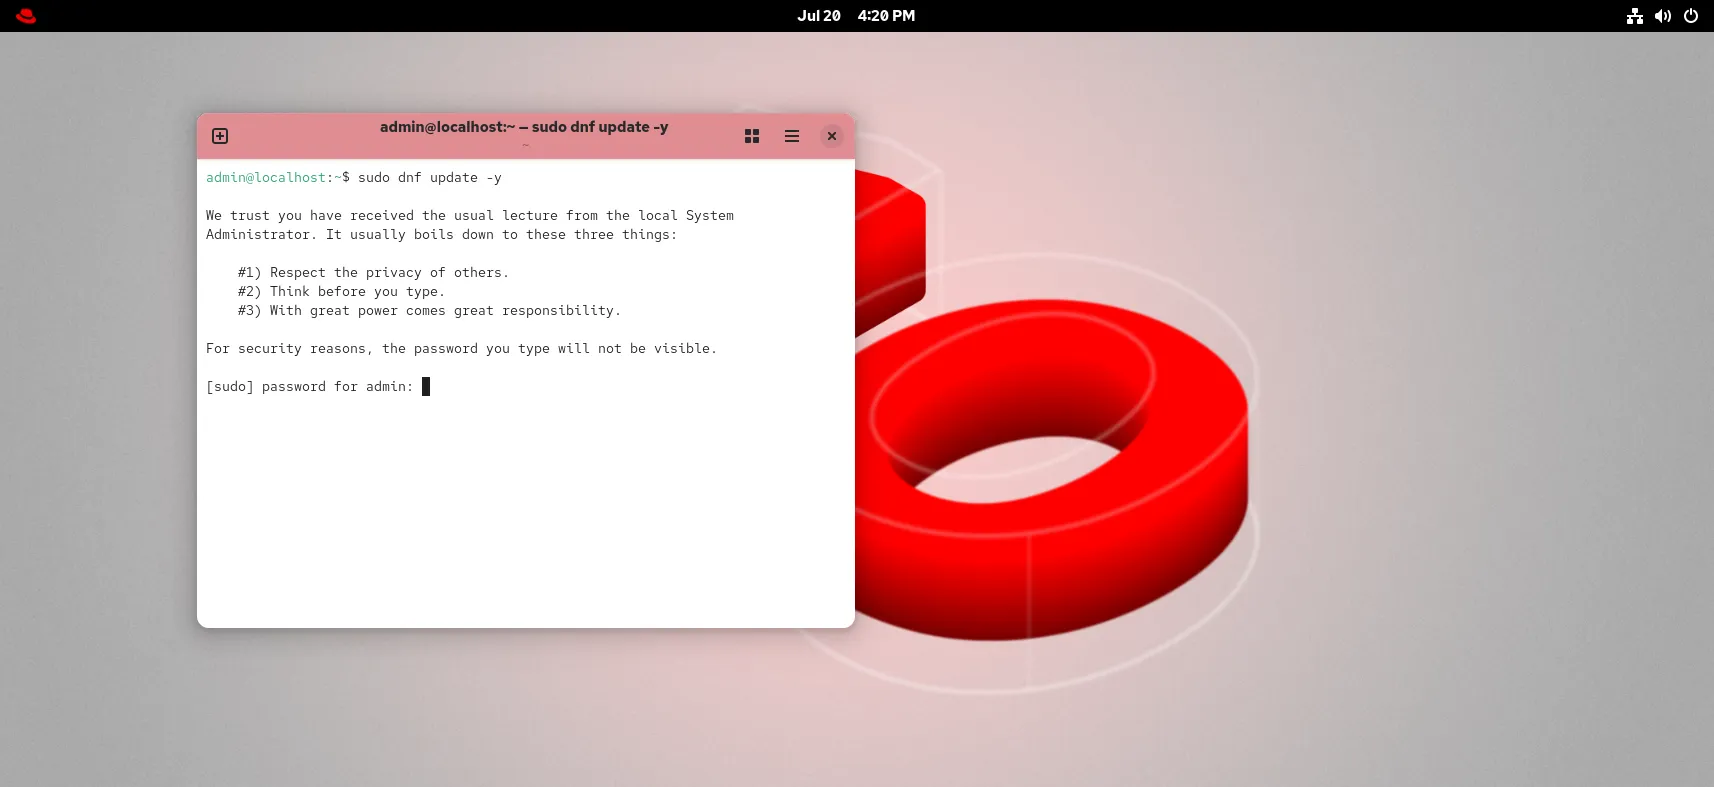
Photo by admingeek from Infotechys
|
uname -r
|
sudo dnf repolist
|
					sudo dnf install \
  https://download1.rpmfusion.org/free/el/rpmfusion-free-release-10.noarch.rpm \
  https://download1.rpmfusion.org/nonfree/el/rpmfusion-nonfree-release-10.noarch.rpm
Once installed, you can install packages such as:
sudo dnf install vlc ffmpeg -y
| Step | Title | Key Command / Action |
|---|---|---|
| 1 | Download ISO | sha256sum … |
| 2 | Create Boot Media | dd if=… of=/dev/sdX |
| 3 | Boot Installer | BIOS/UEFI → USB/DVD |
| 4 | Language & Keyboard | UI selection |
| 5 | Installation Destination | Automatic vs. Custom partitioning |
| 6 | Network & Hostname | nmcli …, hostnamectl |
| 7 | Software Selection | Choose “Workstation” environment |
| 8 | Root Pass & User Setup | UI prompts |
| 9 | Security & Firewall | sestatus, firewall-cmd |
| 10 | Install OS | Click “Begin Installation” |
| 11 | Reboot & Login | Remove media → Log in |
| 12 | Updates & Tools | dnf update, dnf install @development-tools… |
By following these twelve precise steps, you’re now equipped with a fully functional, secure, and up-to-date RHEL 10 Workstation. This setup empowers you with robust tools for software development, system administration, and enterprise-grade stability.
Remember: regularly run sudo dnf update -y to keep your system patched and secure. If you need additional software or additional features like containers, virtualization, or desktop environments like KDE or GNOME tweaks, the dnf system and Red Hat ecosystem have plenty to offer.
Did you find this article helpful? Your feedback is invaluable to us! Feel free to share this post with those who may benefit, and let us know your thoughts in the comments section below.

Learn how to install CentOS Stream 10 Server with GUI in just 12 easy steps. This guide provides clear instructions, CLI examples, and tips for
Learn how to install AlmaLinux 9.5 in 12 easy steps with this comprehensive guide. From downloading the ISO to configuring your system, follow our detailed
Learn how to install Fedora 40 Server in 12 easy steps. Follow this detailed guide with command-line examples, table charts, and essential setup tips to
