Commands
Learn how to upgrade from Fedora 35 to Fedora 37 with this comprehensive guide. Follow step-by-step instructions, including preparation, upgrading, and post-upgrade tasks, to ensure

Implement security warning banners on Fedora versions 35 to 40 with our comprehensive guide. Learn how to set up command-line (CLI) and graphical user interface (GUI) banners using dconf, enhance user awareness, and ensure legal compliance. Follow step-by-step instructions and best practices to keep your system secure.
In today’s digital age, securing your systems is crucial. One effective method is implementing security warning banners, especially on Fedora systems. These banners deter unauthorized access and remind authorized users of their responsibilities. This comprehensive guide will cover how to implement security warning banners across Fedora versions 35, 36, 37, 38, 39, and 40, including the dconf option for GUI logins. Let’s dive in!
Before diving into the implementation steps, let’s explore the importance of security warning banners:
Before implementing security warning banners, ensure your Fedora system is updated. Open your terminal and execute the following command:
sudo dnf update -y
This command updates all installed packages to their latest versions, ensuring your system is secure and ready for further configurations.
Fedora allows creating various types of security banners, including login banners and Message of the Day (MOTD) banners. Let’s start with the CLI logins.
Login Banners |
Login banners appear before the user logs into the system. Here’s how to set them up:
/etc/issue file: Open the /etc/issue file using a text editor. For example (using your preferred text editor):
sudo vim /etc/issue
					***************************************************
** WARNING: Unauthorized access to this system   **
** is prohibited and may be prosecuted by law.   **
***************************************************
/etc/ssh/sshd_config file:
sudo vim /etc/ssh/sshd_config
none with the path to the issue file.
					# no default banner path
#Banner none
Banner /etc/issue
sshd.service to allow the change to take effect
sudo systemctl restart sshd
sudo systemctl enable --now sshd
ssh admin@fedora
					***************************************************
** WARNING: Unauthorized access to this system   **
** is prohibited and may be prosecuted by law.   **
***************************************************
admin@fedora's password:
As you can see, the warning banner is being displayed before the user has access to the system.
Message of the Day (MOTD) Banners |
MOTD banners display after a successful login. To create an MOTD banner:
/etc/motd file: Open the /etc/motd file using a text editor. For example:
sudo nano /etc/motd
Add Your Security Message: Insert the desired security warning message. For instance (using the same message):
					***************************************************
** WARNING: Unauthorized access to this system   **
** is prohibited and may be prosecuted by law.   **
***************************************************
Save and Exit: Save the file and exit the text editor. Then, Log onto your machine again.
ssh admin@fedora
					***************************************************
** WARNING: Unauthorized access to this system   **
** is prohibited and may be prosecuted by law.   **
***************************************************
admin@fedora's password:
***************************************************
** WARNING: Unauthorized access to this system   **
** is prohibited and may be prosecuted by law.   **
***************************************************
Last login: Sat Jul  6 14:08:16 2024
[admin@fedora ~]$
Notice that security warning banners are now displayed before and after access is granted to the system.
For GUI logins, using dconf to set up security banners is effective. Here’s how to do it:
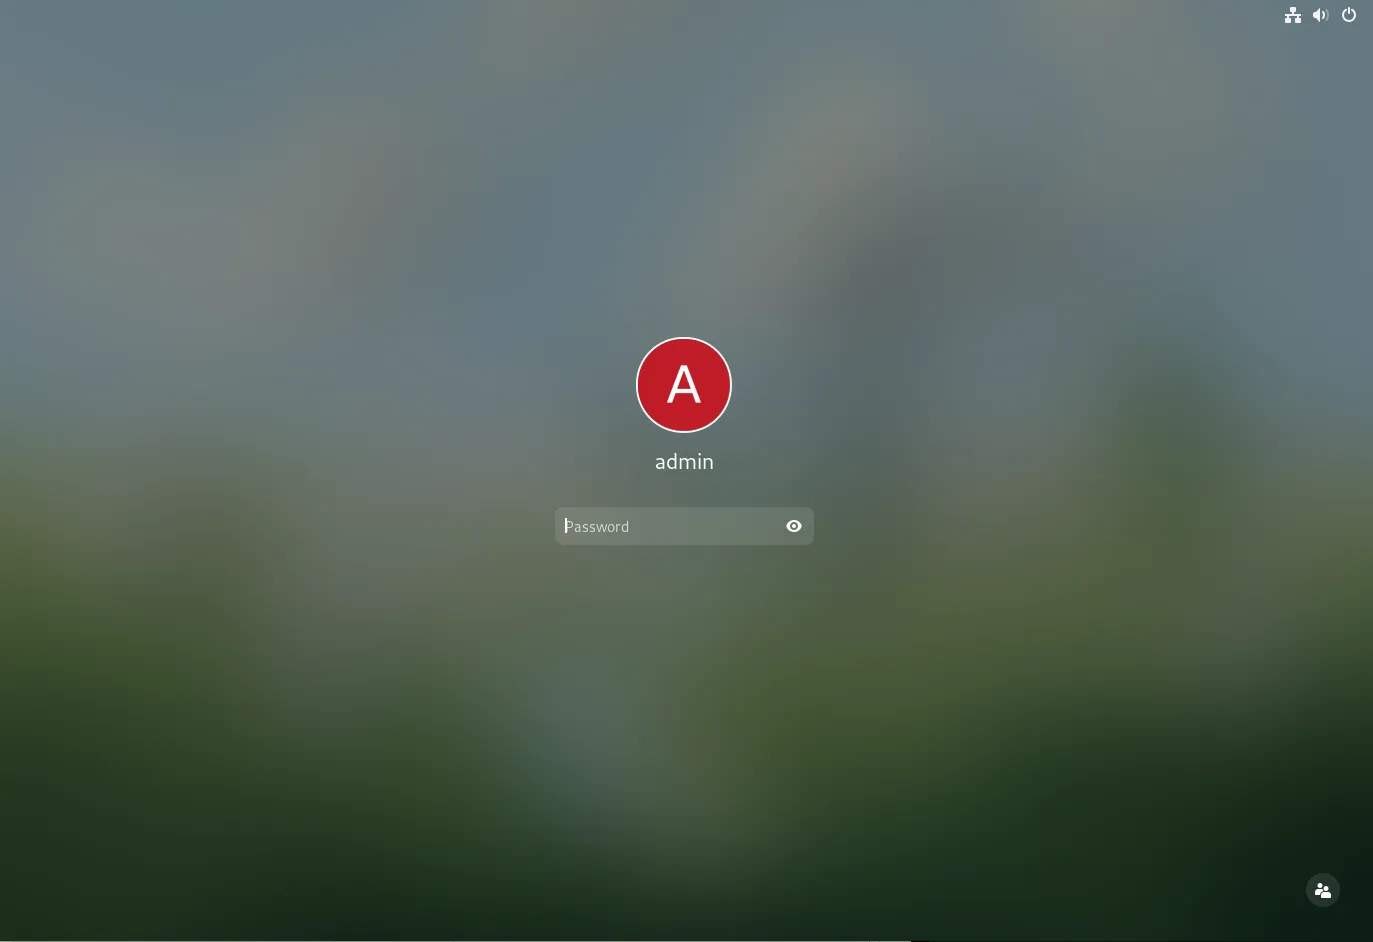
Photo by admingeek from Infotechys
Install dconf Editor |
If you don’t already have dconf editor installed, you can install it using the following command:
sudo dnf install dconf-editor -y
Open dconf editor: Open dconf Editor from your application menu.
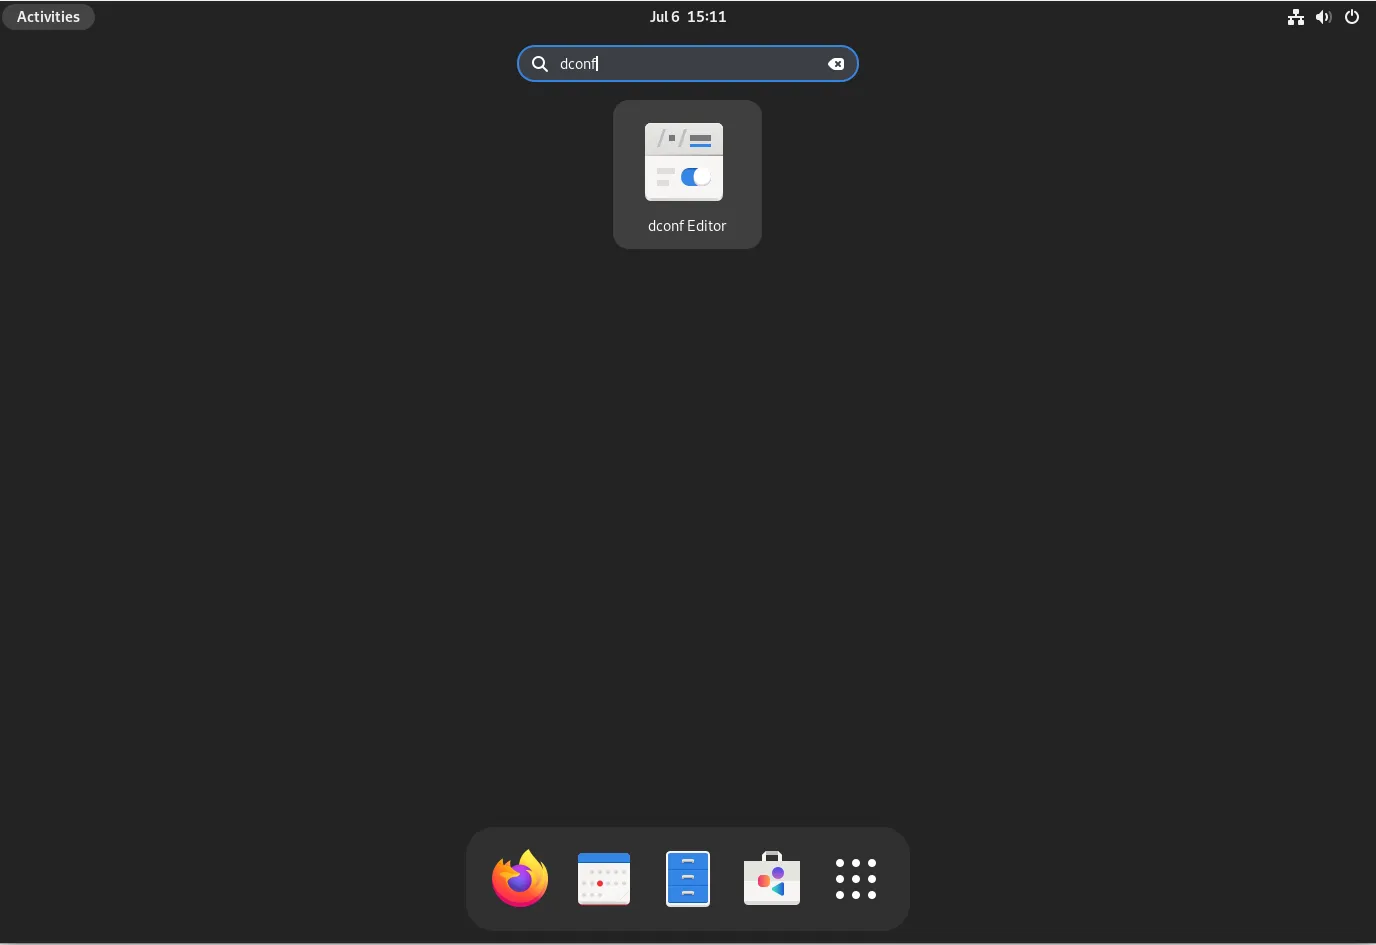
Photo by admingeek from Infotechys
Navigate to Login Banner Settings: Navigate to the path: /org/gnome/login-screen/. Then, enable banner-message-enable and disable-user-list. Also, click the reload button to update the changes.
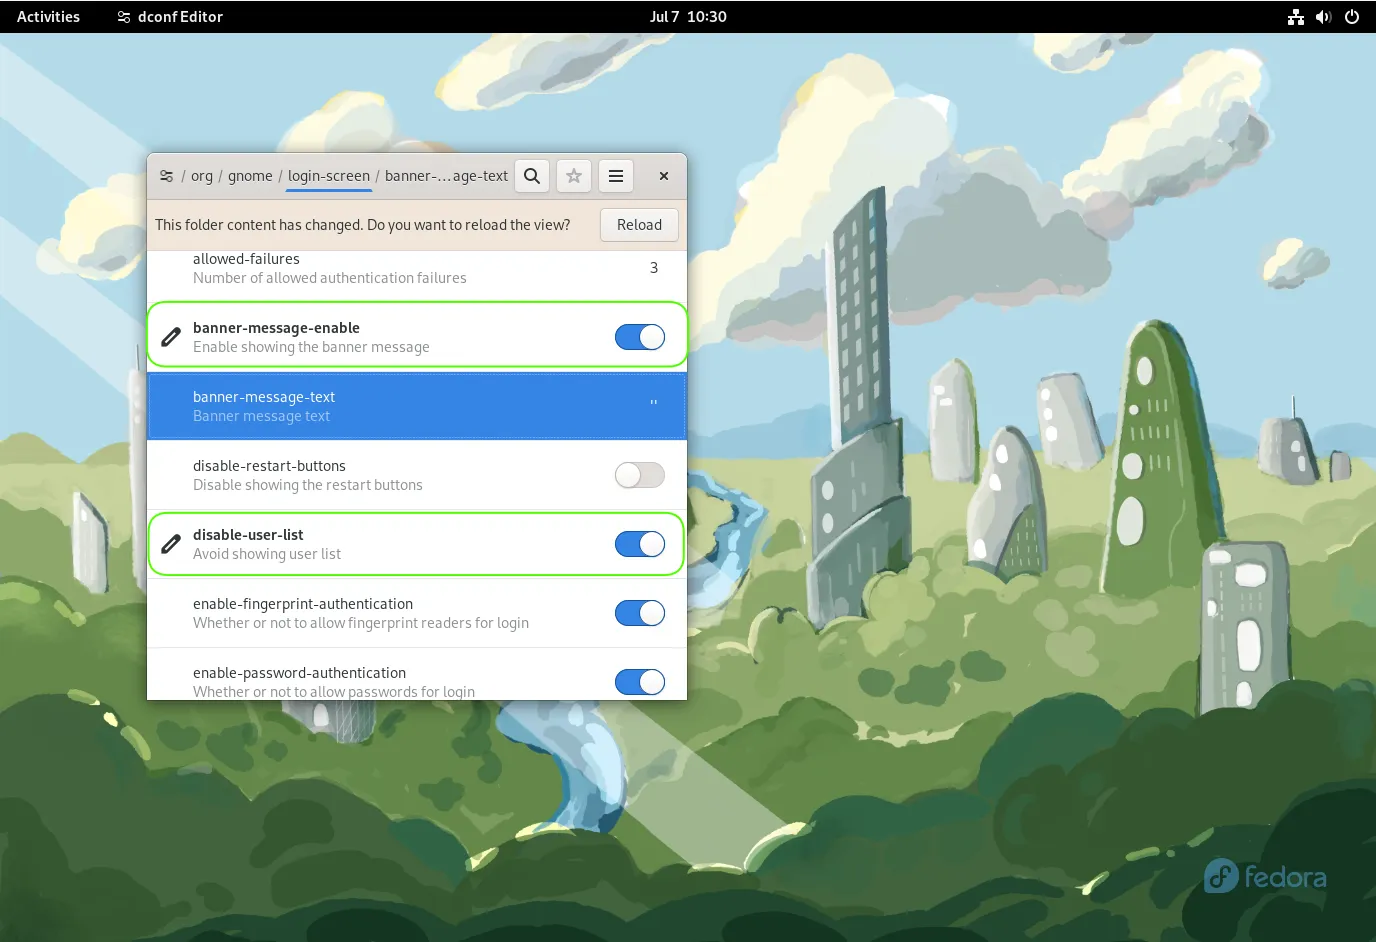
Photo by admingeek from Infotechys
Set the Banner Message: Go to /org/gnome/login-screen/banner-message-text disable the Use default value button and set your security message as the Custom value. For example:
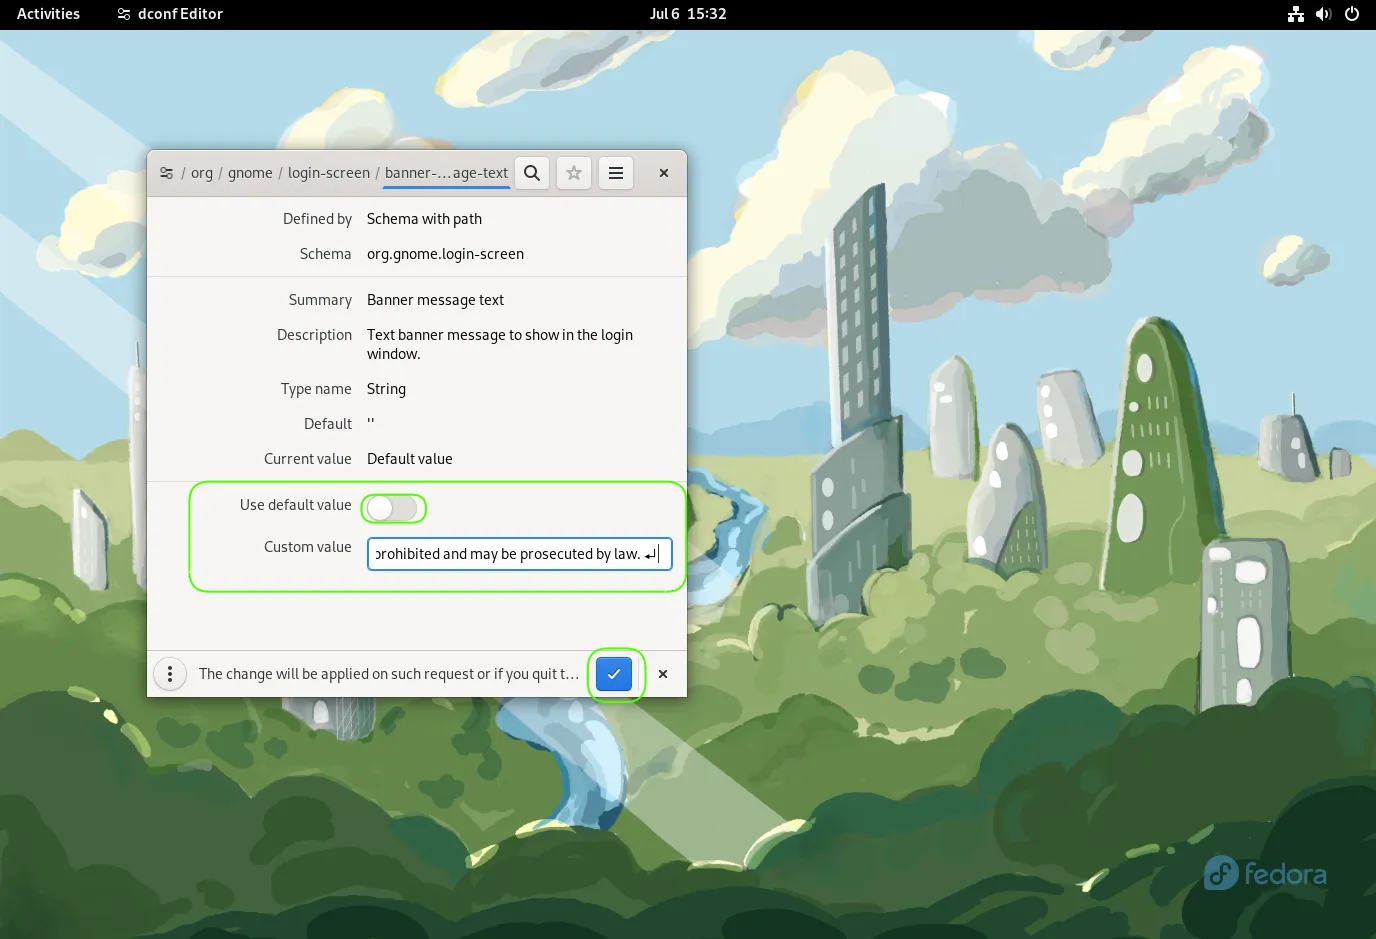
Photo by admingeek from Infotechys
Apply Changes: Click the blue check button to apply the changes and exit the dconf Editor.
Change dconf settings from CLI |
Create a file called 01-banner-message under the /etc/dconf/db/gdm.d/ directory:
sudo vim /etc/dconf/db/gdm.d/01-banner-message
Copy and paste the following into the 01-banner-message file, modifying it as needed to suit your environment:
					[org/gnome/login-screen]
disable-user-list=true
banner-message-enable=true
banner-message-text='This system is intended solely for authorized users. Usage of this system may be monitored and recorded by system administrators. By accessing and using this system, you explicitly consent to such monitoring. It is important to note that if monitoring indicates potential criminal activity, the findings may be shared with law enforcement officials. Unauthorized or inappropriate use of this system may result in disciplinary action, as well as civil and criminal penalties. Your continued use of this system indicates your understanding and acceptance of these terms and conditions. If you do not agree with these terms, please disconnect from the system immediately. This system operates on Fedora release 37 and is utilized to support Linux machines within the infotechys.com domain for laboratory purposes.'
Then, run this command to update the dconf database:
sudo dconf update
Finally, log out of your machine to verify the changes.
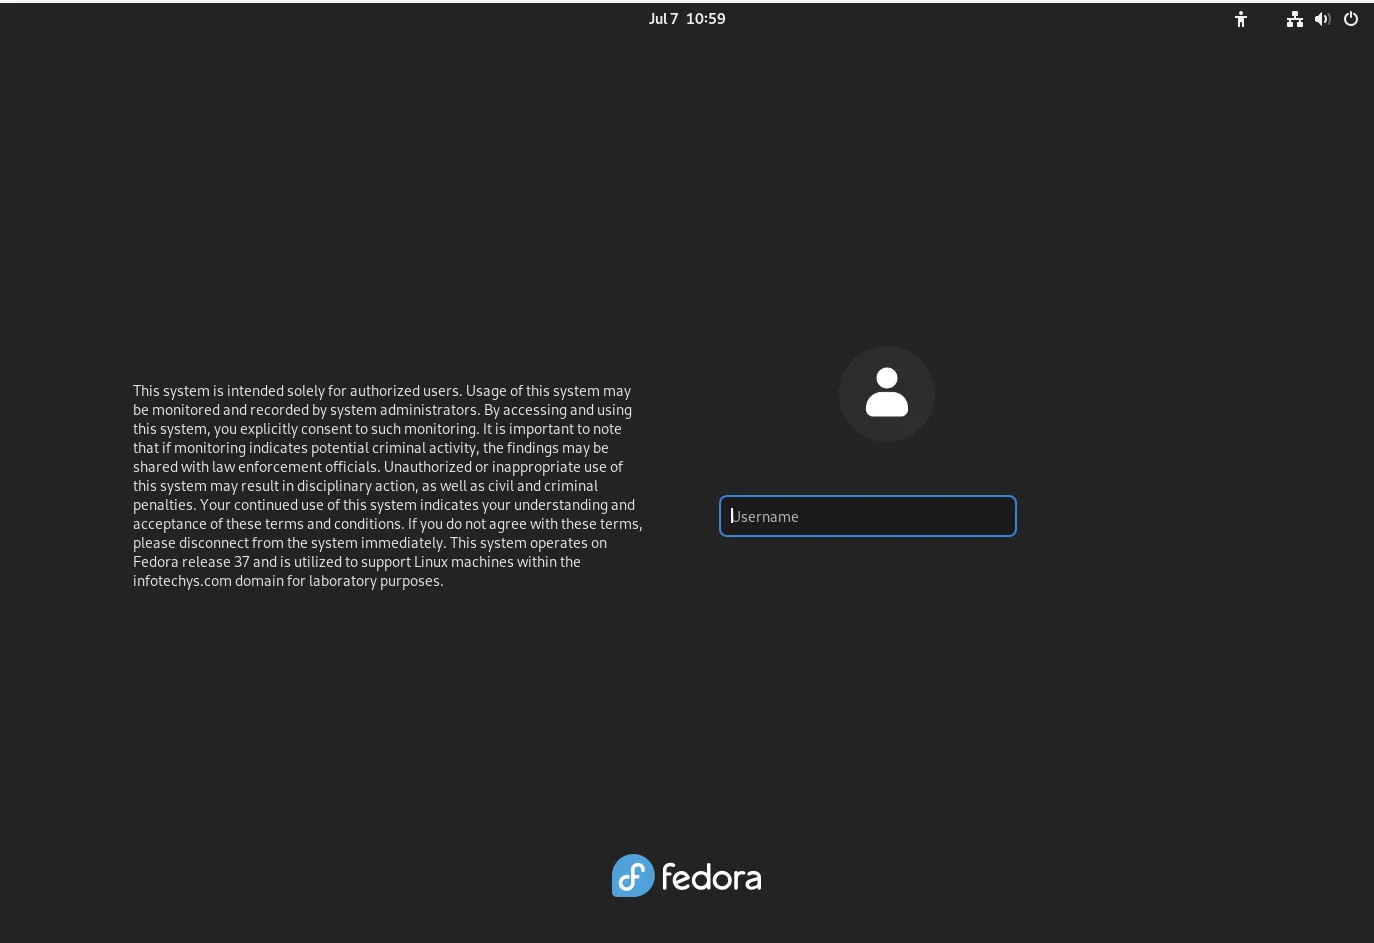
Photo by admingeek from Infotechys
Enhancing Your Security Banners |
To make your security banners more effective, consider adding detailed information. Here are some tips:
Monitoring and Maintenance |
Once you have implemented the security banners, it’s important to regularly monitor and update them. Security policies and contact information can change, so keeping your banners up to date is crucial.
Troubleshooting Common Issues |
Sometimes, security banners might not display as expected. Here are some common issues and solutions:
| Issue | Solution |
|---|---|
| Banner not displaying on login | Ensure the /etc/issue file is correctly edited. |
| MOTD not showing after login | Check permissions and ensure the /etc/motd file is readable. |
| GUI banner not displaying | Verify dconf settings and ensure changes are applied correctly. |
Implementing security warning banners on Fedora versions 35 through 40 is a straightforward yet effective way to enhance your system’s security. By following the steps outlined in this post, you can create and maintain robust security banners that deter unauthorized access and remind users of their responsibilities.
For more information on Fedora security practices, visit the official Fedora Security Guide.
Did you find this article useful? Your feedback is invaluable to us! Please feel free to share your thoughts in the comments section below.
Related Posts
Learn how to upgrade from Fedora 35 to Fedora 37 with this comprehensive guide. Follow step-by-step instructions, including preparation, upgrading, and post-upgrade tasks, to ensure

In this guide, we’ll take you through the step-by-step process of installing Docker on Fedora 38, ensuring you’re equipped to take advantage of its benefits

In this article, we will review how to install MySQL on Fedora 37, providing step-by-step instructions to ensure a smooth installation process. Table of Contents