Installing RHEL7 or CentOS7 on a PC is fairly easy to do. In this tutorial, we will review the installation process step-by-step. Today’s focus will

NFS or Network File System is a commonly known method for network file sharing on Linux hosts. We will create and export an NFS server.
In this article, we will create and export an NFS server in Linux using two CentOS7 virtual machines (VMs) to represent the client and the server.

Image by Christina Morillo from Pexels
Before the days of high-powered storage appliances from tech giants like Netapp, DELL/EMC Isilon, and Hewitt Packard (HP), there needed to be an alternative way to store and share data when local hard disk space was limited and in short supply. The NFS protocol was born out of that need. It allowed end-users to share storage space over a network.
Before we begin, this tutorial assumes you have a RHEL7 or CentOS7 machine running with root or the sudo privileges to become root. First things first, check to see if the nfs-utils package is installed on your machine. If not, make sure it’s installed, running, and enabled to auto start after a reboot of your machine. To check if NFS is installed on your system, run the following command.
[admin@vm1 ~]$ sudo systemctl status nfs.service
The output below represents a running NFS service and if this service is running on your machine, you should see a similar output.
					[admin@vm1 ~]$ sudo systemctl status nfs.service
Loaded: loaded (/usr/lib/systemd/system/nfs-server.service; disabled; vendor preset: disabled)
Active: active (exited) since Tue 2022-02-01 12:16:52 EST; 6s ago
Process: 3191 ExecStartPost=/bin/sh -c if systemctl -q is-active gssproxy; then systemctl reload gssproxy ; fi (code=exited, status=0/SUCCESS)
Process: 3174 ExecStart=/usr/sbin/rpc.nfsd $RPCNFSDARGS (code=exited, status=0/SUCCESS)
Process: 3172 ExecStartPre=/usr/sbin/exportfs -r (code=exited, status=0/SUCCESS)
Main PID: 3174 (code=exited, status=0/SUCCESS)
CGroup: /system.slice/nfs-server.service
Feb 01 12:16:52 vm1.dev.infotechys.com systemd[1]: Starting NFS server and services...
Feb 01 12:16:52 vm1.dev.infotechys.com systemd[1]: Started NFS server and services.
[admin@vm1 ~]$ sudo yum -y install nfs-utils
To start the NFS service, run the following command (below):
[admin@vm1 ~]$ sudo systemctl start nfs.service
To enable the running NFS service so it auto starts after a system reboot, run the following command (below):
					[admin@vm1 ~]$ sudo systemctl enable nfs.service
Created symlink from /etc/systemd/system/multi-user.target.wants/nfs-server.service to /usr/lib/systemd/system/nfs-server.service.
[admin@vm1 ~]$ sudo firewall-cmd --permanent --add-service=rpc-bind
[admin@vm1 ~]$ sudo firewall-cmd --permanent --add-service=mountd
[admin@vm1 ~]$ sudo firewall-cmd --permanent --add-service=nfs
[admin@vm1 ~]$ sudo firewall-cmd --permanent --add-port=2049/tcp
[admin@vm1 ~]$ sudo firewall-cmd --permanent --add-port=2049/udp
[admin@vm1 ~]$ sudo firewall-cmd --reload
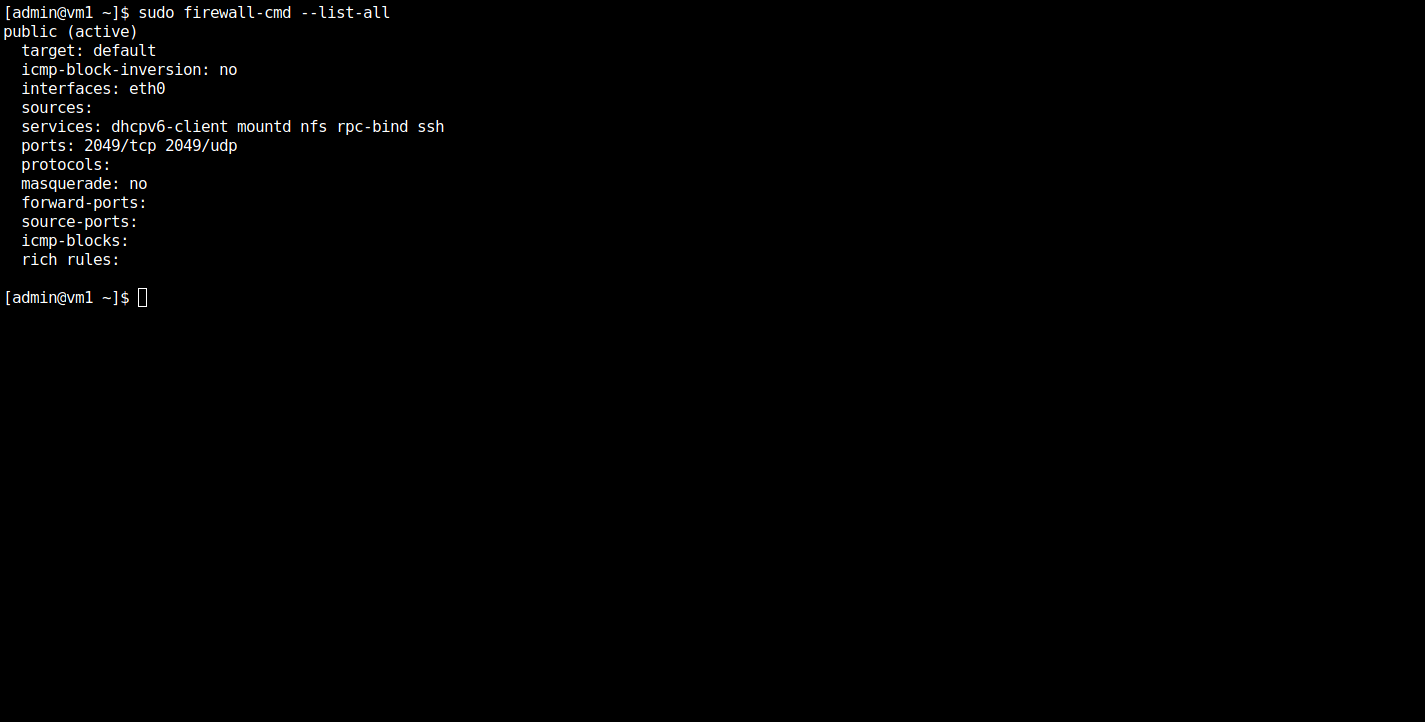
Finally, run the firewall-cmd --list-all command to list all firewall rules and verify all the necessary ports and services are allowed.

Photo by admingeek from Infotechys
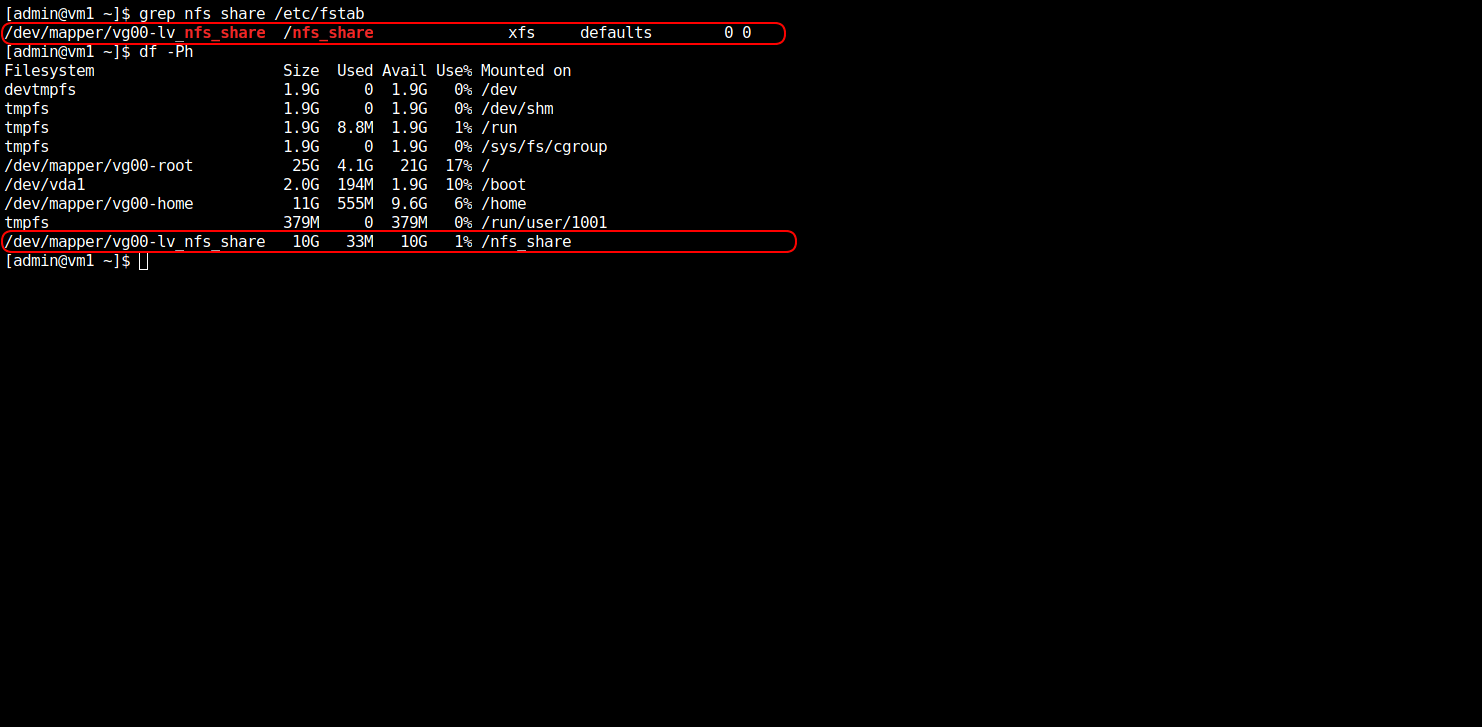
Now that we’ve established NFS is running and enabled properly on the server instance, we can proceed with creating a mount point to export to the client instance. Using the system storage manager (SSM), we created a 10GB mount point called nfs_share and made it persistent on this server by adding an entry for it to the /etc/fstab (see image below).
Visit the “Introducing the System Storage Manager (SSM)” article for instructions on how to create logical volumes and filesystems using SSM.

Photo by admingeek from Infotechys
To begin exporting the share, we need to first make the following entry (below) into the /etc/exports file.
					[admin@vm1:~] $ sudo cat /etc/exports
/nfs_share 192.168.1.197(rw,sync)
NOTE: The IP address in the output (above) belongs to the client host we are exporting the nfs_share to. The IP address entry in your /etc/exports file should match with the IP address of your client host.
Furthermore, the entry above will allow our client server with IP address 192.168.1.197, to mount nfs_share with read and write permissions. In addition, the sync option ensures all transfers to disk are committed to the disk before the write request by the client host is completed.
NOTE: By default, if the rw option is not specified in the /etc/exports file, the nfs_share will export with read-only permissions. There are other options you can specify in /etc/exports for access control purposes. Consult the man pages (
man exports) for more details.Using the exportfs command, export the nfs_share filesystem to the client host.
					[admin@vm1 ~]$ sudo exportfs -va
[sudo] password for admin:
exporting 192.168.1.197:/nfs_share
Next, SSH into the client server and ensure the firewall rules allow for NFS and NFS-related ports and services. Reference the Configure the firewall to allow NFS ports on the server section and repeat those steps on the client host.
Also, verify the firewall rules are applied and working properly.
					[admin@vm2:~]$ sudo firewall-cmd --list-all
public (active)
target: default
icmp-block-inversion: no
interfaces: eth0
sources:
services: dhcpv6-client mountd nfs rpc-bind ssh
ports: 2049/tcp 2049/udp
protocols:
masquerade: no
forward-ports:
source-ports:
icmp-blocks:
rich rules:
Before we proceed with mounting the /nfs_share filesystem, ensure the nfs-utils package is also installed on the client host. Do not start or enable any NFS services as it’s not required on the client host.
[admin@vm2:~]$ sudo yum -y install nfs-utils
Next, using the mount command, we can mount the nfs_share on the client with the following command (below).
[admin@vm2:~]$ sudo mount 192.168.1.196:/nfs_share /nfs_share
The IP address (above) belongs to the NFS server we are exporting from. Run the df command and grep for nfs_share to verify it mounted successfully.
					admin@vm2:~ $ df -Ph | grep nfs_share
192.168.1.196:/nfs_share 10G 32M 10G 1% /nfs_share
The NFS share can be made persistent by adding it as an entry to the /etc/fstab file. This will allow the /nfs_share to mount automatically even after rebooting your machine (see image below).

Photo by admingeek from Infotechys
Related Posts

Installing RHEL7 or CentOS7 on a PC is fairly easy to do. In this tutorial, we will review the installation process step-by-step. Today’s focus will

Configuring autofs in Linux is a straightforward task. This article will guide you through the process of setting up and enabling the autofs service. Table

Table of Contents 🔈Introduction Redhat recently introduced the System Storage Manager (SSM), a unified user interface that allows uses to manage complicated systems in a
