In today’s tutorial, we will install CentOS8 on KVM. The install process is fairly straightforward and we will cover it here step-by-step. We will follow

In this tutorial, we will install Komodo Editor on CentOS8. Granted, it can be installed on any Linux distribution (rpm-based or Debian distro). However, we will demonstrate the installation process using a CentOS8 virtual machine.

However, for this demonstration, our primary focus will be Linux-based.
Before we begin, this tutorial assumes you already have a Linux machine (preferably CentOS8) installed and running a user account with sudo privileges to become root. If you don’t have a CentOS8 instance installed, consider this article, “Install CentOS8 on KVM“, where we reviewed the CentOS8 installation process.
To download the latest Komodo Editor package, visit the ActiveState website. Since we are installing Komodo Editor on CentOS8, we will choose the Linux(x86_64) download link (image below).
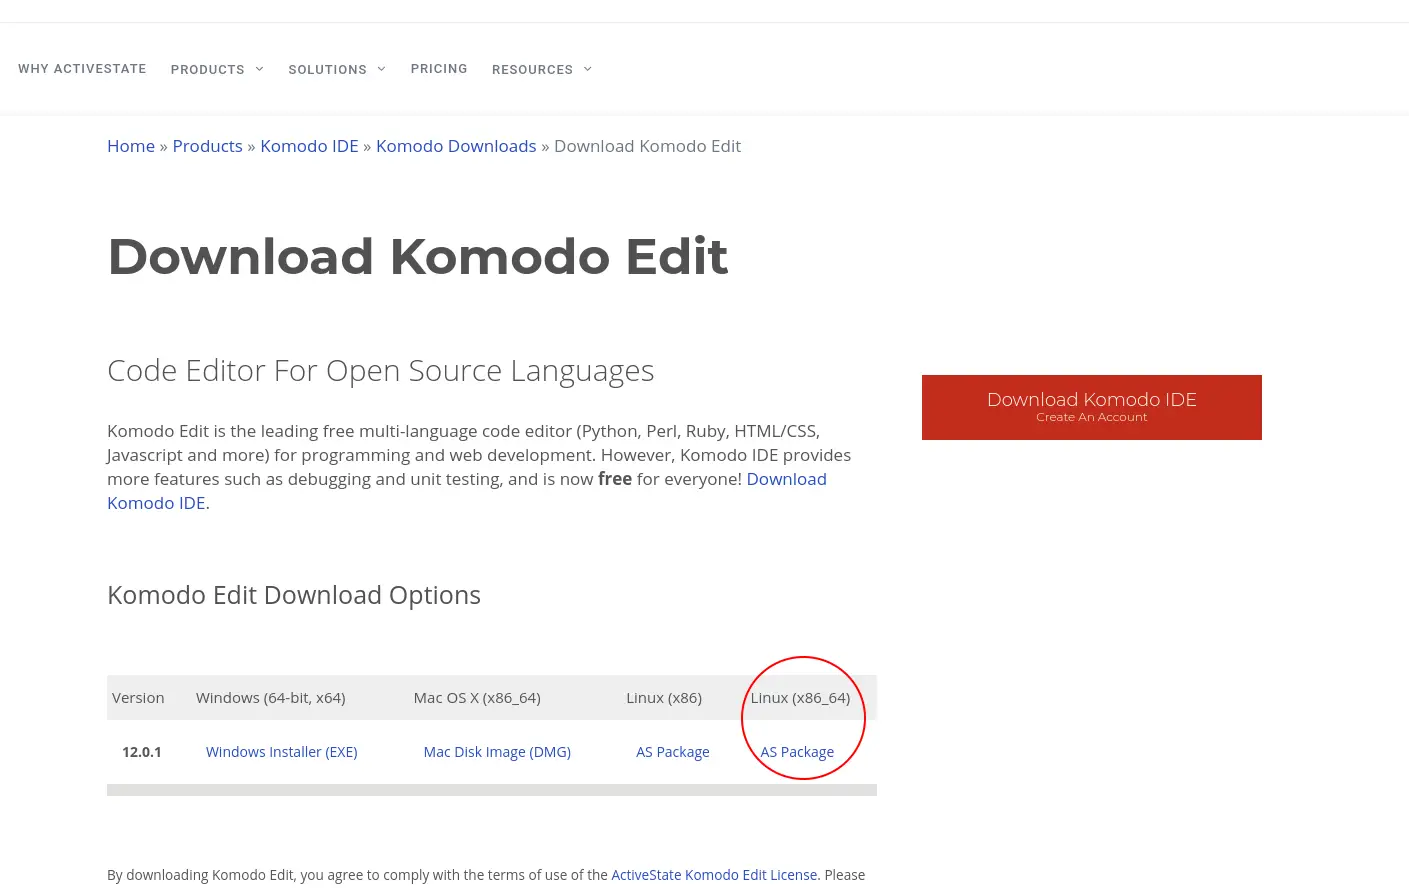
Photo by admingeek from Infotechys
You can also download Komodo Edit using the wget command (below): version 12.0.1 as of the date of this publication.
					[admin@vm5:~ $] wget https://downloads.activestate.com/Komodo/releases/12.0.1/Komodo-Edit-12.0.1-18441-linux-x6_64.tar.gz

--2022-04-09 17:27:20-- https://downloads.activestate.com/Komodo/releases/12.0.1/Komodo-Edit-12.0.1-18441-linux-x86_64.tar.gz
Resolving downloads.activestate.com (downloads.activestate.com)... 52.205.41.227, 52.3.206.59, 34.202.29.12, ...
Connecting to downloads.activestate.com (downloads.activestate.com)|52.205.41.227|:443... connected.
HTTP request sent, awaiting response... 200 OK
Length: 78492849 (75M) [application/x-tar]

Saving to: ‘Komodo-Edit-12.0.1-18441-linux-x86_64.tar.gz’
Komodo-Edit-12.0.1-18441-li 100%[=========================================>] 74.86M 48.9MB/s in 1.5s
2022-04-09 17:27:22 (48.9 MB/s) - ‘Komodo-Edit-12.0.1-18441-linux-x86_64.tar.gz’ saved [78492849/78492849]
Next, unpack the Komodo-Edit zipped file with the following tar command (below):
[admin@vm5:~ $] tar -xzvf Komodo-Edit-12.0.1-18441-linux-x86_64.tar.gz
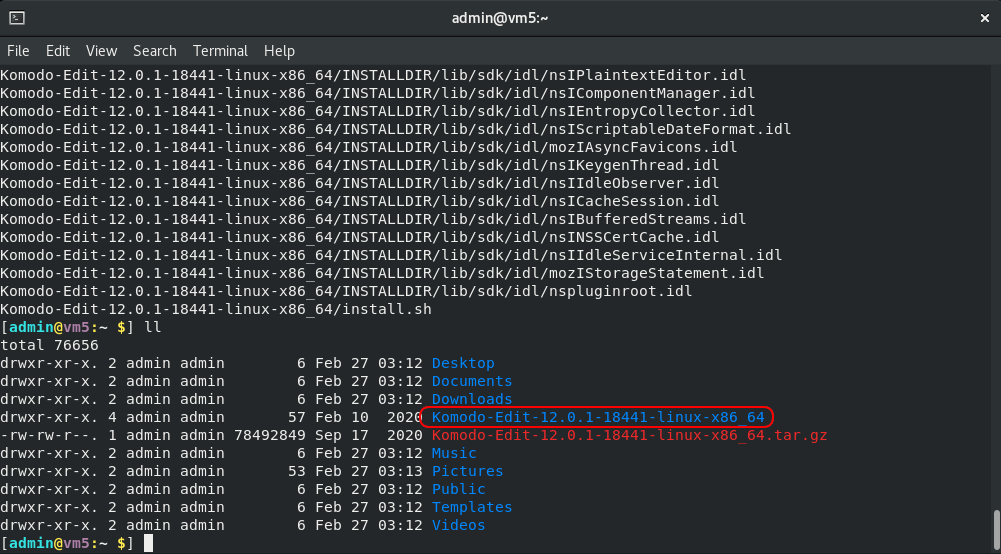
Photo by admingeek from Infotechys
This is not required, but I like to rename the unpacked file to something shorter like Komodo-Edit-12.0.1 — showing just the name and version.
[admin@vm5:~ $] mv Komodo-Edit-12.0.1-18441-linux-x86_64 Komodo-Edit-12.0.1
Now, cd into the Komodo-Editor-12.0.1 directory and run the Installation script (install.sh)
					[admin@vm5:~/Komodo-Edit-12.0.1 $] ./install.sh
Enter directory in which to install Komodo. Leave blank and
press 'Enter' to use the default [~/Komodo-Edit-12].
Install directory:
Enter the path where you want the installation to take place. Otherwise, press the [Enter] key to choose the default option.
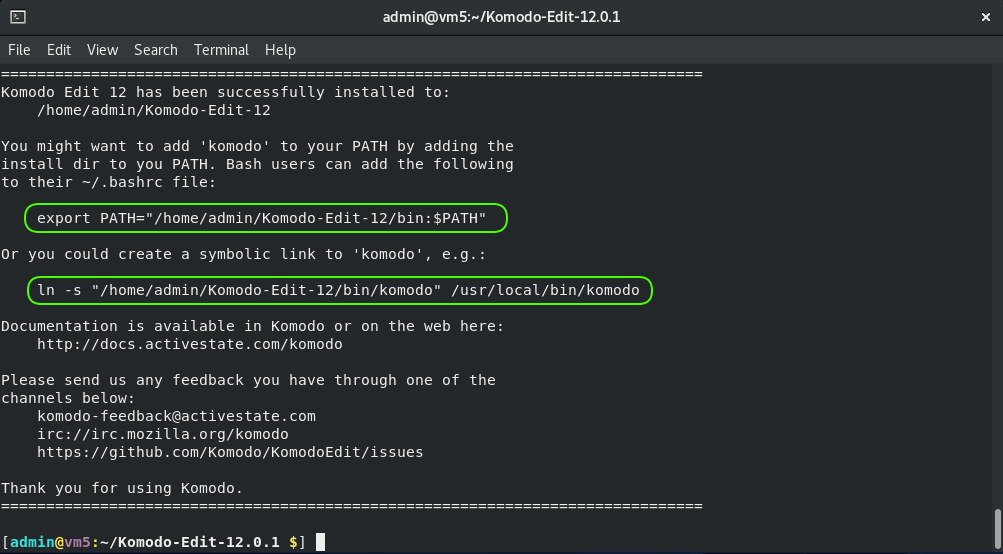
Photo by admingeek from Infotechys
After a couple of minutes, the installation will complete and output the following (image above) to your terminal screen. Follow the instructions above (highlighted in green) as applicable. Your options will look different based on your user or where you choose to install the editor.
In the command below, we’re creating a symbolic link to the komodo executable file. This will allows us to launch the editor by simply entering “komodo” on the command line.
[admin@vm5:~ $] sudo ln -s "/home/admin/Komodo-Edit-12/bin/komodo" /usr/local/bin/komodo
After completing the post-installation steps, you can launch Komodo Editor by selecting it from your activities window (image below). Upon launching the editor for the first time, you will be presented with a number of options. Ignore those options for now by clicking the Next button until you arrive at the startup window (image below).
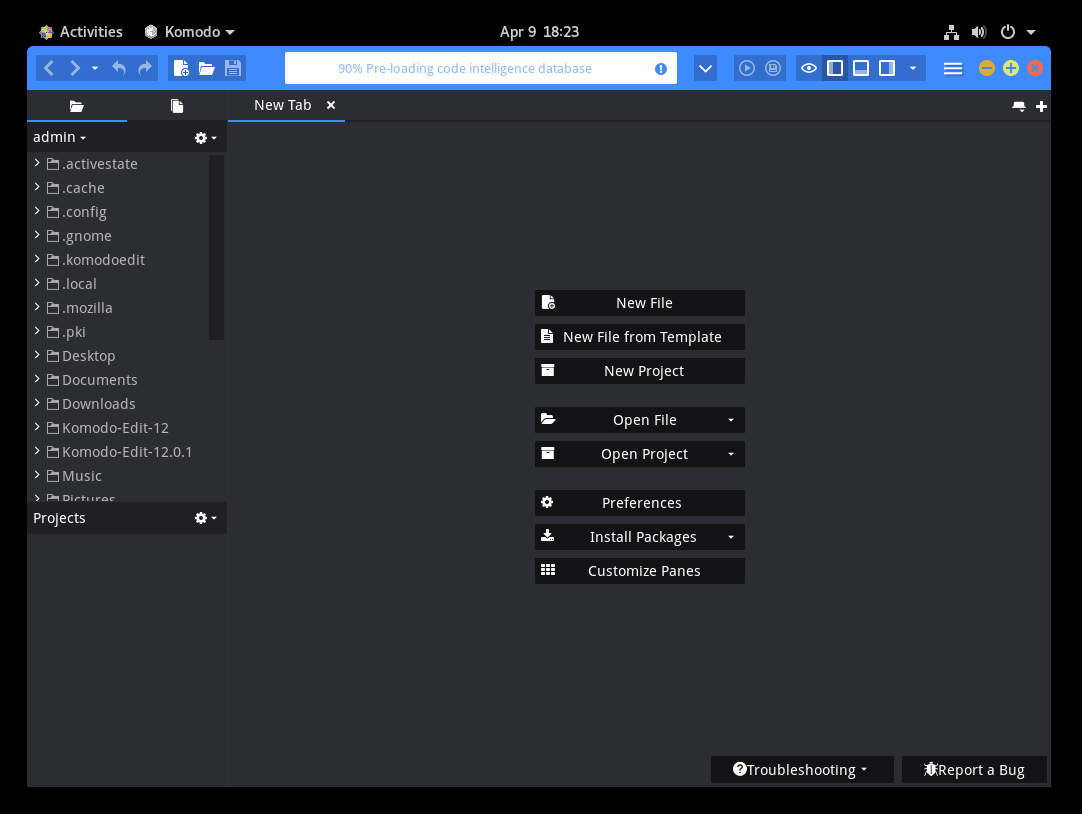
Photo by admingeek from Infotechys
We have successfully reviewed the Komodo Editor installation process on CentOS8. Was this article helpful to you? If so, leave us a comment. We’d love to hear from you!
Related Posts

In today’s tutorial, we will install CentOS8 on KVM. The install process is fairly straightforward and we will cover it here step-by-step. We will follow

In this article, we will review how to install brackets on CentOS8. This will follow a similar procedure we covered in our previous post: Install

In this article, we will review in detail how to install sublime text4 on CentOS8 or RHEL8 and also provide examples. Table of Contents Brief
