In this tutorial, we will review the Kubernetes cluster install on CentOS8. This procedure will mirror our previous article about this subject. Install a Kubernetes

If you’re experiencing the unsupported graphic type ‘spice’ error when accessing virtual machines (VMs) on your oVirt (version 4) environment, don’t worry – there’s a workaround you can try. This error is usually caused by upgrading your operating system to RHEL9 or CentOS 9, as the QXL driver is no longer supported, which is required for proper Spice functionality.
Here are the steps you can take to potentially resolve the issue:
Log in to oVirt’s Open Virtualization Manager (ovirt-engine) from your web browser.
Select a VM and navigate to its console settings.
Change the Graphics Protocol option to SPICE+VNC (enabling VNC).
Click OK to exit the window.
Reboot the VM to apply the new settings.
Switch the VM’s Console options to VNC. The Console Invocation options will be displayed.
Select the noVNC option, which allows you to console into the VM from your web browser.
Finally, click the console button to access the VM.
Please note that in order for this workaround to function properly, you will need to import your ovirt-engine certificate to your web browser’s trusted store. If you encounter an error regarding the certificate not being trusted, you will need to download the certificate (pki-resource) cert file and import it to your web browser. Additionally, ensure that port 6100 is open in your hosted engine or ovirt-engine’s firewall, and make sure that the ovirt-websocket-proxy.service is running, as this method will not work otherwise.
Here is a breakdown of the steps outlined in the solutions section above:
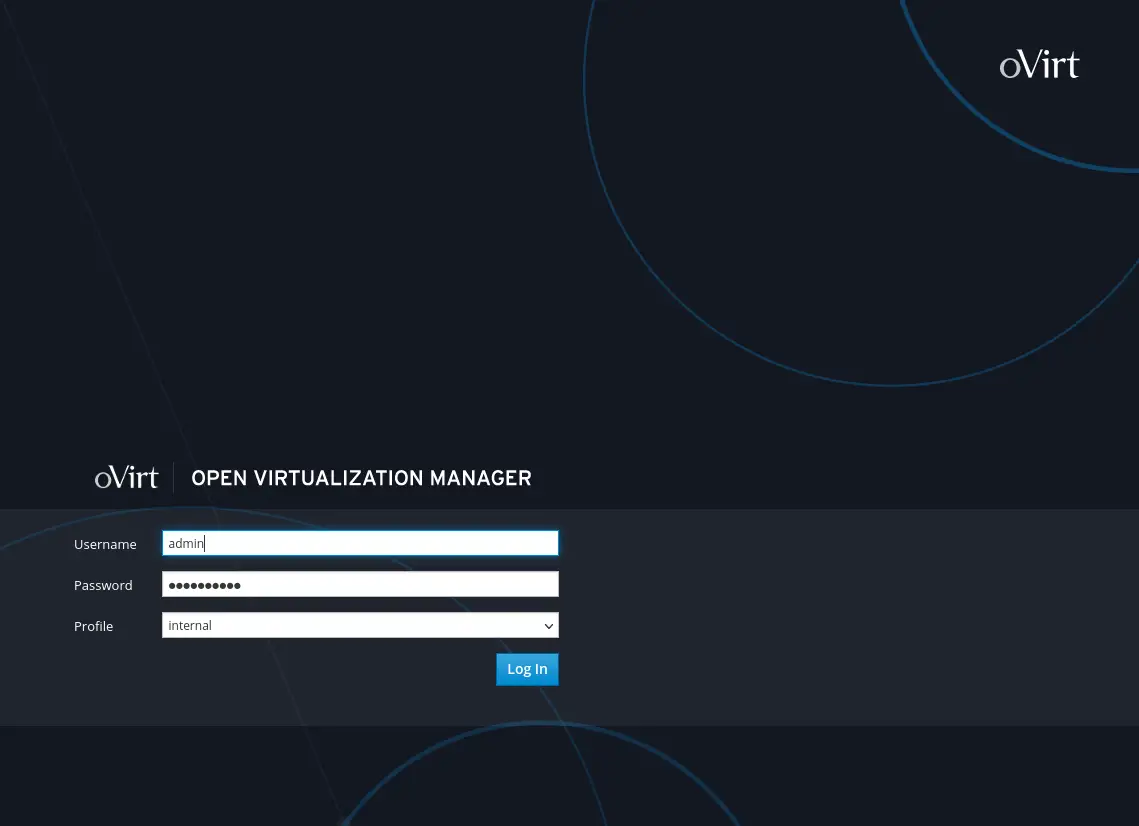
Step 1: Log in to oVirt’s Open Virtualization Manager
Enter your login credentials and navigate to the virtual machines window.

Photo by admingeek from Infotechys
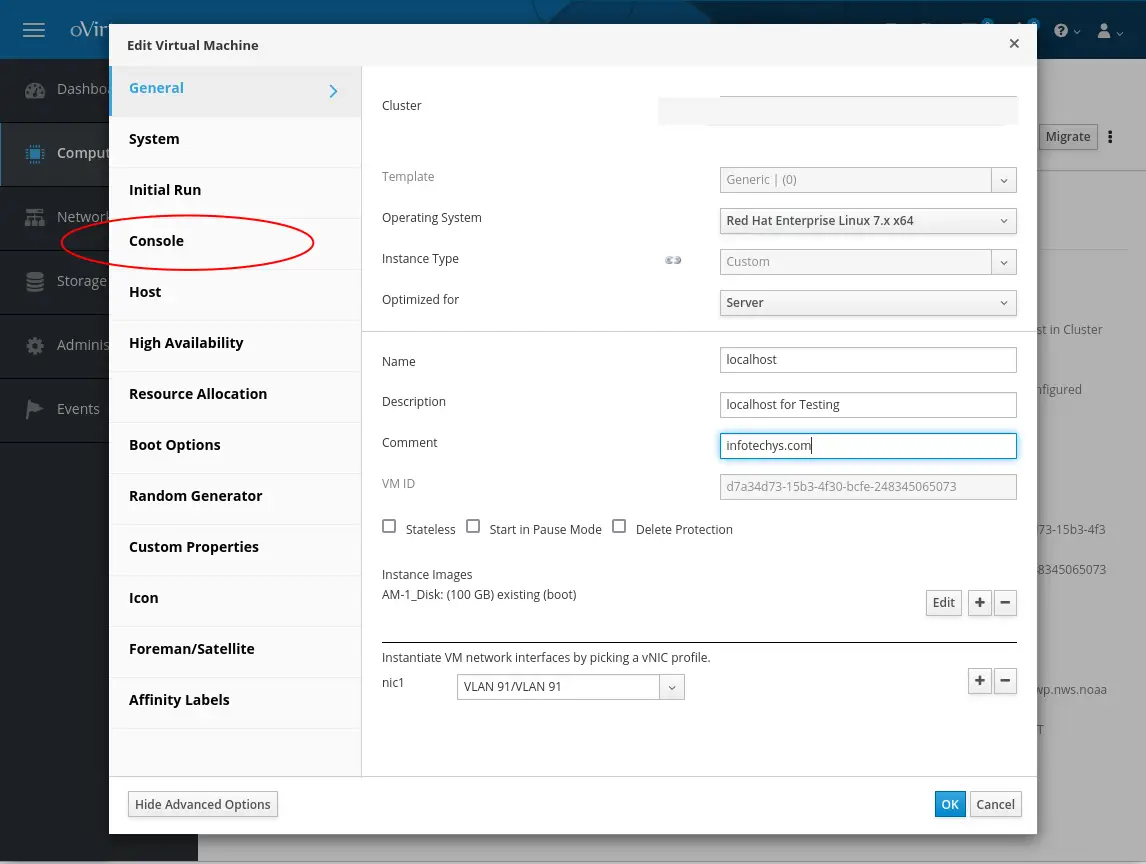
Step 2: Select a VM and navigate to its console settings.
Click the console (circled in red) to be presented with the display driver and graphical console options.

Photo by admingeek from Infotechys
Step 3: Change the Graphics Protocol and Restart the VM.
Select the SPICE+VNC option and click ok to exit the window. Next, reboot the VM to allow the changed settings to take effect.

Photo by admingeek from Infotechys
Step 4: Switch the VM console option to VNC and noVNC.
Switch VM’s console option to VNC and the console invocation option to noVNC. Click OK button to continue.

Photo by admingeek from Infotechys
You’re Done! Now when you console into that VM, you will be redirected to a new tab in your web browser and presented with an encrypted web console session. Repeat steps 1-4 on any other running VMs that require similar access.
Now, we will review how to import the ovirt-engine certificate to Firefox and Google Chrome.
Log in to your oVirt engine from your Firefox web browser.
Click on the padlock icon next to the URL bar to view the site’s security information.
Click on the right arrow next to “Connection secure” and then click on “More Information.”
In the “Page Info” window, click on the “Security” tab.
Click on the “View Certificate” button.
In the Certificate Viewer, click on the “Details” tab.
Click on the “Export” button, then save the certificate file to your desired location.
Close the Certificate Viewer and open Firefox’s Preferences menu.
Click on “Privacy & Security” and then scroll down to the “Certificates” section.
Click on “View Certificates” and then click on the “Import” button.
Browse to the location where you saved the ovirt-engine certificate file and select it.
Click “Open” and then follow the prompts to complete the import process.
Log in to your oVirt engine from your Chrome web browser.
Click on the padlock icon next to the URL bar to view the site’s security information.
Click on “Certificate (valid)” and then click on “Details.”
In the “Certificate Details” window, click on the “Copy to File” button.
Follow the prompts to save the certificate file to your desired location.
Open Google Chrome’s Settings menu and click on “Privacy and security.”
Click on “Manage certificates” and then click on the “Import” button.
Browse to the location where you saved the ovirt-engine certificate file and select it.
Click “Open” and then follow the prompts to complete the import process.
Once you have imported the ovirt-engine certificate to your browser, you should be able to access the VMs through the console without encountering any SSL certificate warnings or errors.
The Spice graphics protocol, utilized for virtualization, empowers virtual machines (VMs) to exhibit high-quality graphics and multimedia content on a remote machine. However, Spice graphics protocol is no longer supported on RHEL9 or CentOS9 because the upstream development for Spice, the QEMU project, has ceased support for the QXL display driver. The QXL driver, essential for proper Spice functionality, facilitates advanced graphics capabilities like 3D acceleration and video playback in virtual machines.
This change affects not only the QXL driver but also several other display drivers deprecated by Red Hat, including Cirrus, VGA, and VMware SVGA. These have been supplanted by the more modern VirtIO-GPU driver, offering enhanced performance and additional features.
Consequently, RHEL9 and CentOS9 no longer accommodate Spice graphics protocol due to its dependence on the QXL display driver. Users are instead encouraged to utilize the VirtIO-GPU driver or other supported display drivers for their virtual machines. This transition aligns with Red Hat’s ongoing commitment to enhancing product performance, stability, and security through the adoption of modern technologies and best practices.
In summary, we have examined the “unsupported graphic type ‘spice'” error in the context of the oVirt virtualization platform and version 9 of the RHEL/CentOS operating system. We now understand the cause of the error and an alternative method for accessing the console of VMs in the oVirt virtual environment.
If you found this article helpful, please let us know by leaving a comment below. We would greatly appreciate your feedback!
Related Posts

In this tutorial, we will review the Kubernetes cluster install on CentOS8. This procedure will mirror our previous article about this subject. Install a Kubernetes

In this article, we will review installing and using Git on Linux machines. Besides minor differences in syntax, the install commands and procedures are similar

In this article, we will review the process for creating snapshots in KVM. As part of this process, we will learn how to script this
