Commands
Learn how to install RHEL 8.10 Workstation in 12 easy steps. This detailed guide covers everything from preparing a bootable USB to post-installation setup, making

Learn how to install Oracle Solaris 11.4 on Intel and AMD x86-64 hardware with this step-by-step guide covering ZFS, installation options, and post-install best practices.
Oracle Solaris 11.4 is a modern UNIX operating system designed for enterprise-grade reliability, security, and performance. Built for mission-critical workloads, Solaris offers advanced features such as ZFS, DTrace, Zones, Predictive Self-Healing, and a fully integrated lifecycle management system. While often associated with SPARC systems, Solaris 11.4 runs exceptionally well on Intel and AMD x86-64 hardware, making it a powerful option for labs, servers, and virtualization hosts.
This guide walks through a complete, practical installation of Oracle Solaris 11.4 on x86-64 hardware, structured to be clear, search-friendly, and suitable for both first-time and returning Solaris users.
Before installing, it helps to understand what makes Solaris unique on Intel/AMD systems:
|
|
|
|
|
|
Solaris 11.4 is especially attractive for administrators who value robustness, compliance, and observability over rapid-release Linux distributions.
📋 Minimum Hardware Requirements |
| Component | Requirement |
|---|---|
| Architecture | 64-bit Intel or AMD (x86-64) |
| CPU | 2 cores recommended |
| RAM | 4 GB minimum (8 GB+ recommended) |
| Disk | 20 GB minimum (ZFS benefits from more) |
| Firmware | BIOS or UEFI |
| Network | Ethernet or supported NIC |
For demonstration purposes, we’ve configured our Solaris server as follows:
| Hostname | RAM | Cores | Storage / Operating System (OS) |
| solaris.dev.naijalabs.net | 8 | 4 | 150 GB / Oracle Solaris 11.4 X86 |
🔹Supported Platforms |
Solaris 11.4 supports a wide range of commodity servers and virtual machines, including:
|
|
|
|
Oracle Solaris installation media is available from Oracle’s official website. Download the text installer ISO image for x86_64 systems.
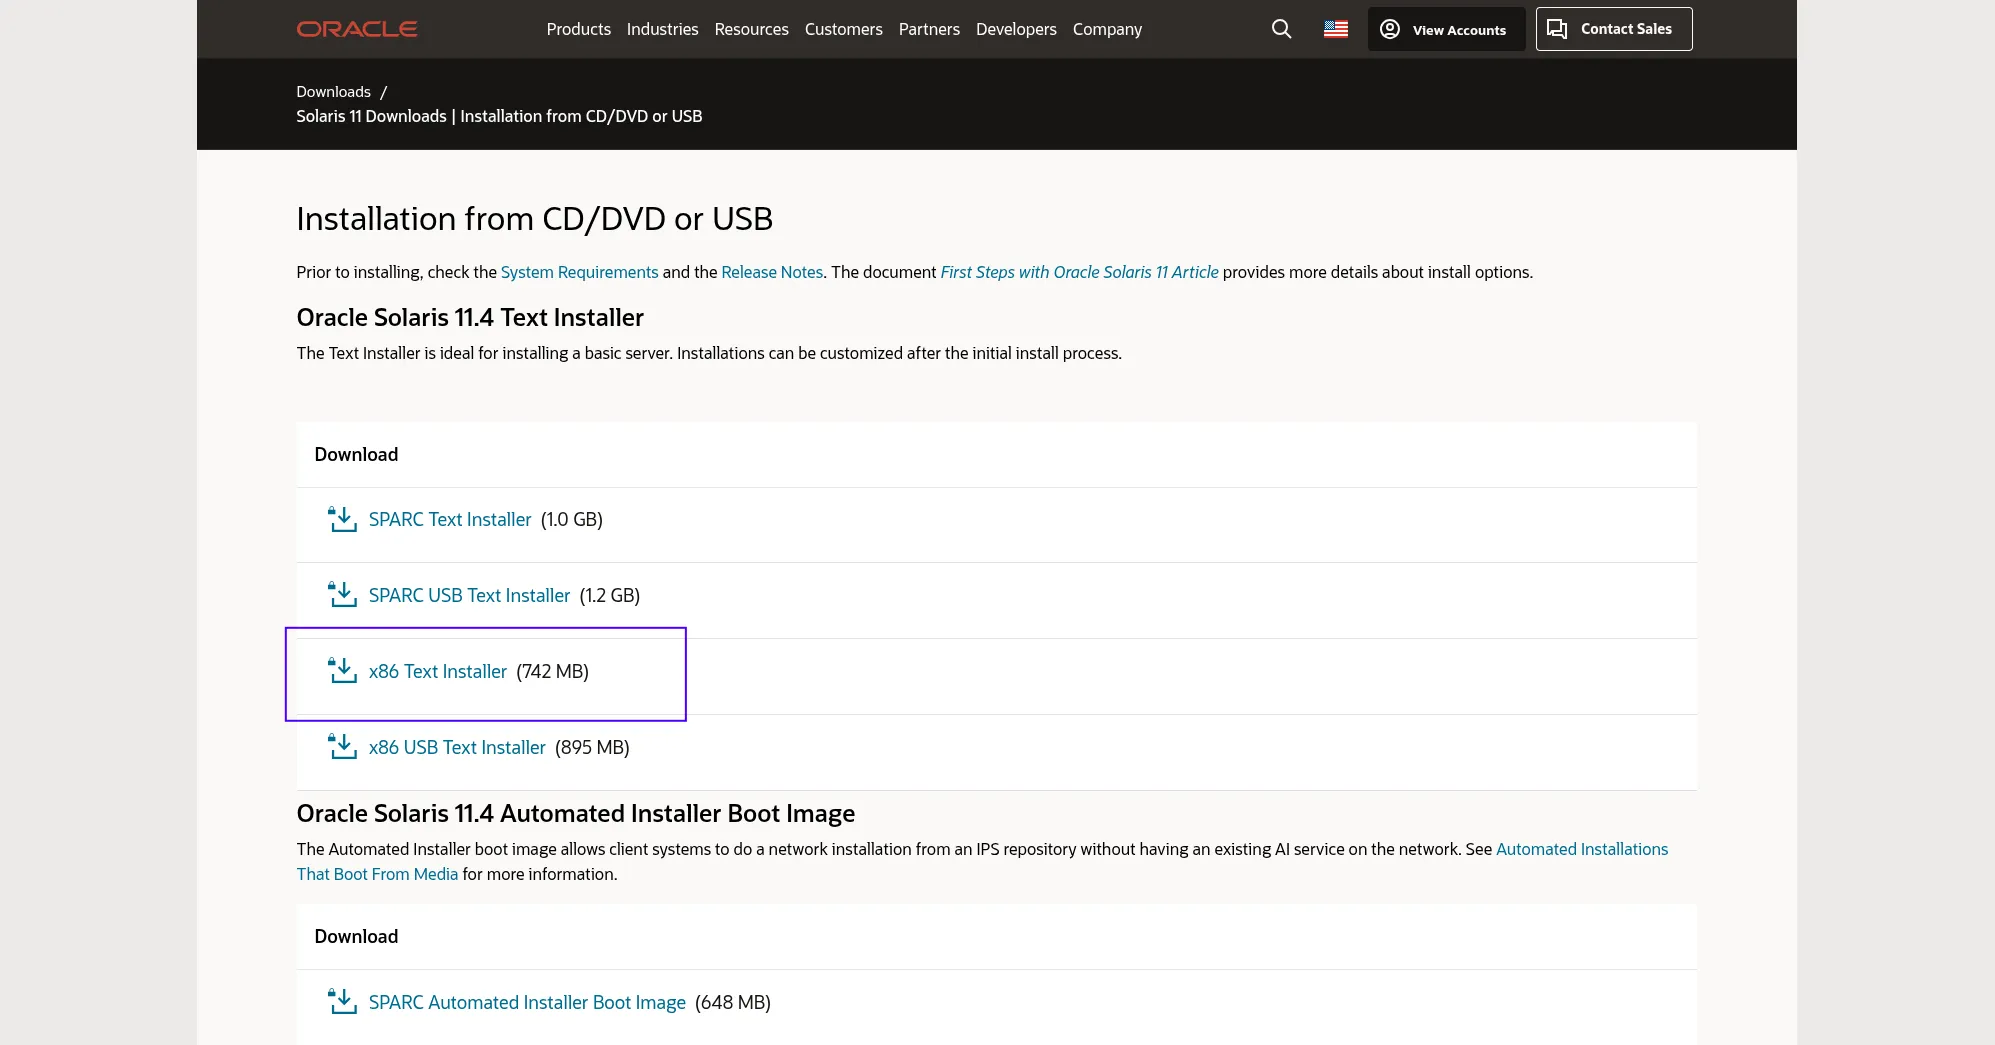
Photo by admingeek from Infotechys
📝 Note: You must have an Oracle account and accept the Oracle License Agreement to access and download the Oracle Solaris 11.4 ISO. |
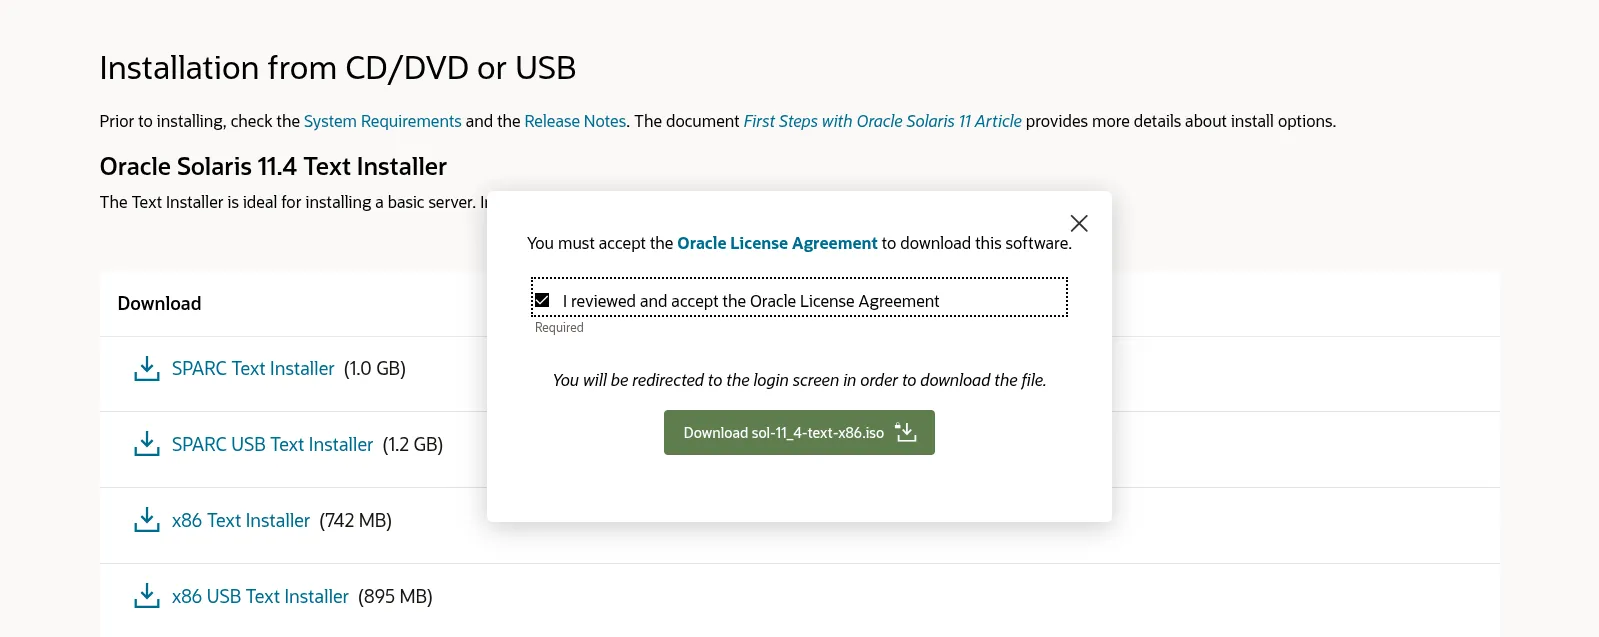
Photo by admingeek from Infotechys
sudo dd if=sol-11_4-text-x86.iso of=/dev/sdX bs=4M status=progress oflag=sync
Replace /dev/sdX with your USB device. Or, you can burn a DVD or use virtualization (e.g., virt-manager, VirtualBox) and mount the ISO directly.
|
|
|

Photo by admingeek from Infotechys
You will be presented with the Oracle Solaris Welcome screen and prompted with the following options:
|
|
|

Photo by admingeek from Infotechys
🔹Disk and ZFS Configuration |
Solaris uses ZFS as the root filesystem, which is one of its strongest advantages.
🔹ZFS Pool Layout Options |
| Layout | Description |
|---|---|
| Single Disk | Simple and fast (labs, VMs) |
| Mirror | Redundancy (recommended for servers) |
| RAID-Z | Data protection with capacity efficiency |
Example pool layout preview:
					rpool
 ├─ rpool/ROOT/solaris
 ├─ rpool/VAR
 └─ rpool/export
📝 Note: Solaris automatically creates Boot Environments, allowing safe upgrades and rollbacks. |
🔹System Configuration |
You will be prompted to enter a computer name (hostname). If applicable, provide a fully qualified domain name (FQDN):
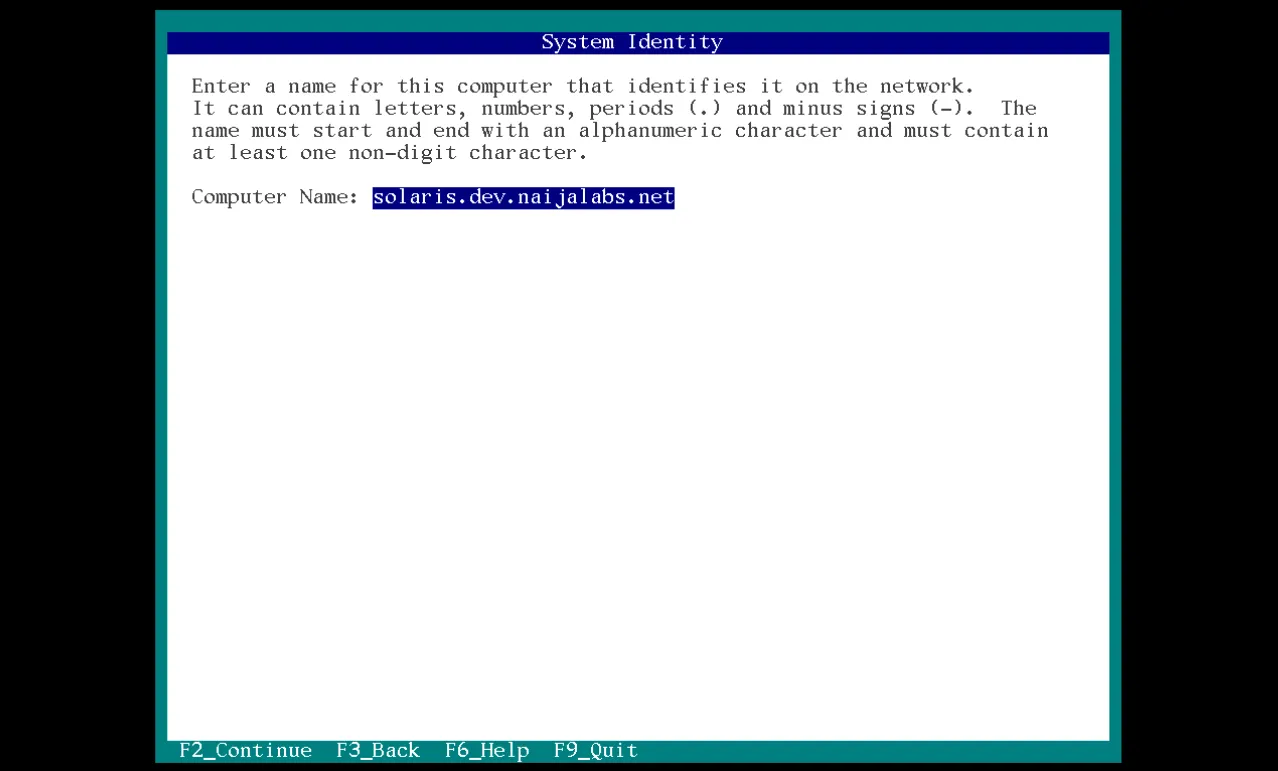
Photo by admingeek from Infotechys
🔹Network Configuration |
Next, select your wired network connection and press the F2 key to continue.
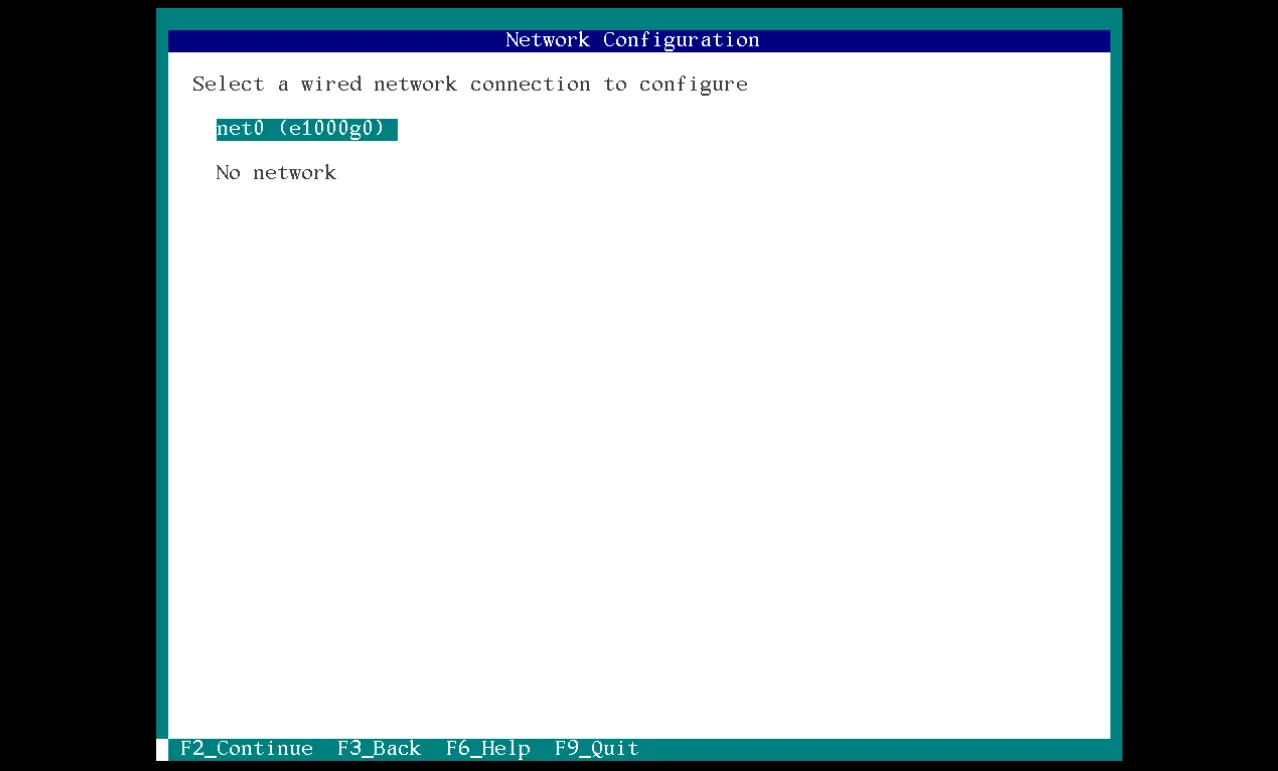
Photo by admingeek from Infotechys
Decide whether to use DHCP to automatically configure the network interface or to configure it manually. If you choose manual configuration, you must provide a unique IPv4 address that is not already in use on your network.
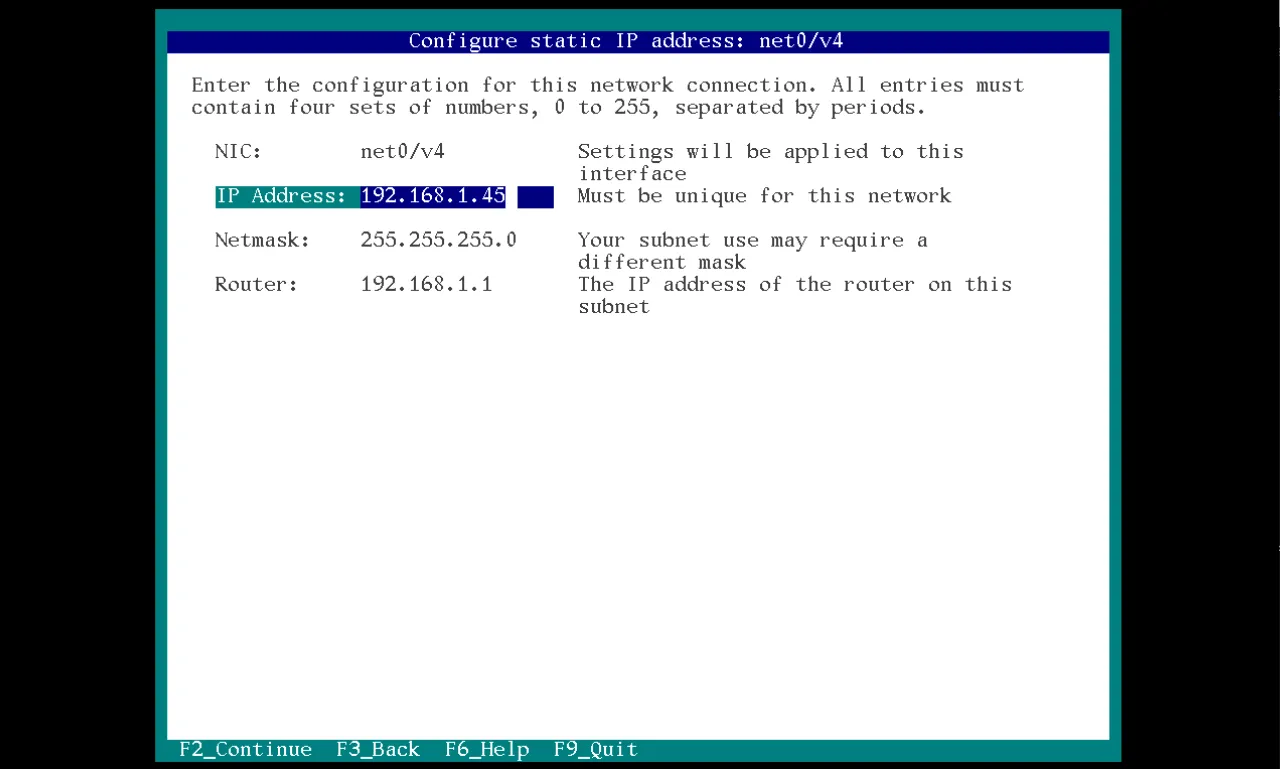
Photo by admingeek from Infotechys
🔹DNS and Name Service Configuration |
Next, choose whether to configure DNS. If you enable DNS, you will need to provide the appropriate nameserver IP address and search domain.
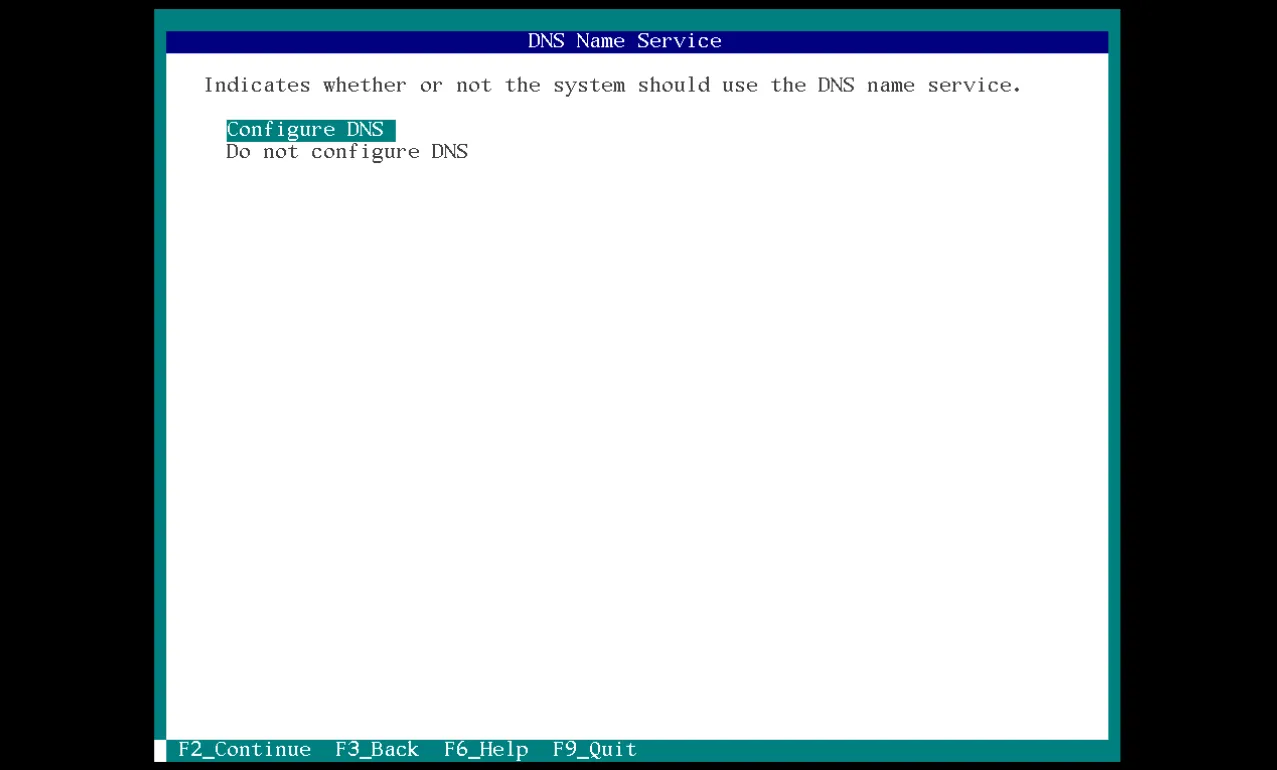
Photo by admingeek from Infotechys
The same applies when selecting a name service (such as LDAP or NIS). The chosen name service can be used in conjunction with your DNS configuration.
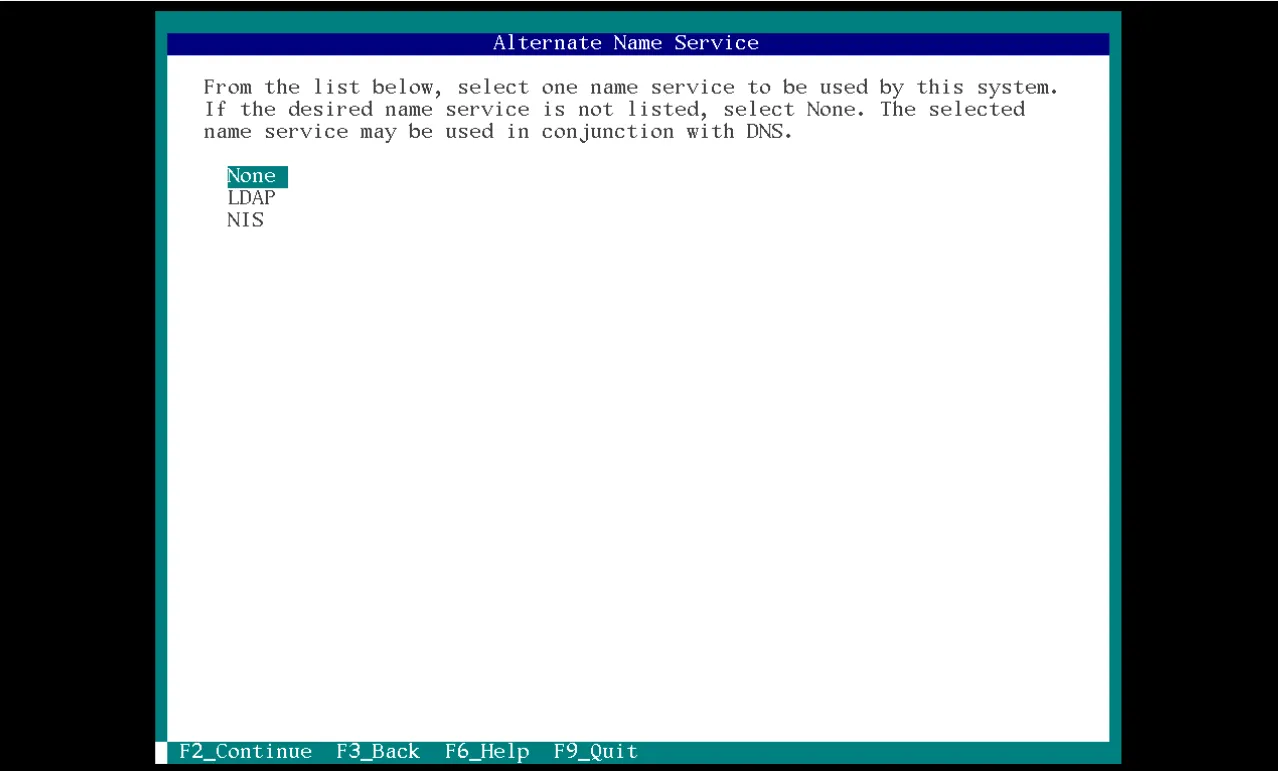
Photo by admingeek from Infotechys
🔹Configure Timezones, Regions and Layouts |
The next sections cover time zone, region, and locale settings. These options are largely self-explanatory and should be selected based on your environment.
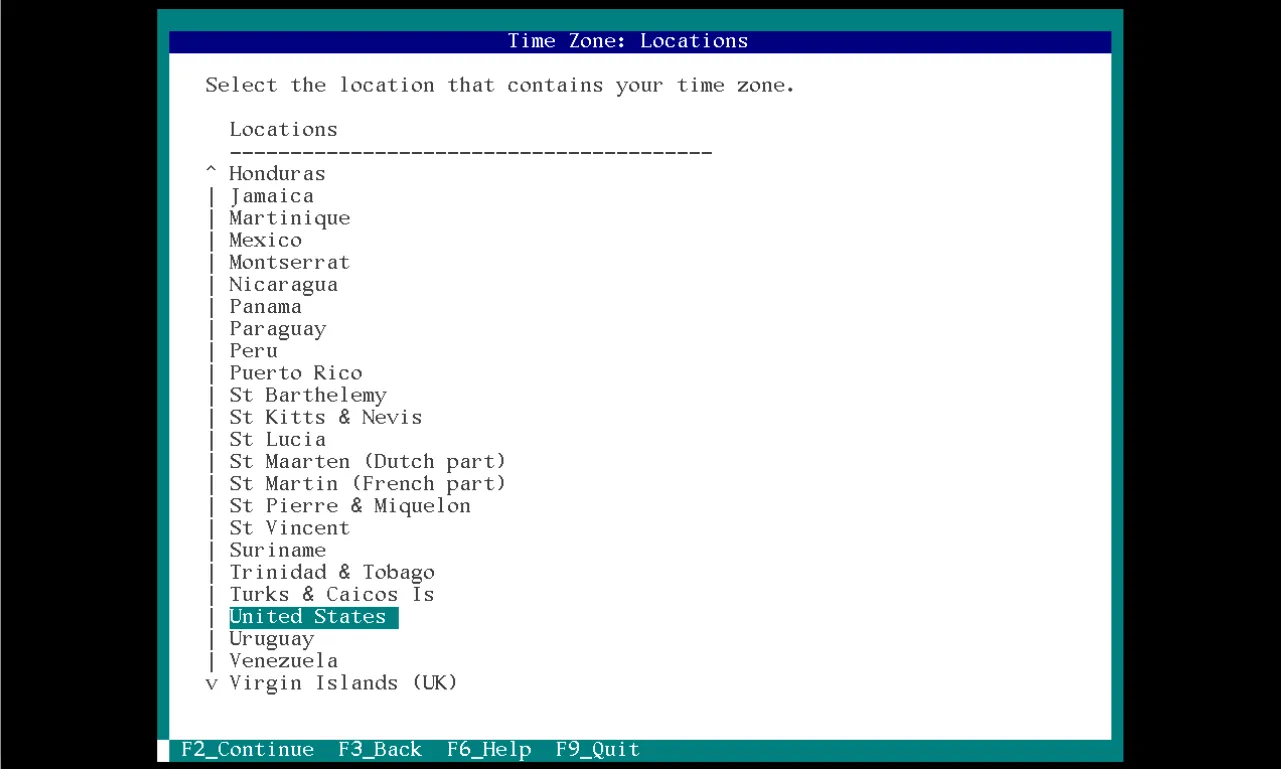
Photo by admingeek from Infotechys
It also includes confirming the date and time (UTC by default) and selecting your keyboard layout and language:
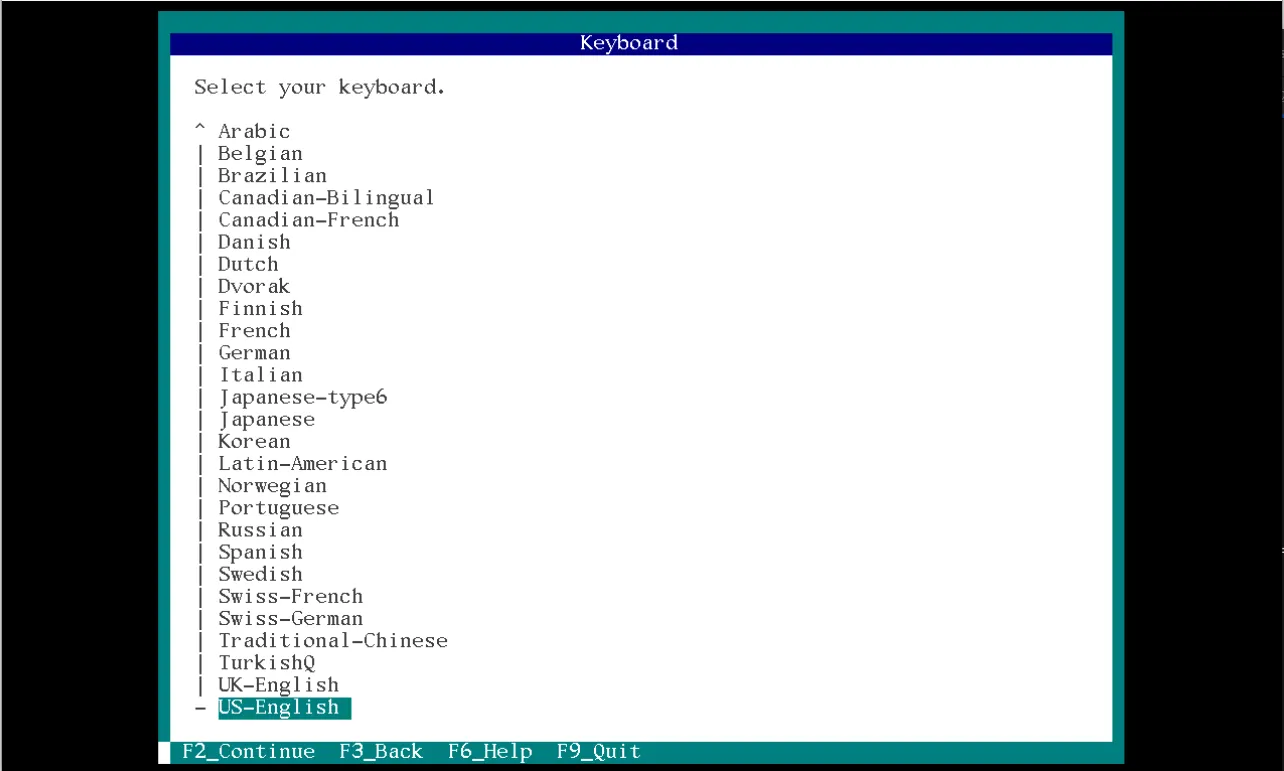
Photo by admingeek from Infotechys
🔹System and User Account Settings |
Finally, define a root password for the system and create a primary user account for yourself. You may also provide an email address to receive security updates from My Oracle Support, or press F2 to continue with the default settings.
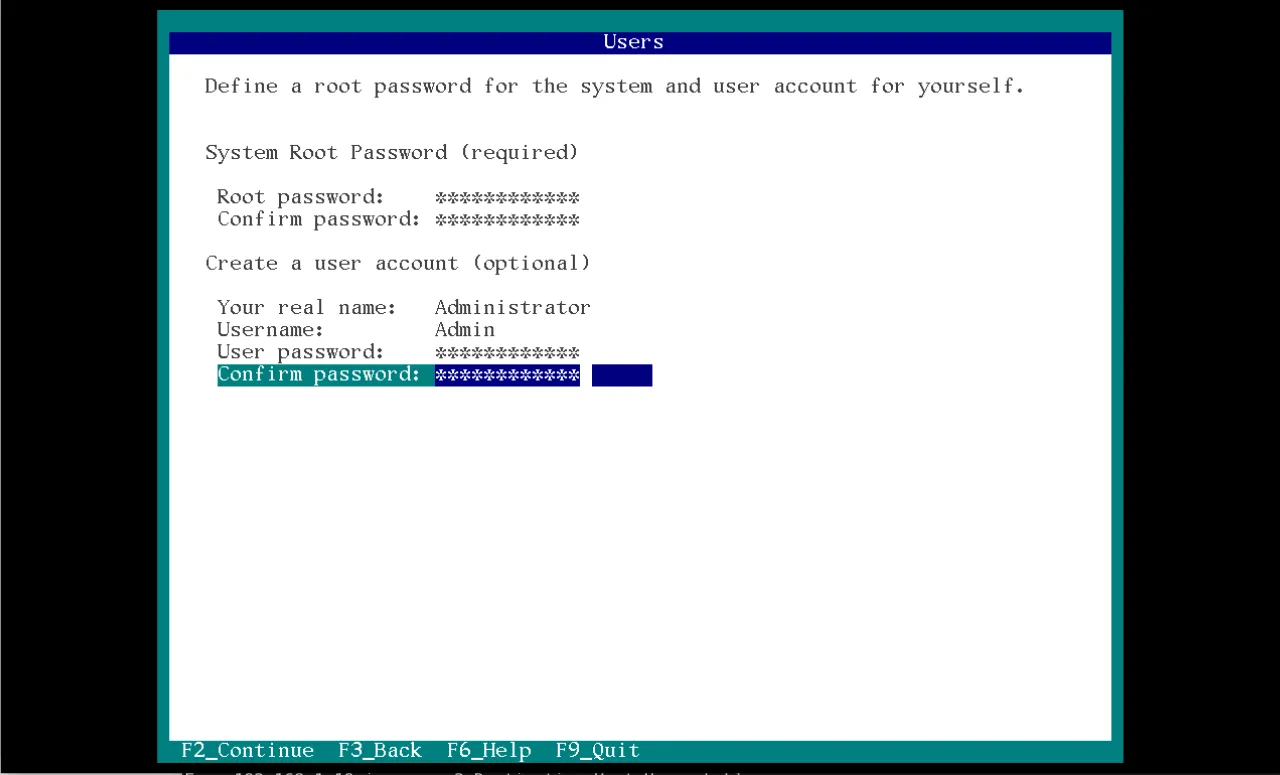
Photo by admingeek from Infotechys
📝 Note: Solaris encourages non-root administration using |
Review the installation summary before proceeding. Press F3 to go back and make changes, or press F2 to start the installation.
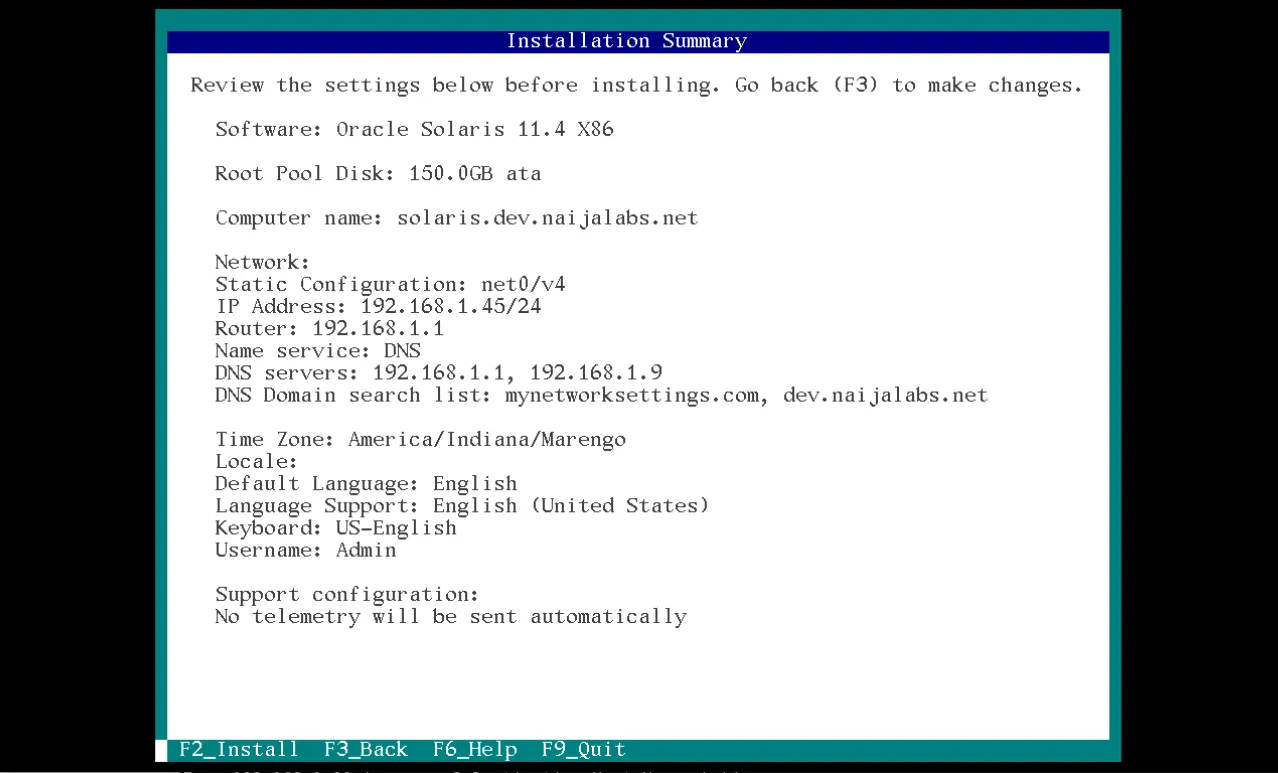
Photo by admingeek from Infotechys
The installation process typically takes 15–40 minutes, depending on the hardware.
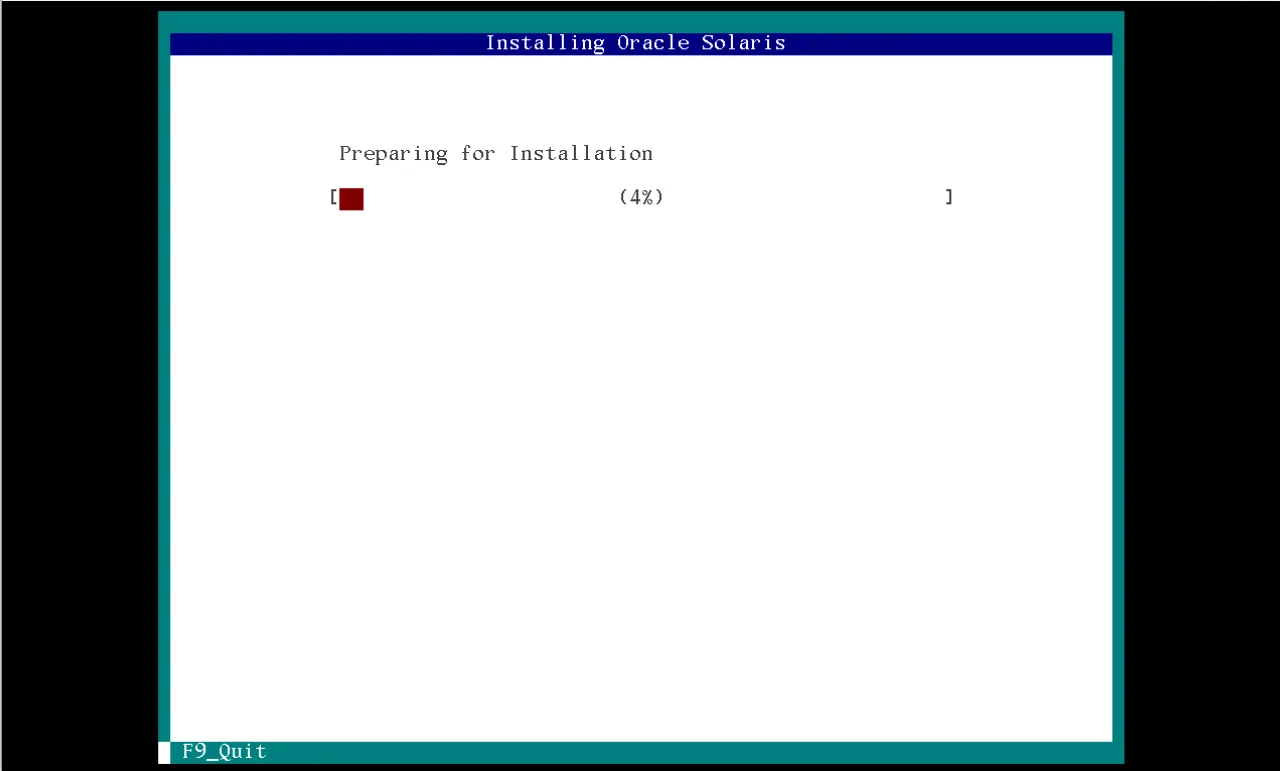
Photo by admingeek from Infotechys
Once completed, the system will prompt you to reboot—press F8 to restart into your new Oracle Solaris installation.
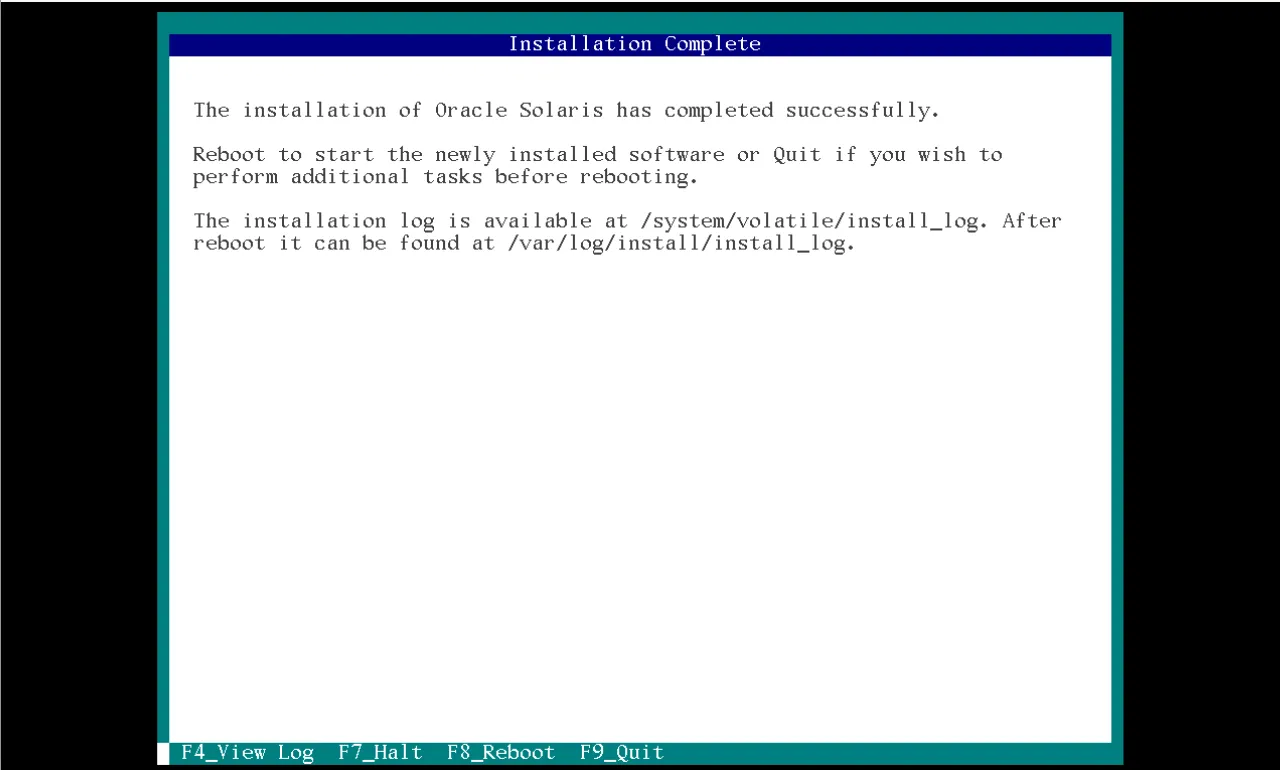
Photo by admingeek from Infotechys
Congratulations! Your Oracle Solaris 11.4 installation is complete. You can now log in using your administrative credentials and begin the post-installation tasks outlined in the next section.
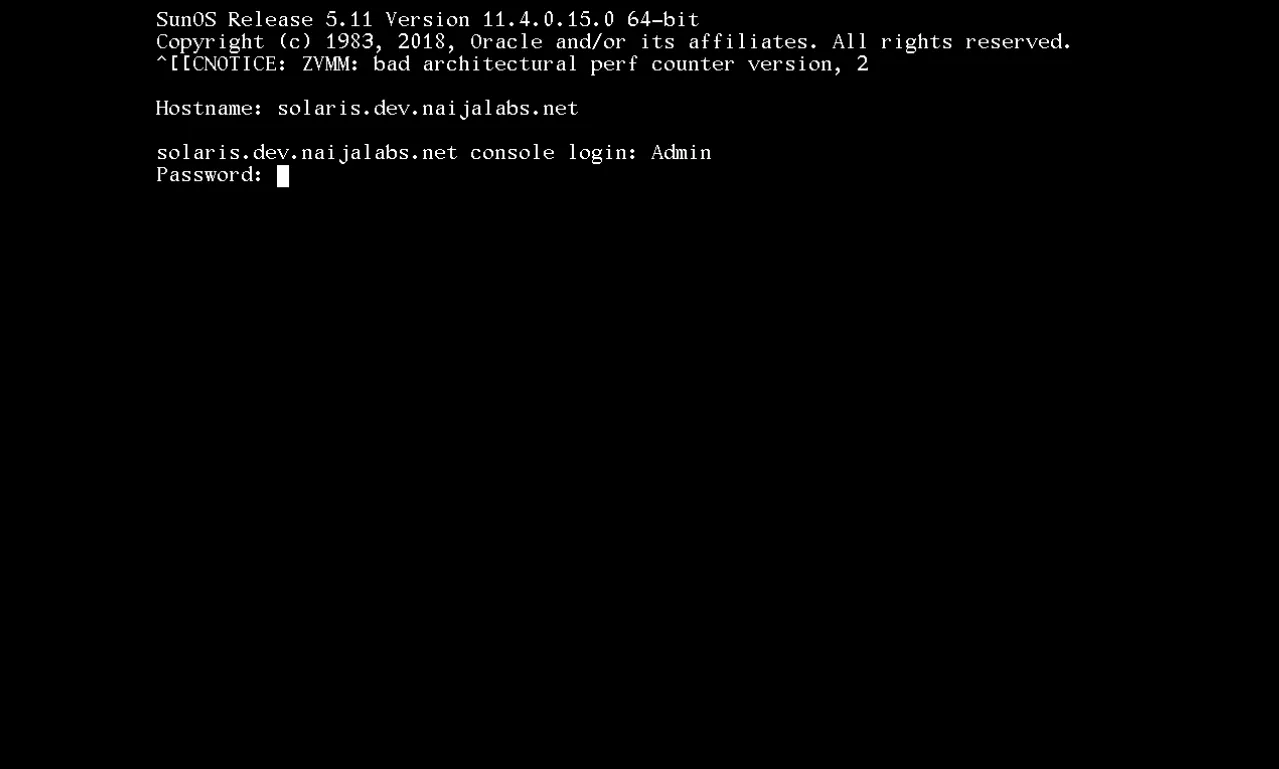
Photo by admingeek from Infotechys
Log in as your user or root.
🟢 Verify Solaris Version |
uname -a
SunOS solaris.dev.naijalabs.net 5.11 11.4.0.15.0 i86pc i386 i86pc
cat /etc/release
					                             Oracle Solaris 11.4 X86
  Copyright (c) 1983, 2018, Oracle and/or its affiliates.  All rights reserved.
                            Assembled 16 August 2018
🟢 Check ZFS Pool Status |
zpool status
					  pool: rpool
 state: ONLINE
  scan: none requested
config:

        NAME    STATE      READ WRITE CKSUM
        rpool   ONLINE        0     0     0
          c1d0  ONLINE        0     0     0

errors: No known data errors
🟢 List Boot Environments |
beadm list
					BE Name Flags Mountpoint Space Policy Created
------- ----- ---------- ----- ------ ----------------
solaris NR    /          3.02G static 2026-01-03 18:30
🟢 Update the System |
Solaris uses the Image Packaging System (IPS):
pfexec pkg update
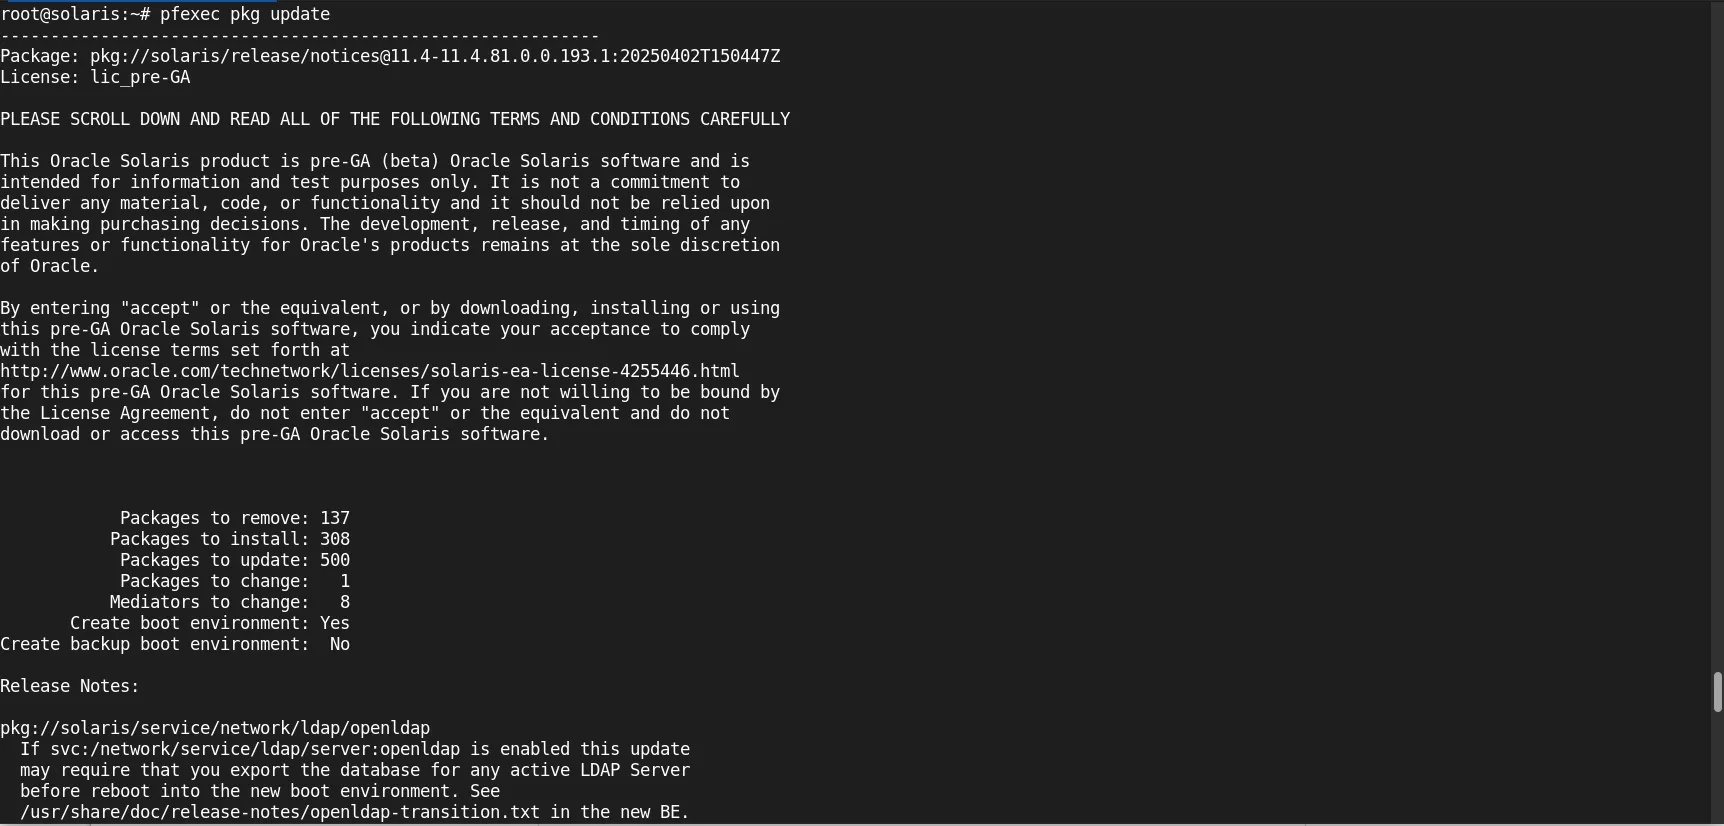
Photo by admingeek from Infotechys
This safely creates a new boot environment before applying updates.
🟢 Install Common Utilities |
pfexec pkg install vim wget sudo
🟢 Enable Network Services |
Solaris uses Service Management Facility (SMF). If it’s not already enabled, run the following commands:
svcs -a
					STATE          STIME    FMRI
legacy_run     19:57:52 lrc:/etc/rc2_d/S89PRESERVE
disabled       19:57:30 svc:/system/device/mpxio-upgrade:default
disabled       19:57:30 svc:/system/labeld:default
disabled       19:57:31 svc:/network/firewall:default
disabled       19:57:31 svc:/network/ipsec/ike:default
disabled       19:57:31 svc:/network/ipsec/ike:ikev2
disabled       19:57:31 svc:/network/ipsec/manual-key:default
disabled       19:57:31 svc:/network/ldap/client:default
disabled       19:57:31 svc:/network/nis/client:default
disabled       19:57:31 svc:/network/nis/domain:default
disabled       19:57:31 svc:/system/name-service-cache:default
...omitted for brevity...
svcadm enable ssh
Check service status:
svcs ssh
					STATE          STIME    FMRI
online         19:57:44 svc:/network/ssh:default
🟢 Privilege Management |
Instead of using sudo everywhere, Solaris uses RBAC:
pfexec zfs list
					NAME                               USED  AVAIL  REFER  MOUNTPOINT
rpool                             9.31G   137G  4.32M  /rpool
rpool/ROOT                        3.27G   137G    31K  none
rpool/ROOT/solaris                3.27G   137G  2.65G  /
rpool/ROOT/solaris/var             571M   137G   429M  /var
rpool/VARSHARE                    34.5M   137G  2.77M  /var/share
rpool/VARSHARE/kvol               27.7M   137G    31K  /var/share/kvol
rpool/VARSHARE/kvol/dump_summary  1.22M   137G  1.02M  -
rpool/VARSHARE/kvol/ereports      10.2M   137G  10.0M  -
rpool/VARSHARE/kvol/kernel_log    16.2M   137G  16.0M  -
rpool/VARSHARE/pkg                  63K   137G    32K  /var/share/pkg
rpool/VARSHARE/pkg/repositories     31K   137G    31K  /var/share/pkg/repositories
rpool/VARSHARE/sstore             3.86M   137G  3.86M  /var/share/sstore/repo
rpool/VARSHARE/tmp                  31K   137G    31K  /var/tmp
rpool/VARSHARE/zones                31K   137G    31K  /system/zones
rpool/dump                        4.00G   137G  4.00G  -
rpool/export                        98K   137G    32K  /export
rpool/export/home                   66K   137G    32K  /export/home
rpool/export/home/Admin             34K   137G    34K  /export/home/Admin
rpool/swap                        2.00G   137G  2.00G  -
To assign roles:
					roleadd sysadmin
usermod -R sysadmin username
🟢 ZFS Snapshots |
zfs snapshot rpool/ROOT/solaris@baseline
Rollback if needed:
					beadm activate solaris-1
reboot
| Issue | Solution |
|---|---|
| No disks detected | Check SATA/AHCI mode in BIOS |
| Installer freezes | Disable unsupported graphics, use text installer |
| No network | Manually configure NIC during install |
| Boot failure | Verify UEFI/Legacy boot consistency |
💡Note: Solaris is conservative with drivers, so newer consumer hardware may require virtualization. |
|
|
|
|
|
👉 When to Use Solaris on x86-64 |
| Use Case | Why Solaris is Ideal | Notes / Considerations |
|---|---|---|
| Mission-critical workloads | Strong filesystem guarantees, predictable patching, and long-term stability | Best for servers or enterprise environments |
| Learning UNIX internals | Advanced observability with DTrace and RBAC | Excellent for labs or education |
| Enterprise security | Built-in RBAC, immutable system components, and robust user management | Security-focused deployments benefit the most |
| Virtualization with Zones | Lightweight OS-level virtualization with low overhead | Can reduce need for full VMs |
| Long-term system stability | Reliable updates, ZFS boot environments, and Predictive Self-Healing | Ideal for production or archival systems |
| Not ideal | Gaming, cutting-edge consumer hardware, cloud-native container focus | Solaris may lack drivers or support for very new hardware |
Installing Oracle Solaris 11.4 on Intel or AMD x86-64 hardware is a straightforward process that rewards administrators with one of the most reliable UNIX environments available today. With ZFS at its core, integrated lifecycle management, and enterprise-grade tooling, Solaris remains a compelling choice for serious workloads on modern hardware.
Whether you are building a test lab, learning UNIX internals, or running critical infrastructure, Solaris 11.4 delivers stability, transparency, and control that few operating systems can match.
Did you find this article helpful? Your feedback is invaluable to us! Feel free to share this post with those who may benefit, and let us know your thoughts in the comments section below.
Learn how to install RHEL 8.10 Workstation in 12 easy steps. This detailed guide covers everything from preparing a bootable USB to post-installation setup, making
Learn how to install CentOS Stream 10 Server with GUI in just 12 easy steps. This guide provides clear instructions, CLI examples, and tips for
Learn how to install RHEL 10 Workstation in 12 easy, step‑by‑step instructions—from downloading the ISO to post‑install configuration, complete with CLI examples and practical tips. Table